802.1x Mode
1. DEFINITION (What is it?)
Using 802.1x on network device with openNAC enables you to gain real-time inventory of all connected assets ** on the network. All coomunication with the network assets takes places regardless of of the access layer and how the asset connected. Visibility and categorization of corporate and non-corporate assets (guests and BYOD) provides critical information for business and technical processes. With this deployment you can identify **WHEN and WHERE the asset is connected in real-time and have a historical view, asset TYPE (Laptop, printer, voIP phone, tablet, mobile phone, IOT, SmartTVs etc.) and additional information about its characteristics. All of this assets information is stored in a CMDB called openNAC CMDB, which stores assets characteristics and attributes in a flexible schema that can be easily expanded. This can be expanded manually by administrator to include business logic, map with internal processes etc. All the events that are harvested from openNAC technologies include information about all the asset’s context:
- Where the asset is connected from, the physical interface used.
- What type of device, laptop, printer, phone, security camera,IOT device of any connected asset.
- Technical information about the connected asset in the corporate network such as IP, MAC, services running, operating system etc.
- When it was connected, real-time and having audit tracing to establish a network access lifecycle.
This CMDB and its assets can be integrated and synced with other CMDB instances and asset repositories.
2. MECHANISMS (How does it work?)
Using AAA (Authentication, Authorization and Accounting)approach openNAC can perform a real time inventory, however it has some constrains:
Note
For supplicant 802.1x users, the authentication process have to be successful instead the visibility process can’t be completed. So the recommendation is use MAB for visibility successful process.
The network host is connected to an interface in network device, later with MAB enable the authentication process will be skip and the Authorization will be success by openNAC.
3. COLLECTED INFORMATION (What do we collect?)
As soon as the visibility module is deployed the following information is gathered about the connected network assets:
- TIME: When was the last time the asset connected.
- MAC ADDRESS: Physical asset address.
- NETWORK DEVICE IP ADDRESS: IP address of the network devices (switch, AP, VPN) where the asset is connected.
- NETWORK DEVICE MAC ADDRESS: MAC address of the network devices (switch, AP,VPN) where the asset is connected on the network.
- PHYSICAL PORTS: Interface where the asset was connected and discovered.
- TYPE OF DEVICE: Through profiling rules and its discovering mechanisms openNAC can identify the asset type.
- MAC VENDOR: Get the vendor assigned to the physical address (Mac address).
- OPENPORTS and BANNERS: The assets open ports and banners are identified enabling deeper understanding of its characteristics.
- TAGS: With plugins such as Discovey and profiling rules it is possible to identify open ports in asset and its type, openNAC uses TAGS to manage all of this information in a flexible way, the TAGs are stroed in the CMDB.
- The Tag=”DOP_TCP_9100” means that the asset has the port 9100 TCP open. The Tag=”EPT_PRINTER” means that openNAC has discovered a printer through its profiling rules.
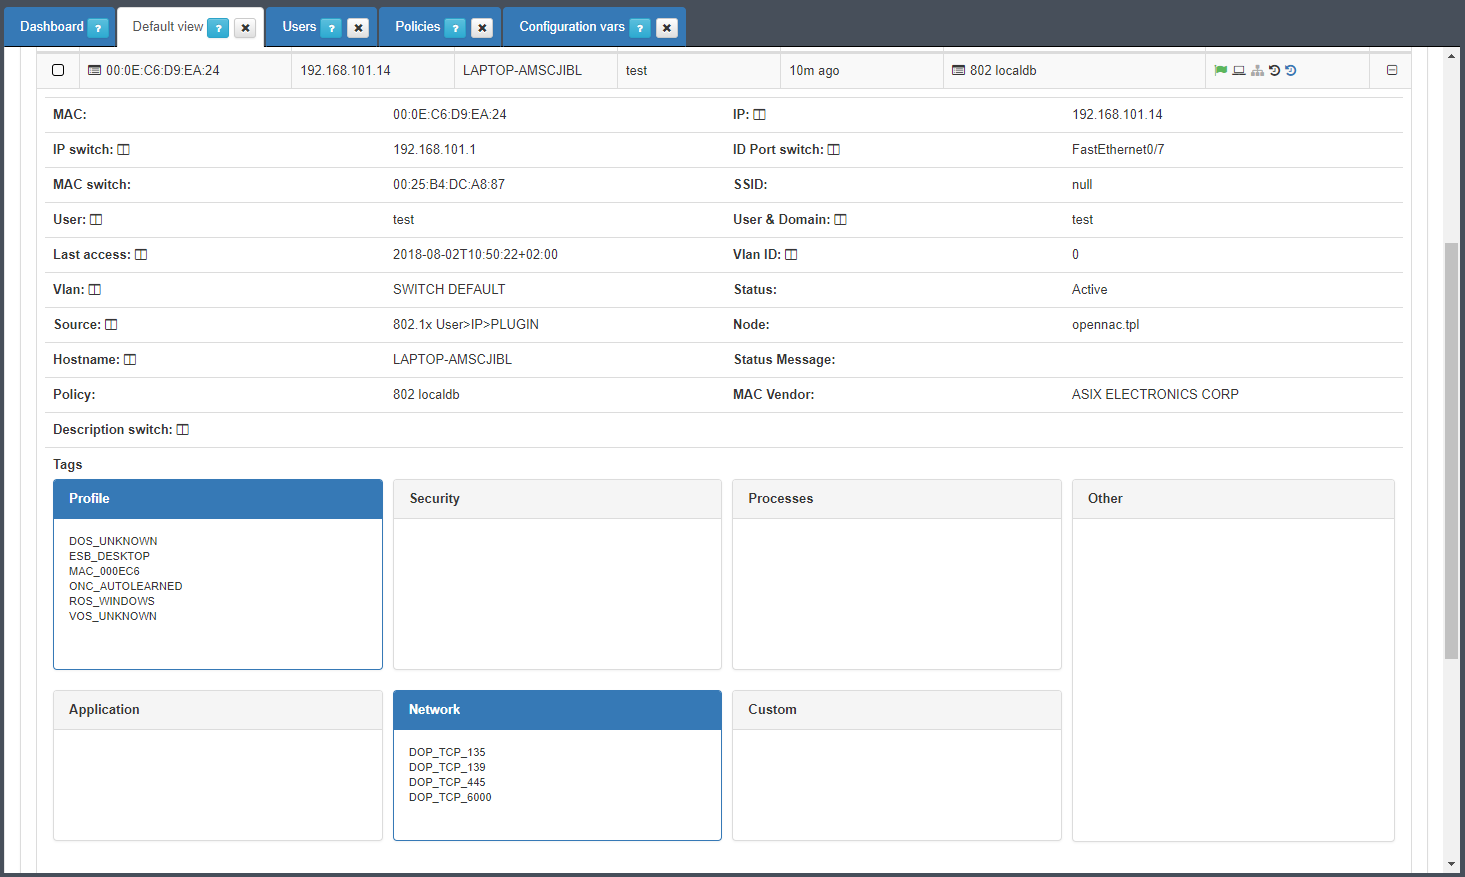
4. DASHBOARD (How do we display the information?)
For each asset wich connect to network openNAC shows the following information.
5. DEPLOYMENT (Do it yourself)
The following is a light guide to deploy visibility 802.1x mode based on basic lab.
5.1 REQUIREMENTS
- openNAC Core.
- Network device 802.1x (switch, ap..) in the following scenario will be used Cisco switch with IOS 12.2.55 or higher.
- openNAC Analytics.
- Client PC, in the following scenario will be used Windows 10.
- User Database as LDAP, AD server or local user database in openNAC core, when is using supplicant users, with MAB users database is no needed.
5.2 SCENARIO ARCHITECTURE
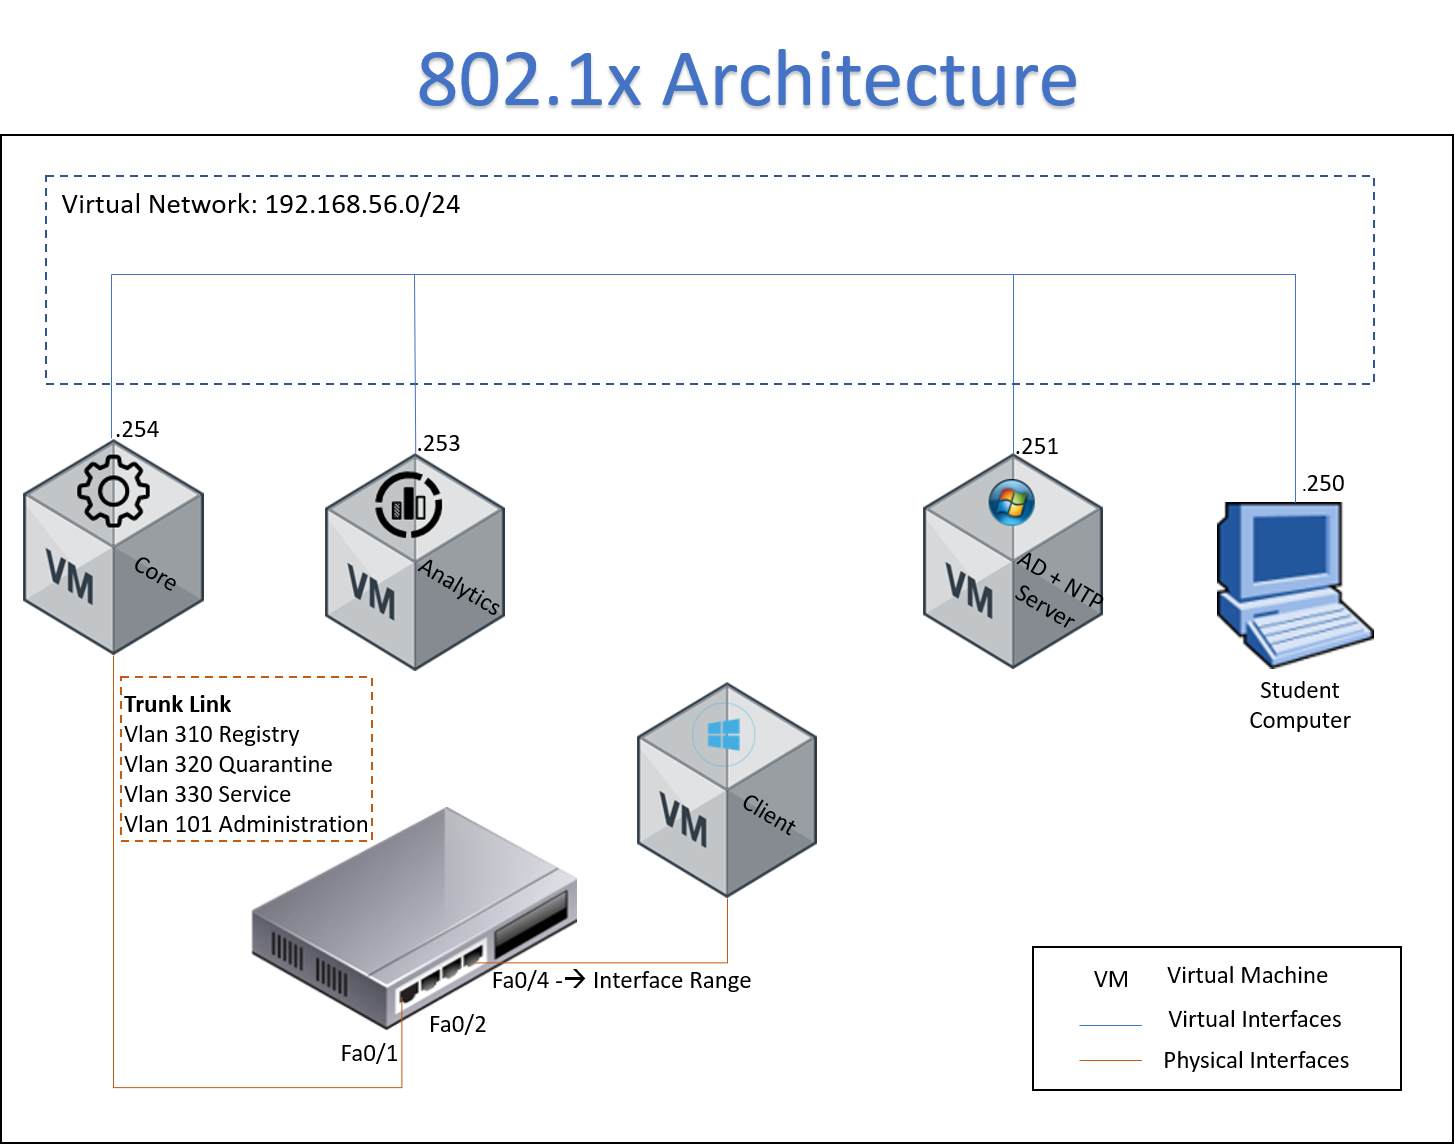
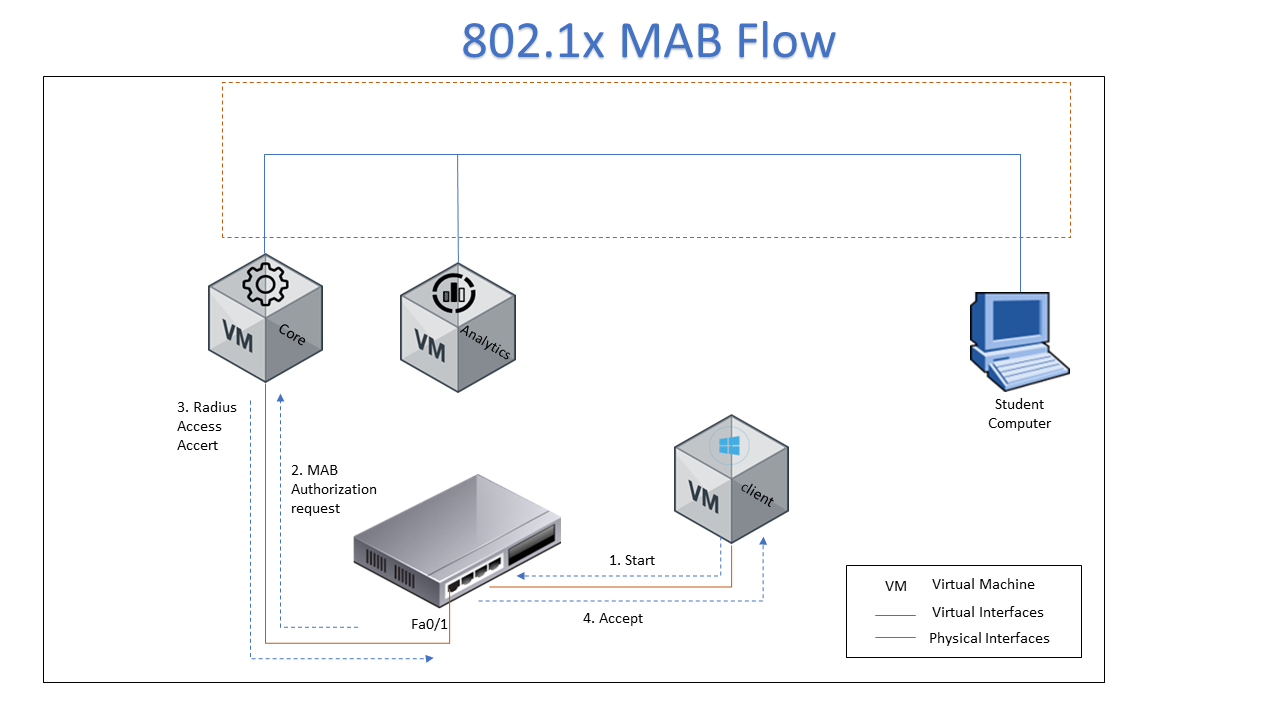
- The client is connected to switch.
- The switch send an authorization request to openNAC.
- The openNAC response accept the connection
- The switch enable the port associated to the connection
5.3 SETTINGS
On Switch
The following link contains the required configuration on switch for visibility use case.
Basic 802.1x Cisco Switch Configuration
On Core
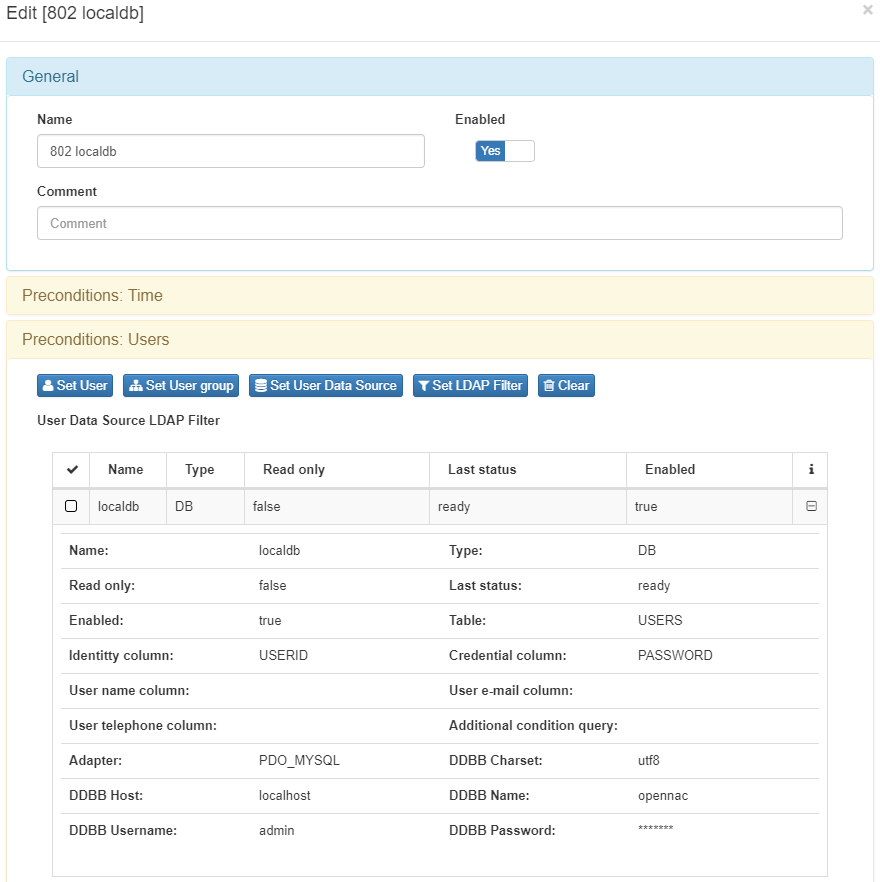
The first step is define if your are going to use a local or external database, for testing propose we recommend use local database.
Using Local Database
Create the user into openNAC local database using web console. Go to ON CMDB –> Security –> Users. Select Add New option.
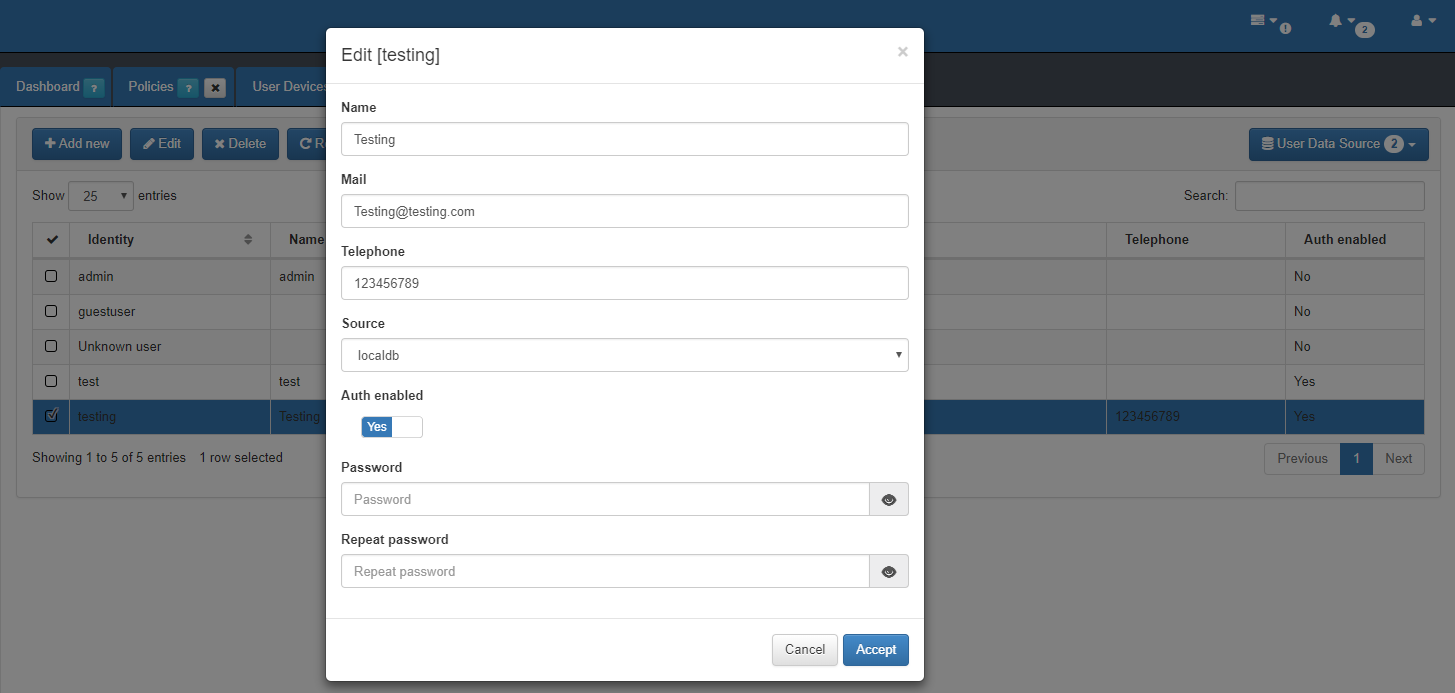
This user will be use the credentials later in EndPoint client for testing.
Using External User Database
For this step review Join Domain
Policy Configuration
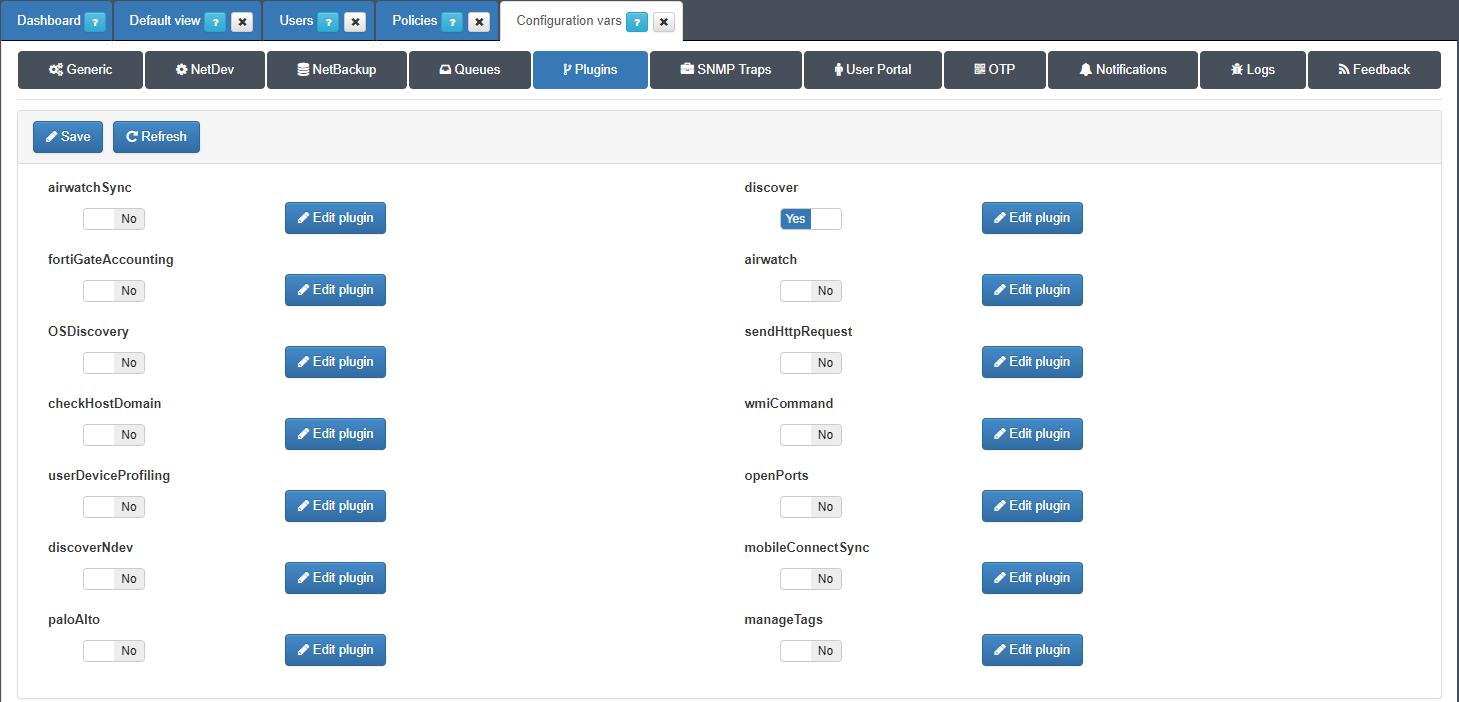
Before configure the policy rule enable Discover plugin. For visibility propose, openNAC use a plugin knows as Discover, this plugin runs a “scan” over each endpoint which can reach trough IP address. So the first step is enable the plugin.
Go to Configuration –> Configuration vars, select plugin tab and enable Discover plugin.
Policy for Local Database
Go to ON NAC –> Policies, click the option Add New. Named the policy in General Tab, Set the users database in Preconditions: User Tab.
In this case the assigned VLan will be the same, so set Switch default VLan.

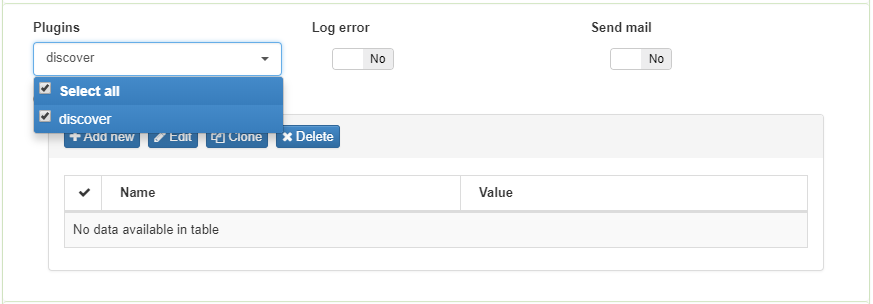
Enable plugin Discover into policy rule.
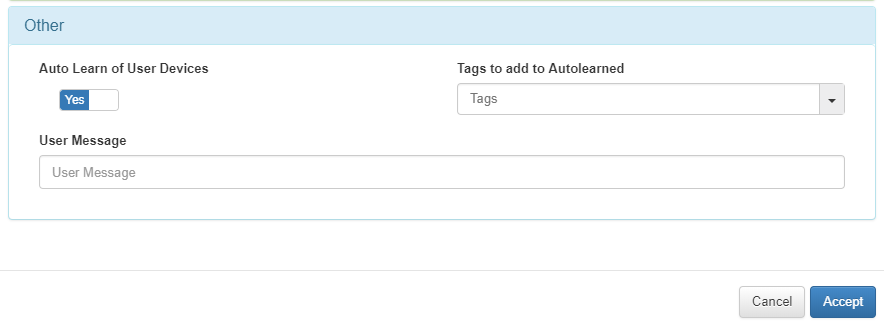
If this is the last policy or the only one you can check the option Auto Learn of User Device to add the devices to openNAC core database.
On EndPoint
You can verify the 802.1x EndPoint configuration for different devices in 801.X Clients Configuration
5.4 TESTING
Turn on the client VM, use the 802.1x configured interface on switch to connect the host. An authentication will be required.
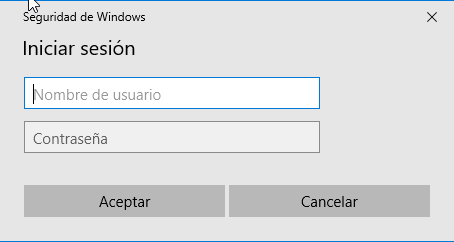
After authentication process.
Go to ON NAC –> Business Profiles –> Default View. In this section you can see in real time the access from endpoints.
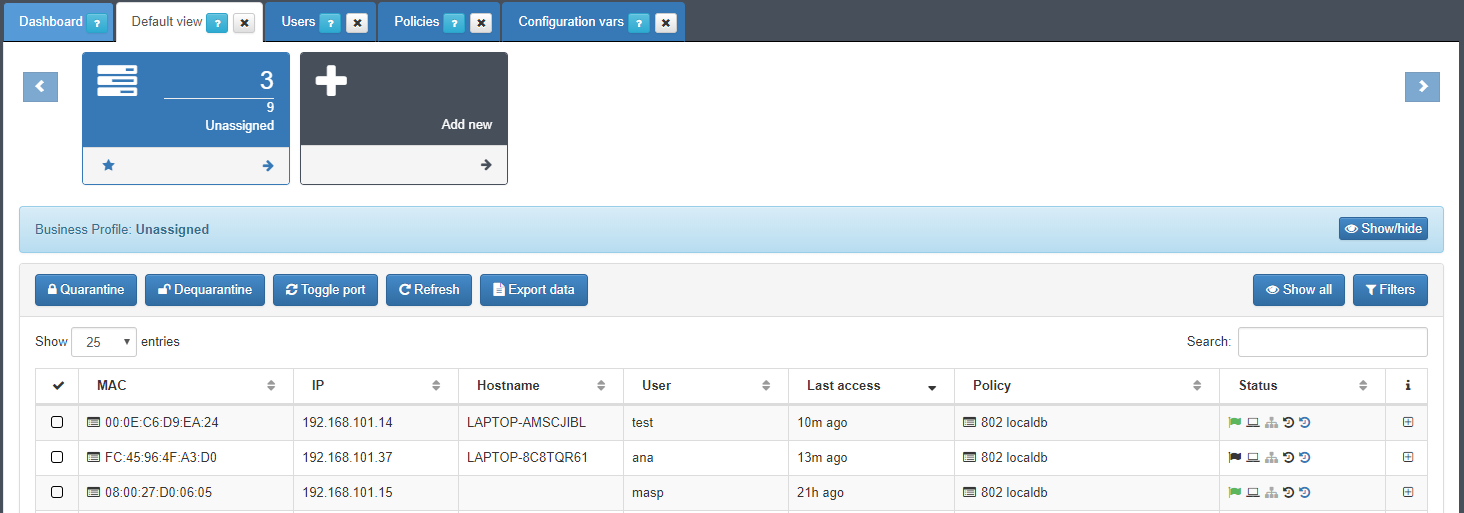
Is important to capture the IP address, using it openNAC will run the plugin over each know asset which match with the previous configured policy.
5.5 TROUBLESHOOTING
- Please perform a basic review Basic Check
- To perform a debug of authentication proces you can verify the link Radius Troubleshooting
- For issues in this procedure review Join Domain Troubleshooting