VPN WITH MOBILE CONNECT DEPLOYMENT
- Is recommended to follow and read the overview about openNAC solution.
- To deploy an openNAC technologies is required to understand and follow network requirements.
- As soon as you have deployed the openNAC is recommended to select the proper use case that fits with you requirements.
- Selecting the use case, an scenario must be configured to covert as much as possible customer needs.
This page shows which steps are required to configure universal network access control use case and the scenario VPN with mobileconnect authentication.
1. DEFINITION
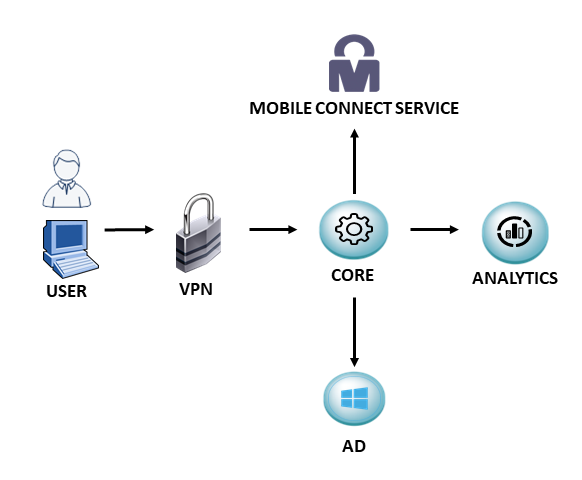
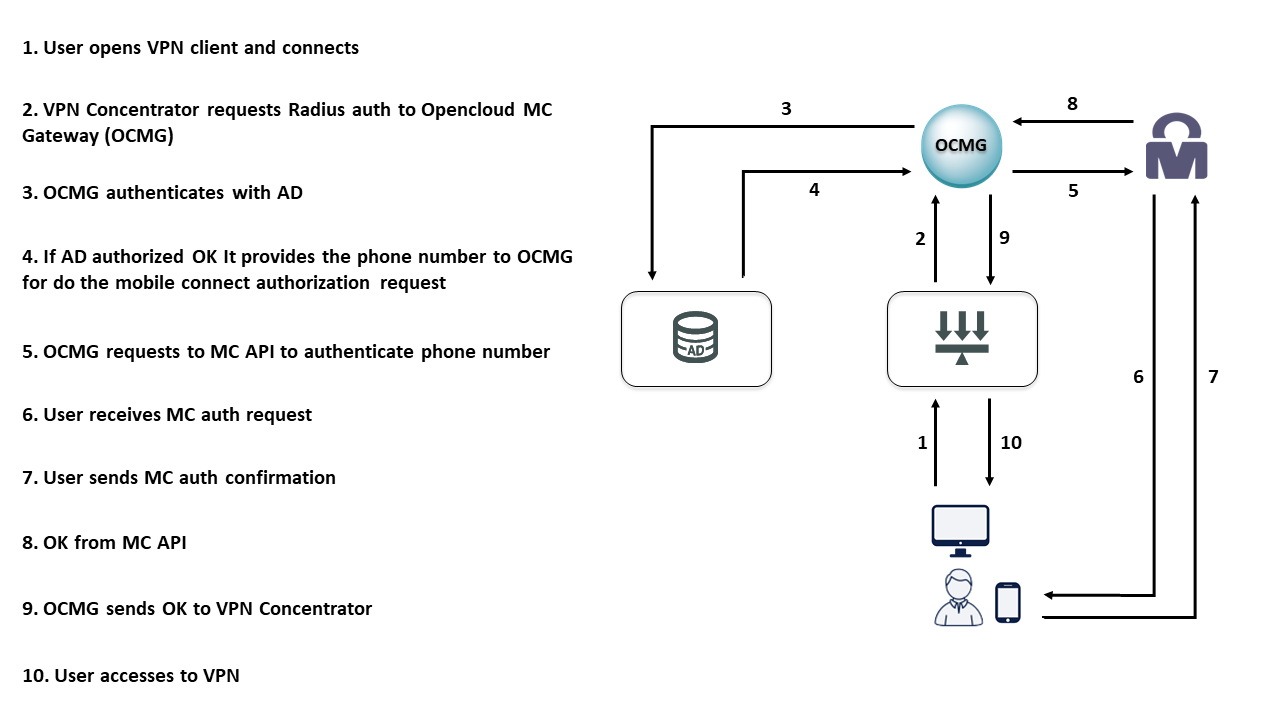
Mobile Connect is an additional layer of security for your network that has been designed with the aim of guaranteeing access to your network, even if someone knows the credentials. With Mobile Connect you can only access the network after verifying the identity of the user through your mobile device. This method can be considered one of the most secure network access solution in the industry, it works a very low level and very robust by design.
3. REQUIREMENTS:
- openNAC Core Server.
- VPN Concentrator.
- openNAC Analytics Server.
- Active Directory or LDAP Server or compatible.
4. SETTINGS:
ON Core
Start and configure openNAC Core. Please read and configure the entire guide of the Core Deployment.
openNAC Core Deployment Guide.
Configure clients.conf file.
vim /etc/raddb/clients.conf
# -*- text -*-
##
## clients.conf -- client configuration directives
##
##      $Id$

#######################################################################
#
#  Define RADIUS clients (usually a NAS, Access Point, etc.).

#
#  Defines a RADIUS client.
#
#  '127.0.0.1' is another name for 'localhost'.  It is enabled by default,
#  to allow testing of the server after an initial installation.  If you
#  are not going to be permitting RADIUS queries from localhost, we suggest
#  that you delete, or comment out, this entry.
#
#

#
#  Each client has a "short name" that is used to distinguish it from
#  other clients.
#
#  In version 1.x, the string after the word "client" was the IP
#  address of the client.  In 2.0, the IP address is configured via
#  the "ipaddr" or "ipv6addr" fields.  For compatibility, the 1.x
#  format is still accepted.
#
client localhost {
        #  Allowed values are:
        #       dotted quad (1.2.3.4)
        #       hostname    (radius.example.com)
        ipaddr = 127.0.0.1

        #  OR, you can use an IPv6 address, but not both
        #  at the same time.
#       ipv6addr = ::   # any.  ::1 == localhost

        #
        #  A note on DNS:  We STRONGLY recommend using IP addresses
        #  rather than host names.  Using host names means that the
        #  server will do DNS lookups when it starts, making it
        #  dependent on DNS.  i.e. If anything goes wrong with DNS,
        #  the server won't start!
        #
        #  The server also looks up the IP address from DNS once, and
        #  only once, when it starts.  If the DNS record is later
        #  updated, the server WILL NOT see that update.
        #

        #  One client definition can be applied to an entire network.
        #  e.g. 127/8 should be defined with "ipaddr = 127.0.0.0" and
        #  "netmask = 8"
        #
        #  If not specified, the default netmask is 32 (i.e. /32)
        #
        #  We do NOT recommend using anything other than 32.  There
        #  are usually other, better ways to achieve the same goal.
        #  Using netmasks of other than 32 can cause security issues.
        #
        #  You can specify overlapping networks (127/8 and 127.0/16)
        #  In that case, the smallest possible network will be used
        #  as the "best match" for the client.
        #
        #  Clients can also be defined dynamically at run time, based
        #  on any criteria.  e.g. SQL lookups, keying off of NAS-Identifier,
        #  etc.
        #  See raddb/sites-available/dynamic-clients for details.
        #

#       netmask = 32

        #
        #  The shared secret use to "encrypt" and "sign" packets between
        #  the NAS and FreeRADIUS.  You MUST change this secret from the
        #  default, otherwise it's not a secret any more!
        #
        #  The secret can be any string, up to 8k characters in length.
        #
        #  Control codes can be entered vi octal encoding,
        #       e.g. "\101\102" == "AB"
        #  Quotation marks can be entered by escaping them,
        #       e.g. "foo\"bar"
        #
        #  A note on security:  The security of the RADIUS protocol
        #  depends COMPLETELY on this secret!  We recommend using a
        #  shared secret that is composed of:
        #
        #       upper case letters
        #       lower case letters
        #       numbers
        #
        #  And is at LEAST 8 characters long, preferably 16 characters in
        #  length.  The secret MUST be random, and should not be words,
        #  phrase, or anything else that is recognizable.
        #
        #  The default secret below is only for testing, and should
        #  not be used in any real environment.
        #
        secret          = testing123

        #
        #  Old-style clients do not send a Message-Authenticator
        #  in an Access-Request.  RFC 5080 suggests that all clients
        #  SHOULD include it in an Access-Request.  The configuration
        #  item below allows the server to require it.  If a client
        #  is required to include a Message-Authenticator and it does
        #  not, then the packet will be silently discarded.
        #
        #  allowed values: yes, no
        require_message_authenticator = no

        #
        #  The short name is used as an alias for the fully qualified
        #  domain name, or the IP address.
        #
        #  It is accepted for compatibility with 1.x, but it is no
        #  longer necessary in 2.0
        #
#       shortname       = localhost

        #
        # the following three fields are optional, but may be used by
        # checkrad.pl for simultaneous use checks
        #

        #
        # The nastype tells 'checkrad.pl' which NAS-specific method to
        #  use to query the NAS for simultaneous use.
        #
        #  Permitted NAS types are:
        #
        #       cisco
        #       computone
        #       livingston
        #   juniper
        #       max40xx
        #       multitech
        #       netserver
        #       pathras
        #       patton
        #       portslave
        #       tc
        #       usrhiper
        #       other           # for all other types

        #
        nastype     = other     # localhost isn't usually a NAS...

        #
        #  The following two configurations are for future use.
        #  The 'naspasswd' file is currently used to store the NAS
        #  login name and password, which is used by checkrad.pl
        #  when querying the NAS for simultaneous use.
        #
#       login       = !root
#       password    = someadminpas

        #
        #  As of 2.0, clients can also be tied to a virtual server.
        #  This is done by setting the "virtual_server" configuration
        #  item, as in the example below.
        #
#       virtual_server = home1

        #
        #  A pointer to the "home_server_pool" OR a "home_server"
        #  section that contains the CoA configuration for this
        #  client.  For an example of a coa home server or pool,
        #  see raddb/sites-available/originate-coa
#       coa_server = coa
}

# IPv6 Client
#client ::1 {
#       secret          = testing123
#       shortname       = localhost
#}
#
# All IPv6 Site-local clients
#client fe80::/16 {
#       secret          = testing123
#       shortname       = localhost
#}

#client some.host.org {
#       secret          = testing123
#       shortname       = localhost
#}

#
#  You can now specify one secret for a network of clients.
#  When a client request comes in, the BEST match is chosen.
#  i.e. The entry from the smallest possible network.
#
#client 192.168.0.0/24 {
#       secret          = testing123-1
#       shortname       = private-network-1
#}
#
#client 192.168.0.0/16 {
#       secret          = testing123-2
#       shortname       = private-network-2
#}


#client 10.10.10.10 {
#       # secret and password are mapped through the "secrets" file.
#       secret      = testing123
#       shortname   = liv1
#       # the following three fields are optional, but may be used by
#       # checkrad.pl for simultaneous usage checks
#       nastype     = livingston
#       login       = !root
#       password    = someadminpas
#}

#######################################################################
#
#  Per-socket client lists.  The configuration entries are exactly
#  the same as above, but they are nested inside of a section.
#
#  You can have as many per-socket client lists as you have "listen"
#  sections, or you can re-use a list among multiple "listen" sections.
#
#  Un-comment this section, and edit a "listen" section to add:
#  "clients = per_socket_clients".  That IP address/port combination
#  will then accept ONLY the clients listed in this section.
#
#clients per_socket_clients {
#       client 192.168.3.4 {
#               secret = testing123
#        }
#}
client 192.168.0.0/16 {
        secret          = testing123
        shortname       = internal192168
}

client 172.16.0.0/16 {
        secret          = testing123
        shortname       = internal17216
}

client 10.0.0.0/8 {
        secret          = testing123
        shortname       = internal10
Configure openNAC propierties file.
vim /etc/raddb/modules/opennac
openNAC {
  # URL to call openNAC API
  apiUrl = http://127.0.0.1/api

  # API Key required when API call is not defined on localhost
  apiKey =

  # Timeout to abort api call (value in seconds)
  apiTimeout = 10

  # Memcached server address
  memcachedIp = localhost

  # Memcached server port
  memcachedPort = 11211

  # Memcached default TTL
  memcachedTTL = 60

  # IP address is notified to openNAC using accounting information,
  # but this address can be received several times.
  # This minimum notification period, defined in seconds, allow avoid send
  # the same information during the specified time.
  ipMinNotificationPeriod = 1800

  # If we don't accept any request without MAC address,
  # we can reject the request.
  # By default, request without MAC address are accepted and processed by openNAC.
  rejectWithoutMac = no

  # Default repository charset used.
  # Mainly used by certificate fields.
  repositoryCharset = cp1252

  # Radius Hunt Group name used to define the VPN servers,
  # to identify all user requests received from them.
  # This information is defined in "/etc/raddb/huntgroups" file,
  # with the following syntax:
  #     vpn             NAS-IP-Address == 1.2.3.4
  vpnHuntgroupName = vpn

  # When OTP authentication is used by openNAC users, for example in VPN connections.
  otpAuth = yes

  # Default result when any issue is produced in openNAC policy evaluation or
  # "apiTimeout" is reached.
  # By default, request is accept and default vlan is assigned
  acceptWhenPolEvalDiscards = yes

  # Default message used to notify authentication error,
  # when radius module error message is not specified.
  defaultAuthErrorMsg = "Error in radius authentication"

  # Enable module debug mode, printing additional debug information.
  debug = no
}
Configure mobile-connect.ini file.
vim /usr/share/opennac/api/application/configs/mobile-connect.ini
; Discovery URL:
url.discovery = "https://discover.mobileconnect.io/gsma/v2/discovery"

; Application callback URL
url.redirect = "https://mobileconnect-dev.opencloudfactory.com/mc-authorize"

; Discovery credentials
discover.client_id = "xxxx-yyyy-zzzz"
discover.secret = "uuuu-vvvv-wwww"

; When discover don't return the correct "client_id" for a specific operator
: we can overwrite this with following indicated
;authorize.client_id.orange_spain = "aaaa-bbbb-cccc"
;authorize.client_id.telefonica_spain = "aaaa-bbbb-cccc"
;authorize.client_id.vodafone_spain = "aaaa-bbbb-cccc"

; When discovery phase has to be ommited, we can send request to an specific operator
; If one of the following properties are empty, the plugin will use discovery phase
;operator.name = "telefonica_spain"
;operator.client_id = "aaaa-bbbb-cccc"
;operator.authorize_base_url = "https://mobileconnect.telefonica.es/es/oauth2/authorize"
;operator.cert = "/usr/share/opennac/api/application/configs/msisdn_telefonica_spain_public.pem

; Proxy settings, if it's required
; Proxy type: http/https/socks/socks5
proxy.proxy_type = "http"
proxy.proxy_url = ""
proxy.proxy_port = 8080
proxy.proxy_user = ""
proxy.proxy_pass = ""

; Connection property to check if SSL certificate is authentic,
; usually we have to disable it when self-signed certificate is used
enable_ssl_verify_peer = true

; Time spent waiting for MobileConnect user response,
; when this number of seconds are reached,
; a timeout error is raised and unauthorized access is considered
timeout = 25

; Default browser language, used to send messages to user
browser.language = "en-US"

; Browser debug: Level 0 (Low), Level 1 (Normal), Level 2 (High)
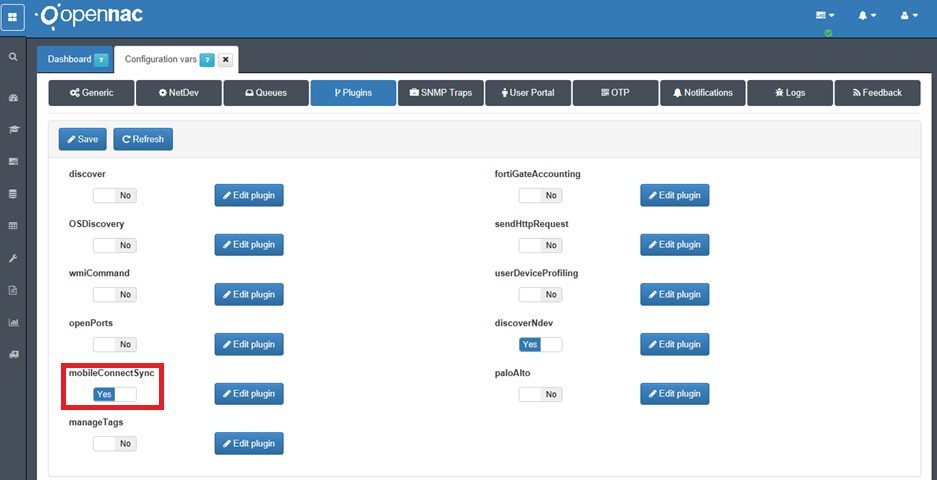
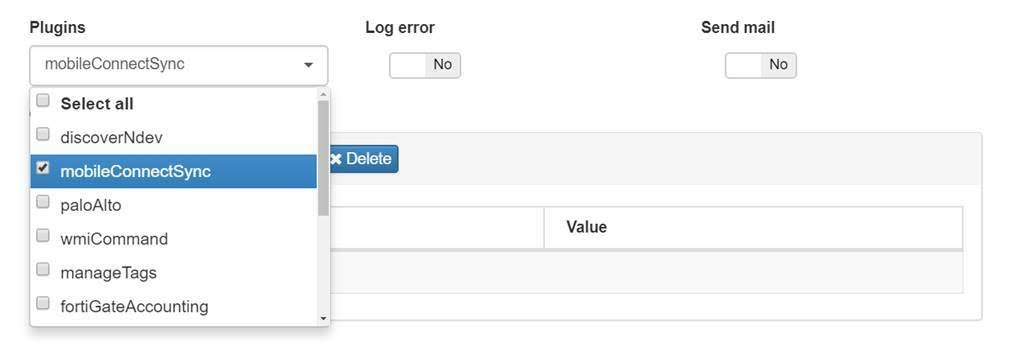
Administration portal
It is necessary to activate the Mobile Connect plugin.
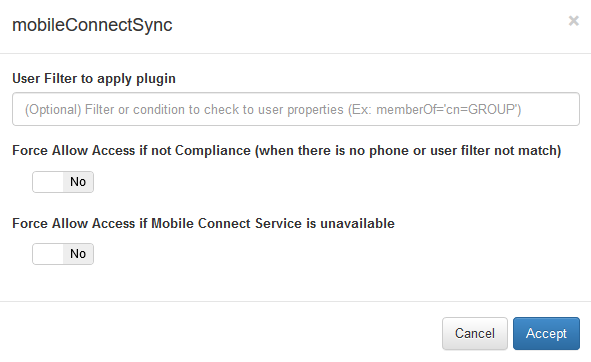
Edit plugin to determine the behavior in certain situations.
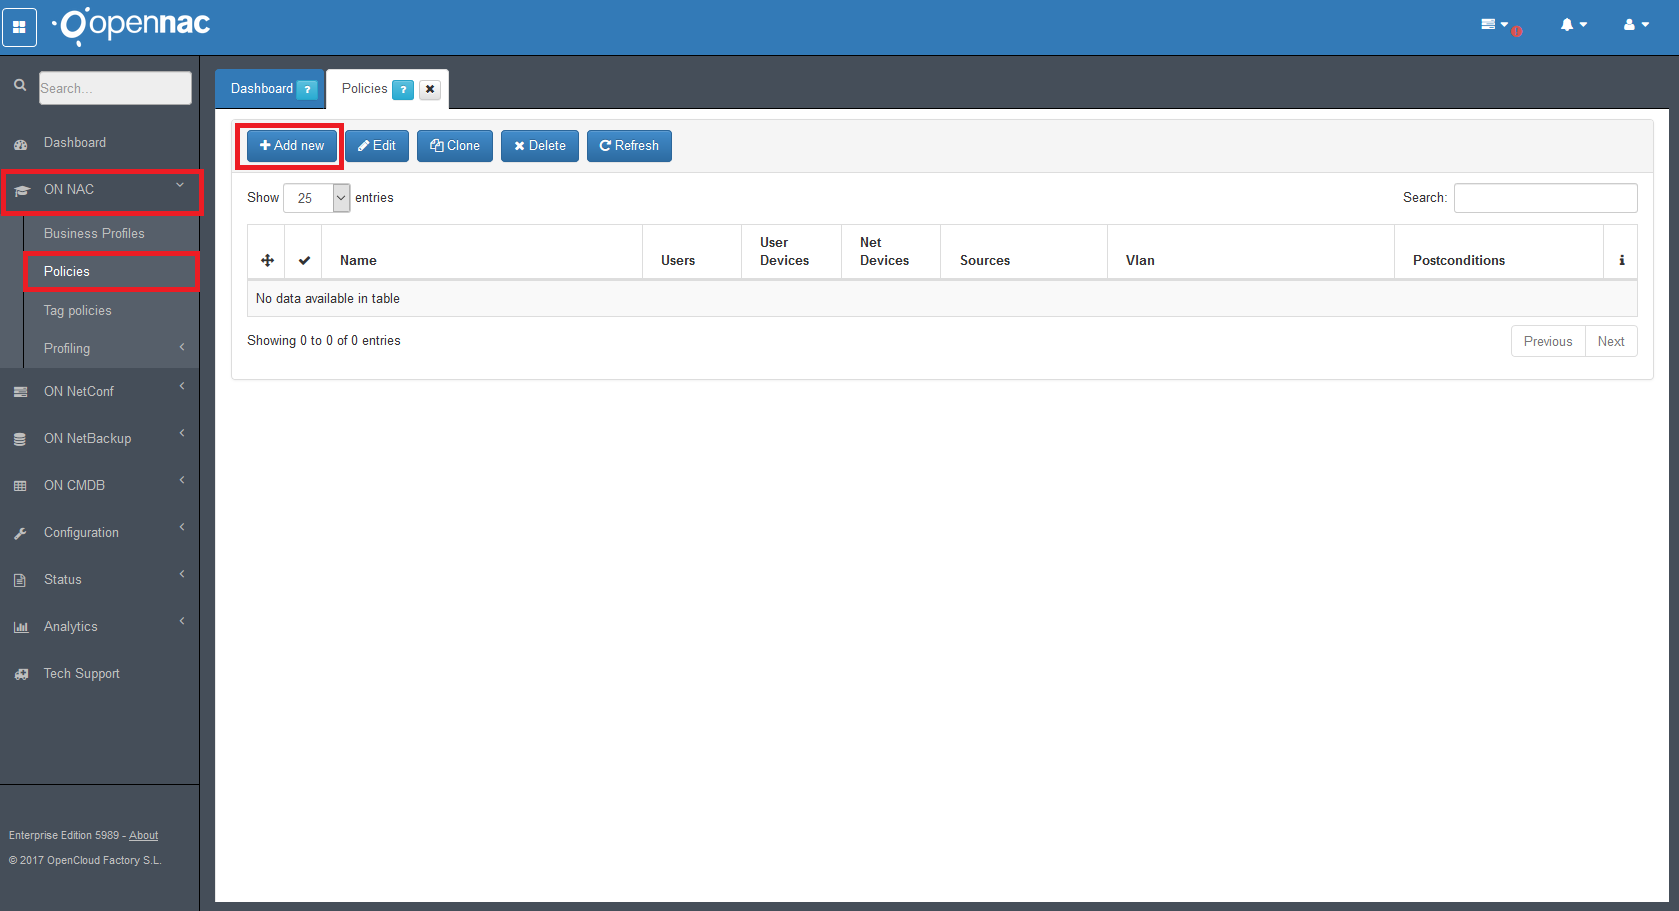
The next step is to create a policy for the service to work. Go to the ON NAC -> Policies in the left side menu and create new policie.
Go to Set User Data Source in the “Preconditions: Users”.
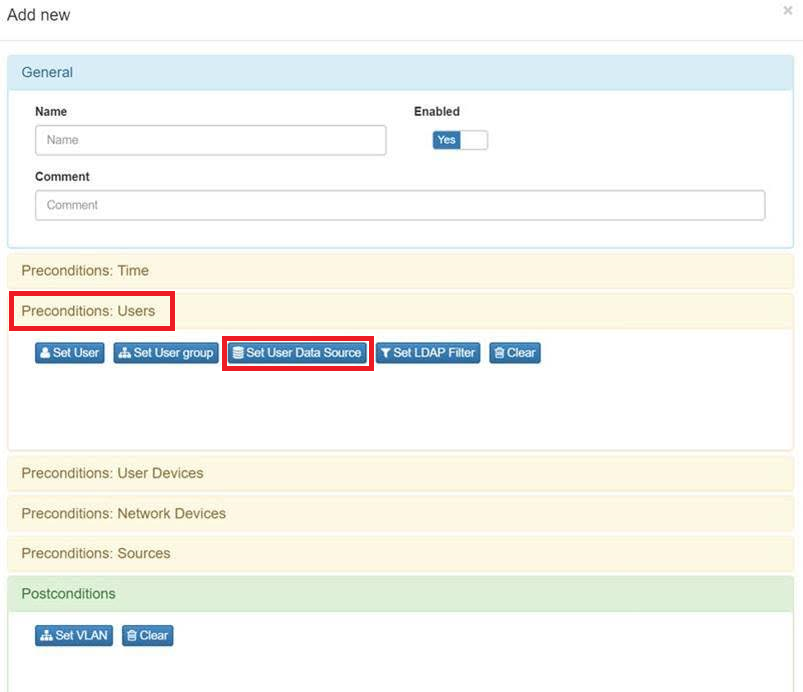
And Set User Data Source for indicate the Active Directory which contais the users data base for authentication process.
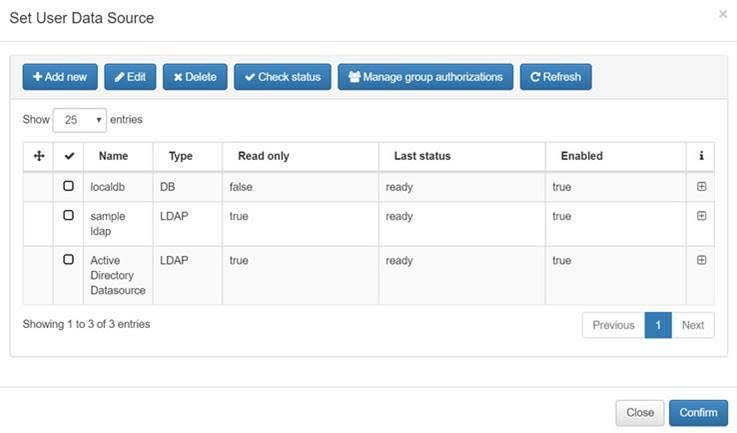
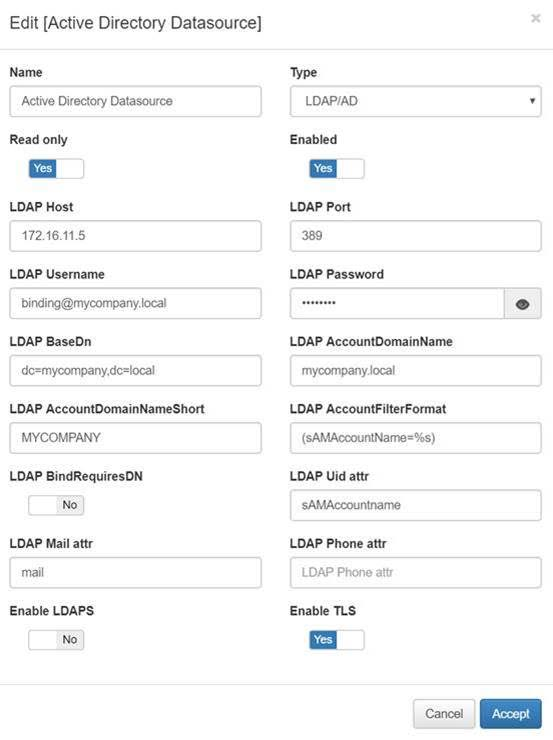
Edit Active Directory Datasource.
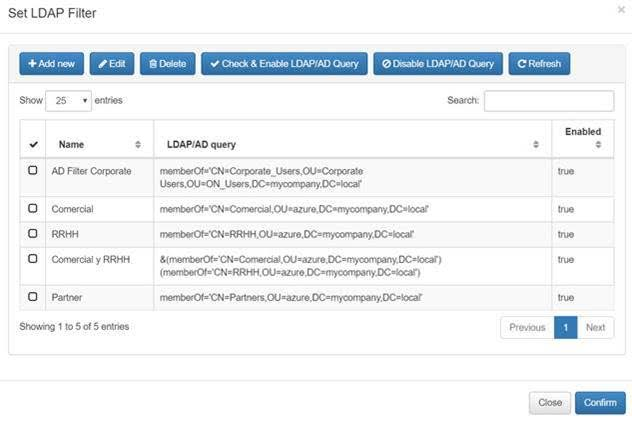
In “Preconditions: Users” go to Set LDAP Filter.
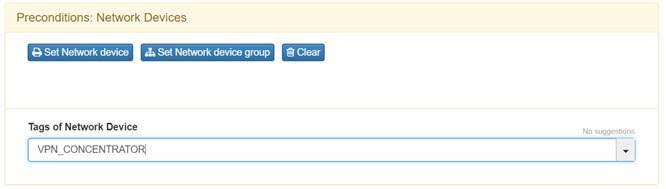
In Preconditions: Network Devices add the VPN Concentrator.
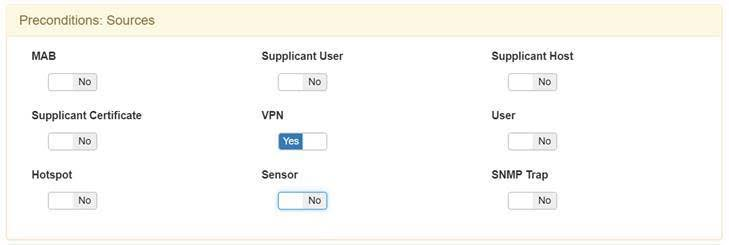
Activate VPN service un Preconditions: Sources.
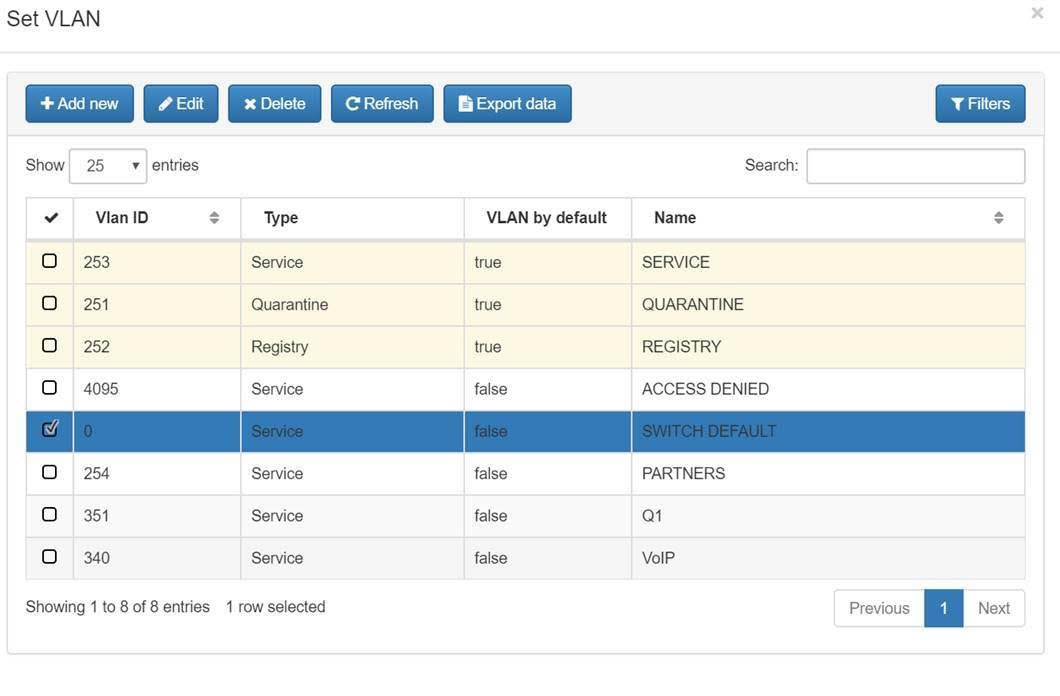
Set Vlan0 for default vlan.
Use the previously activated Mobile Connect plugin in Postconditions.
ON Analytics
Start and configure openNAC Analytics
5. TESTING:
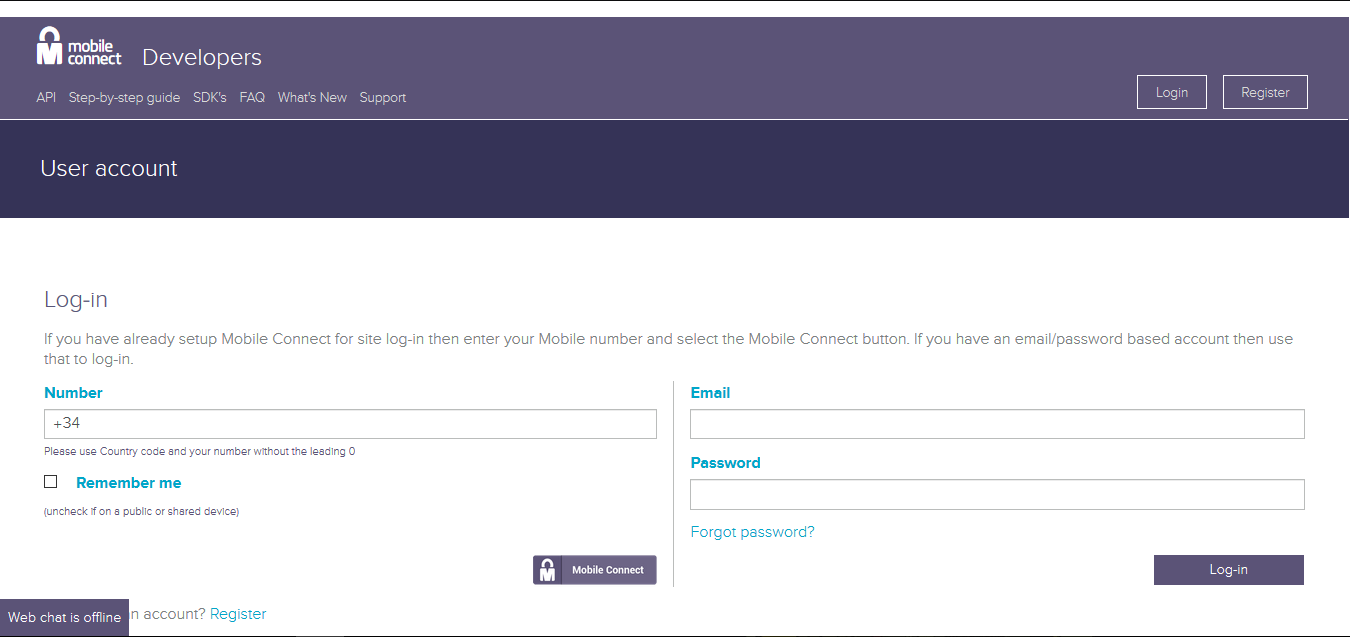
You can test the Mobile Connect service with your phone using a public portal like Mobile Connect Developer. For this test isn’t really necesary an registered account. Enter in Developer Mobile Connect page and introduce your phone number.
There are two cases
- If your provider is not compatible with the mobile connect service, you will receive an SMS with an url to verify the identity.

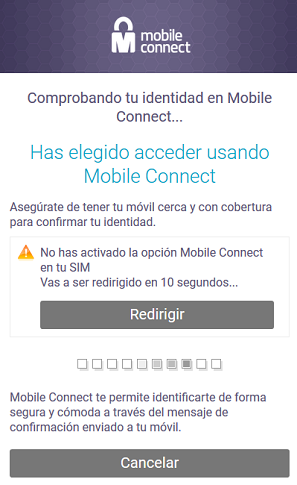
- If your provider is compatible with the mobile connect service, you will receive an advice to verify the identity.
- When you don’t have the service activated you will receive a notice to activate it.
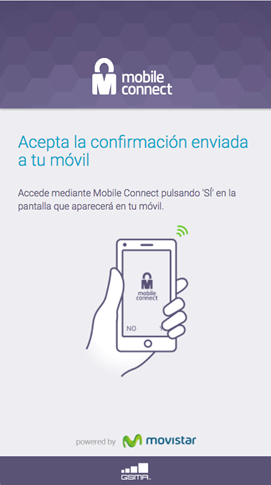
- If you have the service activated simply verify the identity in your smartphone.
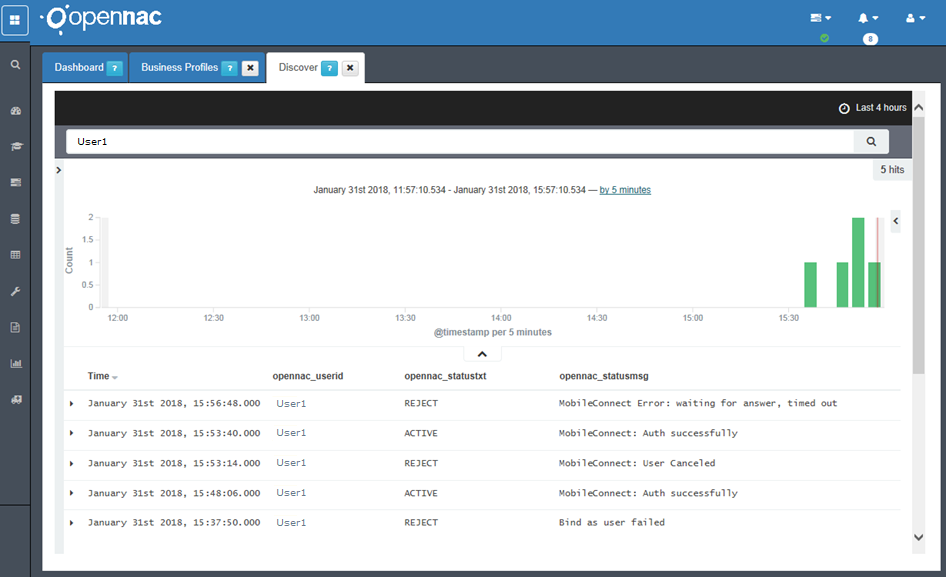
Testing Discover
6. TROUBLESHOOTING:
Please follow the guide for troubleshooting issues Mobile Connect Troubleshooting