OpenNAC Analytics Installation
Into Analytics server there are three main roles:
On Aggregator
Server running Logstash as main service, which receive high volume of data directly from one or more Opennac Core servers. The incoming data is then manipulated and transformed by a set of filters which help to extract the information from the log events and give them context. The processing output is forwarded to other servers and then persisted.
On Analytics (Search Engine)
This component run Elasticsearch, the full text search and analytic engine. On Analytics servers receive data (documents) from On Aggregators, index and persist it in a distributed way, allowing the information be queried and further presented in form of graphics or reports.
Dashboards (Kibana)
The visual presentation of information in form of dashboards or reports is performed by Kibana. The Opennac Core servers are able to direct connect with Kibana and display the dashboards via Web administration interface.
This page shows which steps are required to install openNAC Analytics Instance using an OVA Image.
Step 1. Download Image & Basic Console Configuration
As soon as the OVA image is downloaded, it should be imported in your Hypervisor Technology. Please, visit https://en.wikipedia.org/wiki/Open_Virtualization_Format for further information.
Note
- openNAC has chosen OVA as the main distribution way. Open Visualization Format is an Open Standard for Packaging and distributing virtual appliances.
If you have problems trying to import OVA please review Troubleshooting OVA issue
Step 1.2. Manually configuration (Use setup wizard is recommended instead of manually configuration)
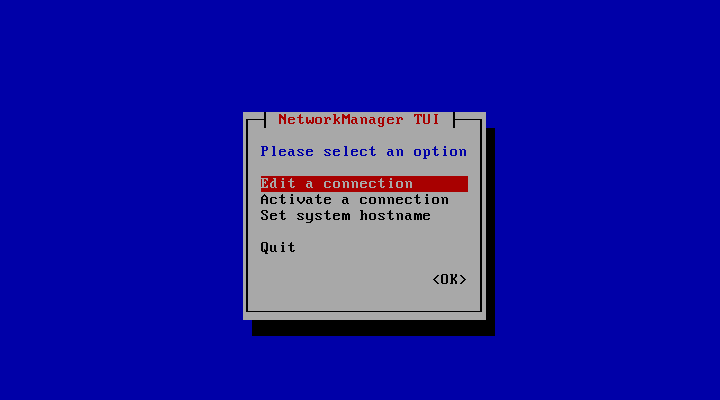
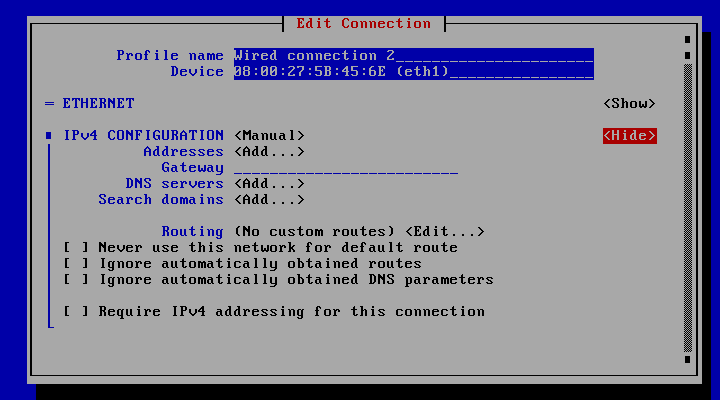
To configure openNAC interfaces you can run the network configuration utility (nmtui) or you can edit the network files manually.

The IP configuration can be perform using this utility. configure according with the deployment used IP Address.

- Manual network configuration:
In case that network configuration needs to be defined using configuration file:
- Go to /etc/systemconfig/network-scripts/ifcfg-eth0 and type:
DEVICE=eth0
BOOTPROTO=none
ONBOOT=yes
NETWORK=10.0.1.0
NETMASK=255.255.255.0
IPADDR=10.0.1.27
USERCTL=no
To ensure that network configuration parameters are properly defined is recommended to restart network service and check IP configuration.
systemctl restart network
ifconfig -a eth0
2 In case openNAC needs to run in a trunk mode needs first to define an interface like explained before and later as many VLANs as needed using subinterfaces.
To define the sub-interfaces you should create new interfaces configuration files with the VLAN ID desired. For instance, to configure VLAN 192 in eth0 interface:
Create the file: /etc/sysconfig/network-scripts/ifcfg-eth0.192 and type your VLAN configuration:
DEVICE=eth0.192
BOOTPROTO=none
ONBOOT=yes
IPADDR=192.168.1.1
PREFIX=24
NETWORK=192.168.1.0
VLAN=yes
Keyboard configuration
- Keyboard configuration gui command-line:
With root account type:
system-config-keyboard
- Keyboard configuration through command-line:
With root account type:
loadkeys es
Loading /lib/kbd/keymaps/i386/qwerty/es.map.gz
Time Zone
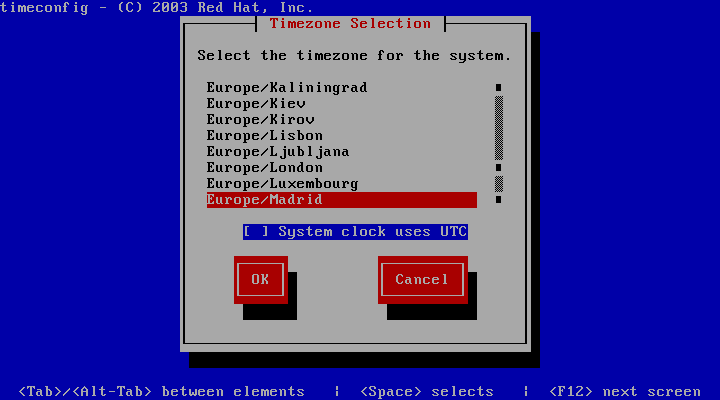
- To change time zone and the use of UTC with root account type.
timeconfig

Step 2. Access to SSH and basic configuration
We can access now to the openNAC Analytics Server using SSH connection using default credentials
Note
User: root
Password: opennac
Note
Remember this a default password that must be changed as soon as possible.
NTP SERVER Configuration
- NTP Server must be configured on openNAC Servers, for instance is required be synchronized because some process could fail, Active Directory joining process. Follow the next steps:
- Is required to stop NTP server before applying any NTP parameters.
systemctl stop ntpd
- Set NTP server to the openNAC Servers, (ntp servers ips are 192.168.0.1 and 192.168.0.2)
ntpdate 192.168.0.1
- Modify the file /etc/ntp.conf and include the proper servers to keep configuration.
server 192.168.0.1
server 192.168.0.2
- Start NTP Server
systemctl start ntpd
CHANGE HOSTS file
Go to /etc/hosts file and include the proper IP for openNAC Core, in the example bellow the ip assigned is 192.168.56.253. this is required to establish communication between openNAC nodes and this should be changed because internal processes use these names.
vim /etc/hosts
The openNAC Core is identify as oncore
cat /etc/hosts
127.0.0.1     localhost localhost.localdomain localhost4 localhost4.localdomain4 core.tpl
192.168.56.254     onmaster
127.0.0.1     onanalytics
127.0.0.1     onaggregator
192.168.56.254     oncore
Step 3: HealthCheck Configuration
Configure HealthCheck for this role, keep in mind if this is an Analytics device. HealthCheck Configuration
Step 4. Update the system
One of the recommended steps that should be carried out when the system has been just deployed is to update it to the latest version available.
Into analytics server there are several roles, aggregator, analytics, or both of them; the update procedure depends which is the current server role, because according with server role some update packages should be updated and others should be excluded of updating process.
The system can be upgraded using two different ways, from local or remote repository:
Step 5. Initial configuration
In order to start openNAC Analytics services please use the following commands:
systemctl start logstash
systemclt start elasticsearch
In order to re-start openNAC Analytics services please use the following commands:
systemctl restart logstash
systemclt restart elasticsearch
- Any issue about logstash data processing or other issue please go to the file /var/log/logstash/logstash-plain.log
- Communication between logstash and elastic-search is using the port TCP 9200
Sometimes is required to review data without using centralized administration portal. Go to the file /opt/kibana/config/kibana.yml and comment the property server.basepath. As soon as you comment this line you can use http://analytics-ip:5601
All the information collected by the Analytics is stored in index, /var/lib/elasticsearch/nodes.
We have a cron task defined at /etc/cron.d/opennac-purge ,this task review disk space, in the case that the disk ocupation is bigger that 70% the data is purged from oldest to newest We have a cron task define at /etc/cron.d/opennac-curator , this task review the number of days of the information stored, by defaul is kept 7 days old, if you want to modfy it go to /etc/elastcurator/action.yaml
unit_count:7
Step 6. Unnecessary Services (Optional)
This step is optional for improve server performance
Disable services:
systemctl disable dhcp-helper-reader
systemctl disable bro
systemctl disable sensor
systemctl disable pf_ring
systemctl disable filebeat
Remove services:
yum remove bro ntopng filebeat opennac-sensor opennac-dhcp-helper-reader pfring
Step 7. API Configuration and openNAC Core IPs
- Check that /etc/hosts includes proper IP for Opennac Core (oncore), Analytics (onanalytics) and Aggregator (onaggregator)
- The API key has to be configured in openNAC Core server, Please go to ON CMDB -> Security -> API Key section, where “IP” would be the opennac-Analytics IP address, and the generated key will be the API key to be used.
- Depending on the amount of data processed by ElasticSearch (mainly sent from Sensor), the disk consumed can be high. There is a script configured in cron, /etc/cron.d/opennac-purge, managing the free disk space. By default, it is executed once a day, but you can consider execute it frequently. Other cron scripts can be deployed and you can find them in /usr/share/opennac/analytics/cron.d/ directory.
- Please check in the directory /etc/default/ and configure the API Key into the file ‘opennac’, where an openNAC API call is done, modify the “API key” used to connect to openNAC API with a valid authentication.
sed -i 's/#HERE_GOES_OPENNAC_API_KEY#/<your_API_KEY>/' /etc/default/opennac
Additional the same file /etc/default/opennac contains a variable ‘OPENNAC_NETDEV_IP=”1.2.3.4”’, this IP address is the Aggregator IP. For that reason, except cluster use where the analytics and aggregator roles are separated, this parameter should be configured using the analytics IP address.
'OPENNAC_NETDEV_IP="<IP_Aggregator>"'
Step 8. Configure Analytics IP on Core Device
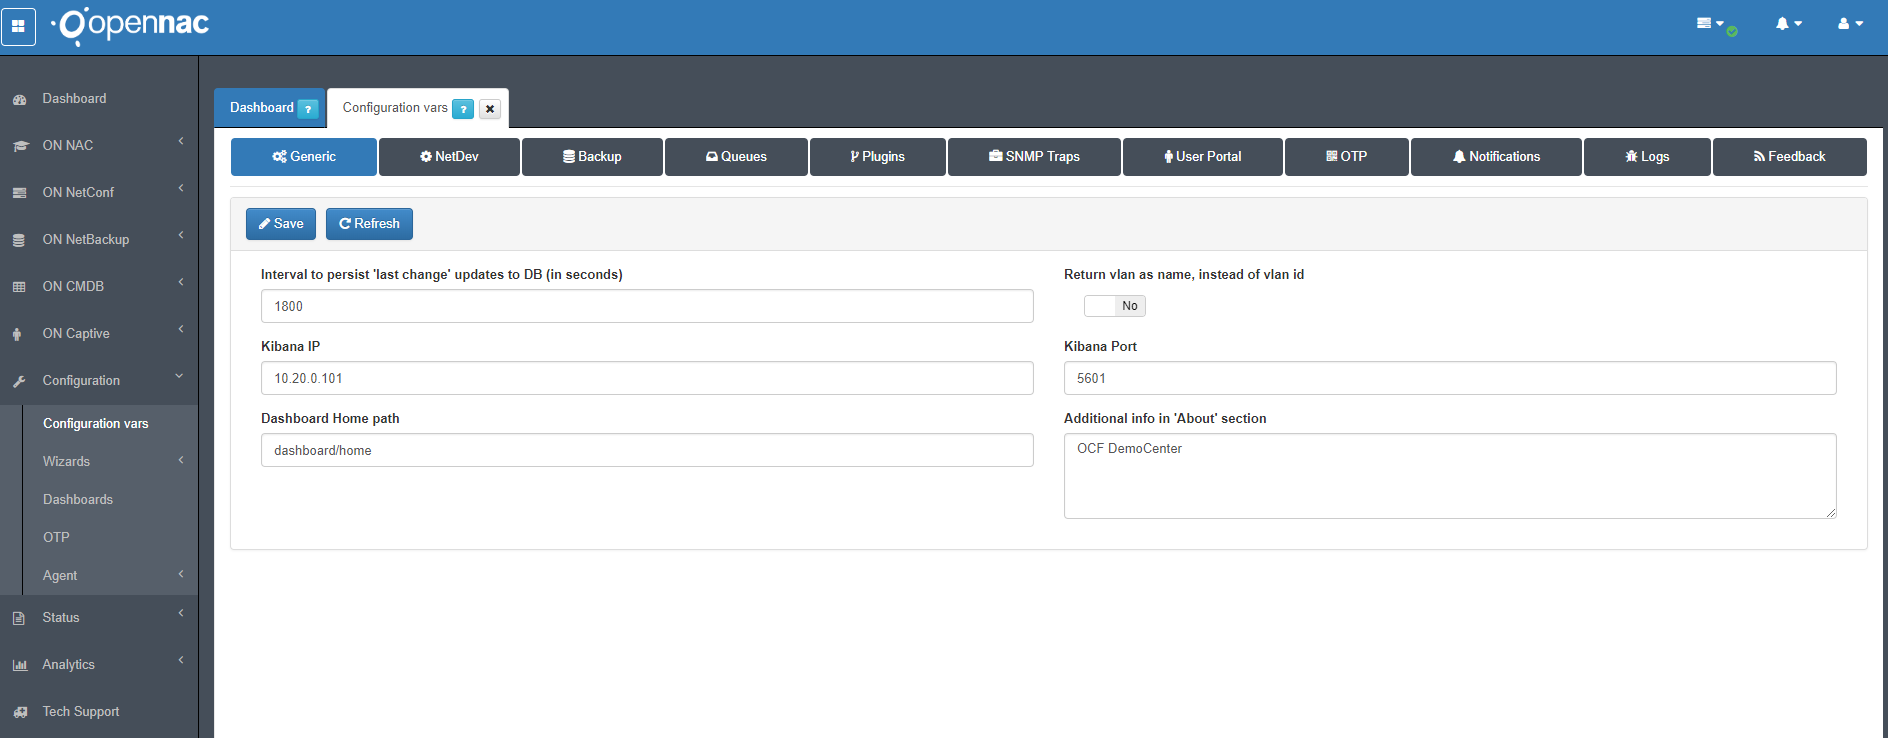
Go to Configuration –> Configuration vars on tab Generic at the edit box Kibana IP fill it with Analytics IP address, this es basic for communication between Core and Analytics, the communication use the port 5601.

Step 9. Enable netflow, sflow and ipfix analysis (optional)
Note
This is an OPTIONAL configuration. Since release 7544, openNAC supports the analysis and discovery of devices using netflows and sflows. To enable this feature you need to have the Recommended Hardware (64GB RAM, 16 cores) for the analytics box and to execute the following steps:
1. Change Logstash JVM Memory size: Edit the file /etc/logstash/jvm.options. We need to have at least 4GB for logstash, 6GB would be optimal:
vim /etc/logstash/jvm.options
-Xms4g
-Xmx4g
2. Enable the flow pipeline: Edit the /etc/logstash/pipelines.yml and uncomment the following lines:
vim /etc/logstash/pipelines.yml
#- pipeline.id: elastiflow
#  path.config: "/etc/logstash/elastiflow/conf.d/*.conf"
- Add the following rules to iptables (sflow is port 6343, ipfix is port 4739 and netflow is port 2055):
-A INPUT -p udp --dport 6343 -j ACCEPT
-A INPUT -p udp --dport 4739 -j ACCEPT
-A INPUT -p udp --dport 2055 -j ACCEPT
4. Certify yourself that the JVM memory size for the elasticsearch is correctly defined as 50% of system RAM. Edit the file /etc/elasticsearch/jvm.options:
vim /etc/elasticsearch/jvm.options
-Xms32g
-Xmx32g
- If you needed to change Elasticsearch JVM properties, restart Elasticsearch:
systemctl restart elasticsearch
- Restart Logstash (Note that the restarts from now on can take several minutes 3-8 aprox., as there are a lot of objects to load:
systemctl restart logstash
Step 10. Configuring use case
As soon as you have the environment and initial configuration in place is required to Understand Use Cases Benefits.
As soon as detected and identify the proper use case this should be configured on openNAC servers.
Check the following section to choose the target use case. Use Cases Implementation
Step 11. Troubleshooting
You can verify the basic troubleshooting for ON Analytics device Analytics Troubleshooting