3.1.3.2. Policies
From the ON NAC > Policies section, you can create, remove, modify, apply, and manage Network Access Control Policies and their objects. Before configuring policies, it is important to properly understand how an OpenNAC Enterprise Policy works.
Note
Refer to the Basic Concepts section for detailed information about the policy functioning.
Security Policy Behavior
Any network access request will be processed according to the security policies in a top-to-bottom order.
Once a policy is matched, access is either granted or denied, and no further rules are processed. If no policy is matched, the request will be handled by the Default policy.

3.1.3.2.1. Default Policies
Your OpenNAC Enterprise environment comes with an extensive set of preconfigured policies.
Each use case requires different configuration parameters specific to that workflow. OpenNAC Enterprise helps you get started by providing a Policies section with basic out-of-the-box policies that have intuitive names, making it easy to identify their usage.
You can customize, build up, or directly use these templates:
UNAC
MAB - Degraded from 802.1X cert
UNAC - Wire - 802.1X Host
UNAC - Wire - 802.1X User
UNAC - Wire - MAB (COMPLIANCE)
UNAC - Wire - MAB (CDT_MAB)
UNAC - Wifi - 802.1X Host
UNAC - Wifi - 802.1X User
Guest
Guest Wifi Accept
Guest Wifi Default
Guest Wire Approved - Compliance
Guest Wire Approved
Guest Wire Default
2SRA
VPN Access - Critical
VPN Access - Standard
VPN Access - Default
VPN 3rd Party Posture
VPN 3rd Party Posture Reject
Note
VPN Access Critical and Standard policies are using a testing User Data Source on its Precondition-Users configurations. You must configure a real Active Directory for these polices.
Visibility
Visibility
Visibility Agent
Note
Visibility and Visibility Agent policies must use an Agent profile with WireGuard enabled on its postconditions. You must configure this manually, as it is not defined by default.
There are two more default policies that are configured to match devices that don’t match any other policy:
Monitor: The first one, defines sending all traffic to Registry VLAN by default.
Catch All: The final policy matches all events that did not match any of the previous policies. This way, you can know which events are out of your policy scope.
3.1.3.2.2. Operational Capabilities
The Policy section features a series of intuitive operational buttons:

Add new: To add a new policy.
Edit: To edit a selected policy.
Clone: To simplify your operations, you can clone existing policies and build-up from their configurations.
Delete: To remove a selected policy.
Refresh: To refresh the page.
Export data: To export the policy rules in JSON format.
Import data: To import data from a JSON or XML file.
Enable/Disable: To enable and disable multiple policies.
3.1.3.2.3. Filters
In the upper right corner of the window, you can find three buttons that enable filtering the Policy view.
To help you navigate and find the different policies, you can use different filters, create sections, and graphically see the plugins that are configured in the different policies.

The first button (Section) allows filtering the different policies -after configuring the “Sections” field in the policies.
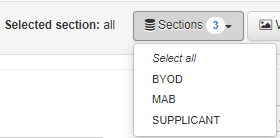
The second button allows visualizing all the Plugins that enabled in the different policies.

The third button allows filtering the policies by parameters like Name, Tags of User Device, Section, Enabled (true or false) etc.

3.1.3.2.4. Contextual menu
By right-clicking on a policy, the following menu will be displayed:
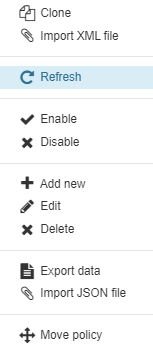
Clone: Allows cloning the policy selected.
Import XML file: To import data from an XML file.
Refresh: To refresh the page.
Enable: To enable the policy if it is disabled.
Disable: To disable the policy if it is enabled.
Add new: To add a new policy.
Edit: To edit the selected policy.
Delete: To remove the selected policy.
Export data: To export the policy rules in JSON format.
Import JSON file: To import data from a JSON file.
Move policy: Allows moving the policy from its current position.
3.1.3.2.5. Add new
To create a new policy, first understand the main sections that are included in a policy evaluation process. Each section will be detailed below.
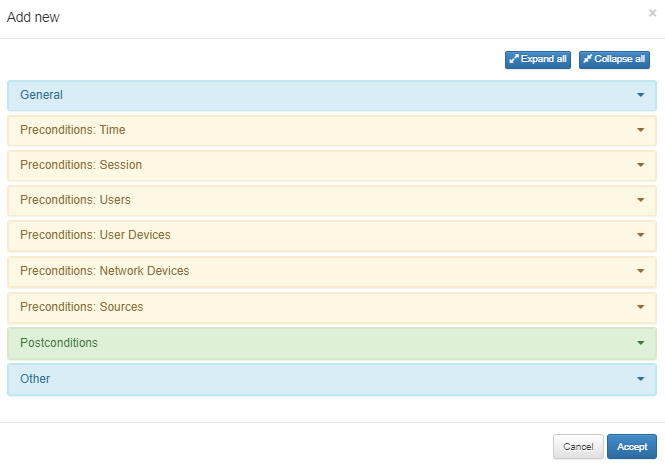
General: Configure the policy name and add a descriptive comment. You can also enable/disable the policy or select a predefined section.
Preconditions: Configure the conditions that will take place before the authentication happens:
Time of the connection
Session
Users
User devices
Network devices evolved
Sources (type of authentication)
Postconditions: Configure the conditions that will take place after that authentication happens:
VLAN assignment
Security Profiles or ACLS at an ingress port
Plugins and their parameters or notifications.
Other: Define a message for network access requests, enable the automatic learning of user devices, and assign a TAG to each device when it matches the policy.
3.1.3.2.5.1. General
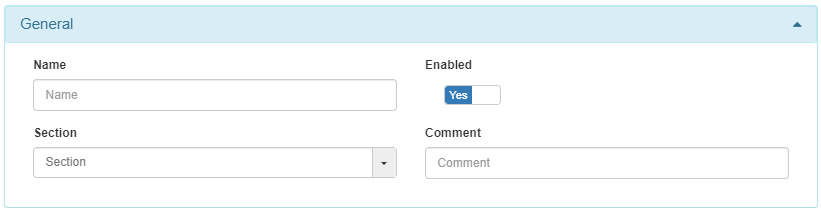
Name: Define a policy name.
Enabled: Flag to enable or disable the policy.
Section: Use this field to select a section to group policies.
Comment: Add a comment related to the policy itself, including as much detail as possible to improve future policy reviews. For instance, it can include additional information such as a change number, date of policy creation, technical reasons for denying or allowing access, and many others.
3.1.3.2.5.2. Preconditions
Preconditions allow us to add conditions before the authentication happens. These preconditions can be the Time of the connection, Users, User and Network Devices evolved, and Type of Authentication (Sources).
See all precondition types detailed below:
3.1.3.2.5.2.1. Time
This parameter configures time ranges when the policy is enabled and the hours users can have network access.

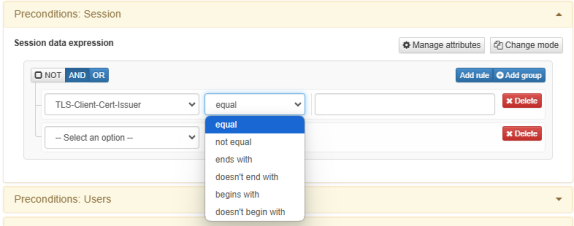
3.1.3.2.5.2.2. Session
The Preconditions: Session enables introducing an expression to filter session data.
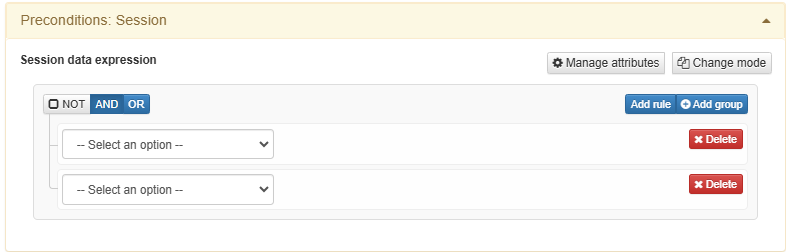
Add the AND/OR logic within rules with the following operators: equal, not equal, ends with, doesn’t end with, begins with, and doesn’t begin with.
To configure the expression attributes click on Manage attributes:
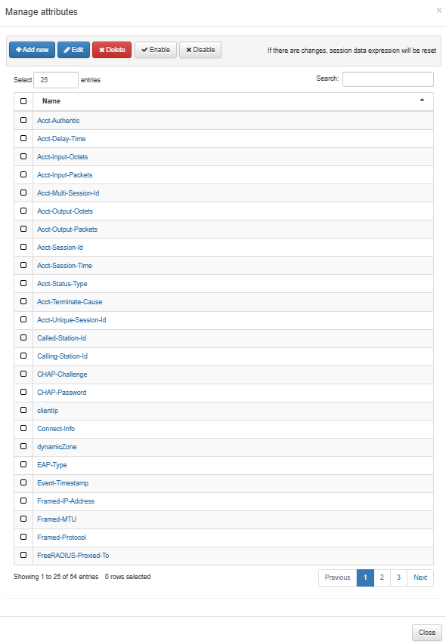
From this view you can create, enable, and disable attributes according to your needs.
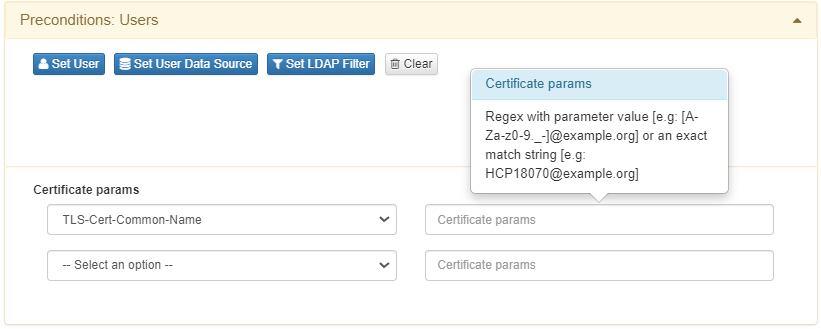
3.1.3.2.5.2.3. Users
As for the Preconditions: Users, you can select users’ identities to allow or deny their network access.
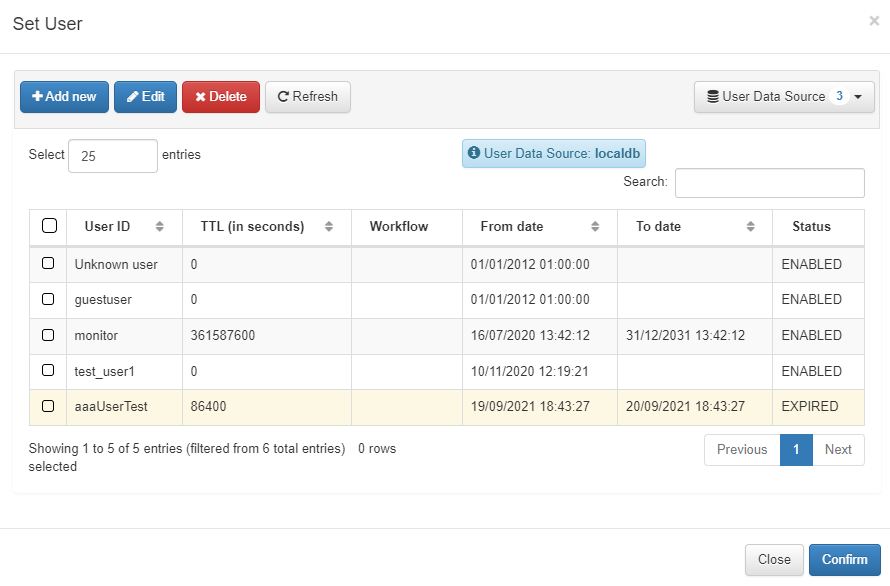
Within the Set User option, select a single user from the users’ local database. Local users are stored in an internal CMDB along with all the NAC Assets. The OpenNAC Enterprise CMDB is located at the ON Core. Refer to the ON CMDB section for more information.
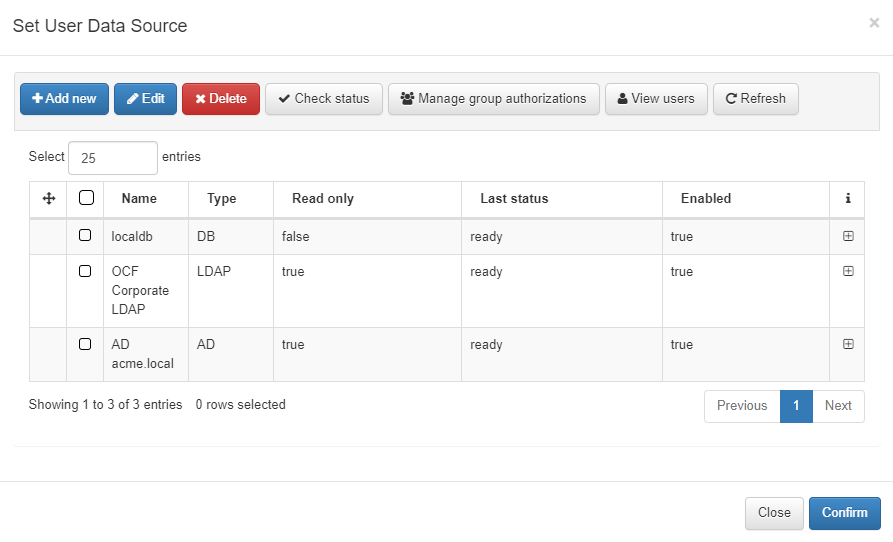
You can select User Data Sources (UDS) by clicking on Set User Data Source. UDS is the identity repository that can be used by the policy engine. Multiple UDS options can be configured (e.g., Active Directory, LDAP Server, Database, and others), and it is also possible to search across them:
Another available parameter within the “Preconditions: Users” is the LDAP Filters:
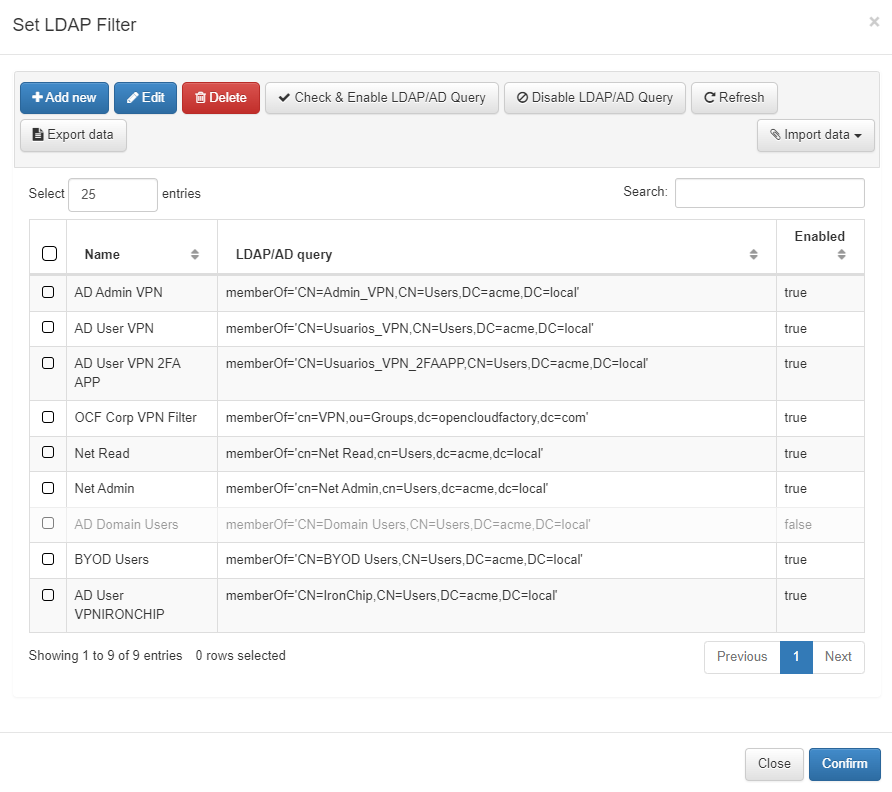
Once you have selected the authentication method (UDS), choose the conditions that must be met for the asset to obtain network access. In other words, LDAP Filters handle the authorization process during policy evaluation.
Note
For seamless integration with Active Directory, the initial step involves adding the ON Core to the domain:
To enable this integration, utilize the wizard located at Configuration > Wizards > Join domain wizard. This integration enables the RADIUS server to utilize AD solely for authentication purposes.
Understanding LDAP Filters and Active Directory Integration
Set User Data Source enables selection of the binding connection with Active Directory.
Set LDAP Filter allows choosing LDAP attributes for authorization processes, like “MemberOf” in the LDAP filter.
Named for its compatibility with LDAPsearch and its filters, the LDAP filter selects attributes such as “MemberOf”. This means that to access the network, users must belong to the Active Directory Group associated with the specific organization unit.
In summary, if users have valid credentials and belong to the appropriate Active Directory group, policy evaluation functions as expected. Any LDAP Filter usable by LDAP search can be applied, whether it is “MemberOf” or another Active Directory attribute indicating group membership.
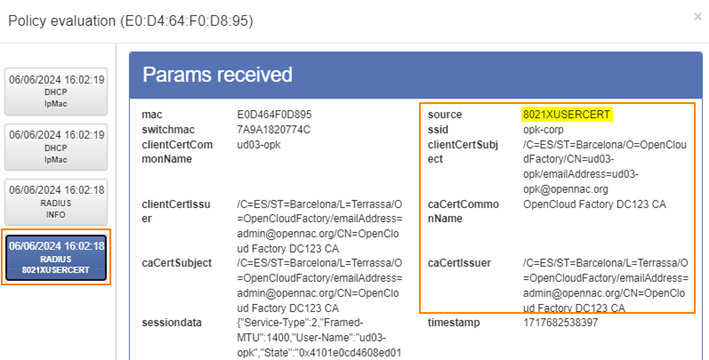
The last field of Preconditions:Users configuration is the Certificate params:
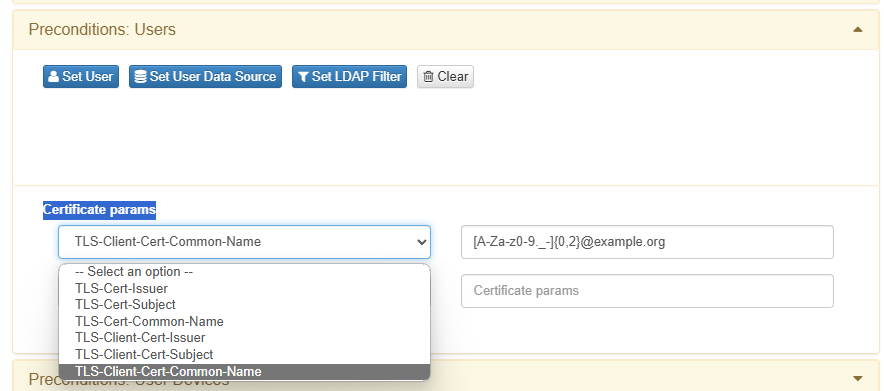
Write the params in Regex syntax as in the example provided above. You can also consult certificate parameters for your reference at the Business Profiles section, by expanding the details of a connection by certificate or visualizing its policy evaluation:
3.1.3.2.5.2.4. User Devices
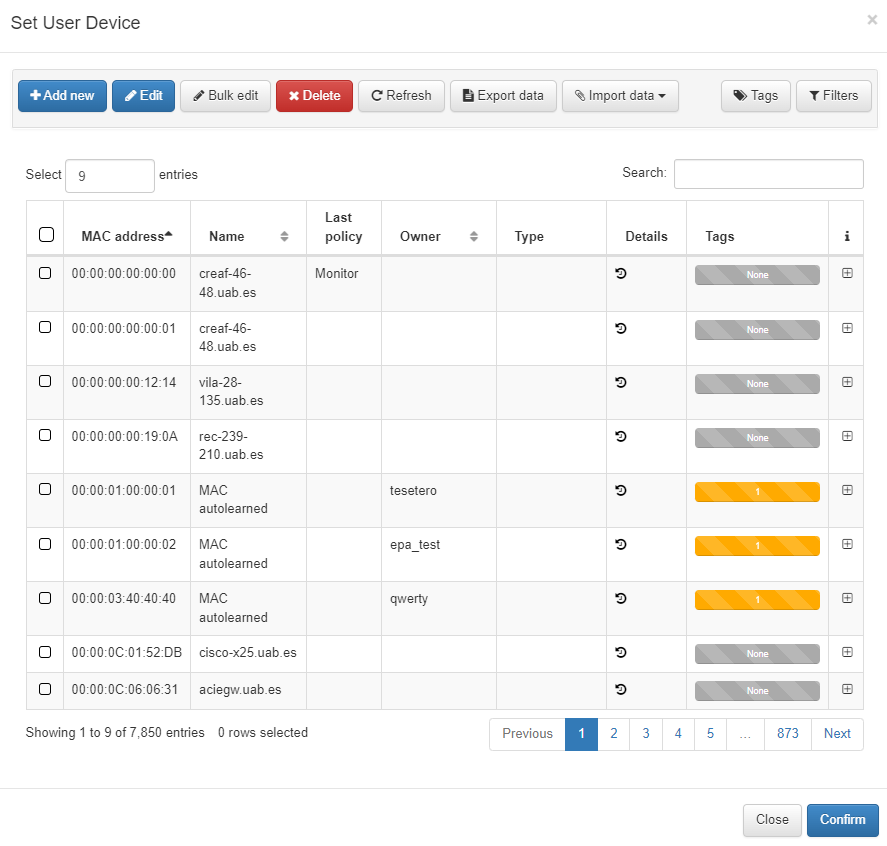
By configuring Preconditions: User Devices, you can associate the user devices registered in the OpenNAC Enterprise CMDB to the policy.
You can select a list of user devices by clicking on Set User Device.
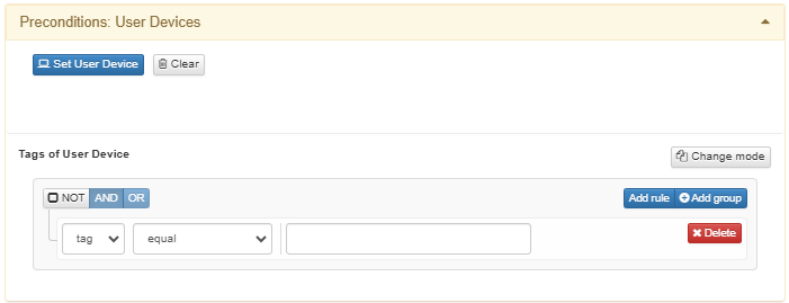
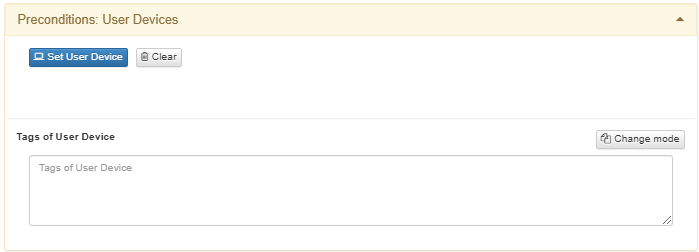
You can also configure Tags of User Device within this section. It enables adding a tag to match the precondition. Click on Change mode to toggle between the Simple Mode and Advanced Mode views.
You can create tag-based expressions to filter devices based on shared characteristics or security posture attributes. This approach simplifies global maintenance, reserving user selection for troubleshooting or specific situations. To write regular expression, switch to the Simple Mode.
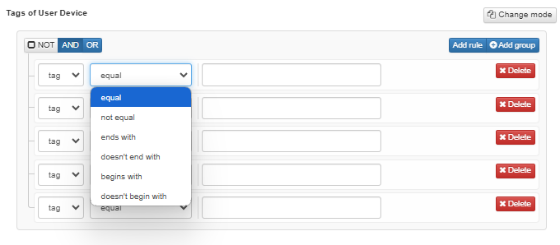
The advanced mode features the following operators: equal, not equal, ends with, doesn’t end with, begins with, and doesn’t begin with:
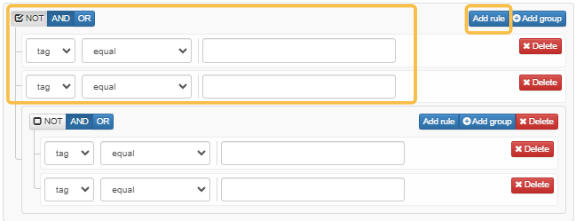
You can add the AND/OR logic within rules:
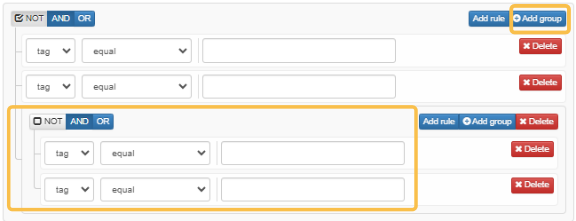
Or within groups:
Refer to the Basic Concepts section to understand the Tag feature and find the out-of-the-box OpenNAC Enterprise Tags within the ON CMDB > Tags section.
Note
OpenNAC Enterprise follows a common standard for tag naming, utilizing three letters for prefixes. To review some available tags, refer to the Tags table.
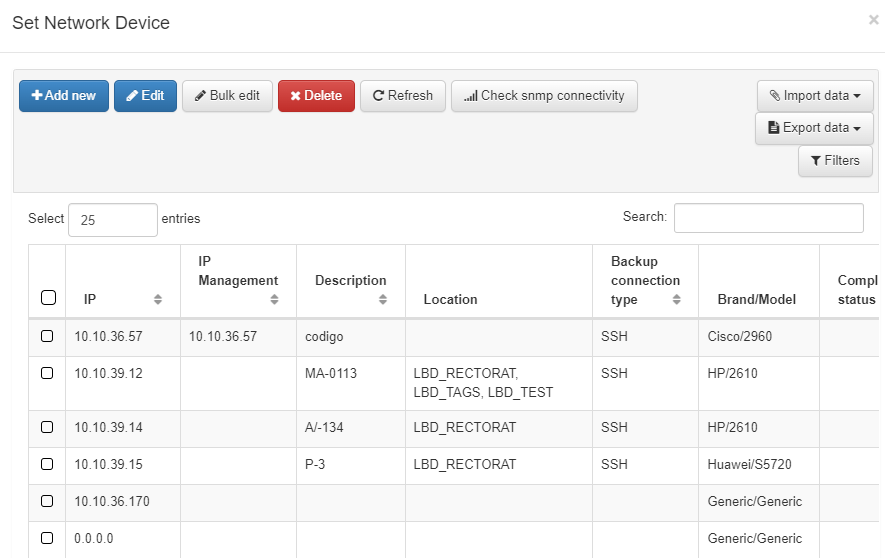
3.1.3.2.5.2.5. Network Devices
By configuring Preconditions: User Devices, you can associate the network devices registered in the OpenNAC Enterprise CMDB to the policy.
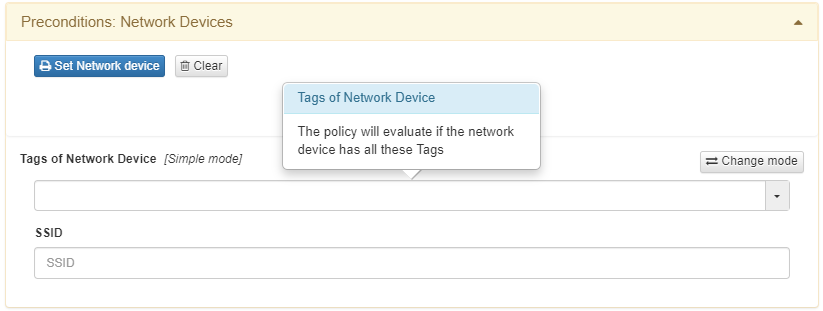
You can select a list of network devices by clicking on Set Network Device.
You can also configure Tags of User Device within this section. It enables adding a tag to match the precondition. Click on Change mode to toggle between the Simple Mode and Advanced Mode views.
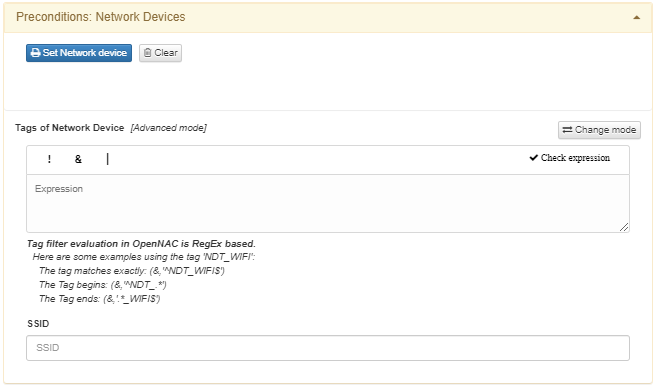
Refer to the previous section for details on Tags of user device, as the parameter functions in the same manner.
You can also define the name of an SSID on which the devices match this policy. This field accepts regular expressions in PCRE format.
3.1.3.2.5.2.6. Sources
By configuring P**reconditions: Sources**, you can define the authentication method to be used during network access requests. It is not recommended to use all methods simultaneously. With a finely tuned policy, better results can be ensured, and mistakes can be avoided.
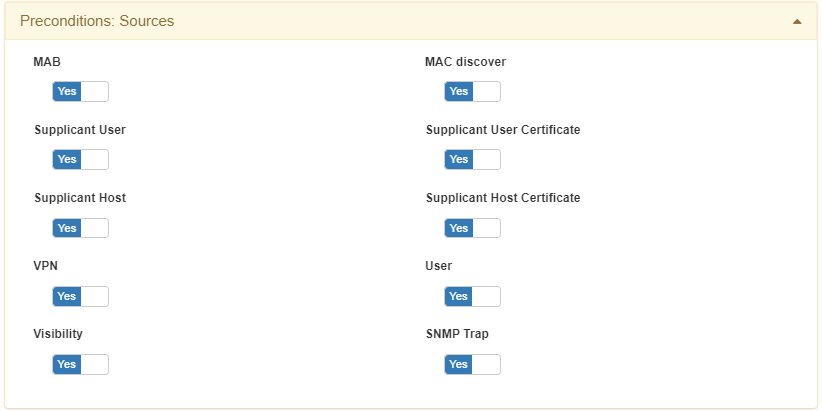
MAB: Mac Address Bypass method is an emulation of 802.1x. In the case there is no 802.1x supplicant listened by the switch port, the switch sends the MAC as the authentication method. It depends on the switch order authentication configuration that is assigned to the port. PRINTER, PHONES, and OTHER DEVICES that do not have a supplicant 802.1x commonly use this authentication method.
Supplicant User: Enabling it, allows authenticated 802.1x supplicants, a common scenario may be a supplicant configured with EAP-MSchapv2. It is common to use a username and password credentials. This type of authentication could use a server certificate and be issued by a supplicant user trusted by a Certification Authority (recommended).
Supplicant Host: When enabling this type of authentication method, we allow the authentication of the workstations using the computer account. If this account is an Active Directory, the workstation account must be registered in the Active Directory domain to be used. A common scenario could be a support team that needs corporate devices to gain access to the network to provide a remote connection with user logon.
Note
In case you don’t have a Supplicant Host configured you will not get network access until the user and password are introduced. Only users with cached credentials can access the network.
A common practice is to create a TAG when the authentication comes from a Supplicant host. We tag all the authentication attempts that come from this type of authentication to identify which workstation is part of the Active Directory domain and which part comes from a Corporate account. With that tag, we can reevaluate our policy actions.
VPN: Enabling this authentication method, we allow commercial VPN servers to be authenticated. Remember that OpenNAC Enterprise technologies allow using 2FA. We can use OTP using Google Authenticator OTP + Password. We have to define the IPS of the VPNS Gateway at the RADIUS level. Juniper, Cisco, Fortigate, Viapps, Checkpoint, or other commonly used VPN Gateway are easy to be integrated. The communication protocol between OpenNAC Enterprise technologies and VPNs is RADIUS protocol.
Visibility: Enabling the visibility source we allow the ON Core to process events that come from ON Sensor. OpenNAC Enterprise technologies include ON Core, Analytics, and Sensor components. For instance and as a use case, devices learned by ON Sensor are sent to ON Core adding a TAG such us SRC Sensor.
MAC discover: By enabling the MAC discover source, we allow the match of devices with known MAC addresses
Supplicant User Certificate: By enabling this type of authentication method, we allow the use of a user digital certificate, EAP-TLS adapts to this authentication method.
Supplicant Host Certificate: By enabling this type of authentication method, we allow the use of a host digital certificate, EAP-TLS adapts to this authentication method.
User: By enabling it, user connection and then authentication attempts through applications are allowed. Administrators of Network devices such as Switches, routers, and VPNs could be a common example. This means that we can use OpenNAC Enterprise to authenticate access to network devices. We can also create authorizations. For instance, in a common authorization scheme, Cisco Switches include different authorization profiles (Privileges Levels) which allow defining a command available for every privilege level. It is also possible to map privileges with Active Directory Groups, for that implementation we use RADIUS attributes.
SNMP Trap: Enabling the SNMP TRAP source allows the ON Core to process events that come from SNMP TRAP sent by a network device. This trap must be in version 1 or 2 and include the MAC address of the end point device.
3.1.3.2.5.3. Postconditions
This topic we will explain the Postconditions section features:
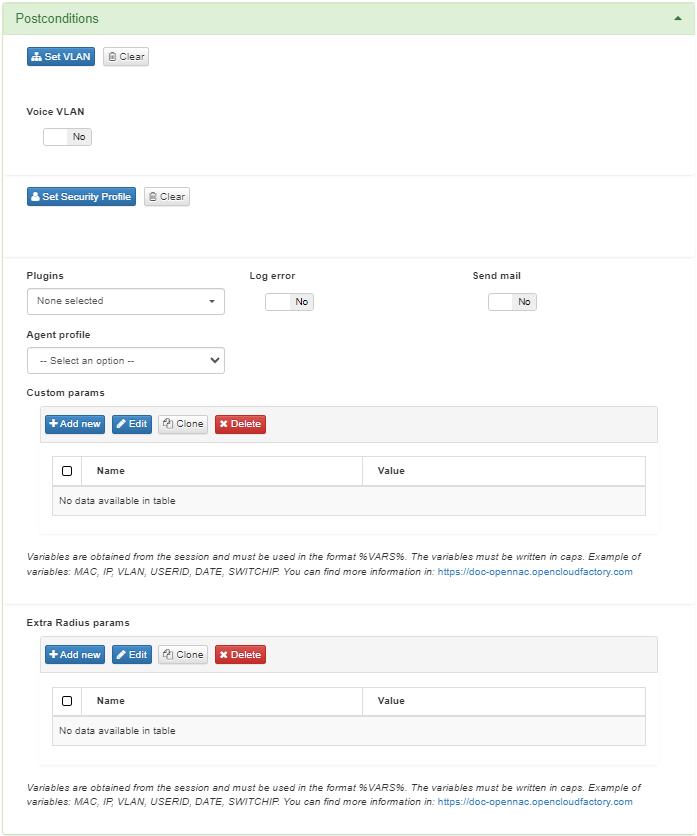
Set VLAN
This field enables VLAN dynamic assignation (logical segmentation).
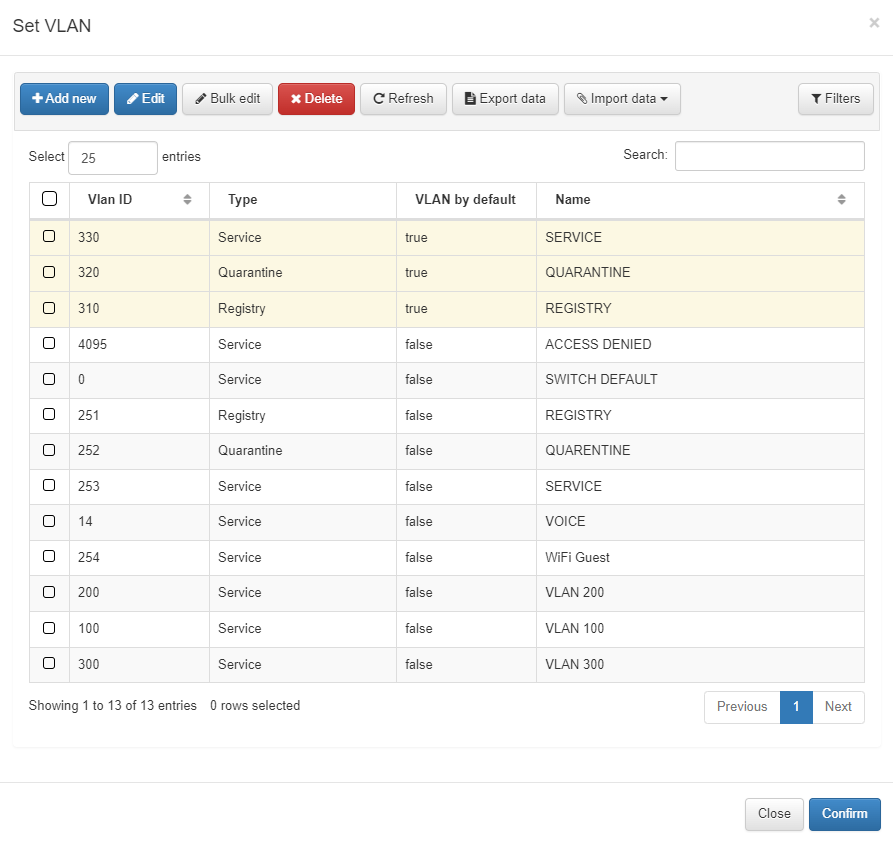
Consider three aspects when configuring VLANs:
SERVICE VLAN (VLAN XXX): The VLAN 533 could be an example of a service VLAN, where any valid VLAN ID can be used to define specific services.
SWITCH DEFAULT VLAN (VLAN 0): Using VLAN 0 means that the switch will assign the default VLAN configured on the switch port. This is the value to use when you want to utilize the switch’s default VLAN settings.
REJECT VLAN (VLAN 4095): Assigning VLAN 4095 indicates that network access attempts should be denied. Since VLAN 4095 is outside the valid VLAN range, using this value will result in access being denied.
Warning
Using a REJECT VLAN, like VLAN 4095, will not execute the plugins selected.
You can also enable the compatibility with Voice VLANs.
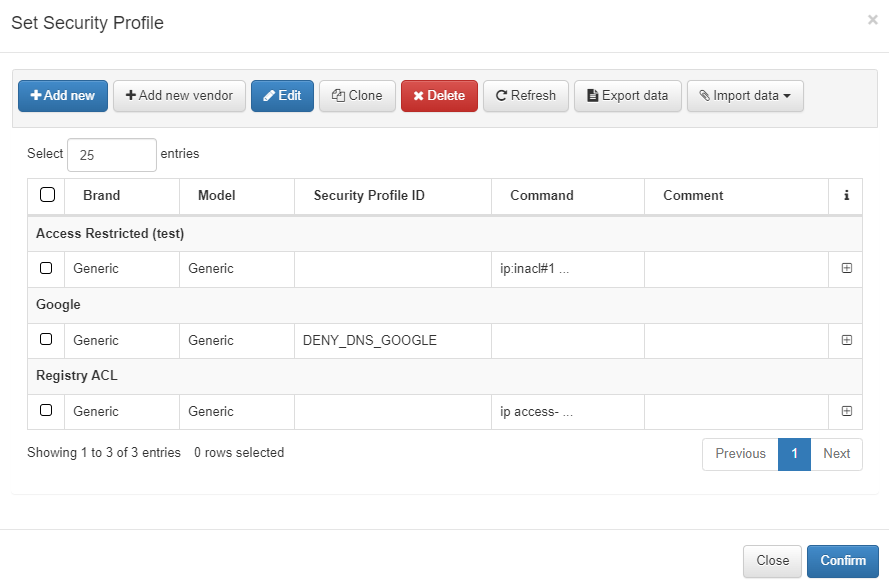
Set Security Profiles
You can set the Security Profile as dynamic or static. For more details, refer to the ON CMDB > Security Profiles section.
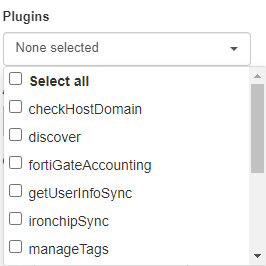
Plugins
From this field, you can associate plugin executions to a policy. The plugins must be previously configured and enabled to be available in this plugin dropdown. For more information about the general plugin configuration, refer to the Configuration > Plugins section.
You can send a Log error through syslog and enable the Send mail option. This way, whenever a rule is matched, an email will be sent. This can be useful for sending security notifications to Security Operation Centers. By default, these two options are disabled.
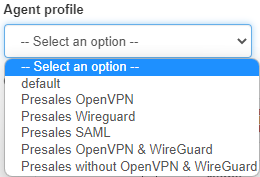
Agent Profile
From this field, you can associate an Agent profile to a policy. They must be previously configured in ON Agent > Agent Profiles to be available in this dropdown.
Custom params
In the Custom params configuration, you can add customized extra information you want to see in the policy evaluation results.
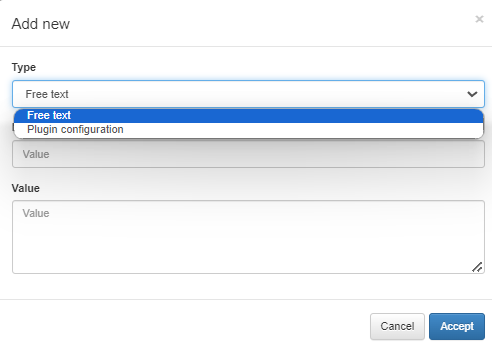
Type: Type of custom parameter:
Free text: Creates a new parameter to return in the policy evaluation.
Plugin configuration: The values you set within a policy will override the corresponding values in the general plugin configuration. Any plugin settings not specified in the policy will use the values from the general plugin configuration.
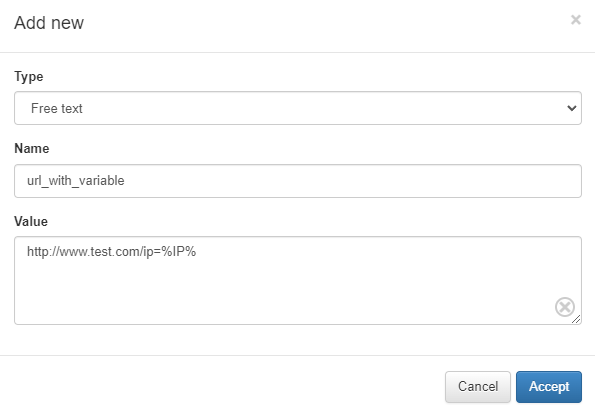
Name: The name of the parameter to configure.
Value: The value of the parameter configured.
In the value field, use variables that come from the policy evaluation response. The available variables are:
Variable |
Description |
|---|---|
RULENUM |
Number of the policy where the device matches |
RULENAME |
Name of the policy where the device matches |
MAC |
MAC address of the device |
DATE |
Date and time when the event occurred |
USERID |
ID of the user |
SWITCHIP |
IP address of the switch |
SWITCHPORT |
Port of the switch |
SWITCHPORTID |
ID of the port of the switch |
IP |
IP address of the device |
VSA |
Vendor Specific Attributes |
VLAN |
VLAN to which the device is assigned |
To use these parameters, add them in the format %VAR% (enclosed in percentage signs and in uppercase). An example of this is as follows:
Extra Radius params
To configure this field, vendor RADIUS dictionaries (attributes and its values) must be considered and sometimes imported. For instance, modifying session timeouts, assigning pool IP, applying policies based on identities, and more.
For adding a new Extra Radius params, configure the following fields:
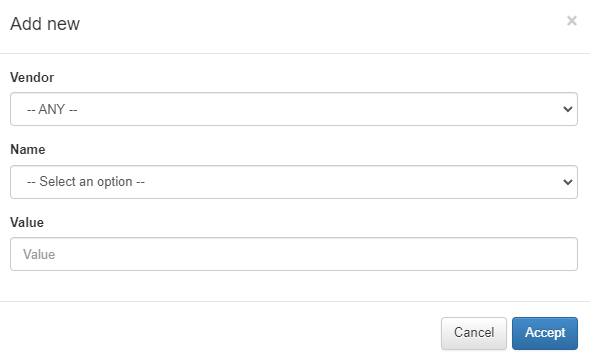
Vendor: Vendor of the network device.
Name: Name of the radius parameter to set.
Value: Value for the RADIUS parameter.
In the value field, use the variables as described in in Custom Params.
Note
The custom fields added to the user devices will also be taken.
3.1.3.2.5.4. Other
In the last section Other we find the last options.
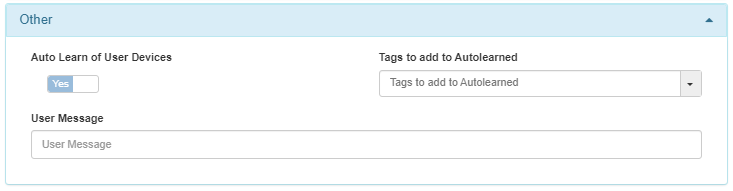
Auto Learn of User Devices: Enabling this flag, allows OpenNAC Enterprise to add unknown devices that access this policy to the database. The device is auto-learned during its first policy evaluation without requiring reevaluation.
Tags to add to Autolearned: Add tags in the devices that openNAC has self-learned. It only works when “Auto Learn of User Devices” is activated.
User Message: OpenNAC Enterprise can send notifications to devices with the ON Agent installed. A message can also be sent using the captive portal. These notifications will be displayed after a payload is sent in the following scenarios:
At agent startup
At every scan payload
At every manual payload (refresh status)
When the policy of the current Agent changes
When the message content has been changed.
Use this field to configure the policy message.
After configuring all the necessary fields for your policy, click on Accept to save the settings.