Security
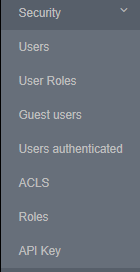
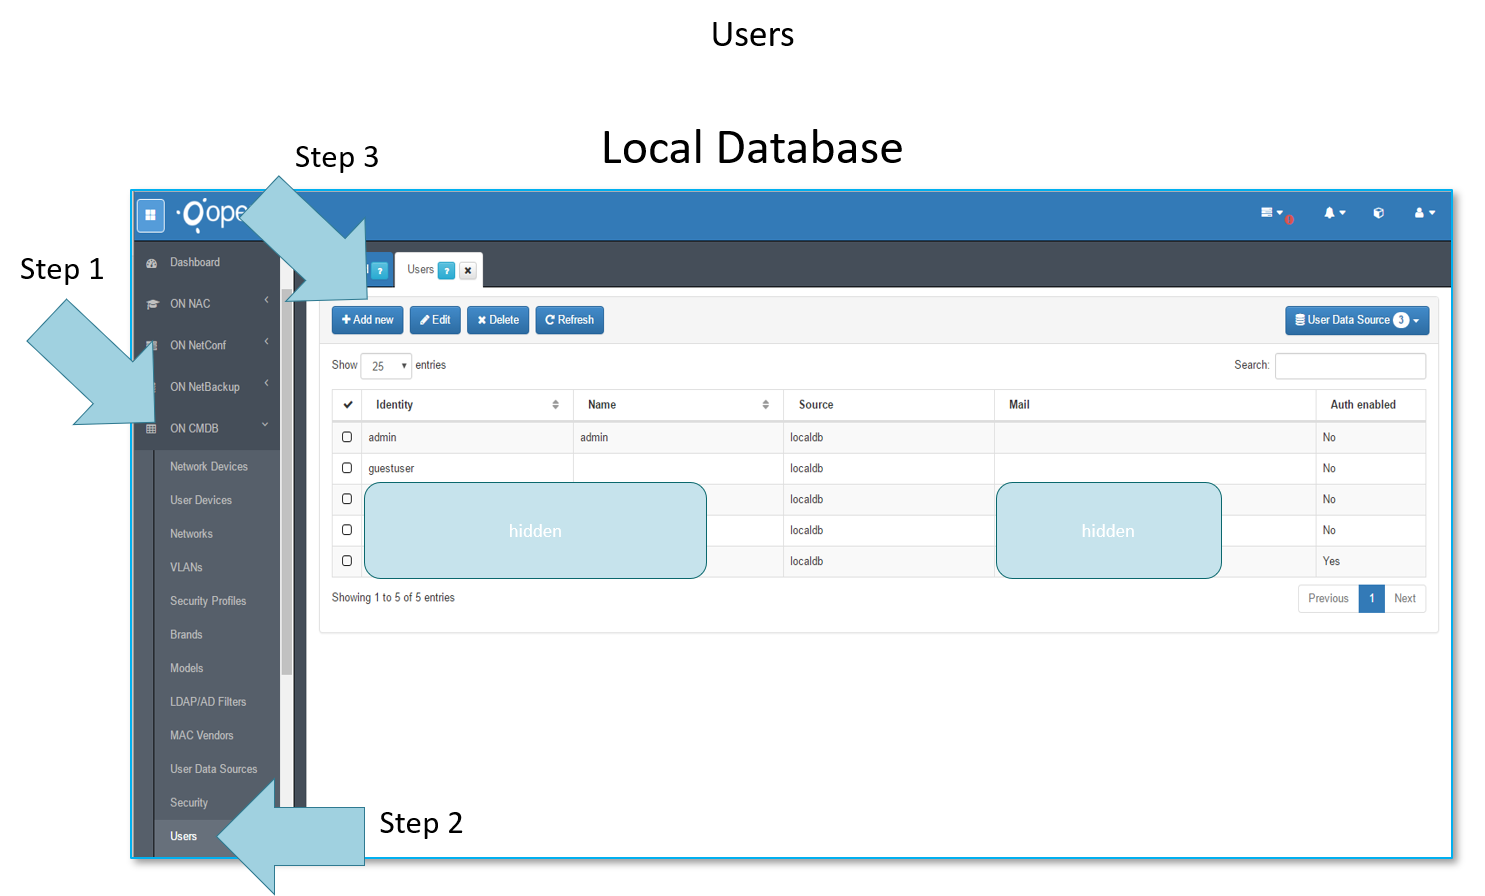
Users
Going to ON CMDB -> Security -> Users sections allows to create users, these users can be created on local database following the steps 1, 2 and 3 consecutively.
User Roles
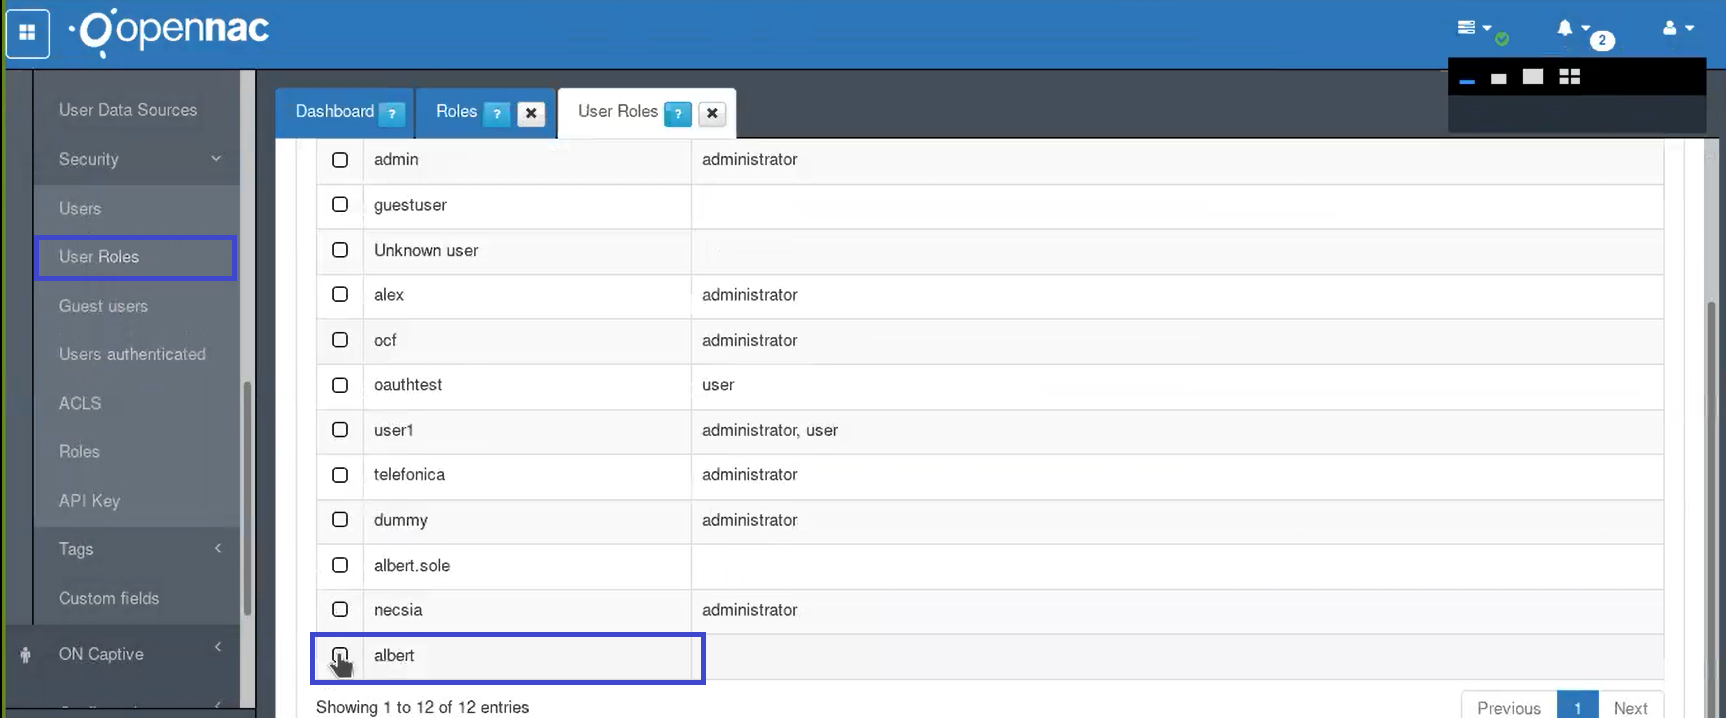
Going to ON CMDB -> Security -> User Roles as shown by the Step 1 and Step2 is possible to assign the User role to a User, in this case we have selected the user admin as shown by the Step 3, edit it as shown by the ** and later we assign the role ”administrator” to the user admin as shown by the Step 4.
These roles are used to manage access to openNAC Web administration portal. Remember that Active Directory Groups or LDAP can be used to create roles.
ACLs
Going to ON CMDB -> Security -> ACLs as shown by the Step 1 is possible to define the capabilities used by the roles (formally named ACLS), this security method allow us to control which actions can be carried out by user. This ACLs are also valid and used to provide security to the API as well, this ACL define which methods are available to be use through HTTP connection and its classes and description.
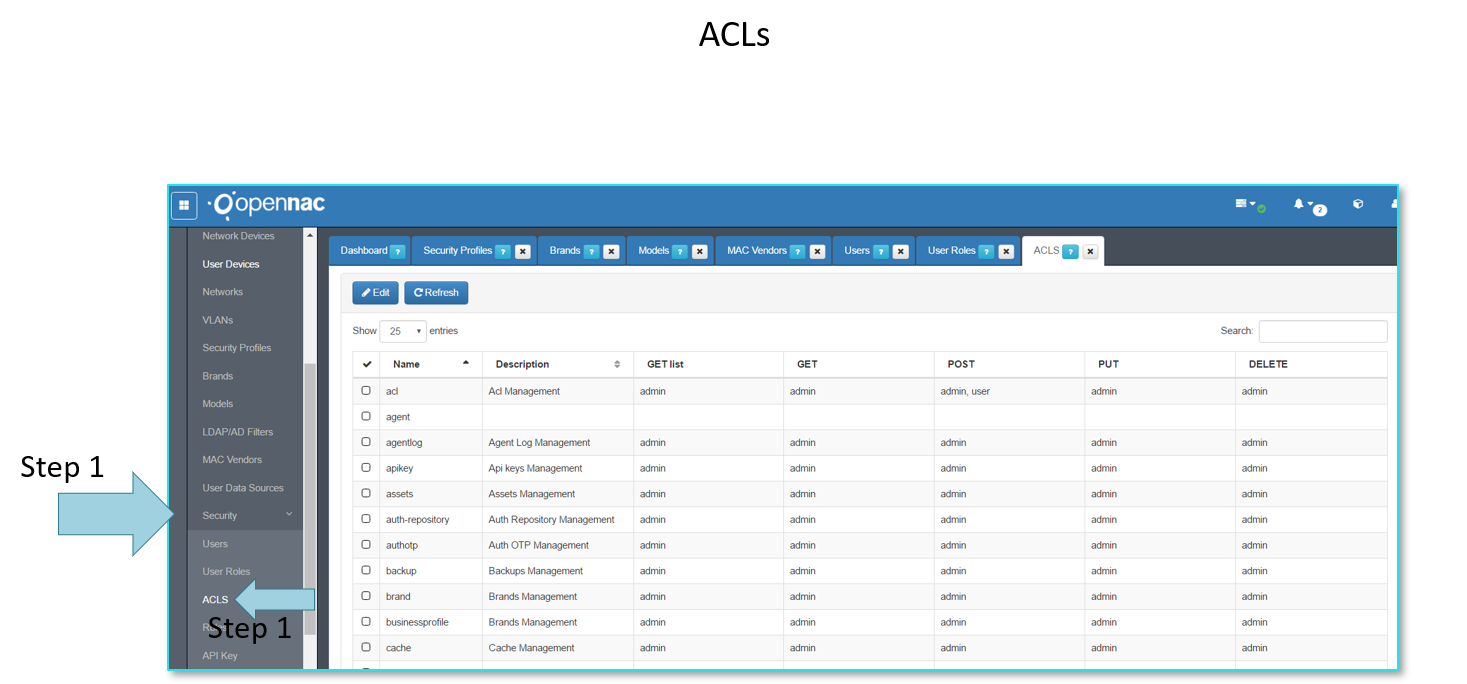
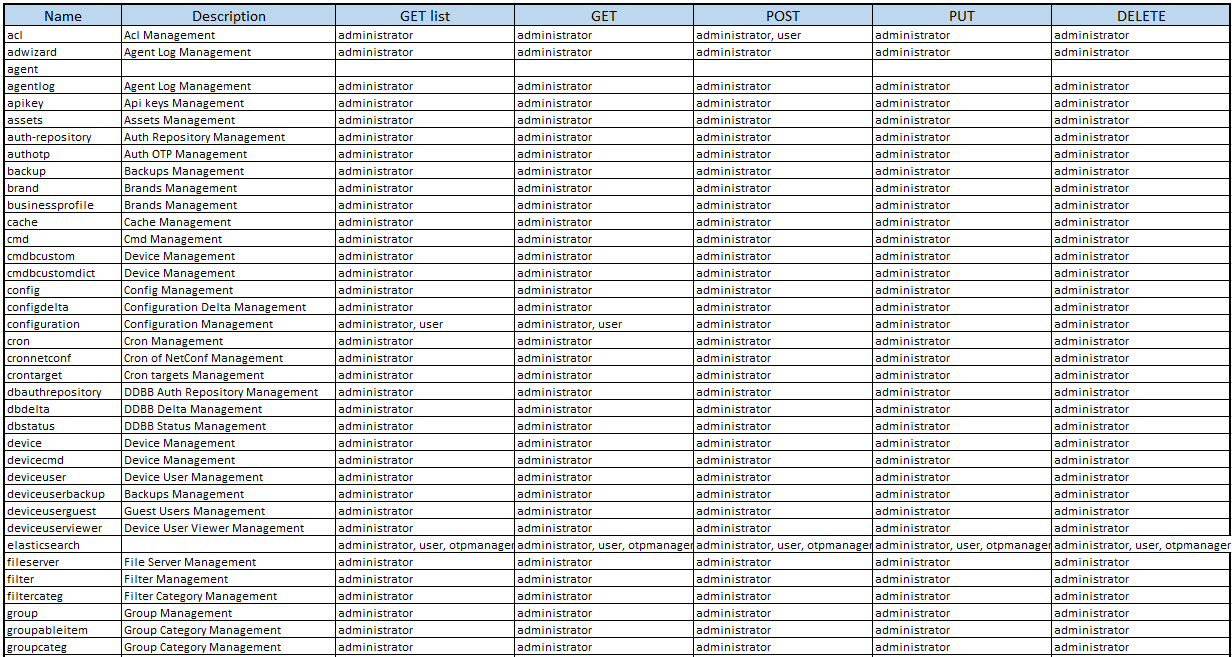
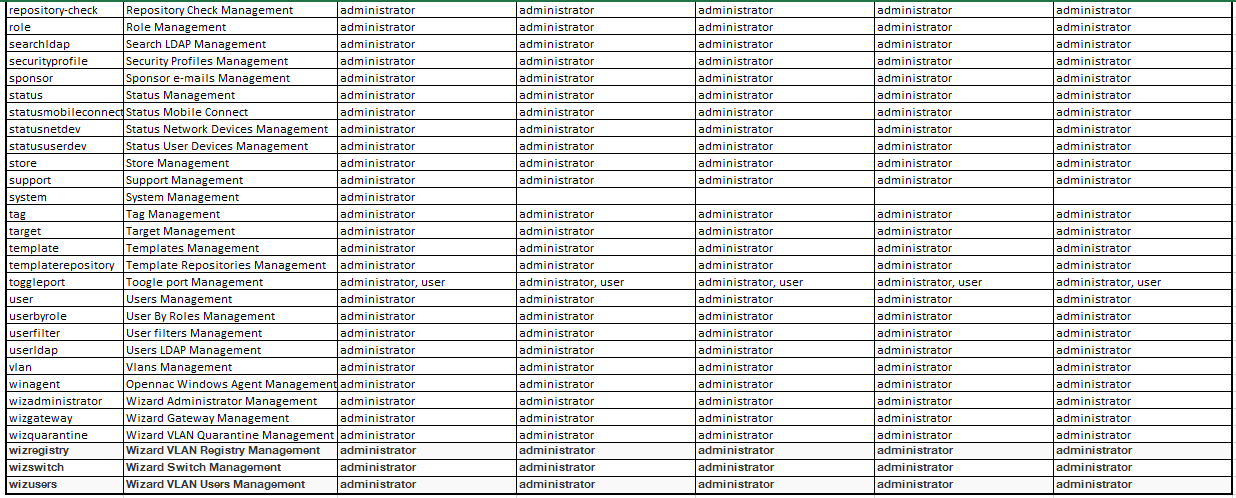
Here bellow are the current ACLs, the families, its methods and the roles that can use these capabilities.

Roles
Using roles, administrators can generate console profiles and later associate them to a single web console user. This functionally allows administrators to provide different console views for particular uses, by customizing the console access and the permissions given to a particular user. Configure roles as follows:
Go to ON CMDB –> Security –> Roles

Select the option add new.
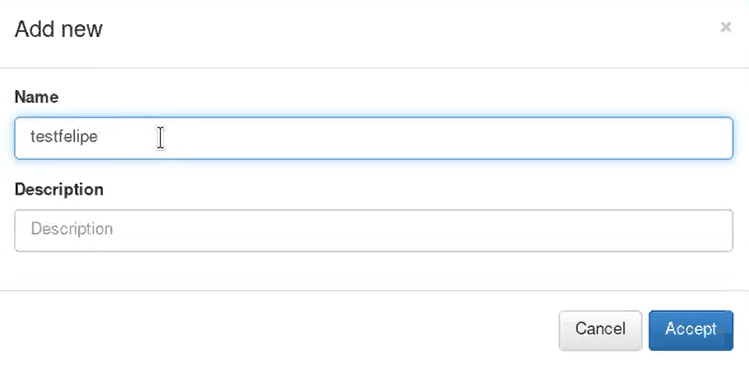
When a new role has been created the minimum access are configured through ACLs. Now assign this role to a created user.
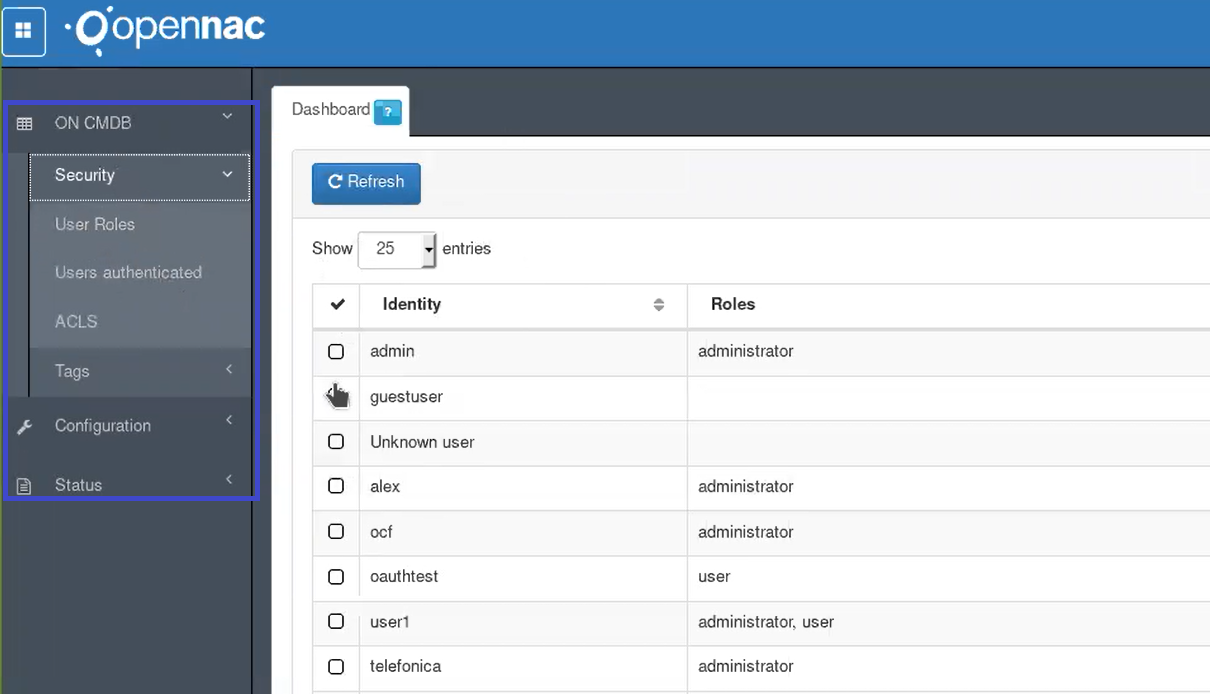
Go to ON CMDB –> Security –> User Roles.
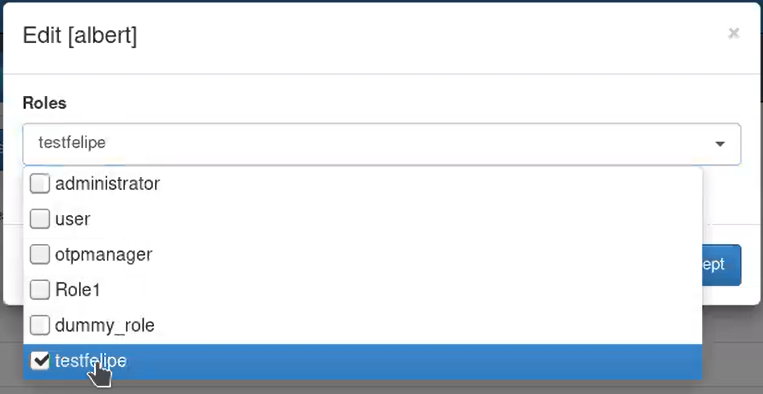
Select the user and click in the Edit option. Into edit look for the created role and select it.
Go to ON CMDB –> Security –> Roles. Select the created role and click on Manage role. Here the administrator can view and select all the openNAC web console menu options, with the available permissions for each one.
Blue: Enable and disable Views
Green: Enable and disable ACL’s
Red: The color conventions are shown
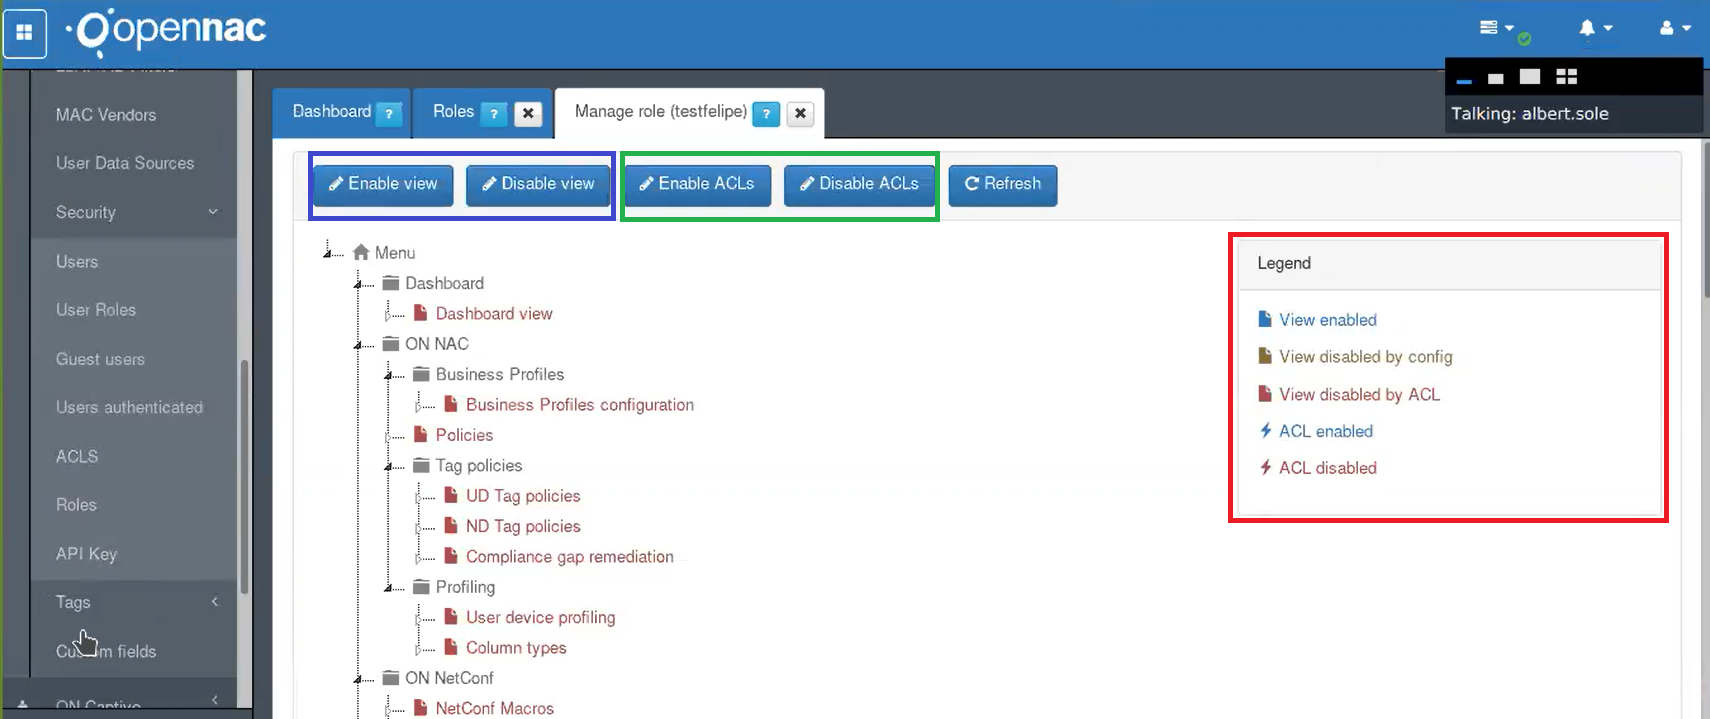
In this list the blue options are enable and red ones are disable. On the top administrator can enable and disable views by selecting an specific view and clicking on enable and disable view.
Administrators can also enable and disable options for an specific view, selecting and specific option into an specific view an clicking into enable and disable ACLs
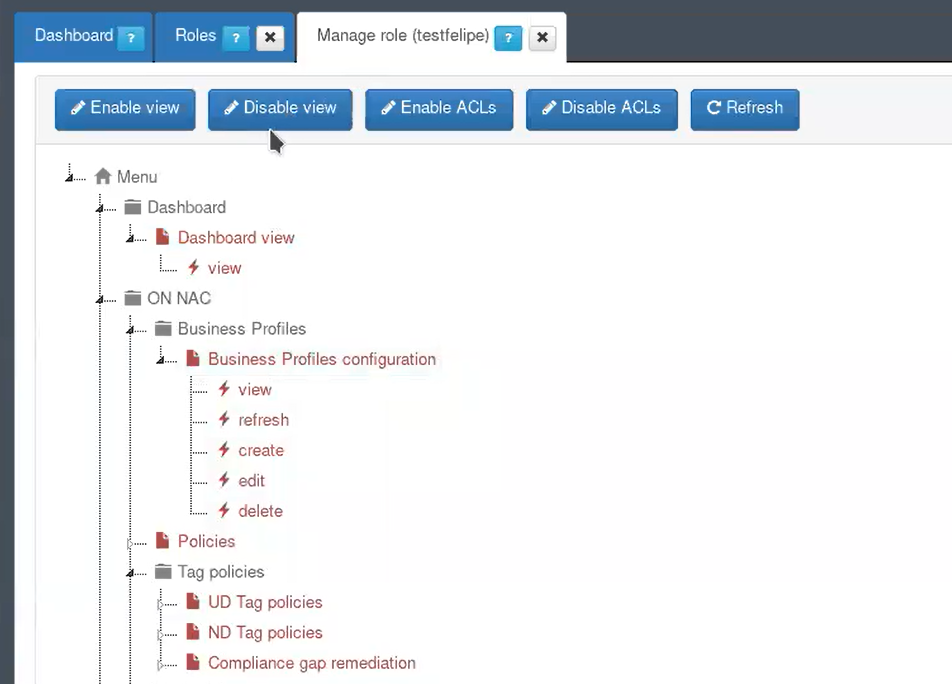
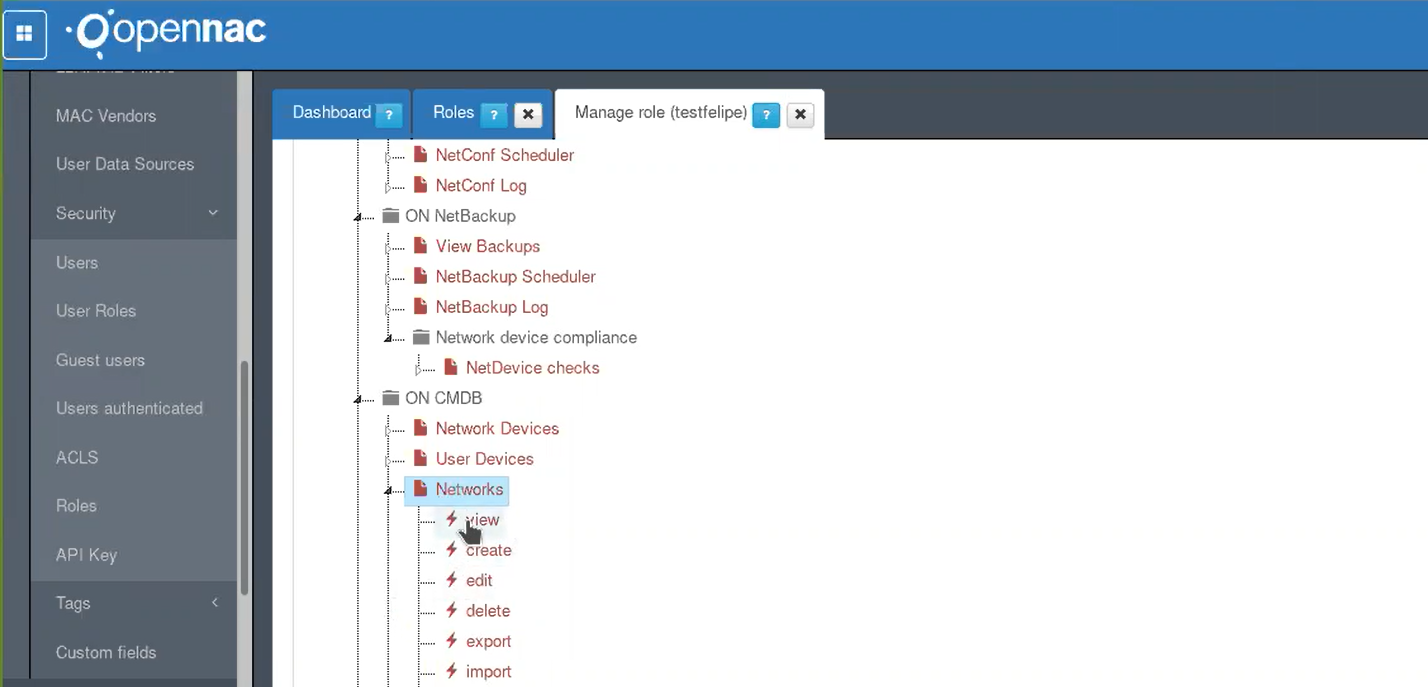
Thunder icon: This icon is for ACLs, red for disable and blue for enable according with the color conventions
File icon: This icon foe views, red for disable and blue for enable according with the color conventions
Once enable, the user associated to the modify role will have the options configured into the managed role. For testing, log in again into openNAC web console, but this time using the user used to associate the role.
This user has the minimum ACLs configuration. Administrators can modify the permissions, and the associated ACLs using the administrator user.
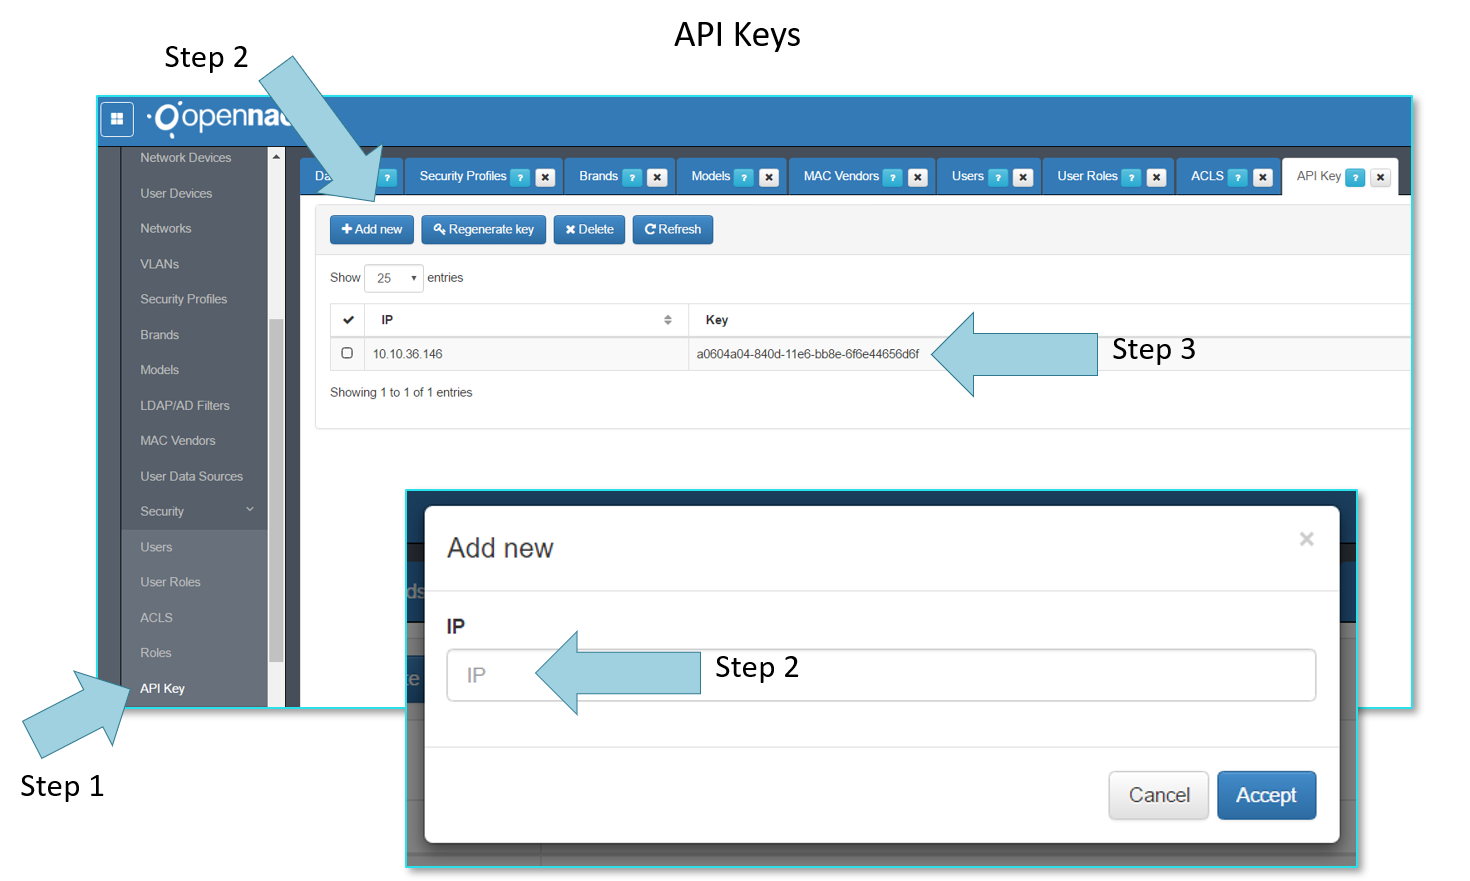
API Key
Going to ON CMDB -> Security -> API Key as shown by the Step 1 is possible to define an API Key, this API Key is a security method that allow us to control network access to the openNAC Core API itself. The API key requires to be defined using the source IP of the users that tries to connect as shown by the Step 2.
As soon as the source IP is added a security token is automatically created, if you want to interact with the product through it, the API must be used to query API classes, the security token code for API authentication looks like as shown by the Step 3.
One of the main use case for the API keys are third party integration (NGFW, SIEM, AVS, PATCHING, MDMS…) and our own integration. With this API key is not required to have user/password to interact with openNAC technologies.