9.2.4.10. Meraki
9.2.4.10.1. Generic
In this section, we will cover the configuration of the Meraki controller to use Web authentication.
Note
There is currently no way to reevaluate the access of the device using OpenNAC Enterprise. This means that there is no real-time action when trying to isolate a device. The RADIUS reauthentication delay will determine the maximum response time of the access reevaluation.
First, create a new ssid and then edit its settings.
Configure it as seen in the screenshot below.
Note
Make sure to configure your RADIUS server so it’s accessible externally under a domain name or a public IP address. Replace on.mycompany.com by what you will configure. The only port needed is 1812 in UDP. Refer to the Meraki documentation for more details.
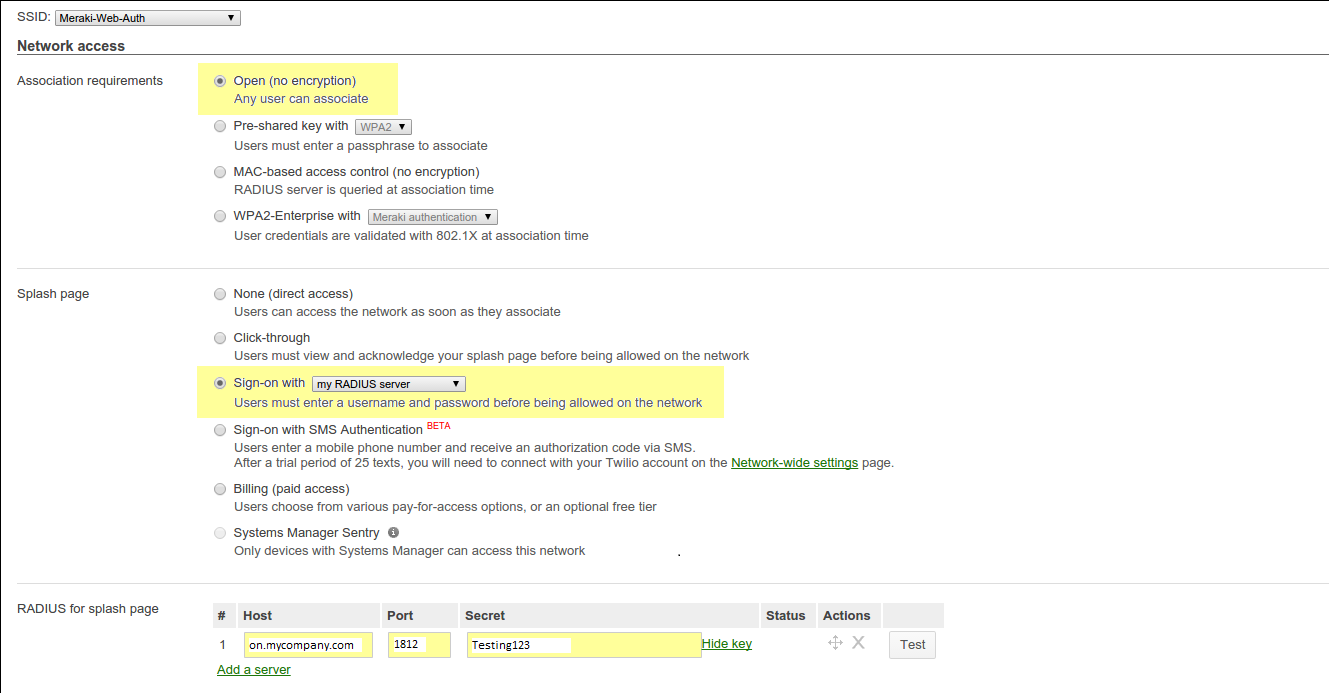
Next, configure the options for the users access as shown below.
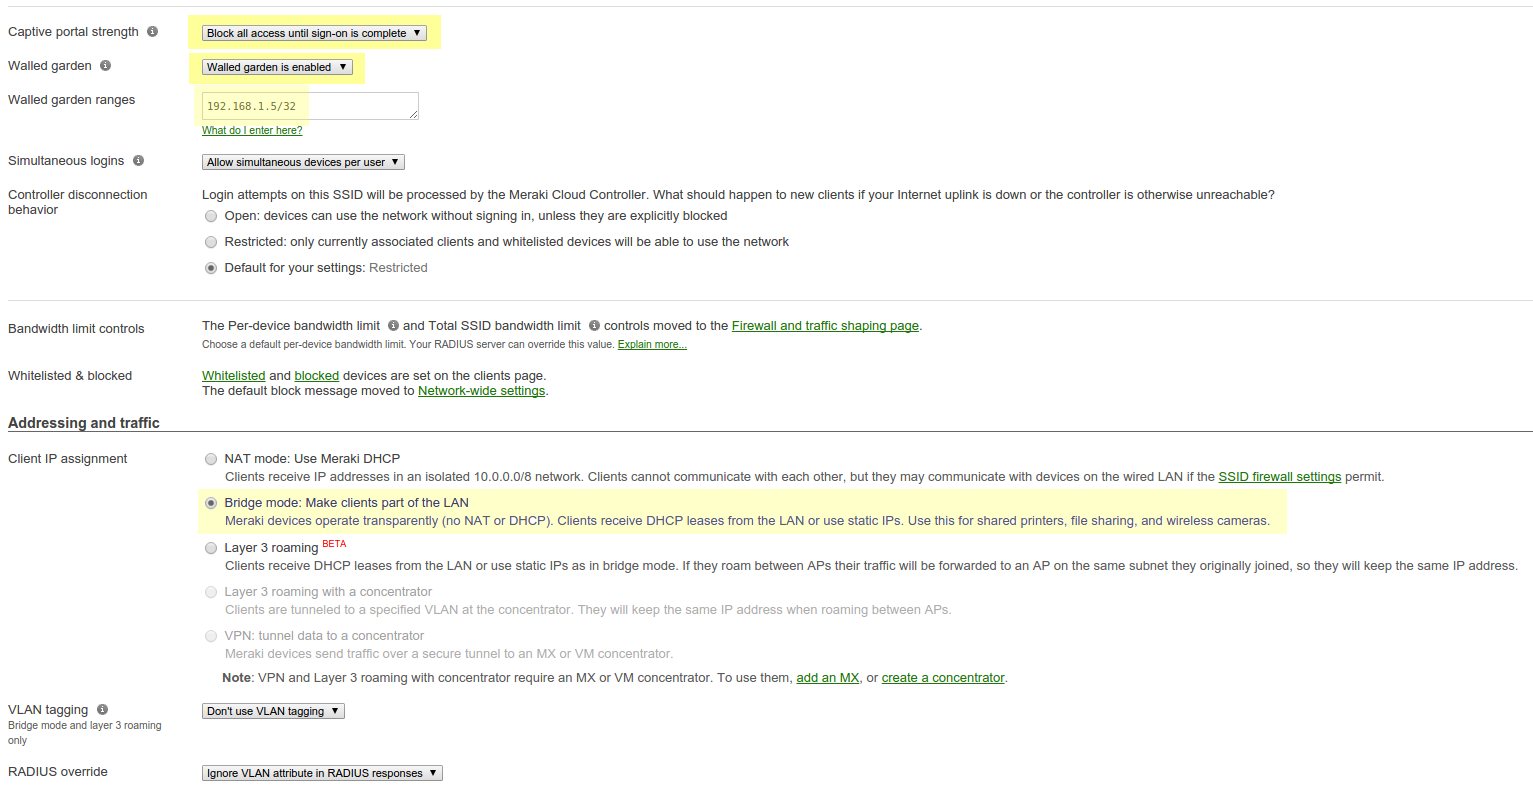
Where 192.168.1.5 is the IP address of your OpenNAC server.
Note
Make sure you select bridge mode so your users are not NATed through your AP. If you need the devices to be on another VLAN, modify the VLAN tagging of the SSID.
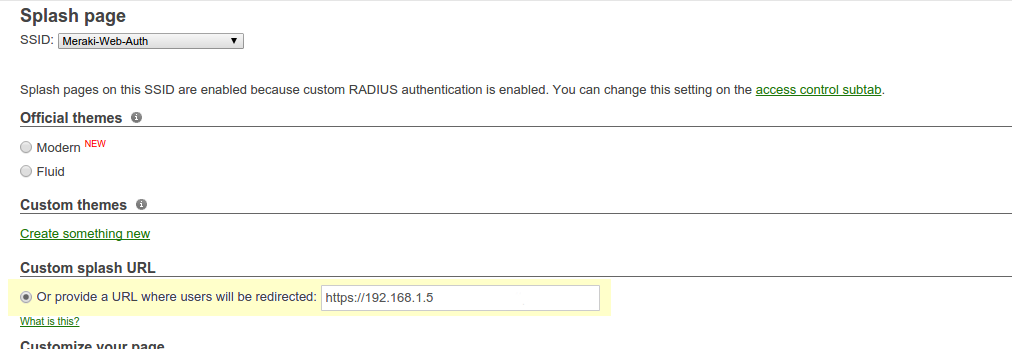
Next, go to Wireless → Configure → Splash page. Select the Custom splash URL and configure the URL pointing to your OpenNAC server.
Note
Even if you enabled the bridge mode on the access point, it will still send a NATed IP address during the initial HTTP request. To workaround this you will need to forward the DHCP traffic of the network your nodes are connected to so OpenNAC has the proper IP information of the devices.
Once you have configured the Meraki, you will need to configure it in the OpenNAC switches. You will need to create an entry for the public IP address of your cloud controller and one for the MAC address of your AP. After that Meraki is configured this should be properly configured on OpenNAC Servers.
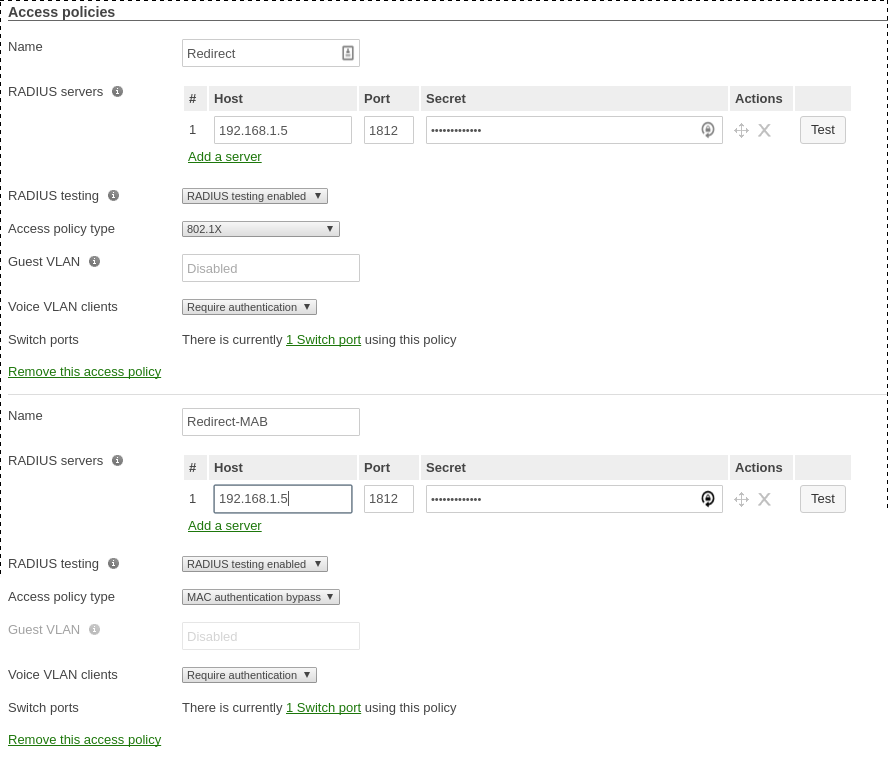
9.2.4.10.2. Switch MS220-8
Note
You should already have one port setup as Uplink, using a mode trunk, with at least your Registration and Production VLAN allowed on it.
The Meraki switch offer configuration for VLAN enforcement only.
You will need to access the Meraki dashboard to configure your switch. When you reach it, you will need first to create a policy. You can create a “MAC authentication bypass” or a “802.1X” policy. Depending if you want to authenticate user via dot1x or MAB. You cannot combine both neither use a fallback mode on the same port, each port with a policy applied will be exclusive to MAB or dot1x.
To access the policy creation go to Switch → Access policies in the Meraki dashboard menu. From there create a new policy, use the example below to create your policy.