9.2.4.3. Aruba
9.2.4.3.1. Aruba OS 5.0 & 6.0
In this section, we cover the basic configuration of the Aruba wireless controller for OpenNAC Enterprise via the web GUI. It was done on an Aruba Controller 200 software version ArubaOS 5.0.3.3, tested on a Controller 600 with ArubaOS 6.0 but it should apply to all Aruba models.
Note
If you are already using your Aruba controllers and don’t want to impact your users, you should create new AAA profiles and apply them to new ssids instead of modifying the default ones.
AAA Settings
In the Web interface, go to Configuration → Authentication → RADIUS Server and add a RADIUS server named “opennac” then edit it:
Set Host to OpenNAC’s IP (192.168.1.5)
Set the Key to your RADIUS shared secret (Testing123)
Click Apply
Under Configuration → Authentication → Server Group add a new Server Group named “opennac” then edit it to add your RADIUS Server “opennac” to the group. Click Apply.
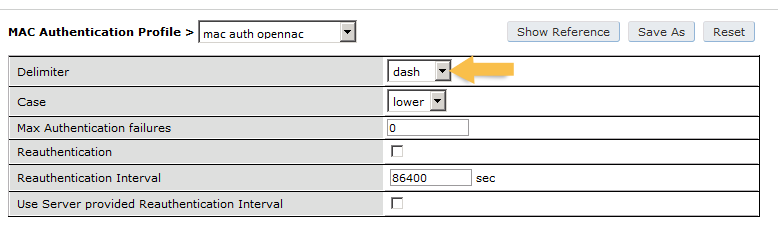
Under Configuration → Authentication → RFC3576 add a new server with OpenNAC’s IP (192.168.1.5) and your RADIUS shared secret (Testing123). Click Apply. Under Configuration → Authentication → L2 Authentication edit the MAC Authentication Profile called “default” then edit it to change the Delimiter to dash. Click Apply.
Under Configuration → Authentication → L2 Authentication edit the 802.1X Authentication Profile called “default” then edit it to uncheck the Opportunistic Key Caching under Advanced. Click Apply.
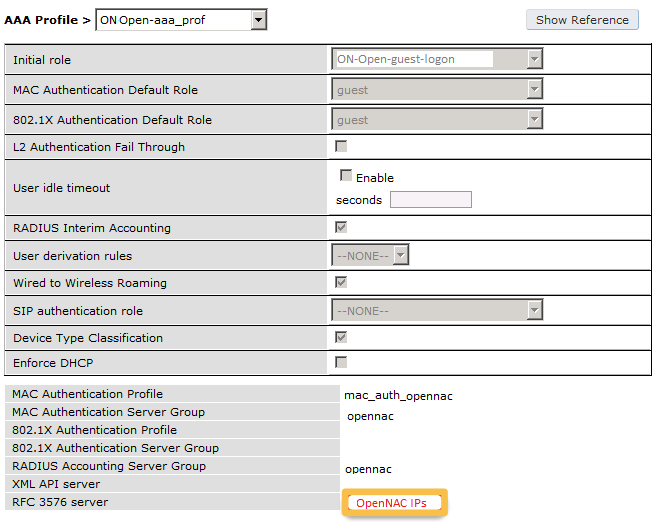
Under Configuration → Authentication → AAA Profiles click on the “default-mac-auth” profile then click on MAC Authentication Server Group and choose the “opennac” server group. Click Apply. Move to the RFC3576 server sub item and choose PacketFence’s IP (192.168.1.5) click add then apply.
Under Configuration → Authentication → AAA Profiles click on the “default-dot1x” profile then click on 802.1X Authentication Server Group and choose the “opennac” server group. Click Apply. Move to the RFC3576 server sub item and choose PacketFence’s IP (192.168.1.5) click add then apply.
Public ssid
In the Web interface, go to Configuration → AP Configuration then edit the “default” AP Group. Go to Wireless LAN → Virtual AP create a new profile with the following:
AAA Profile: default-mac-auth
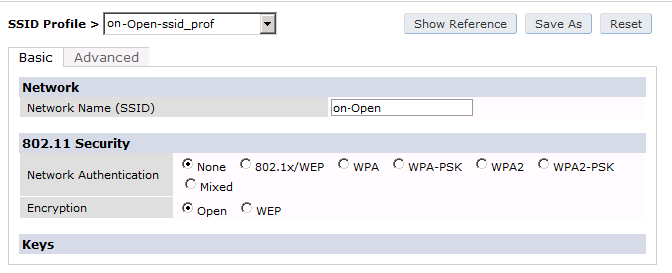
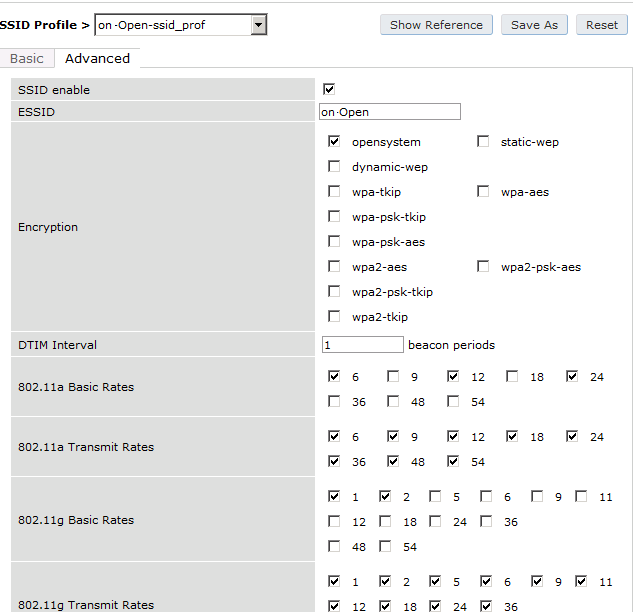
ssid Profile: Select NEW then add an SSID (opennac-Public) and Network authentication set to None
Secure ssid
In the Web interface, go to Configuration → AP Configuration then edit the “default” AP Group. Go to Wireless LAN → Virtual AP and create a new profile with the following:
AAA Profile: default-dot1x
ssid Profile: Select NEW then add an ssid (opennac-Secure) and Network authentication set to WPA2
WebAuth
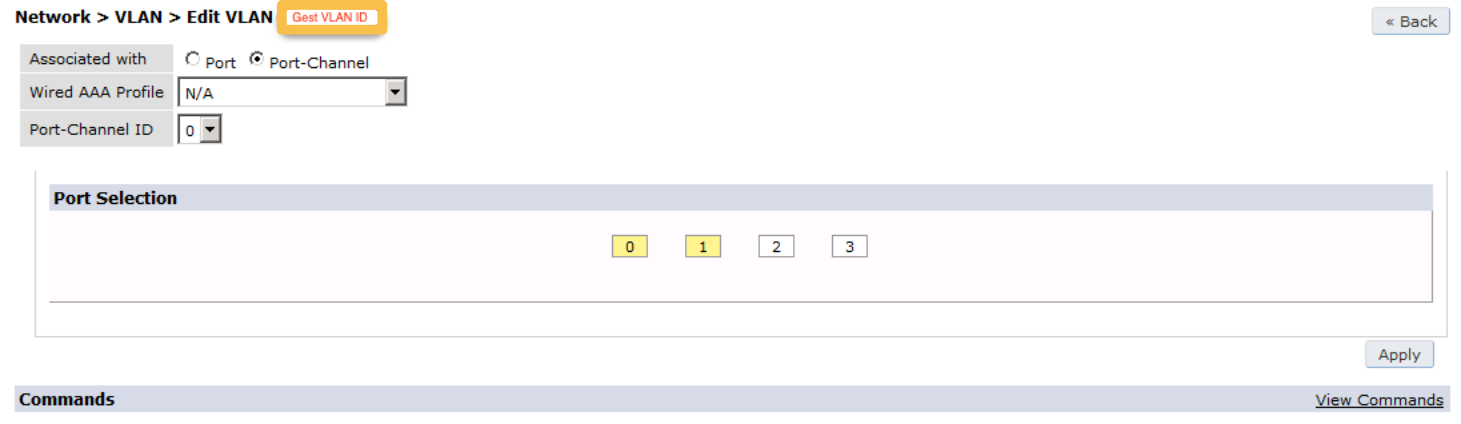
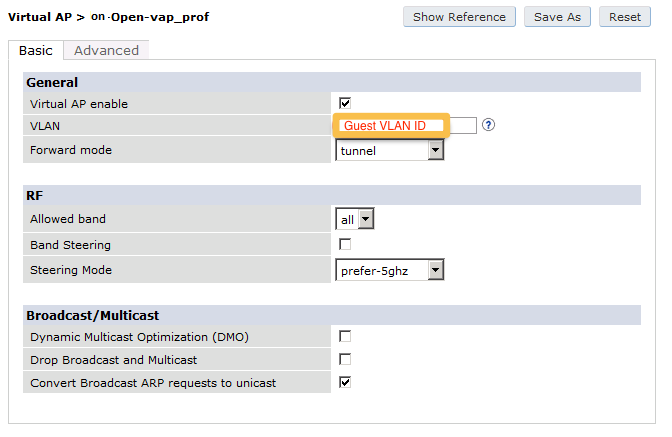
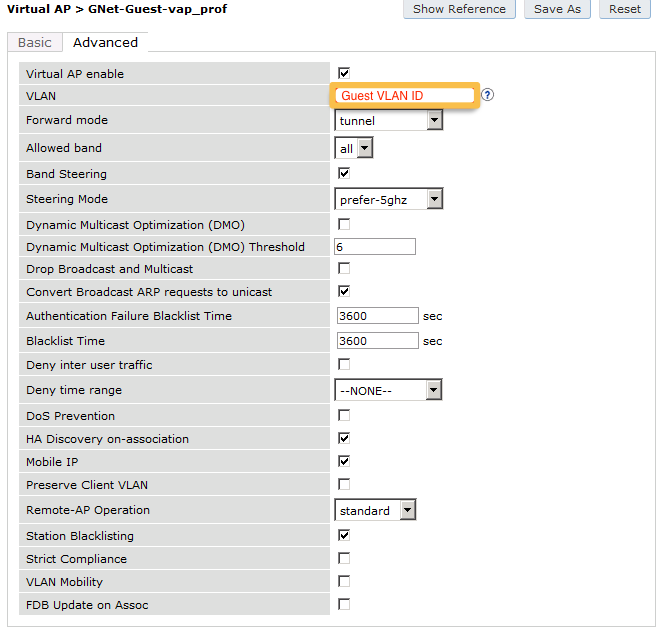
First, you will need to configure a guest VLAN.
Next, you will need to configure a RADIUS server.
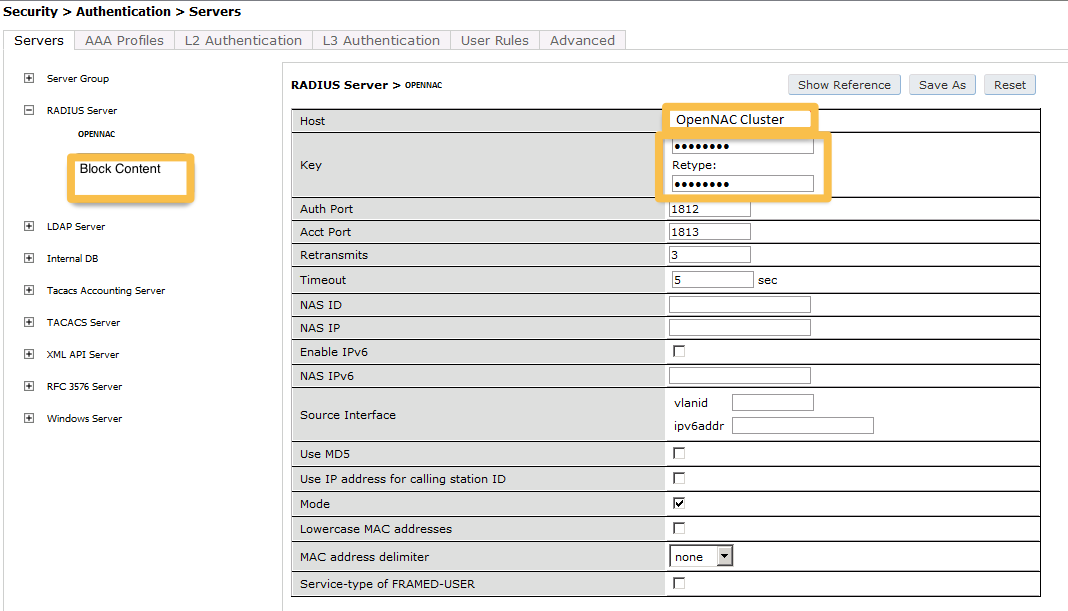
aaa authentication-server radius "opennac"
host 192.168.1.5
key Testing123
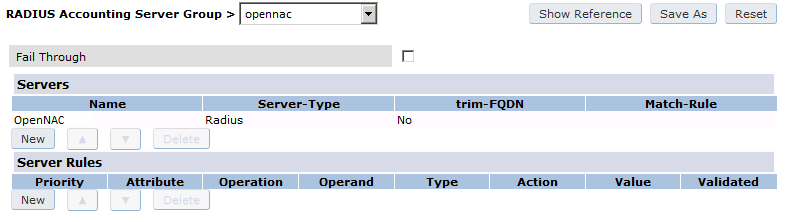
Add your RADIUS server to a AAA group, under Security -> Authentication -> Servers -> Server Group:
aaa server-group "opennac"
auth-server "opennac" position 1
Then define the RFC 3576 server, which will allow you to do CoA.

aaa rfc-3576-server "192.168.1.5"
key Testing123
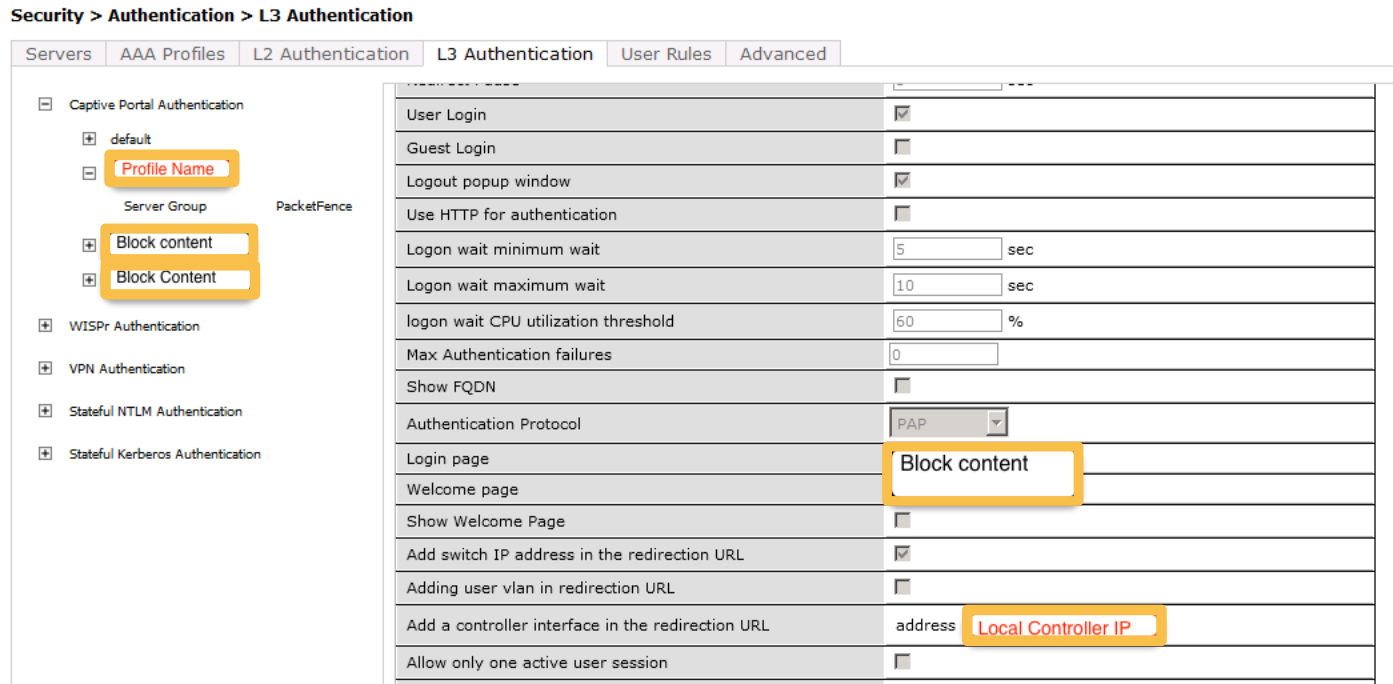
Next, you will need to create the policy that will redirect users to the OpenNAC Enterprise captive portal when they are not authenticated. Go to Security → Authentication → L3 Authentication → Captive Portal Authentication Profile
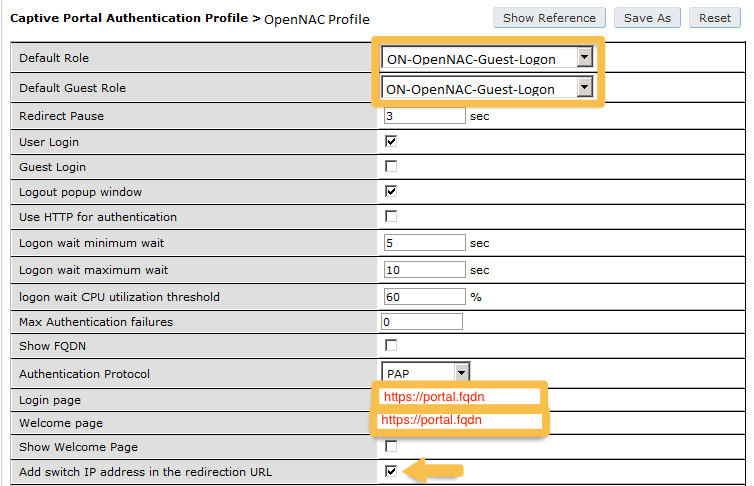
aaa authentication captive-portal "opennac-externalportal"
default-role auth-guest
redirect-pause 3
no logout-popup-window
login-page https://192.168.1.5/Aruba
switchip-in-redirection-url
Now, create the policy for the guest access, for example Internet only.
Add the authentication for the Captive Portal Profile in Security → Authentication → L3 Authentication → Captive Portal Authentication Profile → Server Group:
aaa authentication captive-portal "opennac-externalportal"
server-group "opennac"
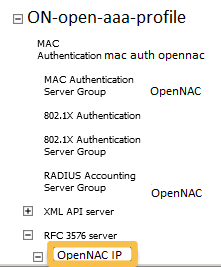

aaa profile "opennac-externalportal"
initial-role opennac-portal
radius-interim-accounting
radius-accounting "opennac"
rfc-3576-server "192.168.1.5"
Define a policy to allow the traffic.
First add a destination in Advanced Services → Stateful Firewall → Destinations:
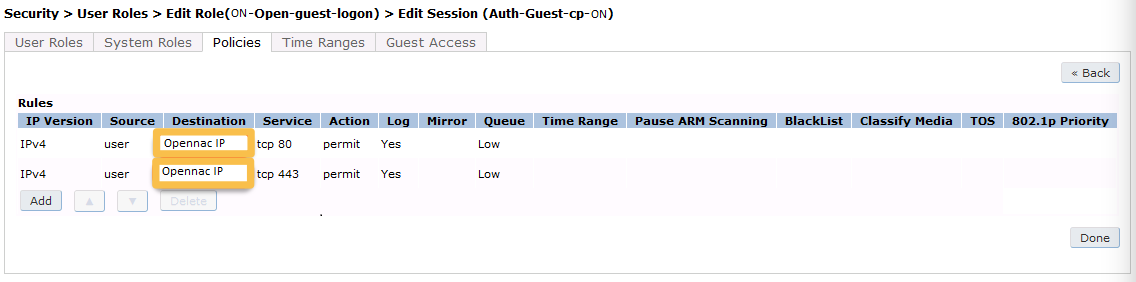
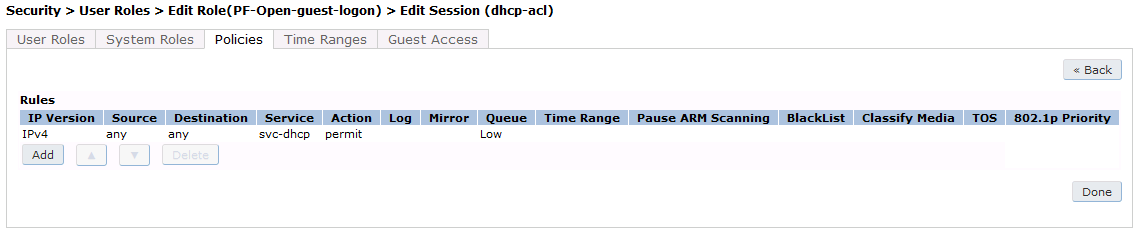
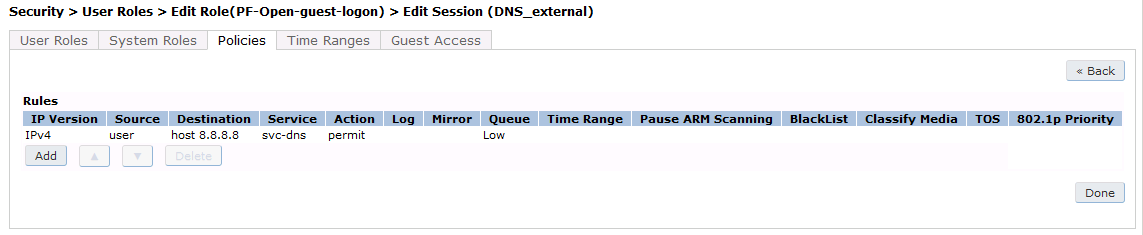
Source NAT on VLAN
ip access-list session "opennac-externalportal"
alias "user" alias "opennac-portal" "svc-http" permit queue low
alias "user" alias "opennac-portal" "svc-https" permit queue low
Source NAT per Application
ip access-list session "opennac-externalportal"
alias "user" alias "opennac-portal" "svc-http" src-nat queue low
alias "user" alias "opennac-portal" "svc-https" src-nat queue low
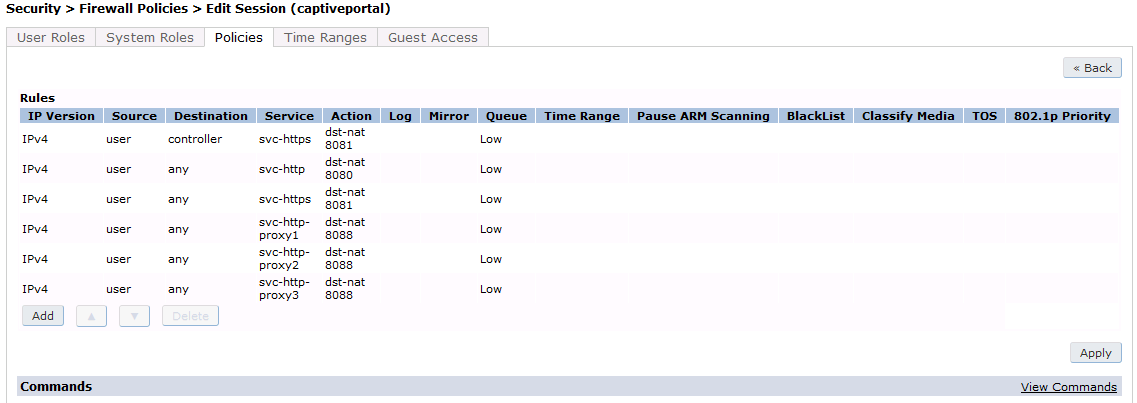
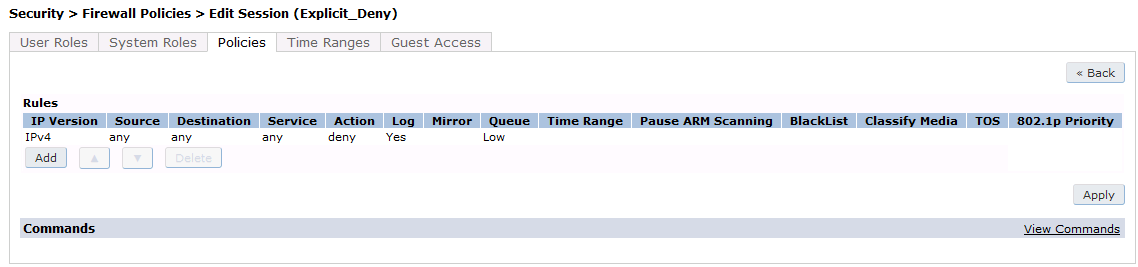
Now add the newly created policy to the Captive Portal Profile, Security → User Roles:
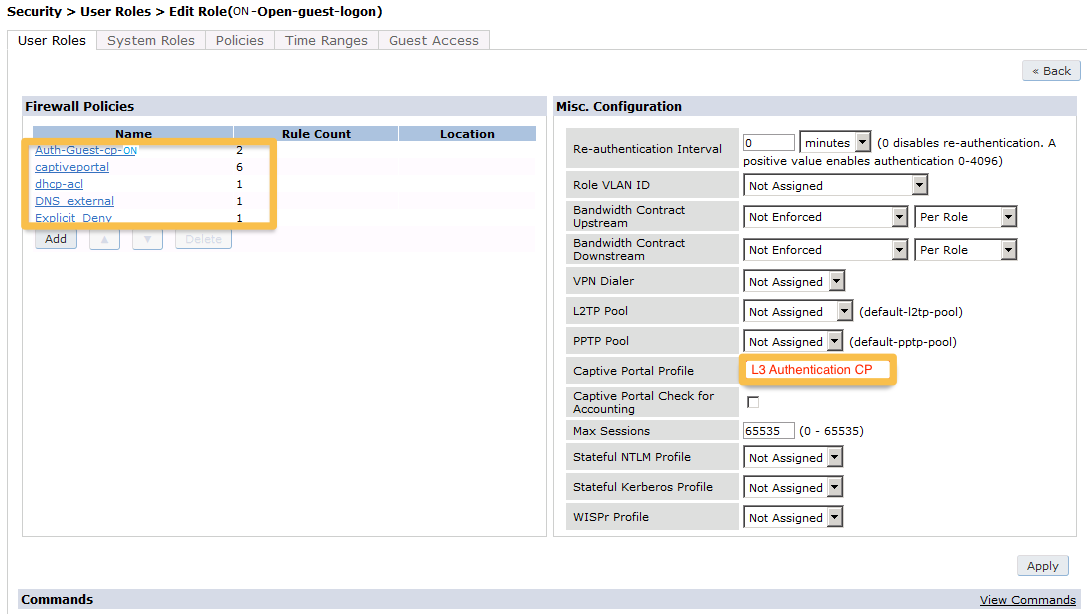
user-role "opennac-portal"
access-list session "opennac-externalportal" position 1
access-list session "captiveportal" position 2
access-list session "guest-logon-access" position 3
access-list session "block-internal-access" position 4
access-list session "v6-logon-control" position 5
access-list session "captiveportal6" position 6
captive-portal "opennac-externalportal"
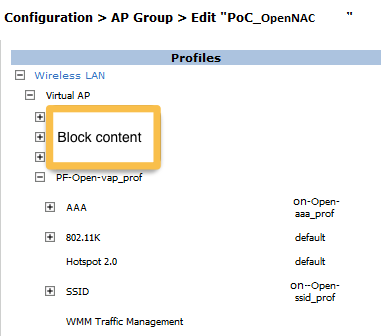
Finally, create the ssid and associate the profile to it. Virtual AP profile:
wlan virtual-ap "opennac-externalportal"
ssid-profile "opennac-externalportal"
aaa-profile "opennac"
General AP settings and principal-worker controller case.


The next step will be to configure the Aruba WiFi controller. In the OpenNAC Enterprise console, add the switch in ON CMDB → Network Devices
9.2.4.3.2. Aruba OS 8.0
In this section, we cover the basic configuration of the Aruba wireless for OpenNAC Enterprise via the web GUI and CLI. It was done on an ArubaOS software version 8.9.0.2, tested on a AP 207 and AP 505H.
9.2.4.3.2.1. GUI
Here we are going to see the steps that must be followed to carry out the configuration through the GUI.
Create an Authentication Server
The first step is to create a new authentication server. To do this, we must go to Configuration → Security and within the list of options select “Authentication Servers” and click “+”” to add a new one.
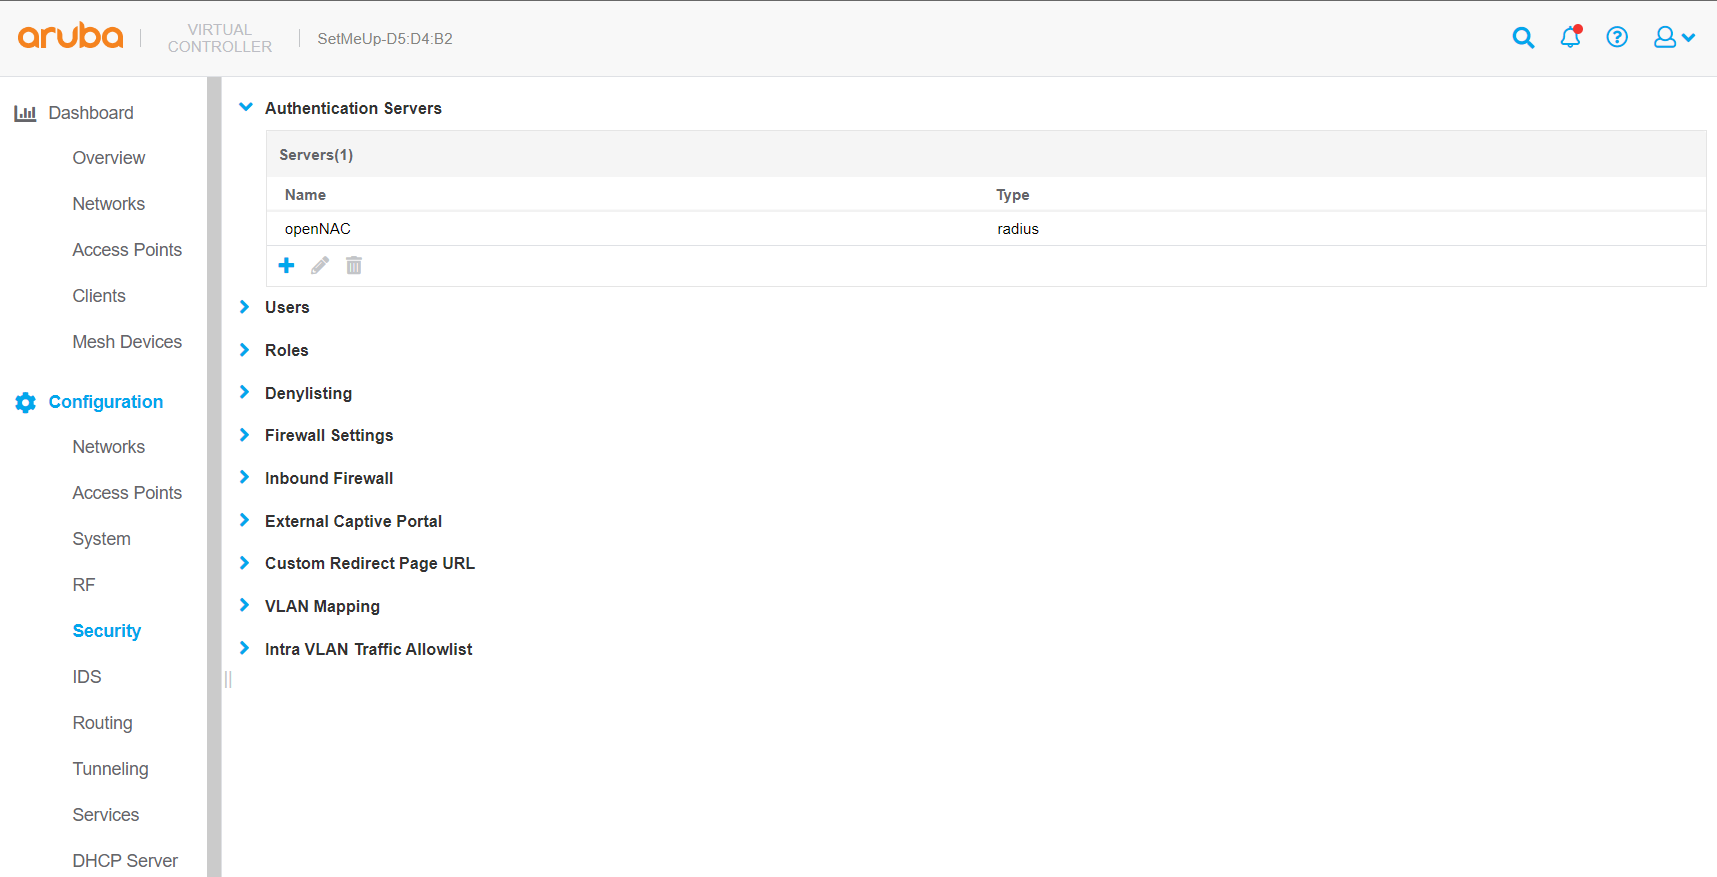
In the popup that will open, we must define the fields of the new authentication server (such as name, IP, radius key, CoA, etc)
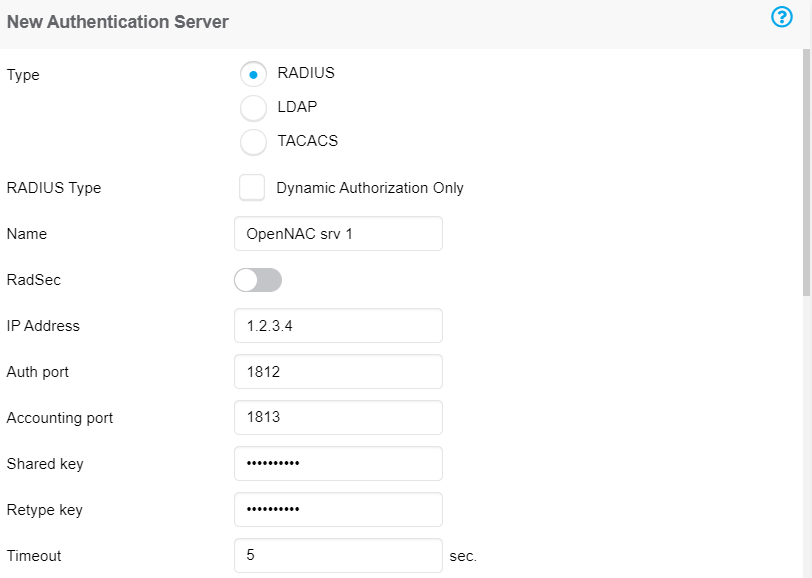
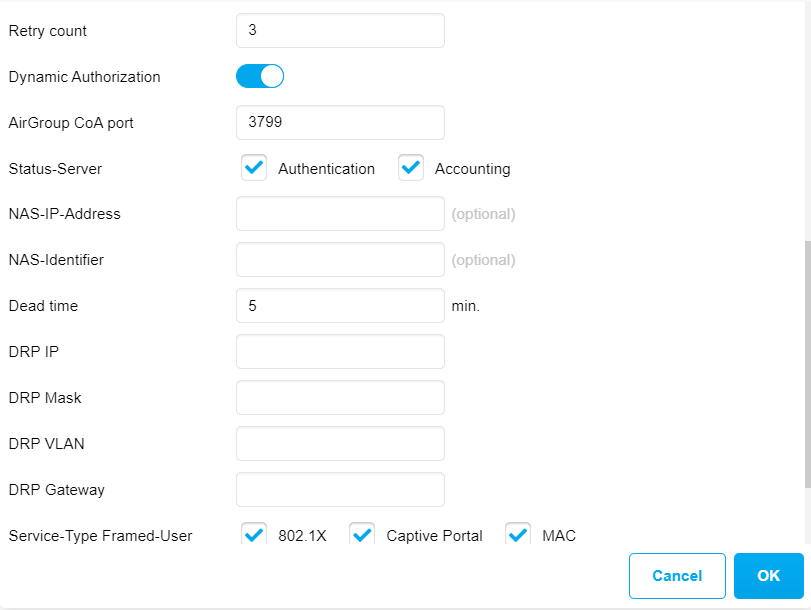
Once the fields are filled in, click “OK”.
Create a External Portal Instance
In the event that we are using a captive portal for network access, we must execute the following steps to define it. If this is not the case, skip this step.
The first step is to create a new captive server. To do this we must go to Configuration → Security and within the list of options select “External Captive Portal” and click “+”” to add a new one.
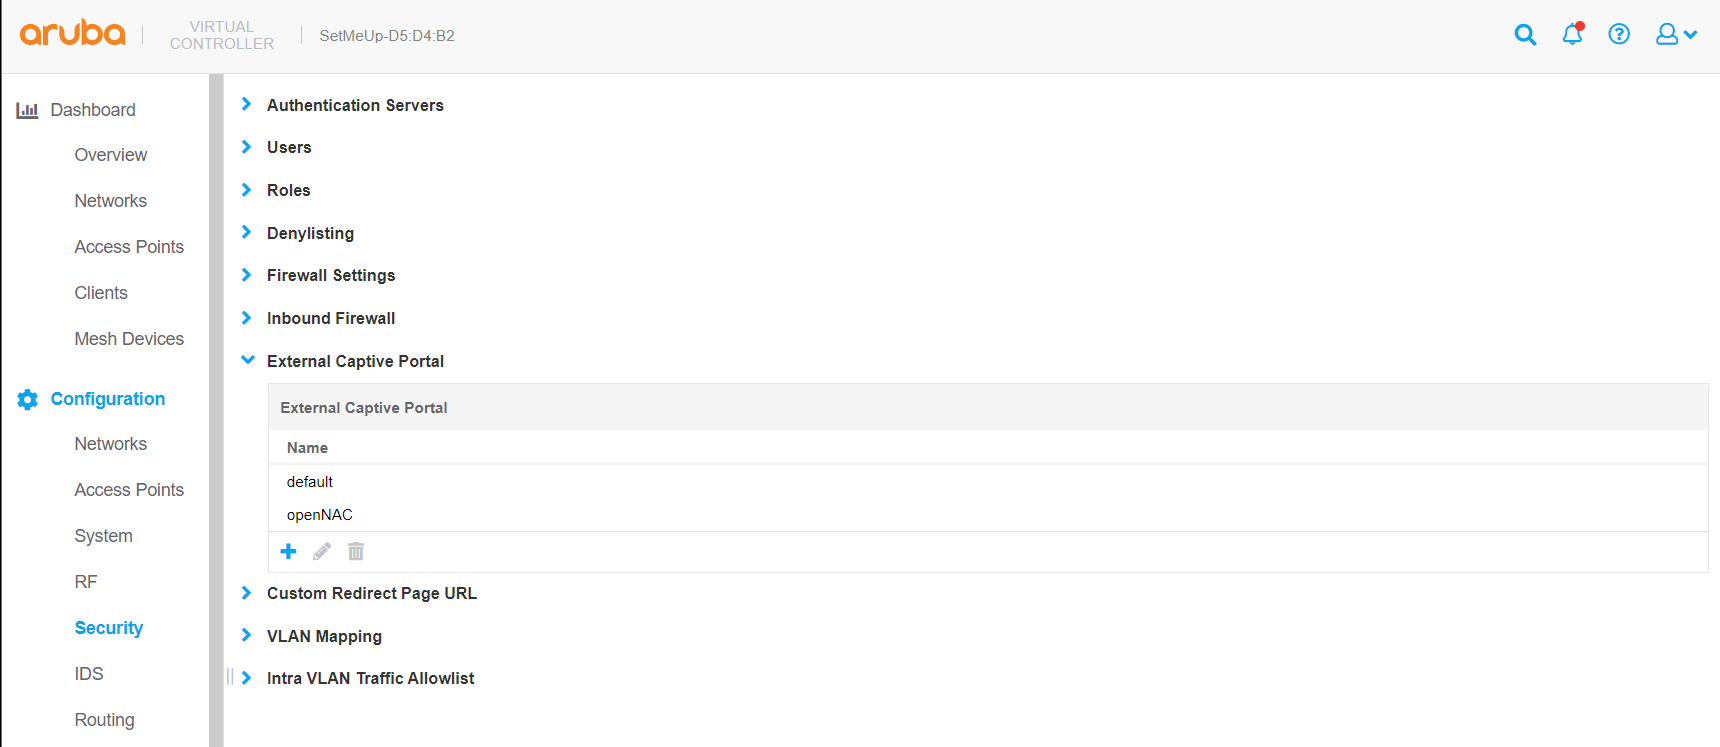
In the popup that will open, we must define the fields of the new captive portal (such as name, IP, url, port, etc)
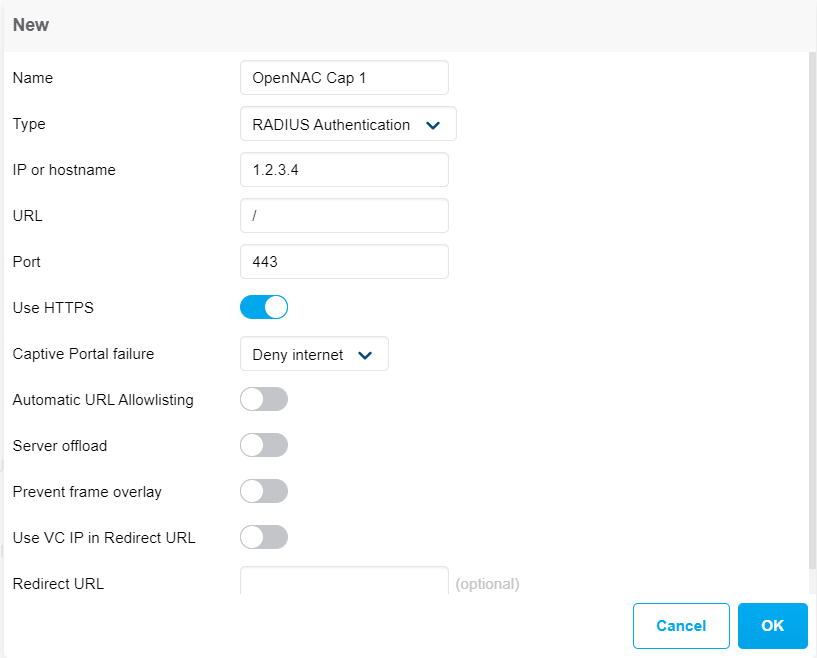
Once the fields are filled in, click “OK”.
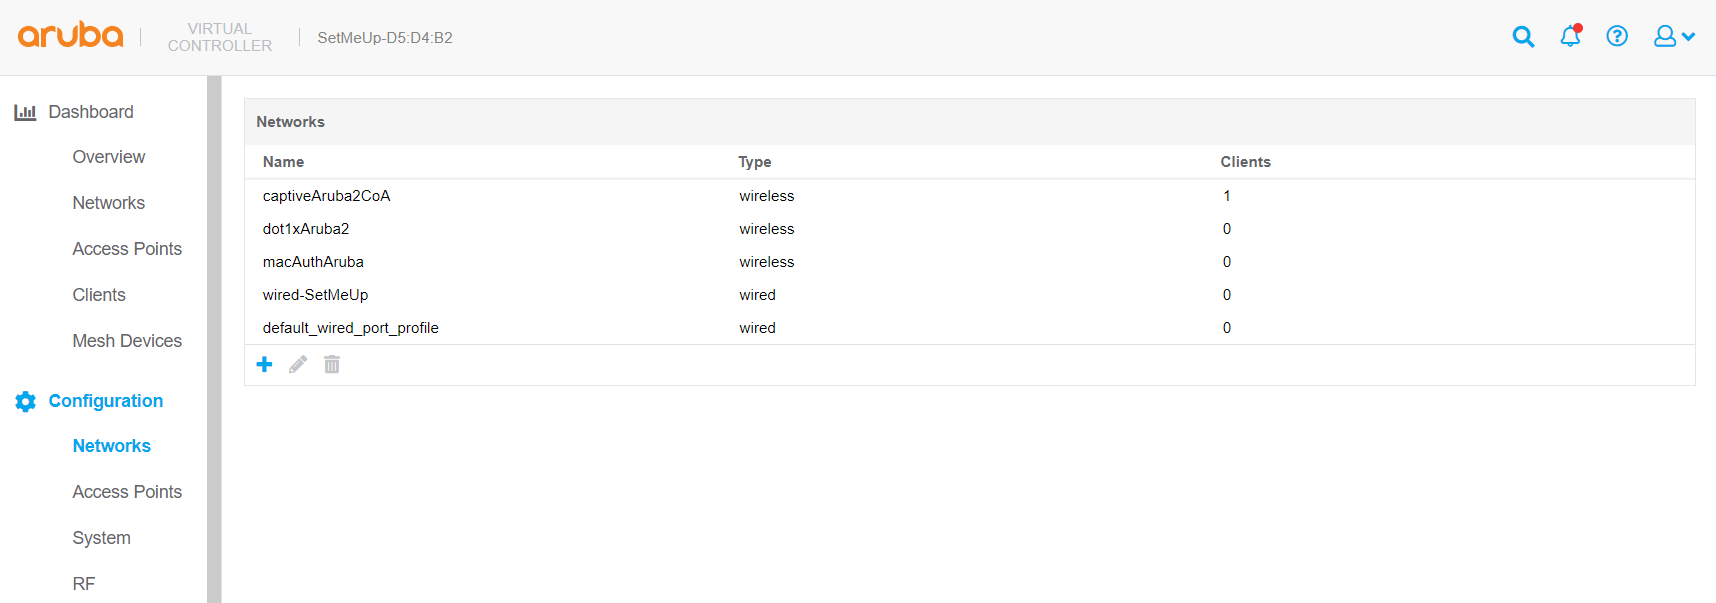
Create a new network
At this point, we are going to create the new network for clients access.
First, we must go to Configuration → Networks and click “+”” to add a new one.
The first thing that we are going to be asked for, is basic information about the network:
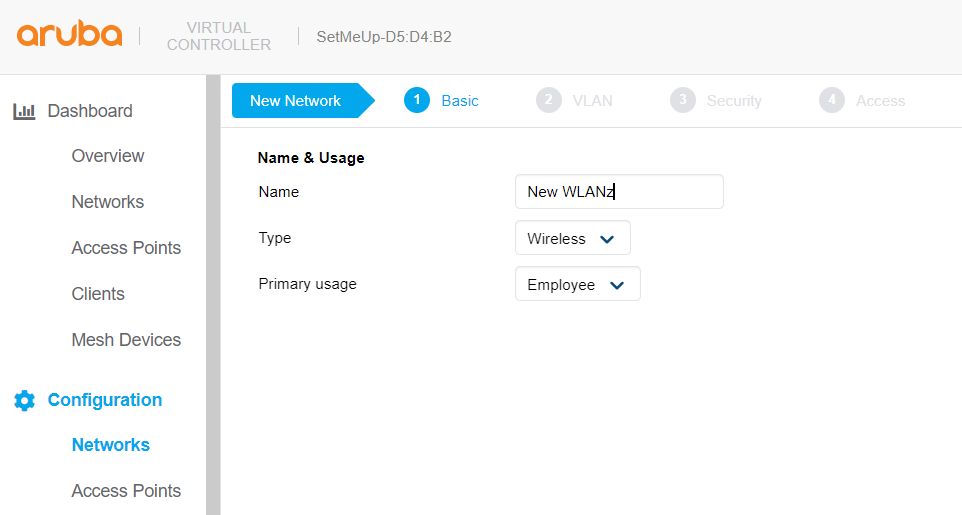
Name: Name that we want the network to have (SSID).
Type: Network type (wired or wireless).
Primary Usage: Main usage of the network Employee (Auth) or Guest (Captive Portal).
In the next step, we will define the VLAN of the network:
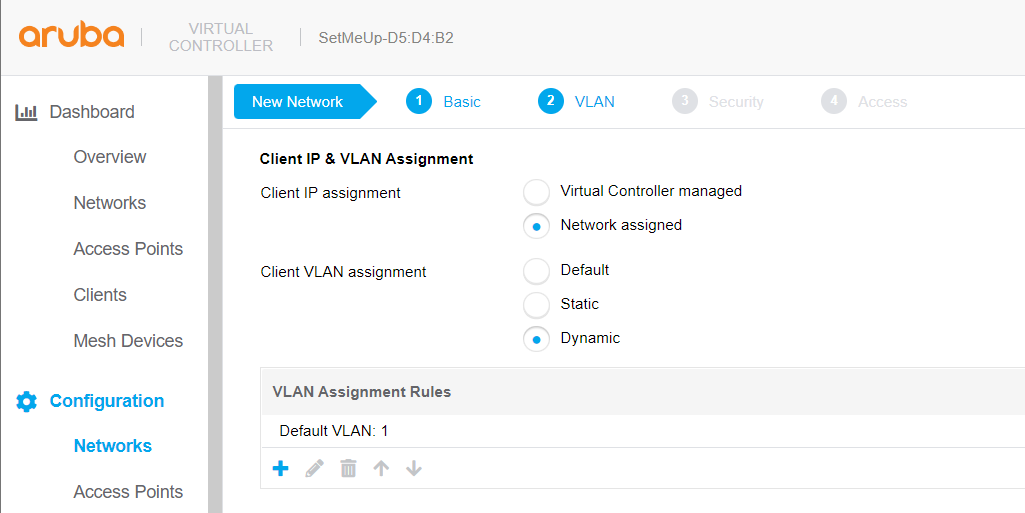
Default: the default VLAN will be assigned when accessing the network.
Static: the defined VLAN will be assigned when accessing the network.
Dynamic: The VLAN that is sent through the RADIUS server will be assigned. In case of not being defined in the RADIUS, the default will be honored.
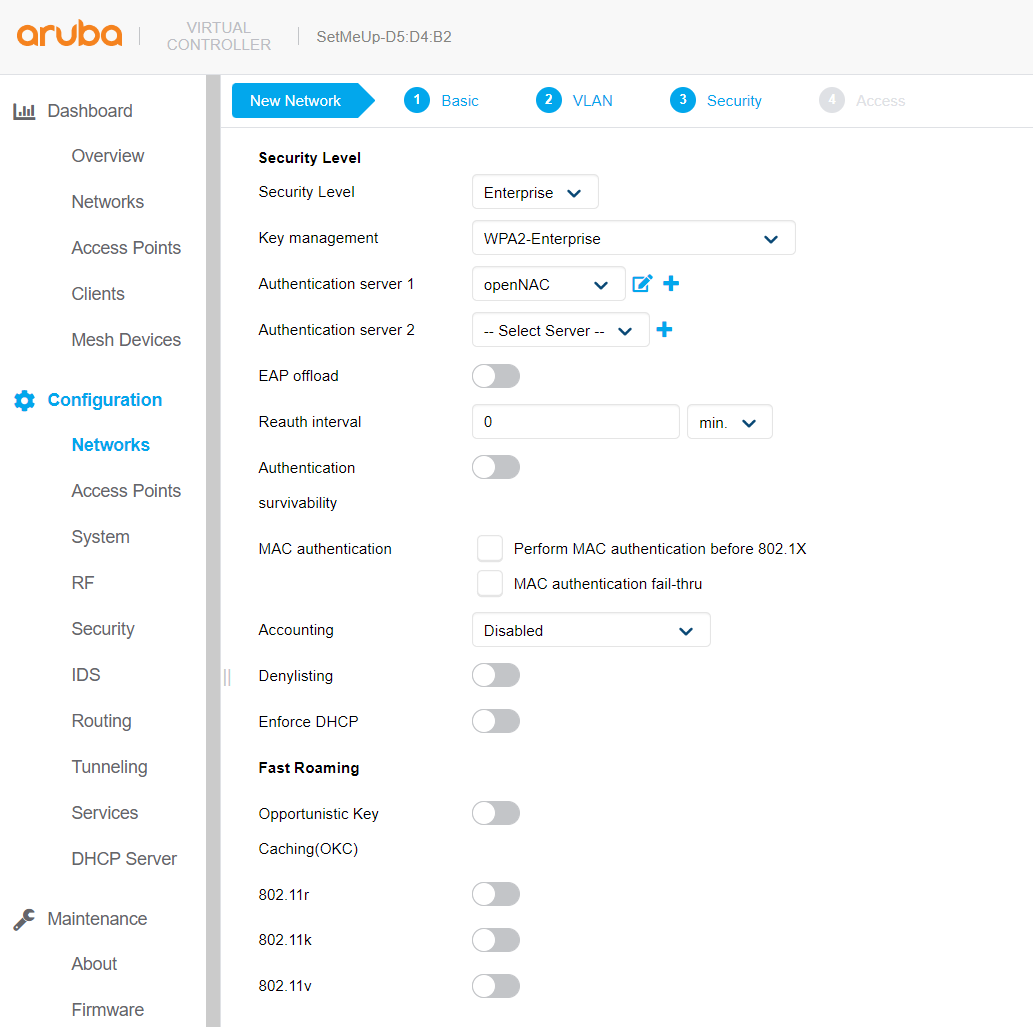
The next point is to define network security.
We will see the different ways to configure network security depending on the type of authentication desired:
Dot1x:
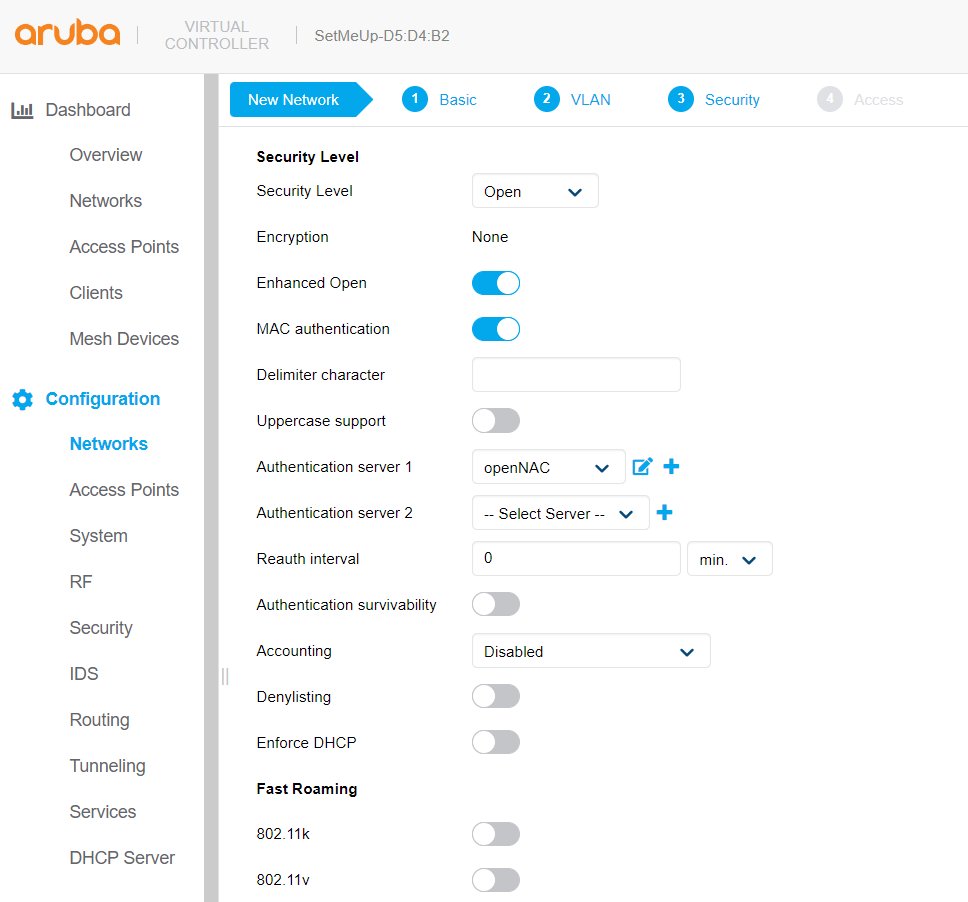
Mac Authentication:
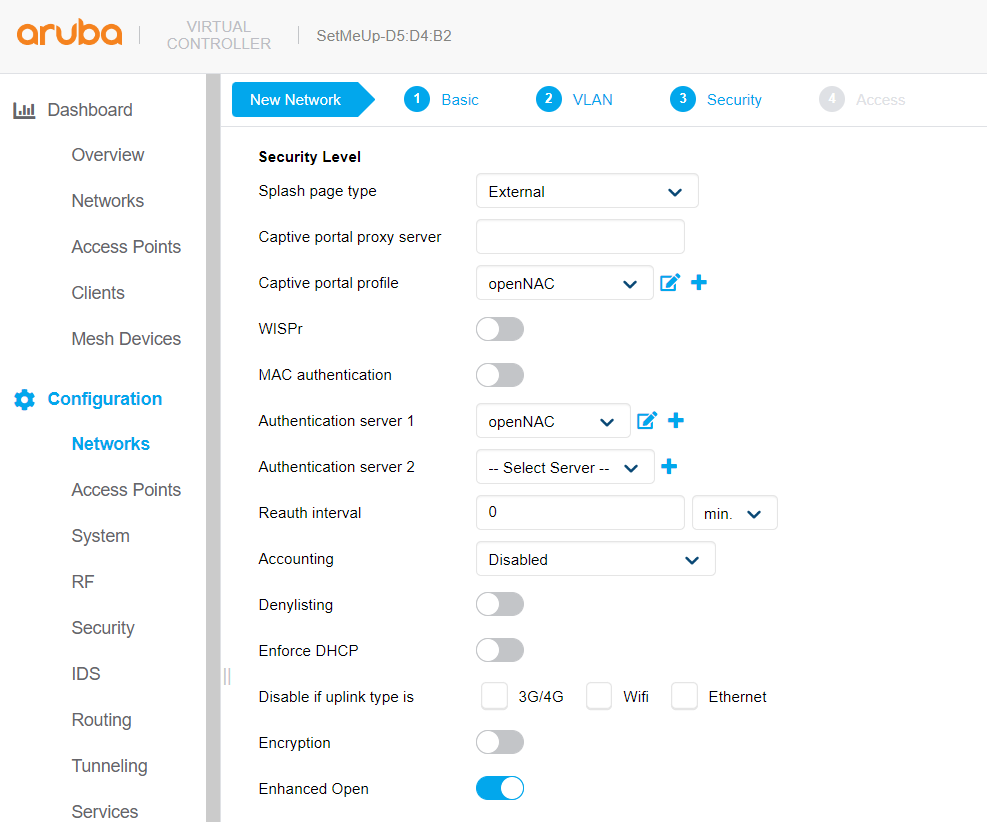
Captive Portal:
In the last point, we will define the access rules of the network.
If we do not want to apply rules or roles, we will mark the “Unrestricted” option.”

To finish the configuration of the new network, we must select “Finish”. The new network should appear in the list of networks and its SSID should start broadcasting immediately.
9.2.4.3.2.2. CLI
Define Auth Server
wlan auth-server openNAC
        ip <ON Core IP>
        port 1812
        acctport 1813
        key 7bd03038ccb46fbc1e05903bd7e446280401efacf0d00c21
        rfc5997
        rfc3576
        cppm-rfc3576-port 3799
        service-type-framed-user 1x
        service-type-framed-user cp
        service-type-framed-user mac
Define External Portal Server
wlan external-captive-portal openNAC
        server <ON Captive IP>
        port 443
        url "/"
        auth-text ""
        auto-whitelist-disable
        https
Define SSIDs
Basic Dot1x Authentication
wlan ssid-profile dot1xAruba
        enable
        index 1
        type employee
        essid dot1xAruba
        opmode wpa2-aes
        max-authentication-failures 0
        vlan 1
        auth-server openNAC
        rf-band all
        captive-portal disable
        dtim-period 1
        broadcast-filter arp
        dmo-channel-utilization-threshold 90
        local-probe-req-thresh 0
        max-clients-threshold 64
Basic Mac Authentication
wlan ssid-profile macAuthAruba
        enable
        index 2
        type employee
        essid macAuthAruba
        opmode enhanced-open
        max-authentication-failures 0
        vlan 1
        auth-server openNAC
        rf-band all
        captive-portal disable
        mac-authentication
        dtim-period 1
        broadcast-filter arp
        dmo-channel-utilization-threshold 90
        local-probe-req-thresh 0
        max-clients-threshold 64
Basic Captive Portal Authentication
wlan ssid-profile captiveAruba
        enable
        index 0
        type guest
        essid captiveAruba
        opmode enhanced-open
        max-authentication-failures 0
        auth-server openNAC
        rf-band all
        captive-portal external profile openNAC
        dtim-period 1
        broadcast-filter arp
        dmo-channel-utilization-threshold 90
        local-probe-req-thresh 0
        max-clients-threshold 64
The next step will be to configure the Aruba WiFi controller. In the|ON_VAR| console, add the switch in ON CMDB → Network Devices
9.2.4.3.3. Aruba Controller 200
In this section, we cover the basic configuration of the Aruba Controller 200 for OpenNAC Enterprise using the command line interface. We suggest you to use the instructions above for the Web GUI.
VLAN definition
Here, we create our opennac VLANs, and our AccessPoint VLAN (VID 66). It is recommended to isolate the management of the thin APs in a separate VLAN.
vlan 2
vlan 3
vlan 5
vlan 10
vlan 66
AAA Authentication Server
aaa authentication-server radius "opennac"
   host 192.168.1.5
   key Testing123
aaa server-group "Radius-Group"
 auth-server opennac
AAA Profiles
aaa profile "default-dot1x"
   authentication-dot1x "default"
   dot1x-default-role "authenticated"
   dot1x-server-group "Radius-Group"
   radius-accounting "Radius-Group"
aaa profile "opennac"
   authentication-mac "on_mac_auth"
   mac-server-group "Radius-Group"
   radius-accounting "Radius-Group"
WLAN ssids: profiles and virtual AP
wlan ssid-profile "opennac-Public"
   essid "opennac-Public"
wlan ssid-profile "opennac-Secure"
   essid "opennac-Secure"
   opmode wpa2-aes
wlan virtual-ap "Inverse-Guest"
   aaa-profile "opennac"
   ssid-profile "opennac-Public"
wlan virtual-ap "Inverse-Secure"
   aaa-profile "default-dot1x"
   ssid-profile "opennac-Secure"
ap-group "Inverse"
   virtual-ap "Inverse-Guest"
   virtual-ap "Inverse-Secure"
   ids-profile "ids-disabled"
9.2.4.3.4. Aruba Instant OS
Add your opennac instance to your configuration:
wlan auth-server opennac
ip 192.168.1.5
port 1812
acctport 1813
timeout 10
retry-count 5
key Testing123
nas-ip [Aruba Virtual Controller IP]
rfc3576
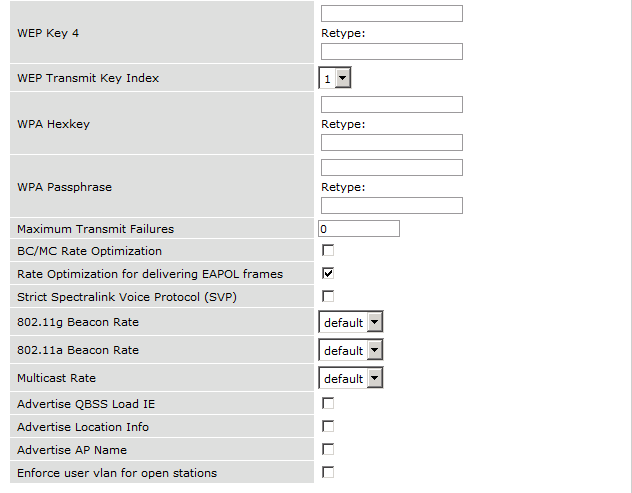
Add dynamic VLAN rules and MAC auth to your ssid profile:
wlan ssid-profile ssid
index 0
type employee
essid ESSID
wpa-passphrase WPA-Passphrase
opmode wpa2-psk-aes
max-authentication-failures 0
vlan 1
auth-server OpenNAC
set-vlan Tunnel-Private-Group-Id contains 1 1
set-vlan Tunnel-Private-Group-Id contains 4 4
rf-band all
captive-portal disable
mac-authentication
dtim-period 1
inactivity-timeout 1000
broadcast-filter none
radius-reauth-interval 5
dmo-channel-utilization-threshold 90