3.1.9.1. Manage VPNGW
In the Manage VPNGW section, you can install and manage the VPN Gateway nodes, create new farms, configure workers, and also manage the OpenVPN, WireGuard and Shorewall protocols.
3.1.9.1.1. Creating a new Farm
Before performing any configurations in the Manage VPNGW, you need to install the node in the ON Core.
3.1.9.1.1.1. Update to latest version
One of the recommended steps to take when the system is newly deployed is to update it to the latest version available.
To update the ON VPNGW component, go to the ON VPNGW Update Section. Once the update is finished, you can continue with the basic configuration.
3.1.9.1.1.2. Healthcheck configuration
Healthcheck is the system monitoring module. It has service controls that ensure that all necessary system services are running properly.
On a fresh installation of ON VPNGW, the first step is to check if the package is installed:
rpm -qa | grep opennac-healthcheck
If the healthcheck package is not installed, you need to install it:
dnf install opennac-healthcheck -y
After the installation, you need to configure it:
cd /usr/share/opennac/healthcheck/
cp -rfv healthcheck.ini.vpngw healthcheck.ini
3.1.9.1.1.3. Installing the Node on the ON Core
To install the node in the ON Core, access the Administration Portal.
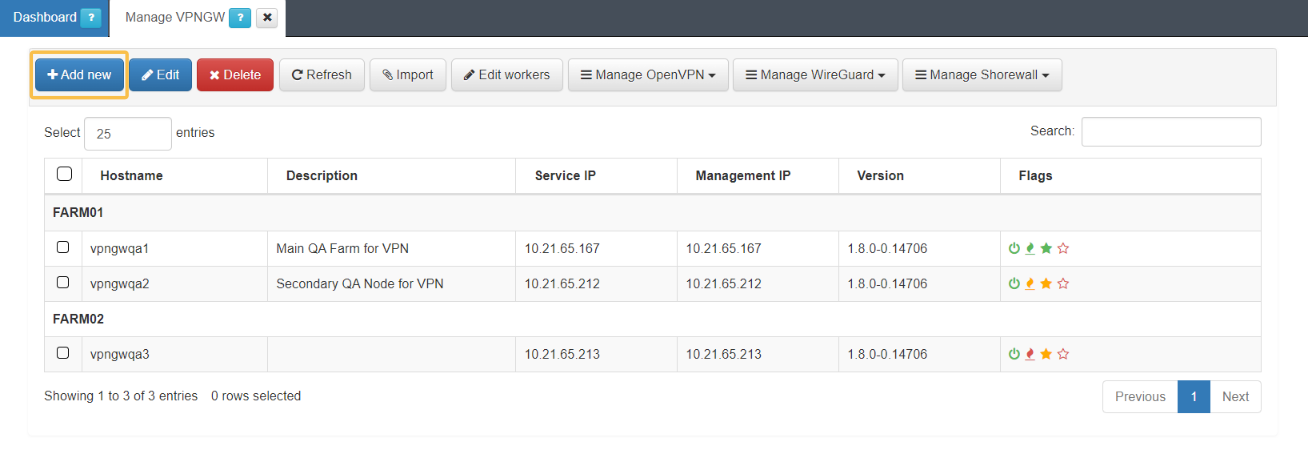
In the main menu, open the VPNGW > Manage VPNGW section.
You will have to configure the following fields within the Add new pop-up window:
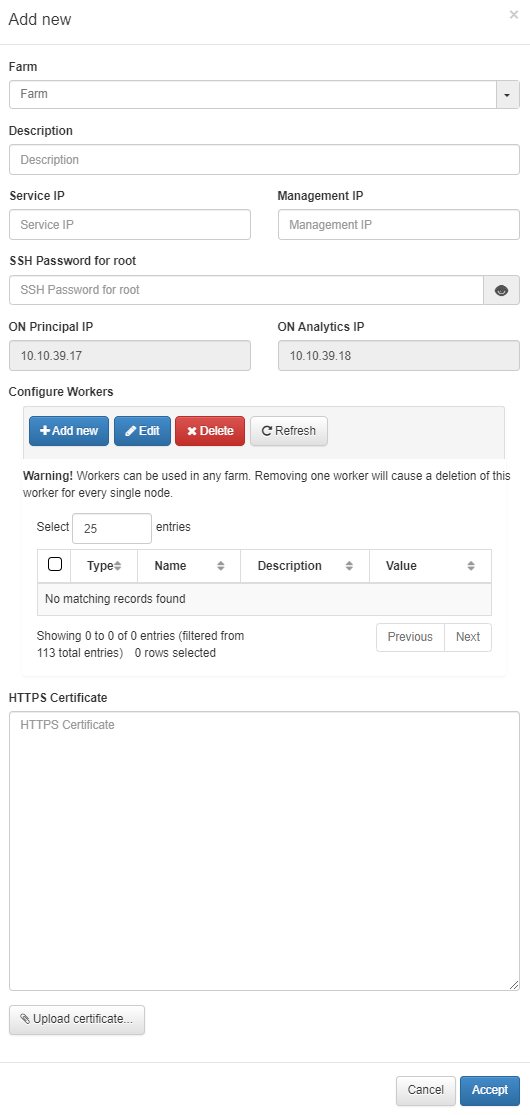
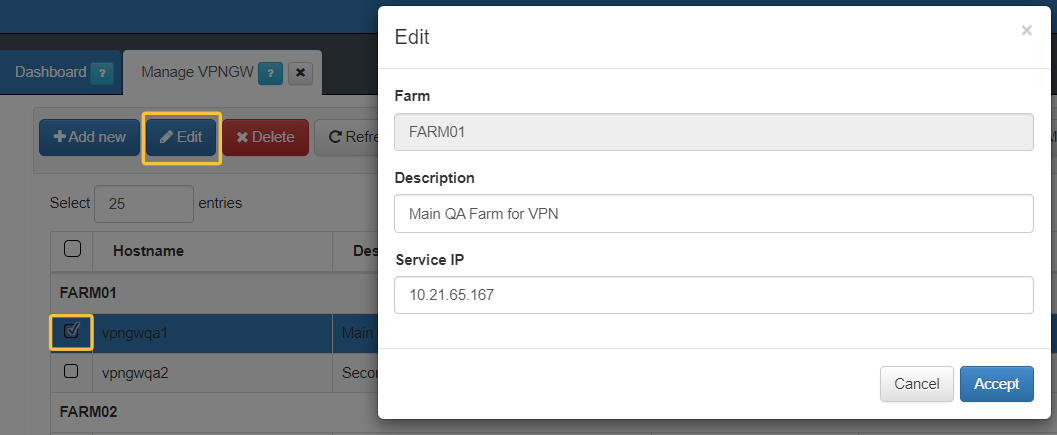
Farm: Location of the node to be able to identify where the node is located.
Description: Description of the node.
Service IP: IP assigned to the node to be imported.
Management ip: Field for the management IP of the node.
SSH password for root: SSH credentials of the node, by default root/opennac.
ON Principal IP: Field for the ON Principal IP.
ON Analytics IP: Field for the ON Analytics IP.
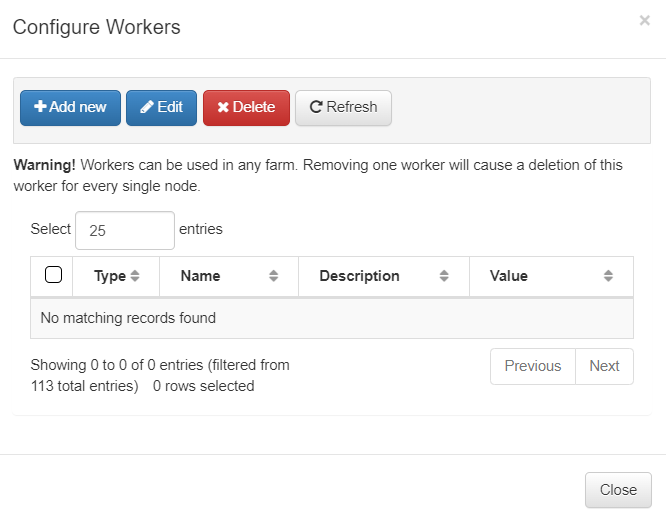
Configure Workers: In this subsection you can configure Workers. By clicking on the Add new button you will see the following pop-up window:
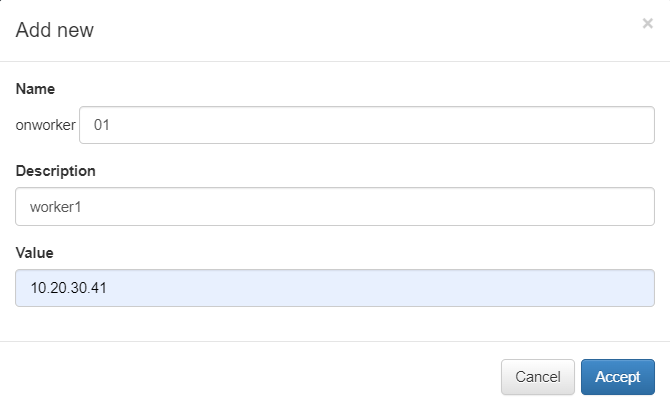
Name: The onworker identification name.
Description:You can enter a worker description.
Value: The worker’s IP.
HTTPS Certificate: By clicking on the Upload Certificate button, you can upload the Certificate file. You can also copy and paste it to the HTTPS Certificate field.
If you don’t have a certificate you can create it with the following commands:
mkdir certificates
cd certificates/
openssl genrsa -out mydomain.key 2048
openssl req -new -key mydomain.key -out mydomain.csr
openssl x509 -req -days 365 -in mydomain.csr -signkey mydomain.key -out mydomain.crt
bash -c 'cat mydomain.key mydomain.crt' >> mydomain.pem
cat mydomain.pem
Copy the content of mydomain.pem to the HTTPS Certificate field. This file also includes the RSA Private Key in the certificate.
Click on Accept and the node will be installed. This process may take a few minutes. It is important not to close the browser in the middle of the process.
Note
Once the node is installed, it is necessary to restart from the console (reboot) to apply the changes.
You can edit a previously created node by selecting its checkbox and clicking on the Edit button.
Once you have created your nodes you will see them displayed in the main menu:
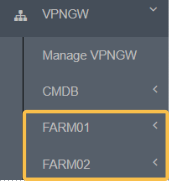
Read the Farm section to understand its features and configuration options.
3.1.9.1.2. Managing options
Moving on to the following buttons available in the Manage VPNWG view you can see the following options:

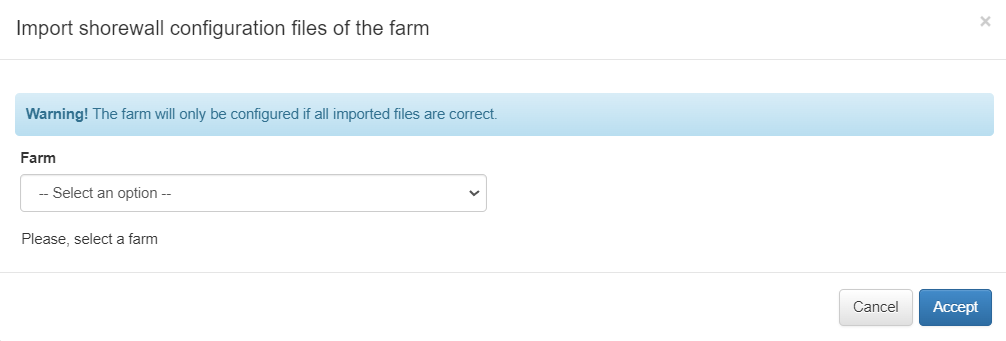
Import: By clicking on the Import button, you can import shorewall configuration files of a selected farm.
Edit Workers: By clicking on the Edit workers button, it displays the exact same window you find inside the add new node section. It gives you a quick access to your workers.
The Manage OpenVPN, Manage Wireguard, and Manage Shorewall buttons display the same options in their dropdown menus:
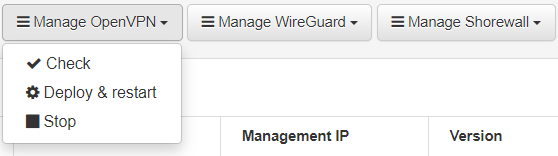
After you have applied all node configurations (see the Farm section), you will be able to start the VPN service (OpenVPN or WireGuard) using its correspondent dropdown menu.
It allows you to check, deploy and restart, or stop a service.