Network Device Compliance
1. DEFINITION (What is it?)
Through this use case you can validate specific configuration params for any network device, it can be use for audit proposes, for validating the security or general configuration of the network devices. You can define the minimum configuration requirements and establish a compliance policy for network devices.
2. MECHANISMS (How does it work?)
For collect information from asset, openNAC extract a backup of every single network device. For it exists two methods:
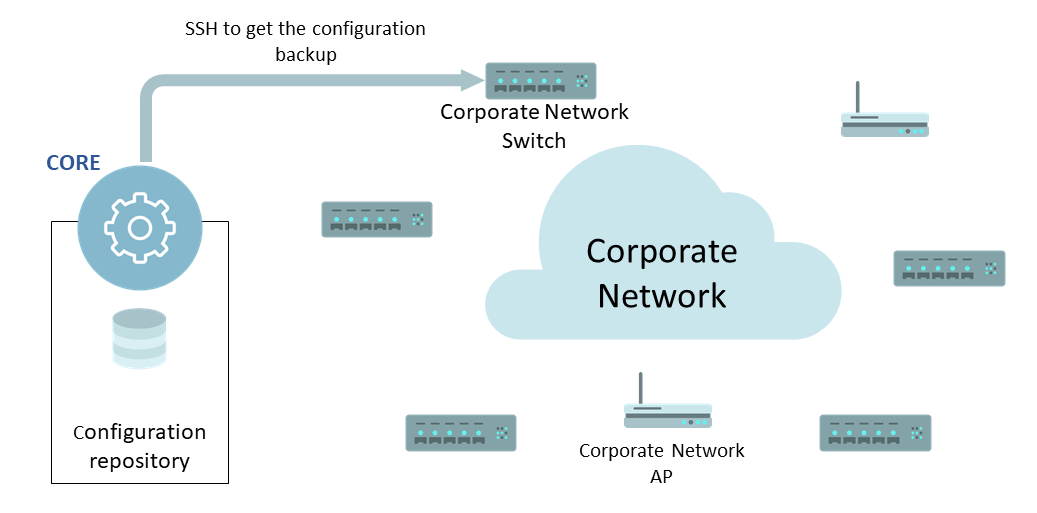
- Active: openNAC access via SSH to network device to obtain the current configuration backup.
- Passive: this method is used when it is not possible to access directly to network device, so, openNAC using SCP obtains the configuration backup of each network device from a remote repository.
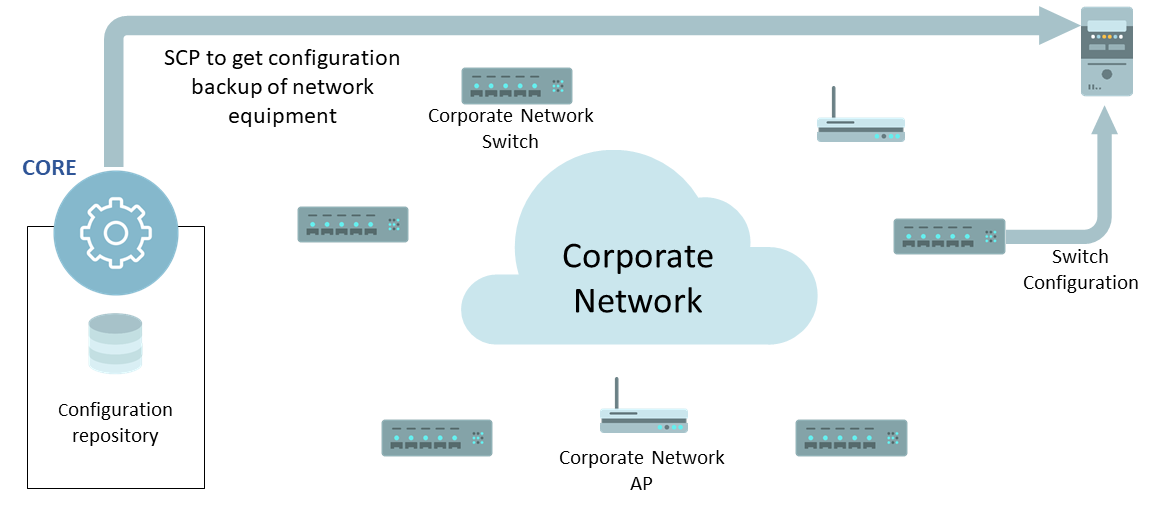
The following image we have a vision about the network device compliance operation.
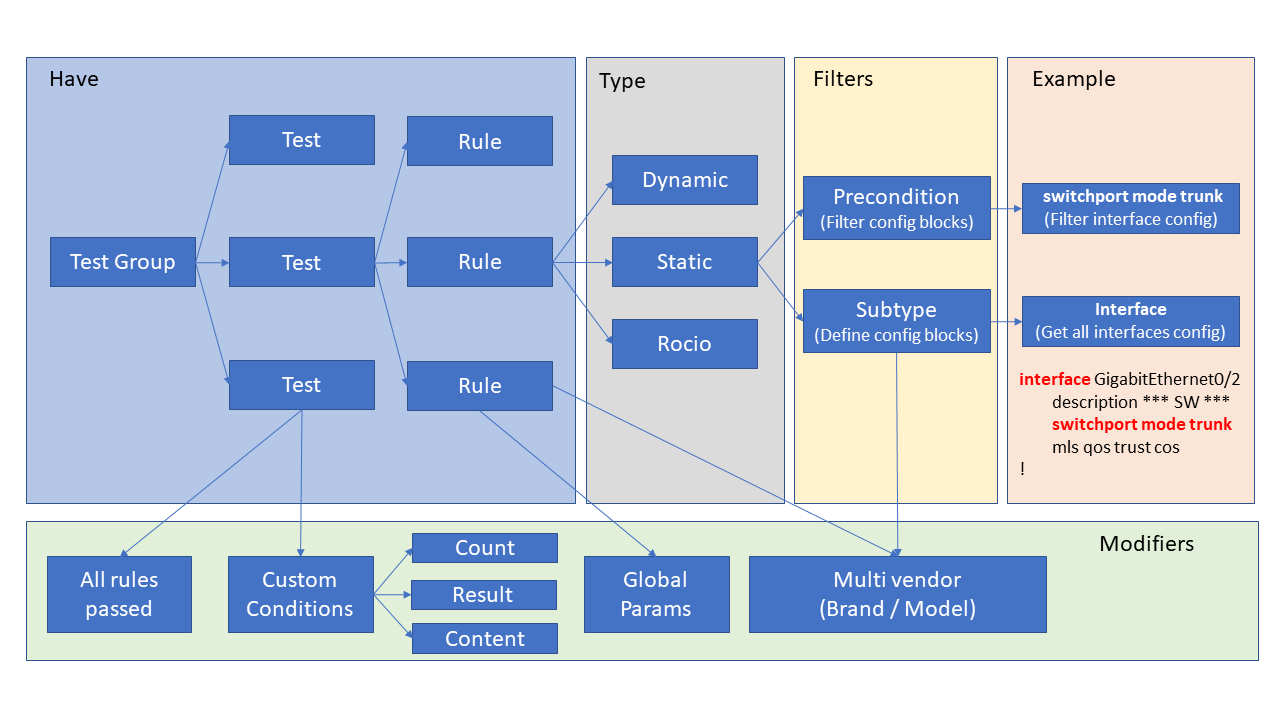
Test groups are composed by series of tests and each test is made up of a set of rules (several rules can be grouped in a single test). For example, you can group rules to check: IP, a configured radius server, SSH protocol version…
The output evaluation test is binary, pass or fail, depending on two criteria:
- All the checks of the rules have been pass. Otherwise the test is given as fail.
- With customized options allowing greater power and flexibility. You can set a threshold for approve the test, by custom conditions to specify the output for each rule evaluation.
The conditions are as follows:
- Based on the count, the number of times a rule matches.
- Based on the output, whether the test has failed or not.
- Based on the content, that the test has matched with a specific line.
Note
Multiple conditions can be used.
Note
As example, a condition could be created as follows: Rule 1 has matched three times, rule 2 has been failed and rule 3 match the content is the specific one. After the evaluation of the conditions allow us to decide if the test has passed or fail.
There are three rules types:
- Dynamics, these rules issue a command against the network device and result is checked with a regular expression.
- Static, a backup of the configuration of the network device is obtained and later all the lines are checked with a regular expression.
- Rocío, is a software developed by a Polytechnic University of Madrid used by the CCN, it checks a number of rules previously defined. In this software you cannot create more rules than you already have included. OpenNAC will run this software and send the backup from the network device o remote repository.
Note
In the regular expressions used by the dynamic and static rules, you can use global parameters, and it can be used in several tests to avoid change all the tests in case of modify the value of these parameters, some examples would be to verify the IOS version, or the IP of a RADIUS server that has changed.
The Filters.
Unlike the dynamic rules that execute a specific command over network device to obtain specific information and compare it with the regular expression, instead static rules read a complete backup of the configuration. To focus on the specific part that you want to test in the static rules there are some filters to fit the part that you want to check with the regular expression, in this case there are two types of filters:
- Preconditions, filters the content in blocks that meet certain conditions (for example within those interfaces that are configured in trunk mode), it is a double filter.
- Subtypes, define the configuration blocks (for example interfaces, vlans, etc …), these filters will allow checking only on these blocks.
Note
Both rules and blocks are multivendor, they must be defined by brand and model.
3. REQUERIMENTS
OpenNAC Core and Analytics.
Connectivity from CORE device to administration management interface of the network equipment: SSH: TCP/22
User access to the management console: - Read only: COMPLIANCE - Administrator: MASS CONFIGURATION
4. DEPLOYMENT (Do it yourself)
4.1. Create Static Rule with subtype and precondition
- Subtypes:
To create this rule is necessary to create a subtype for it, Go to ON NetBackup -> Network Device Compliance -> NetDevice tests, and access to Network device subtypes tab. Click on Add New.
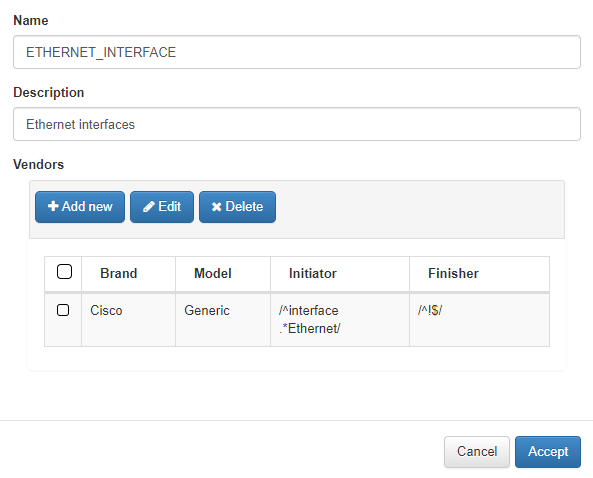
The name and description fields are filled in and a Vendor will be added.
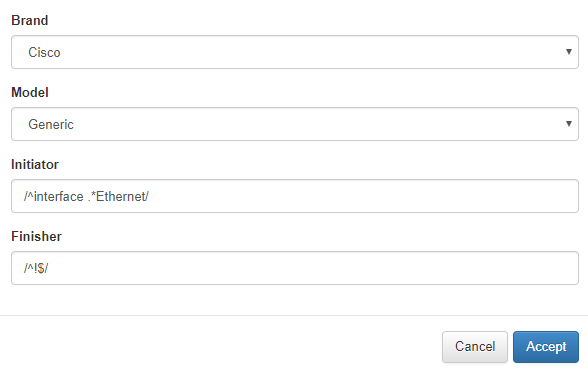
When adding the Vendor, the manufacturer and the model will be selected, the Initiator will also be included with a regular expression, and the Finisher, which will delimit the buckup part of this subtype.
Note
In this case the subtype fits the interfaces configurations.
- Preconditions:
This rule will also use preconditions, Go to ON NetBackup -> Network Device Compliance -> NetDevice tests, and access to Network device preconditions tab. Click on Add New.
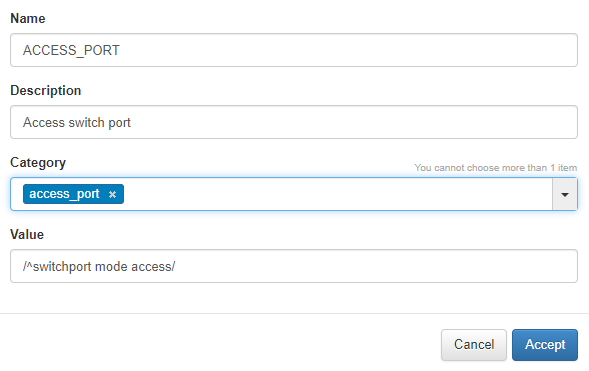
The Name and description fields are filled in, a category is added, and the regular expression is added to match the configuration.
Note
This regular expression checks that the string exists switchport mode access.
- Static Rule:
Finally, the rule will be created with the subtype and precondition previously created. Go to ON NetBackup -> Network Device Compliance -> NetDevice tests, and access to Network device rules tab. Click on Add New.

The fields Name, Description are filled in, a tag without prefix is added since this will be assigned by openNAC. Select the Static Type and add a Vendor.
Note
In the openNAC rules it will automatically add the prefix CRF or CRP after checking. CR means Custom Rule y F or P, Fail or Pass.
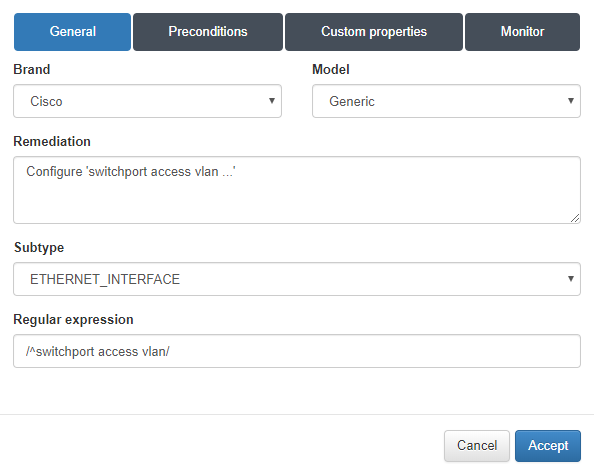
In the General tab when adding the Vendor we will select the Brand, Model, a text that will show in case the rule fails for remediation and we select the Subtype previously created. A regular expression will also be added to check a string within the subtype.
Note
This regular expression checks that the string exists switchport access vlan.
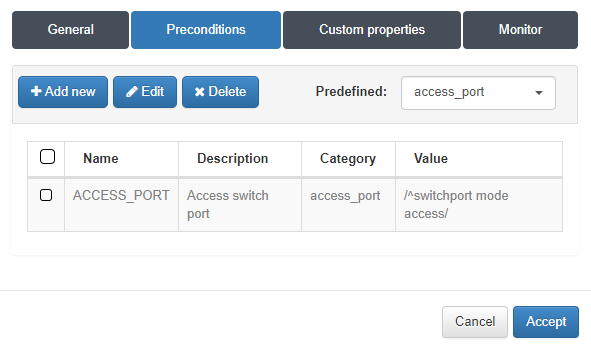
In the Preconditions tab, we will select the precondition previously created. We accept and that rule would already be created.
4.2. Create Dynamic Rule
Now we will see a Dynamic Rule, for this as in the previous step Go to ON NetBackup -> Network Device Compliance -> NetDevice tests, and access to Network device rules tab. Click on Add New.
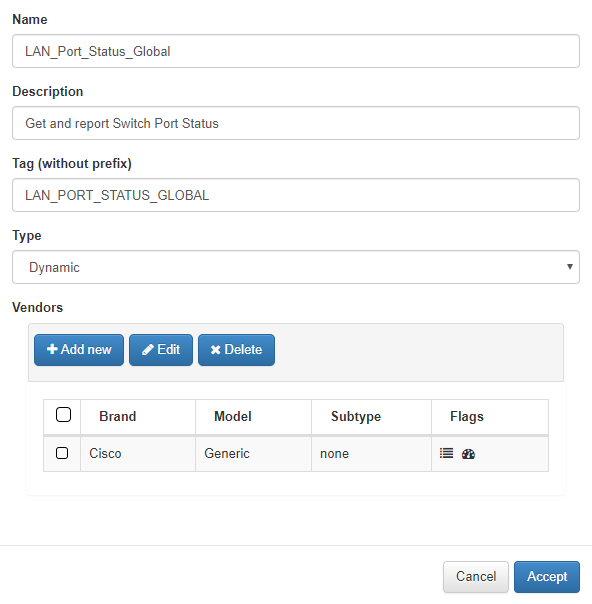
The fields Name, Description are filled in, a tag without prefix is added since this will be assigned by openNAC. Select the Dynamic Type and add a Vendor.
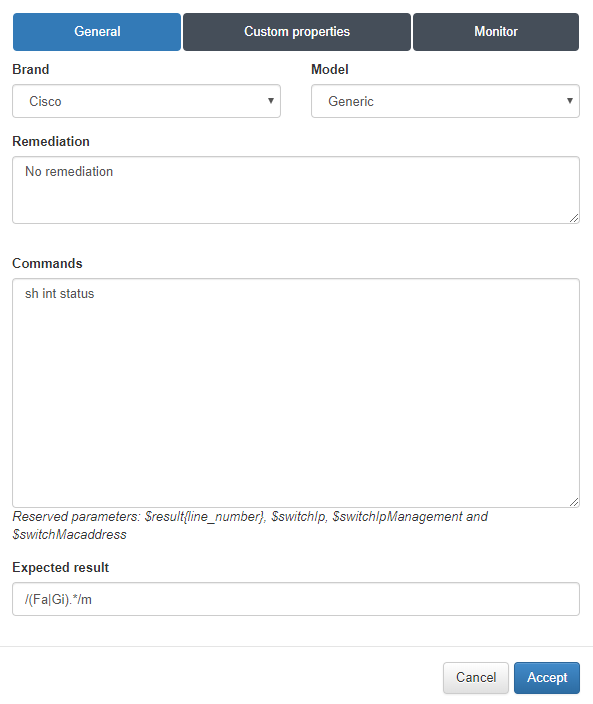
In the General tab when adding the Vendor we will select the Brand, Model and a text that will show in case the rule fails for remediation. Then the command that openNAC will launch to Network Device for obtain the output will be added, and regular expression will be added that will verify the output is the expected.
Note
The described command will obtain the status of the interfaces, and the regular expression will verify that the output has Fa (corresponding to FastEthernet) or Gi (corresponding to GigabitEthernet).
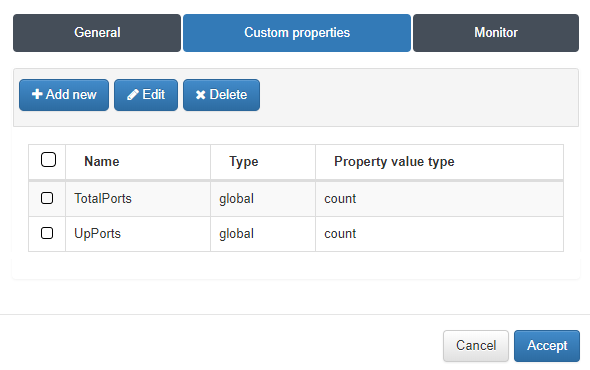
After, Custom Properties will add the obtained information into openNAC logs and CMDB. In the Custom properties tab click on Add New.
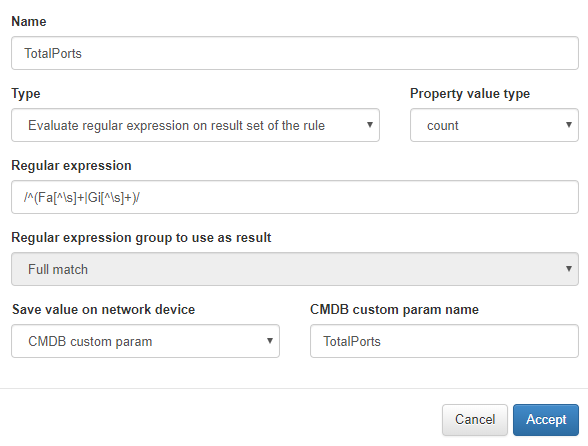
We will fill the blanks to add a regular expression that will specify the string you want to save in logs or CMDB.
For more information about the fields go to the Network device section …. ref: page
Note
The regular expression will match all lines that start with Fa (corresponding to FastEthernet) or Gi (corresponding to GigabitEthernet) and have additional information afterwards.
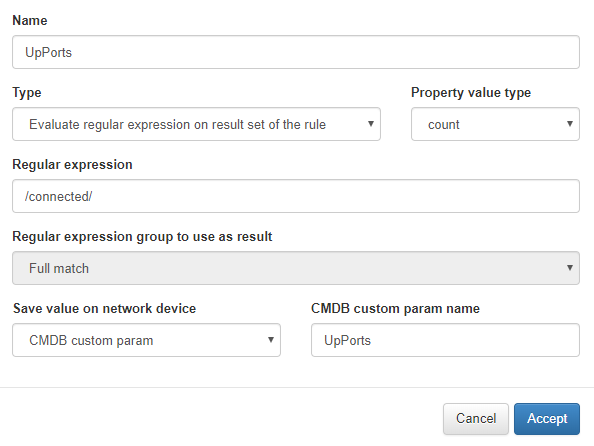
In the second, the fields will be filled in just the same as the previous one
Note
The regular expression will match all the lines that contain the connected string.
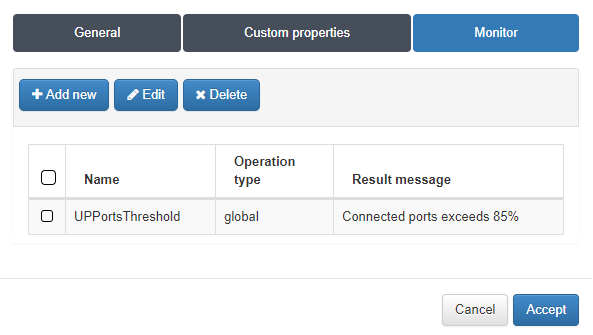
In the monitor tab we can make checks of the information obtained in the custom properties. Click on Add New.
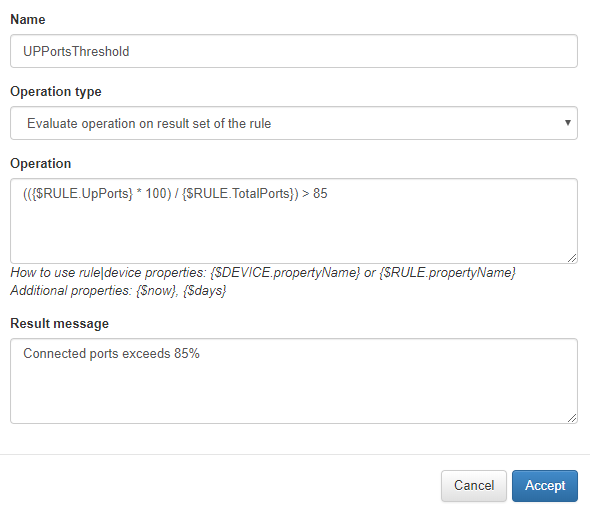
Fill the blanks and write the check you want to perform in the Operation field.
For more information about the fields go to the Network device section Netbackup config.
Note
The expression in the Operation field verifies that 85% of the ports are active.
4.3. Create Rule with Params
In this rule we will use a Param. Go to ON NetBackup -> Network Global Parameters. Click on Add New.
Note
The parameters are especially useful to include values that can be modified in the future, such as IPs, version numbers, etc …
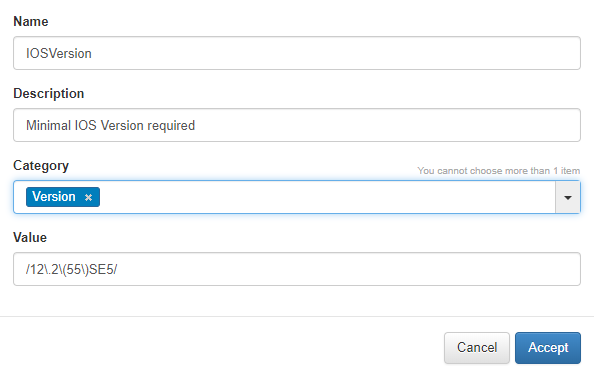
Fill the blanks and the Valor field is a regular expression between / delimiters.
Note
This regular expression checks will provide us with a string with the version later verified in the rule.
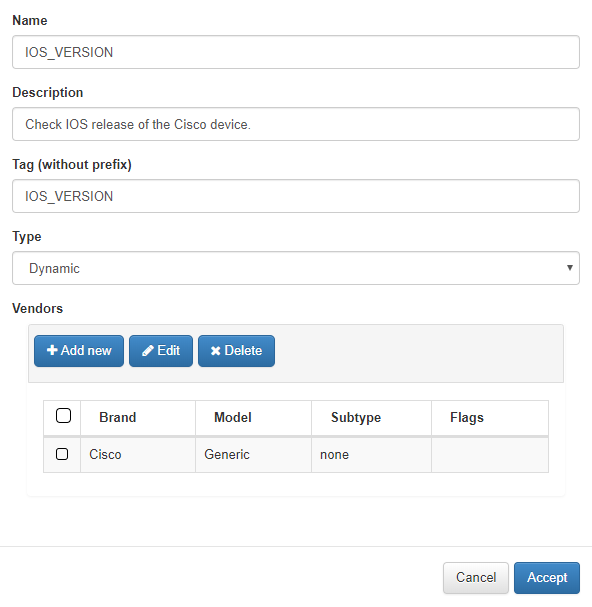
After creating the param, a new rule will be created. Go to ON NetBackup -> Network Device Compliance -> NetDevice tests, and access to Network device rules tab. Click on Add New.
The fields are filled.
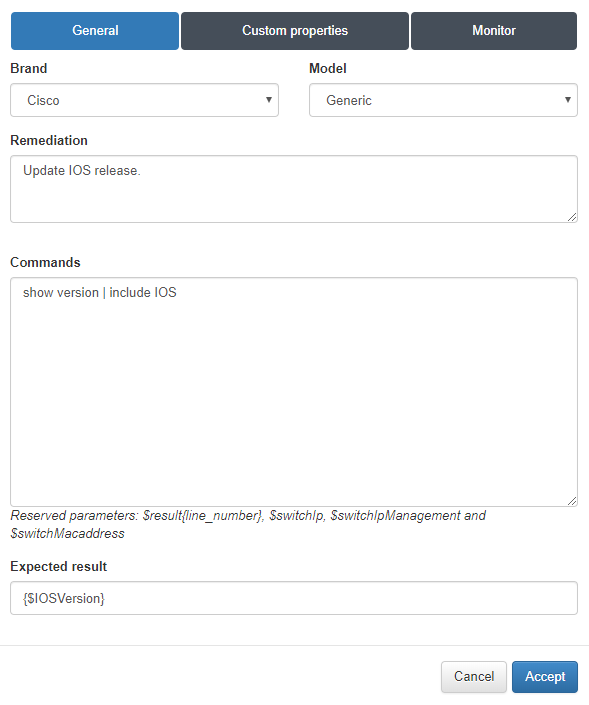
When adding the Vendor into the Expected result field, the parameter call will be made.
Note
The syntax to include the param is {$parama_name}
4.3. Create Rocio Rule
Finally we will create a Rocio type rule. Go to ON NetBackup -> Network Device Compliance -> NetDevice tests, and access to Network device rules tab. Click on Add New
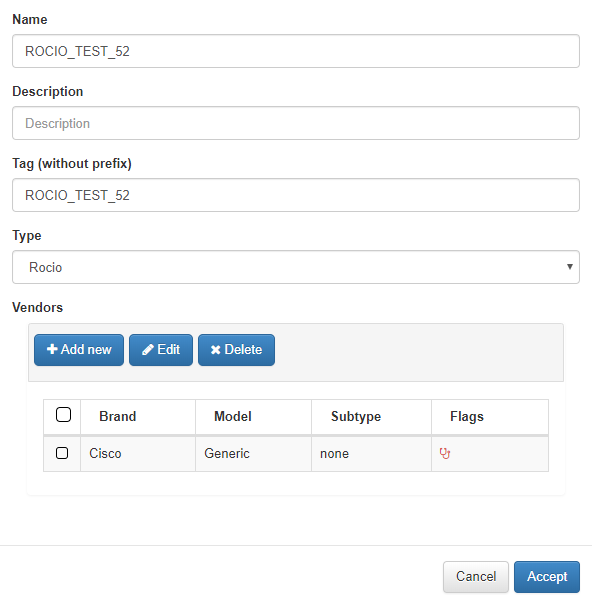
The fields will be completed as in the previous rules and select type Rocio.
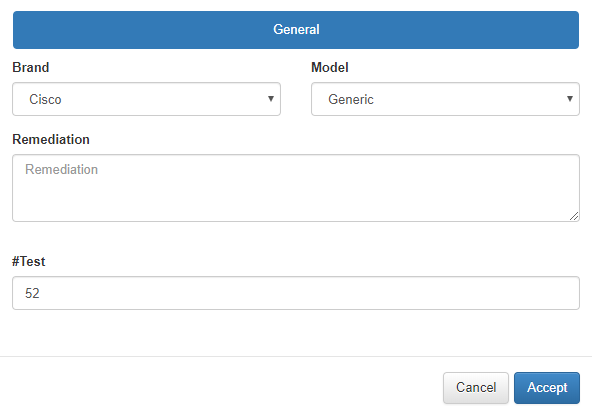
After, adding the Vendor in the #Test field will include the Rocio rule number.
For more information about Rocio rules, access the reference table. Rocio test list.
4.4. Create Test
Once the rules are created you can group several rules to create the tests. For this section we will create two tests. Go to ON NetBackup -> Network Device Compliance -> NetDevice tests, and access to Network device tests tab. Click on Add New.
- Test 1
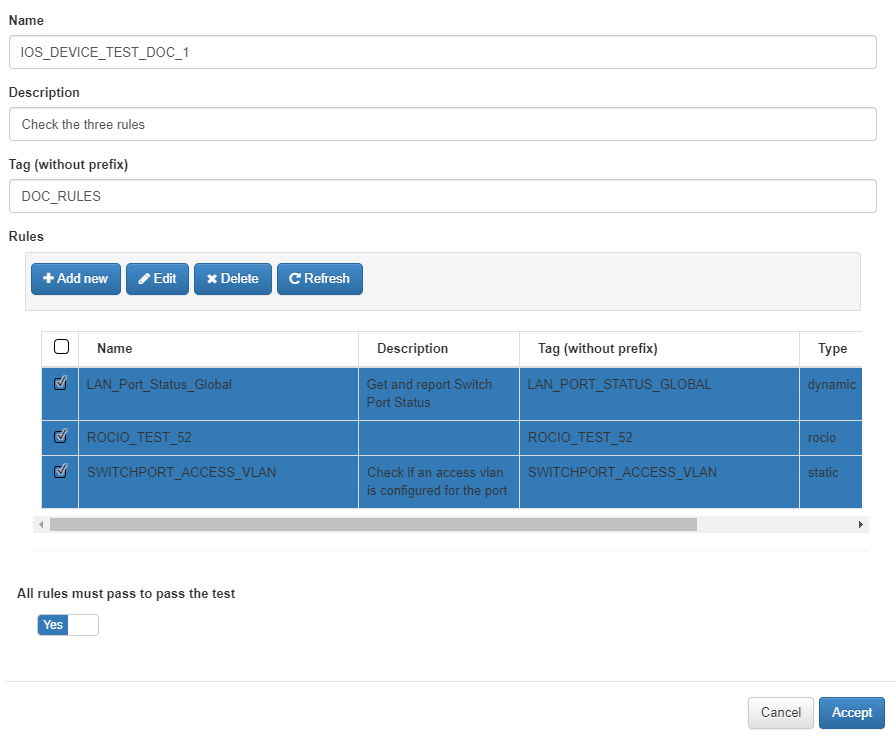
The form will be fill, select the rules to be included in this test. In addition, as in the rules, a tag without a prefix will be added later to see the test result.
Note
OpenNAC automatically add the prefix CTF or CTP after checking. CR means Custom Test y F or P, Fail or Pass.
- Test 2
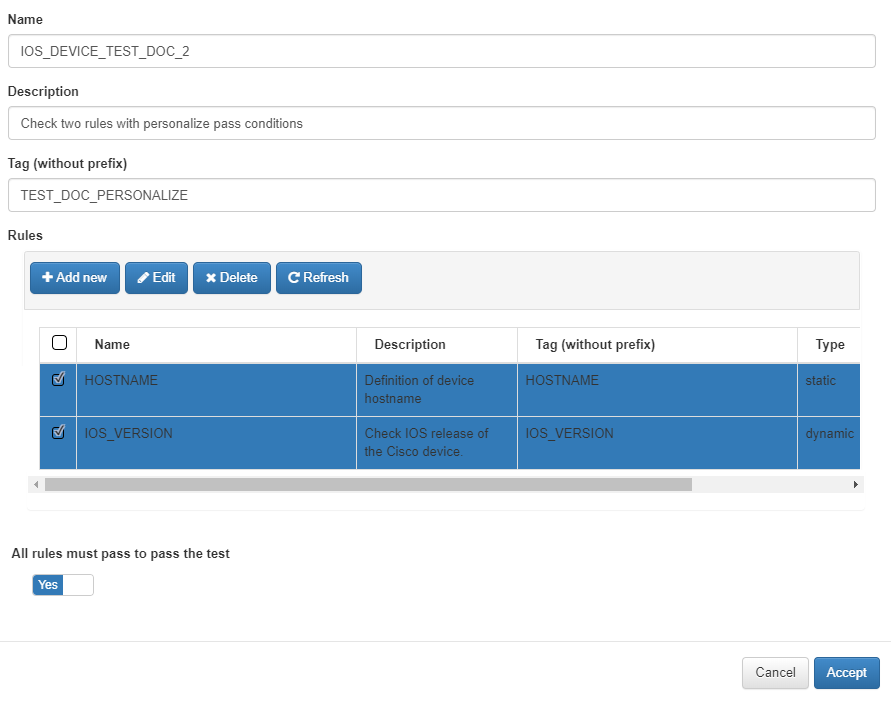
We will create another test with the remaining created rules.
4.5. Create Group Test
A group tests will be created with the latest created tests. Go to ON NetBackup -> Network Device Compliance -> NetDevice tests, and access to Network device test groups tab. Click on Add New.

The form will be filled in, the selected tests that will be included in this group. In addition, as in the tests and rules, a tag without a prefix will be defined to later see the result of the test group.
Note
OpenNAC automatically add the prefix CGF or CGP after checking. CG means Custom Group y F or P, Fail or Pass.
4.6. Assign Test Groups to Network Devices
In this step we will proceed to assign the test group created to a specific Network Device on which we want to perform the compliance process. Go to ONCMDB -> Network Devices. Edit a existing Network Device.
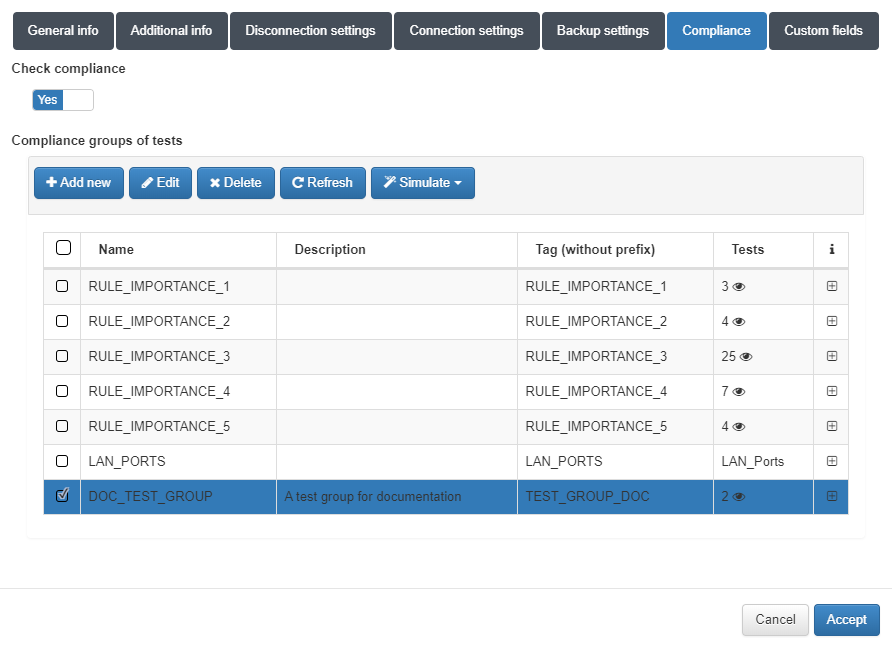
In the Compliance tab, activate the Check compliance option and select the group test created.
Note
To openNAC launch the tests, access to the switch must be previously configured.
4.7. Schedule Tests
To run the tests is necessary to assign a schedule indicating the period. Go to ON NetBackup -> Network Device Compliance -> NetBackup Schedule. Click on Add New.
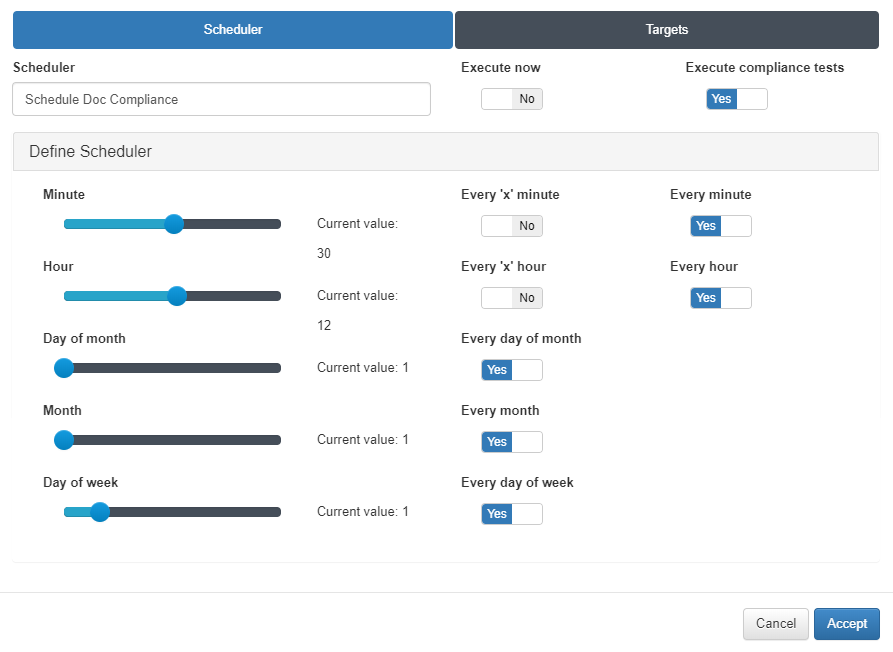
In the Scheduler tab we will select with the options the period with which we want to run the tests, and we will mark the option Execute compliance test, otherwise we will only obtain the backup without performing any tests. We can also select the Execute now option to perform the tests at the moment.
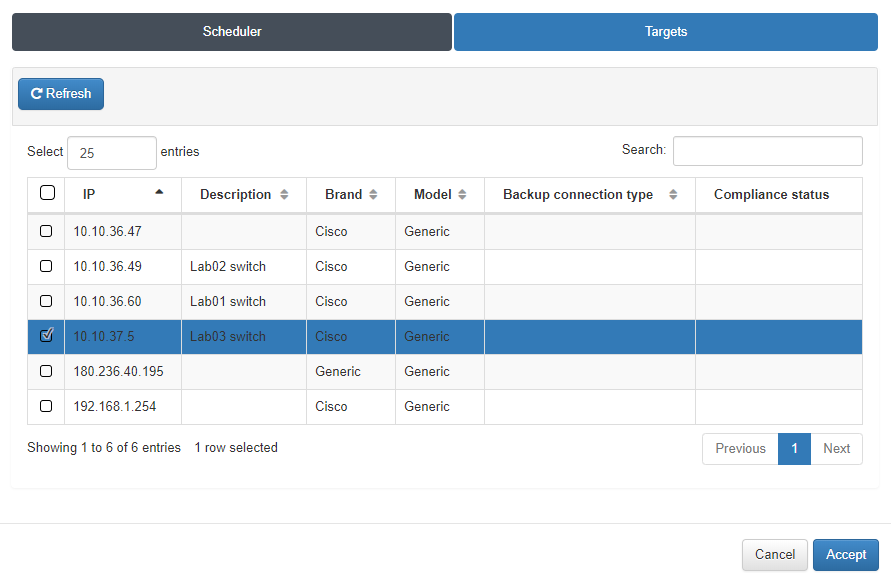
In the Targets tab we will select the Network Device for which we want to apply this schedule.
4.8. View Log
Once the schedule has been applied, we can check in this section that the task has been executed. Go to ON NetBackup -> Network Device Compliance -> NetBackup Log.
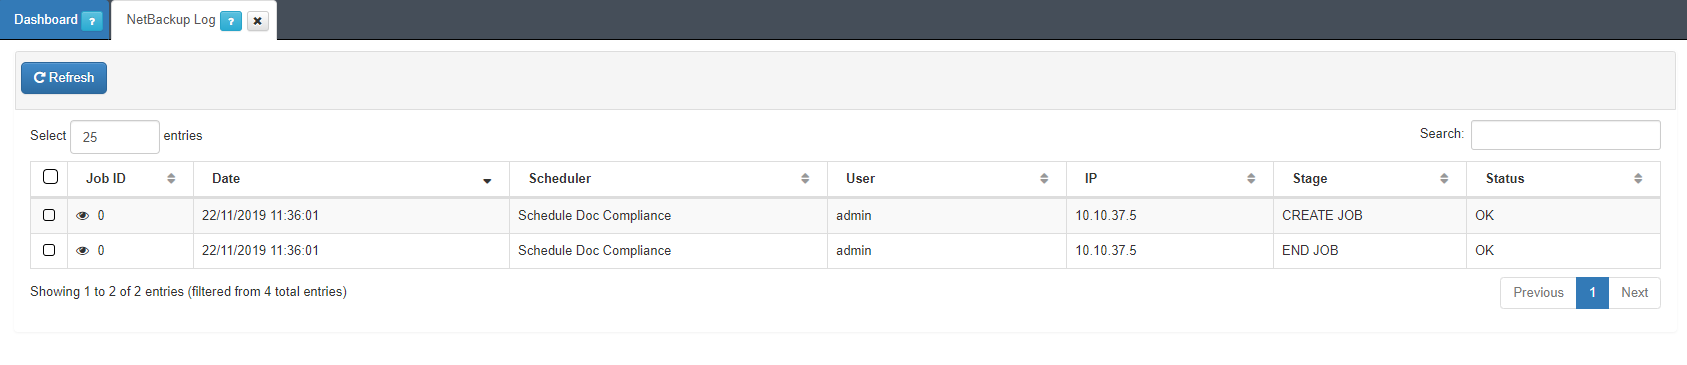
Here we can see the tasks that have been executed.
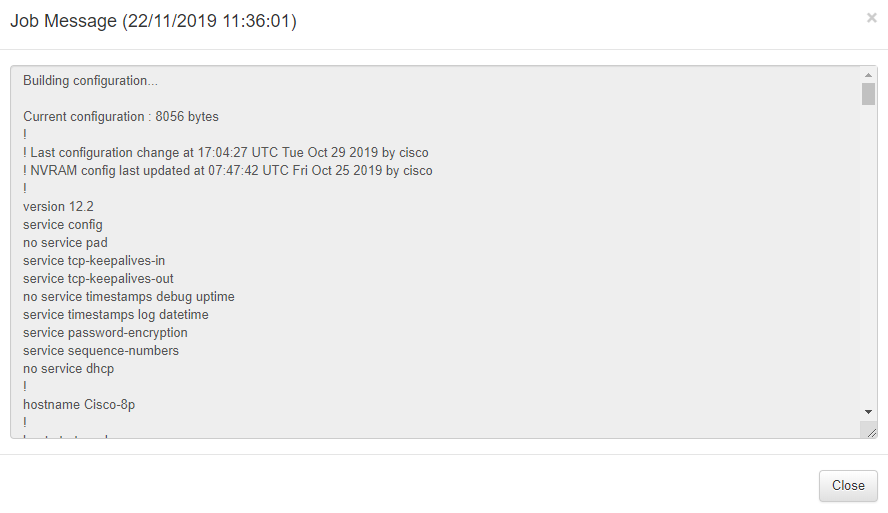
For more detail click on the eye icon to see the backup obtained.
4.9. View Compliance Status
Finally, we can check the compliant status of our Network Device. . Go to ONCMD -> Network Devices.
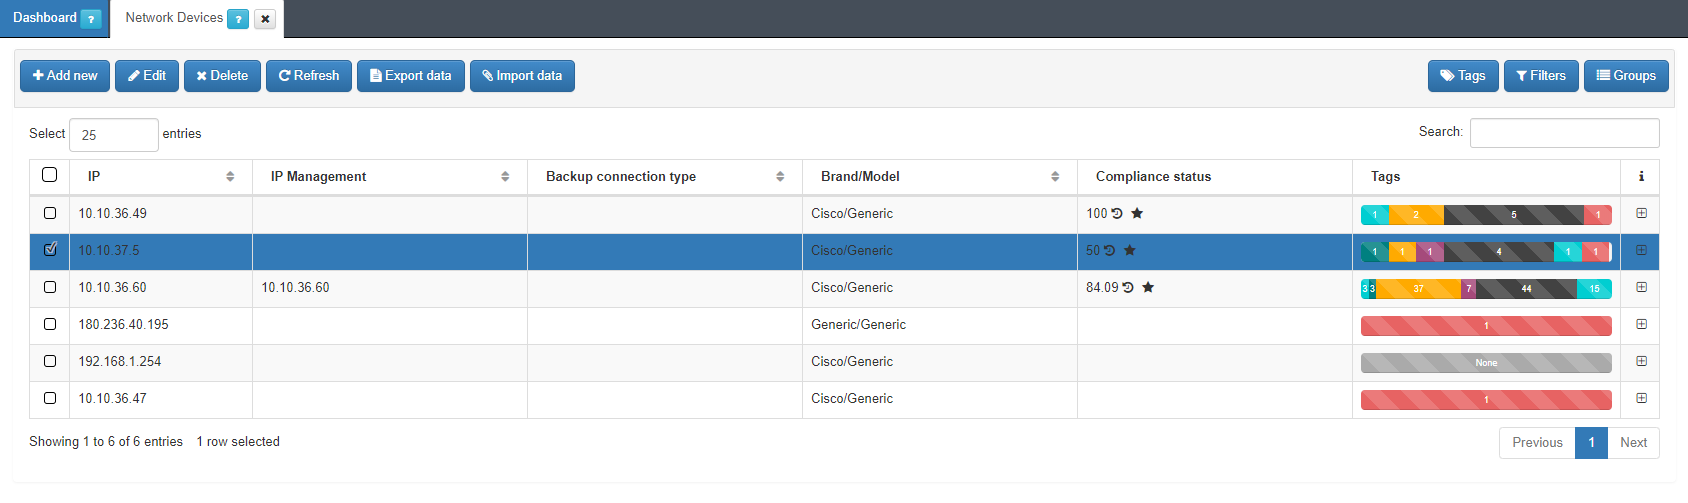
We will see a list of our Network Devices and the percentage of compliance.
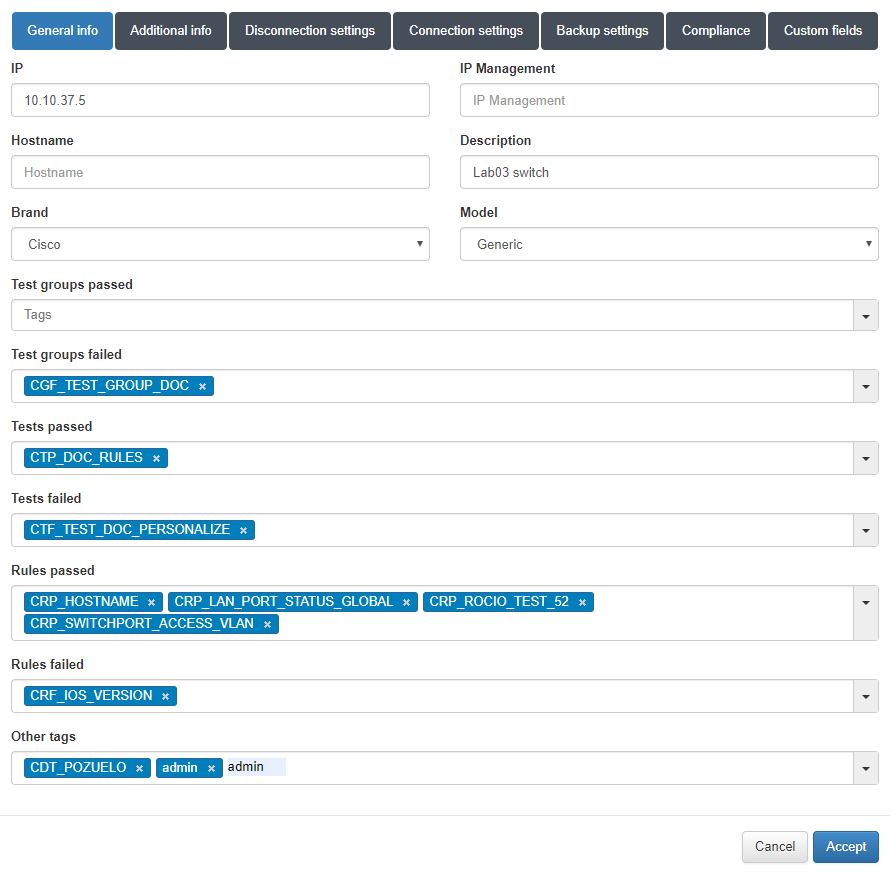
If we expand the information with the + button, the TAGs previously created will be displayed with the corresponding prefixes that indicate whether they have pass or fail.
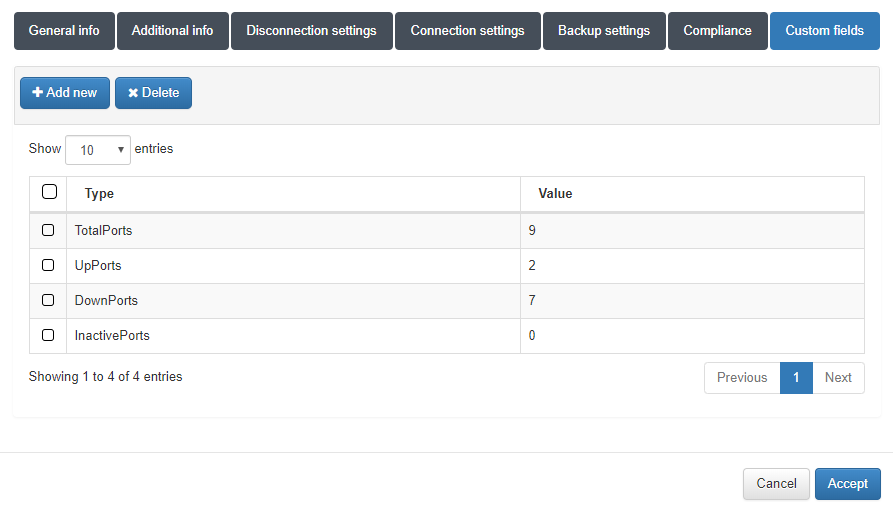
As additional information in the tab Custom Fields we can see the results obtained from the custom properties and monitor.
4.10. View Network Device Compliance Dashboard
Finally, you can see the compliance statistics on the dashboard for this purpose. Go to Analytics -> Use Cases -> Network Device Compliance.
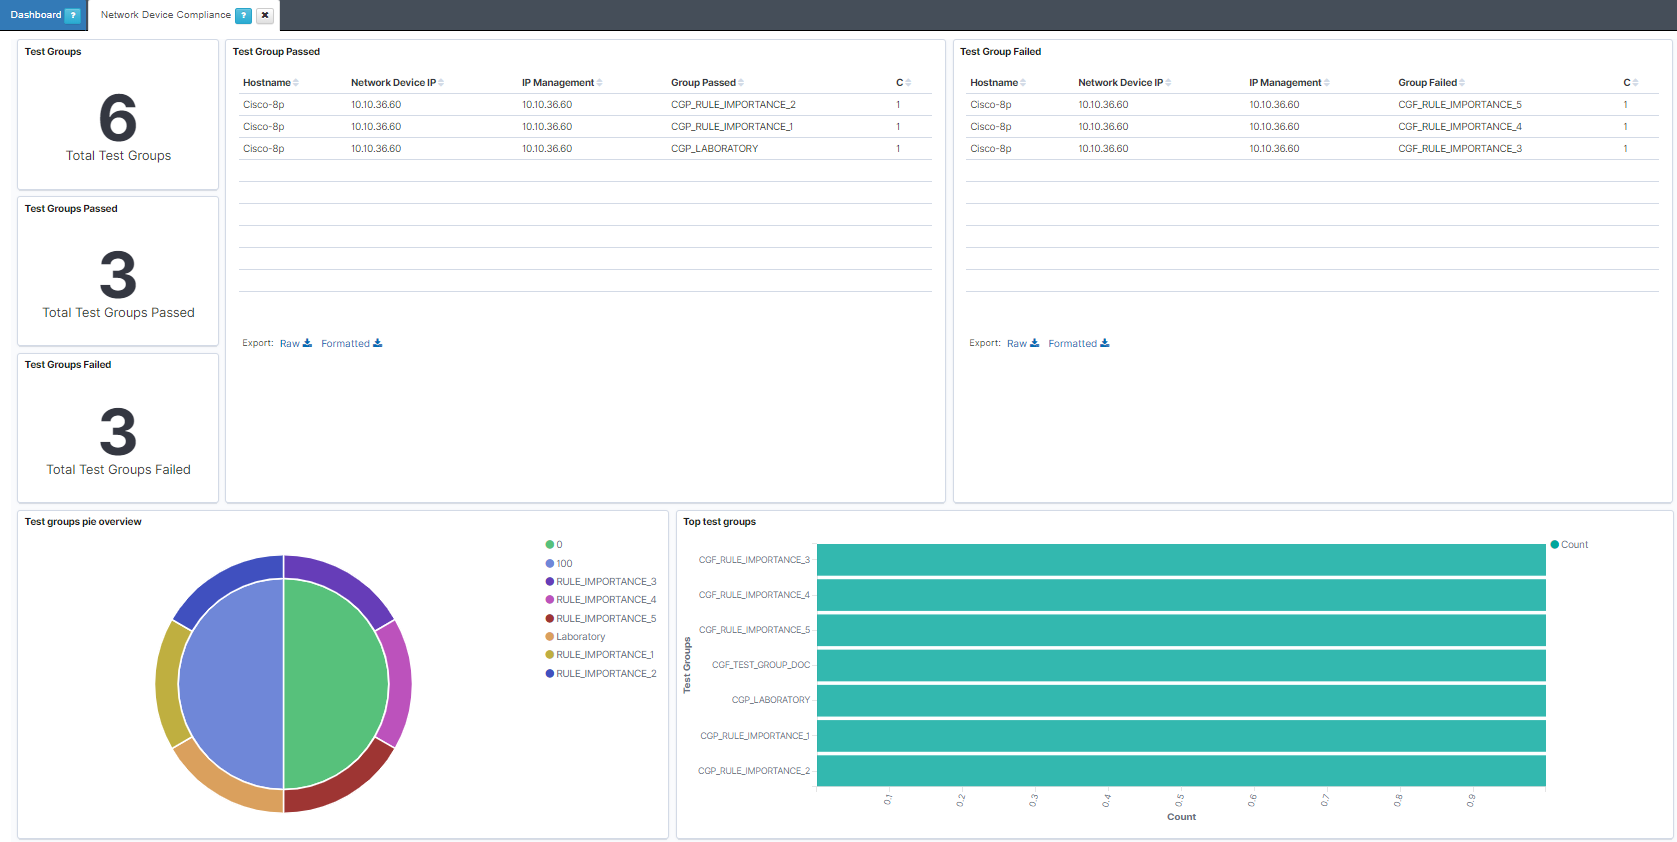
Note
Remember that new custom dashboards can be developed to cover the client needs.