Proxy Server Configuration
Definition (What is it?)
When you have several independent Active Directory domains, without any relationship between them, you need use a proxy-radius as a frontend to dispatch request to backends connected to each Active Directory, because the radius server only can be associated with one Active Directory domain.
Architecture Example
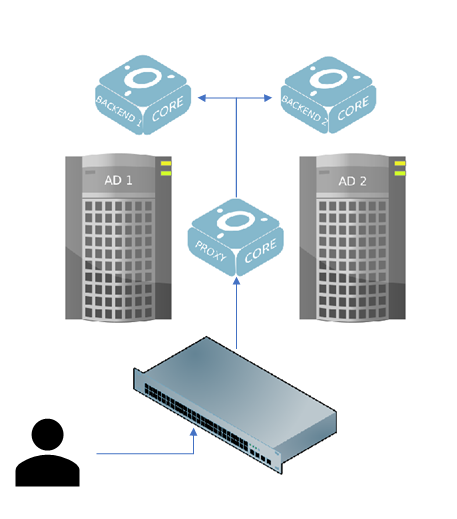
Each openNAC will be joined to specific AD and the Proxy-Server (dispatcher) send the 802.1x request to the openNAC of the corresponding domain.
Brief Exaplanation of Proxy Radius
Since the requests will go through the proxy-radius, it is necessary to configure this behaviour. In the configuration file, we will see that there are three things that must be configured: the home_server the home_server_pool and the realm. A detailed explanation of each concept can be found within the /etc/raddb/proxy.conf file
Definitions:
- The home_server is the configuration related to the backends that will be doing the authentications. We will specify a name (valid within this file) and then fill out the necessary onformation such as the IP.
- The home_server_pool is used for fallbacks and loadbalancing, thus is the configuration related to how the proxy will decide to which backend should it send the requests. It will contain the different home_servers which we want to use. In this case, the type used is keyed-balance, which is a loadbalancing type. keyed-balance definition: the home server is chosen by hashing (FNV) the contents of the Load-Balance-Key attribute from the control items. The request is then sent to home server chosen by taking:server = (hash % num_servers_in_pool). If there is no Load-Balance-Key in the control items, the load balancing method is identical to “load-balance”. Therefore if the key is present, it will be compatible with EAP. In this case the Load-Balance-key can be found the following file: /etc/raddb/sites-available/default_proxy.
- The realm is the point of entry. Each realm will contain a specific pool to which they will foward the requests. The requests will try to match the different realms and will enter the one that matches with the name. For example if the realm is called example.com and the user bob@example.com is authenticating, since they both contian the same domain, it will match.
Therefore, the link will go like this: realm -> home_server__pool -> home_server, where “->” means points to. note: home_servers can be used in more than one home_server_pool.
Configuration
Requirements:
- Know all domains names, short name (NETBIOS) and full name (FQDN).
- One openNAC (Core) or openNAC server farm for each Domain without any relationship, joined to respective domain.
- openNAC (Core) with SSH access that will be configured as a Proxy-Server.
Proxy Server Configuration
SSH into the Core node that will be configured as a Proxy
This node will be the dispatcher for all radius requests, the backends will execute the evaluation policy (Poleval)
Change the /etc/raddb/sites-available/default file by /etc/raddb/sites-available/default.proxy
mv /etc/raddb/sites-available/default_proxy /etc/raddb/sites-available/default
Configure the /etc/raddb/proxy.conf. This file contains a pool of radius servers to manage fail-over and load-balancing, and each pool will contain one or more radius servers.
vim /etc/raddb/proxy.conf
In this point it’s necessary to know all Windows domain names, short names (NETBIOS) and full names (FQDN). All IP addresses of the Backend servers. And it’s necessary to define a shared key to encrypt the packets between the Proxy Servers and Backends.
It’s very important configure this file in order.
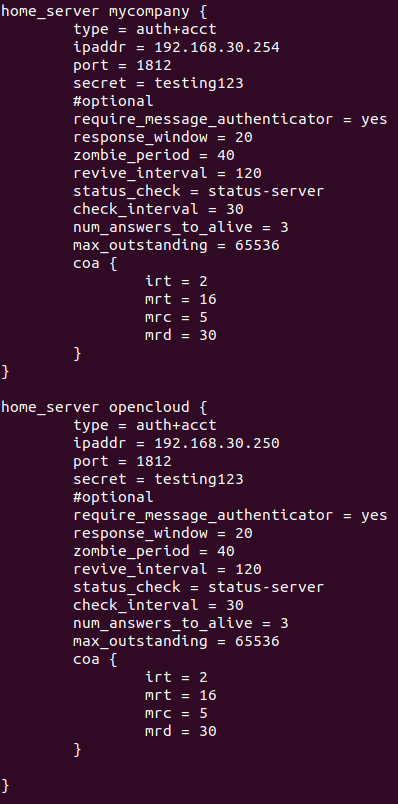
Define the servers:
These are the backend servers we are going to authenticate against (usually a slave). There must be an entry for each backend server.
home_server <nameserver 1> {
type = auth+acct
ipaddr = <IP Address backend domain 1>
port = 1812
secret = <shared key>
#optional
require_message_authenticator = yes
response_window = 20
zombie_period = 40
revive_interval = 120
status_check = status-server
check_interval = 30
num_answers_to_alive = 3
max_outstanding = 65536
coa {
        irt = 2
        mrt = 16
        mrc = 5
        mrd = 30
    }
}

home_server <nameserver 2> {
type = auth+acct
ipaddr = <IP Address backend domain 2>
port = 1812
secret = <shared key>
#optional
require_message_authenticator = yes
response_window = 20
zombie_period = 40
revive_interval = 120
status_check = status-server
check_interval = 30
num_answers_to_alive = 3
max_outstanding = 65536
coa {
        irt = 2
        mrt = 16
        mrc = 5
        mrd = 30
    }
}
Note
- <nameserver> It’s the name that will engage with the pool. This can be any name such as “slave1”. This name will be later used when defining the pools
- <IP Address backend domain> It’s the IP of the Backend who contains the trust relationship with the domain.
- <shared key> It’s the string to encrypt the packets between the Proxy Servers and Backends. Remember this string because will be configure in the Backend servers.
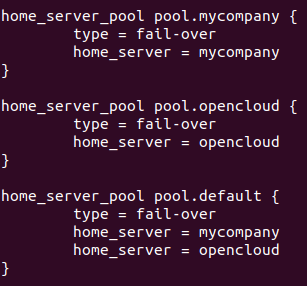
Create the pools
A pool will be created for each domain plus one that will be used to perform local authentications in openNAC.
- Before proceding analyse the environment being configured. Do you have 2 or more domains? (for example ACME and MyCompnay) Are you doing a “join” with a different backend server for each domain? (for example one server does the join with ACME and the other one with MyCompany).
- The following examples will try to illustrate some common posibilities.
Note
- Each environment will be different. Consider which server is joined with which AD. A server will be only able to authenticate a user if its joined with that AD. Thus the home_server_pools and realms will depend on this.
- REMEMBER: A pool will be created for each domain plus one that will be used to perform local authentications in openNAC.
Example #1:
- There is only one domain and two authenticating backend servers (already joined). The names for each server were defined as: server1 and server2. In this case we would have one pool:
home_server_pool pool.auth {
        type = keyed-balance
        home_server = server1
        home_server = server2
}
Example #2:
- There are two domains and two authenticating backend servers (already joined). Each server will authenticate with a different domain (one used for ACME and the other one for MyCompany. The names for each server were defined as: serverACME and serverMyCompany. In this case we would have three pools: one for each domain and a default pool.
home_server_pool pool.authACME {
        type = keyed-balance
        home_server = serverACME
}

home_server_pool pool.authMyCompany {
        type = keyed-balance
        home_server = serverMyCompany
}

home_server_pool pool.default {
        type = keyed-balance
        home_server = serverACME
        home_server = serverMyCompany
}
Structure:
home_server_pool <namepool 1> {
        type = keyed-balance
        home_server = <nameserver 1>
}

home_server_pool <namepool 2> {
        type = keyed-balance
        home_server = <nameserver 2>
}

home_server_pool pool.default {
        type = keyed-balance
        home_server = serverACME
        home_server = serverMyCompany
}
Note
- <namepool> It’s the name that will engage with the pool with realm. This can be any name such as “authentication1_pool”. This name will be later used when defining the realms
- <nameserver> It’s the server name assigned in the previous step. If the home_server is called “slave1”, in here the name shoudl be “slave1”.
- The default pool handles all request that were not answered by the domains defined before, also request with no domain associate as MAB request.
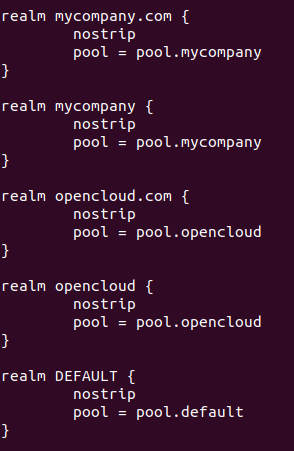
Define the realms
We will have different realms for different domains and or ways to access such domain (for example using the short name or the FQDN notations). Following the the previous examples, their respective realms will be:
Example #1:
realm DEFAULT {
    nostrip
    pool = pool.auth
}
Example #2:
realm acme.com {
    nostrip
    pool = pool.authACME
}

realm acme {
    nostrip
    pool = pool.authACME
}

realm mycompany.com {
    nostrip
    pool = pool.authMyCompany
}

realm mycompany {
    nostrip
    pool = pool.authMyCompany
}

realm DEFAULT {
    nostrip
    pool = pool.default
}
Structure:
realm <FQDN from nameserver 1> {
    nostrip
    pool = <namepool 1>
}

realm <Short domain name from nameserver 1> {
    nostrip
    pool = <namepool 1>
}

realm <FQDN from nameserver 2> {
    nostrip
    pool = <namepool 2>
}

realm <Short domain name from nameserver 2> {
    nostrip
    pool = <namepool 2>
}

realm DEFAULT {
    nostrip
    pool = pool.default
}
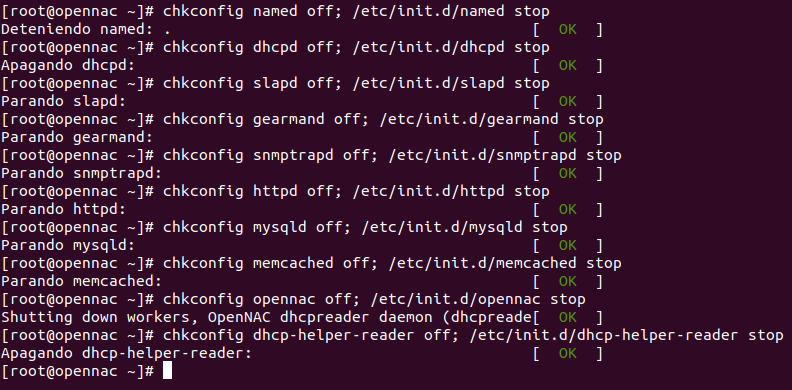
- Disable some unnecessary services
chkconfig named off; /etc/init.d/named stop
chkconfig dhcpd off; /etc/init.d/dhcpd stop
chkconfig slapd off; /etc/init.d/slapd stop
chkconfig gearmand off; /etc/init.d/gearmand stop
chkconfig snmptrapd off; /etc/init.d/snmptrapd stop
chkconfig httpd off; /etc/init.d/httpd stop
chkconfig mysqld off; /etc/init.d/mysqld stop
chkconfig memcached off; /etc/init.d/memcached stop
chkconfig opennac off; /etc/init.d/opennac stop
chkconfig dhcp-helper-reader off; /etc/init.d/dhcp-helper-reader stop
Disable openNAC crons, removing the following files
rm /etc/cron.d/opennac-scheduler
Note
The healthcheck should be configure according with the openNAC device role, for more information Healthcheck.
Additional the script for back-up should be modified, that’s because a proxy radius deployment doesn’t have internal db so the process to export the db will fail, to prevent this add –avoid-db-dump into backup script as follows:
26 23 * * * root /usr/share/opennac/utils/backup/opennac_backup.sh --avoid-db-dump > /dev/null 2>&1
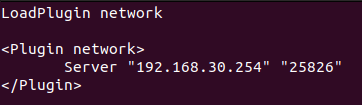
- Configure collectd to send the trending information to the openNAC master.
Edit or create the file network.conf in /etc/collectd.d/
vim /etc/collectd.d/network.conf
Add the following lines
LoadPlugin network

<Plugin network>
       Server "<openNac Master IP>" "25826"
</Plugin>
Note
This step is done because services that check collectd have been disabled.
Comment all lines from the files mysql.conf and curl_json.conf from /etc/collectd.d/ directory, after that open the files to ensure that all lines are commented
sed -i 's/^\([^#]\)/#\1/g' /etc/collectd.d/mysql.conf

vim /etc/collectd.d/mysql.conf

sed -i 's/^\([^#]\)/#\1/g' /etc/collectd.d/curl_json.conf

vim /etc/collectd.d/curl_json.conf
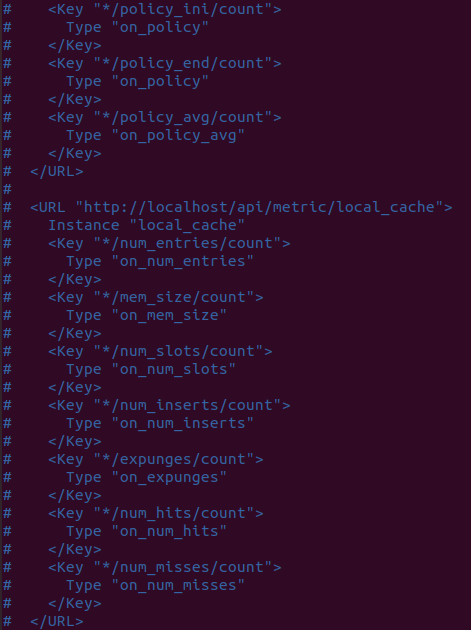
Note
This screenshot don’t show all final content, navigate to the end to ensure that all lines are commented.
Restart the collectd service
service collectd restart

Backend Servers Configuration
- FreeRadius general configuration
Proxy-radius needs access password to request to this server, so in /etc/raddb/clients.conf file we have to include the connection values
vim /etc/raddb/clients.conf
client <Proxy Server IP> {
    secret      = <shared key>
    shortname   = proxy-radius
}
service radiusd restart
Note
<shared key> It’s the string defined on the proxy server in the file vim /etc/raddb/proxy.conf, used to encrypt the packets between the Proxy Servers and Backends.

- Configure collectd
From backend server, we can send information to frontend by collectd
We can create the network.conf file in /etc/collectd.d/ directory, with the following content, where 192.168.1.1 is the server IP and 25826 the UDP port
LoadPlugin network

<Plugin network>
       Server "<Core Master IP> " "25826"
</Plugin>
- Restart the service
service collectd restart
Master Server Configuration
Configure collectd server
Collectd is the server who manage the information displayed in “Trending” option from “Status” section. If we configure this server to receive the Proxy and Backend servers information, we will show all nodes information from openNAC user interface.
- Create the network.conf file in /etc/collectd.d/ directory
vim /etc/collectd.d/network.conf
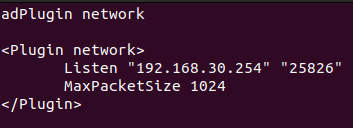
- Add the following content, with the openNAC Master IP and 25826 the UDP port
LoadPlugin network

<Plugin network>
    Listen "<openNAC Master IP>" "25826"
    MaxPacketSize 1024
</Plugin>
- After the file creation, we have to restart the service
service collectd restart
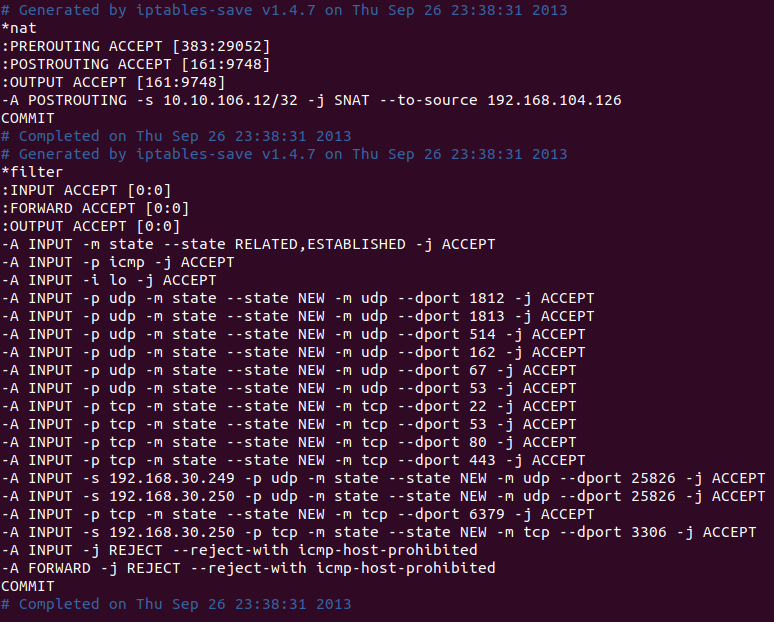
Configure firewall to open the UDP port in order to allow clients connections. We could edit the /etc/sysconfig/iptables file adding the following line before “REJECT” section:
vim /etc/sysconfig/iptables
-A INPUT -s <Proxy Server IP> -p udp -m state --state NEW -m udp --dport 25826 -j ACCEPT
-A INPUT -s <Backend 1 IP> -p udp -m state --state NEW -m udp --dport 25826 -j ACCEPT
-A INPUT -s <Backend 2 IP> -p udp -m state --state NEW -m udp --dport 25826 -j ACCEPT
...
Note
Remember add one line for each Core joined to domain with its IP
- Restart the iptables service to apply the new firewall rules
service iptables restart
