2.1.1. Proxmox OVA Deployment
This section is intended to show the process of deploying the different OVAs of the OpenNAC Enterprise nodes in the Proxmox virtualizer.
2.1.1.1. Administration portal configuration
Access to the Proxmox web portal, and click the Create VM button in the upper right corner.
A pop-up window will open to start configuring the machine.
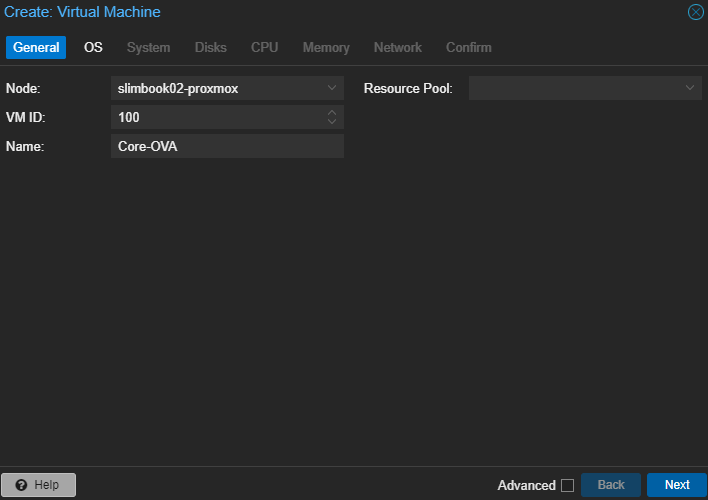
In the General section, select the Node where you want to deploy the machine, the VM ID to reference the machine (use an ID that is not being used for another machine) and also configure a name (and optionally a resoruce pool). Once you have finished the configuration, click on the Next button.
In the OS section, configure the operating system. In this case, check the box Do not use any media, as you will configure the OS for the machine later through the CLI. Once you have finished the configuration, click on the Next button.

Warning
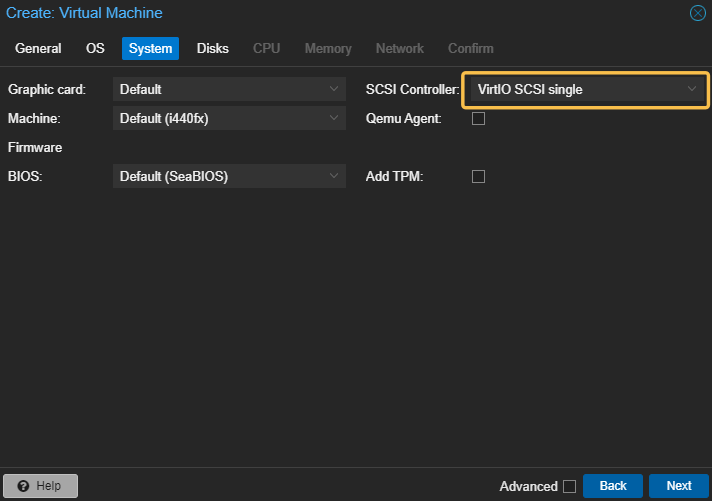
Before proceeding, ensure that in the System section, the values are set to Default and the VirtIO SCSI single controller is selected.
After enuring the above-mentioned configuration, click on the Next button.
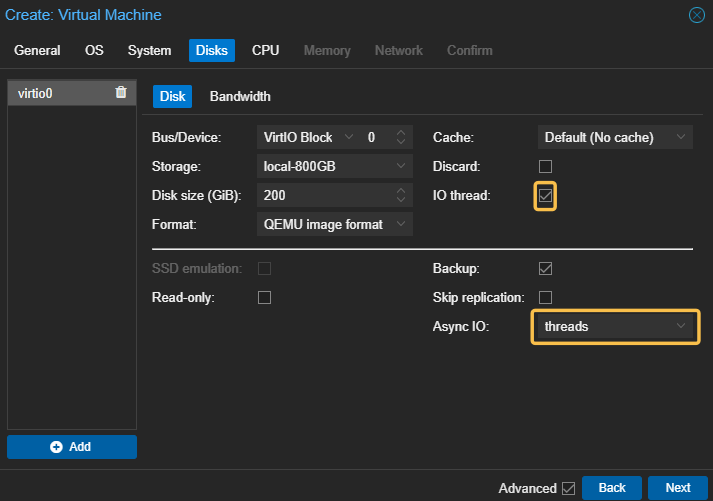
In the Disks section, it will be important to assign a unit that has enough free space to save your machine. For that, select the size that you will assign to it and also the format of the image that you are going to create. Take into account the recommended sizing for the multiple OpenNAC Enterprise nodes.
Note
It is important to remember the storage unit that you configure in Storage field to later find the image of the machine that you are creating via CLI.
Enable IO thread and configure the Async IO field as threads.
Once you have finished the configuration, click on the Next button.
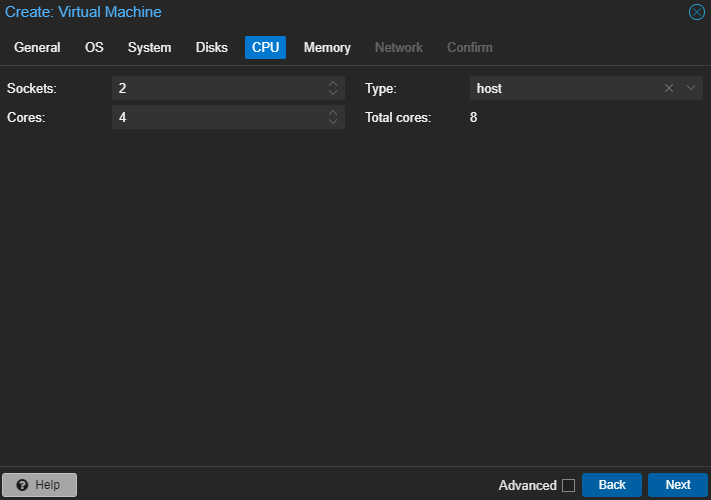
In the CPU section, configure the number of Sockets and Cores. Depending on the machine you want to create or for performance reasons, use one configuration or another. Take into account the recommended sizing for the multiple OpenNAC Enterprise nodes.
It will also be necessary to specify that the CPU is type host.
Once you have finished the configuration, click on the Next button.
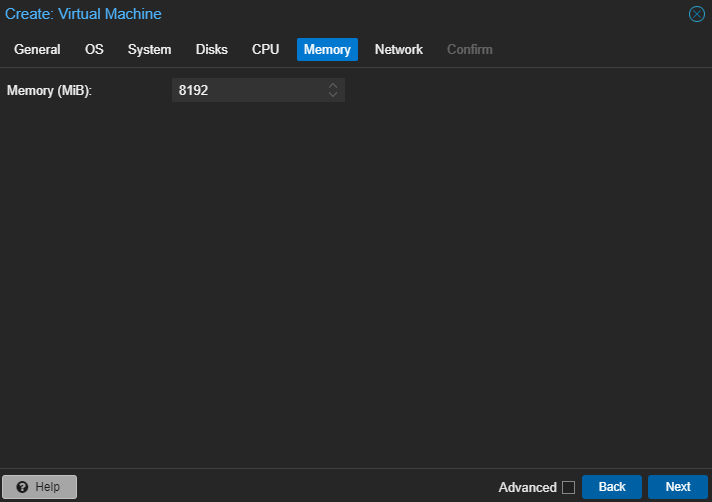
For the Memory section, check the Components section to find more information about the node you want to deploy. Once you have finished the configuration, click on the Next button.
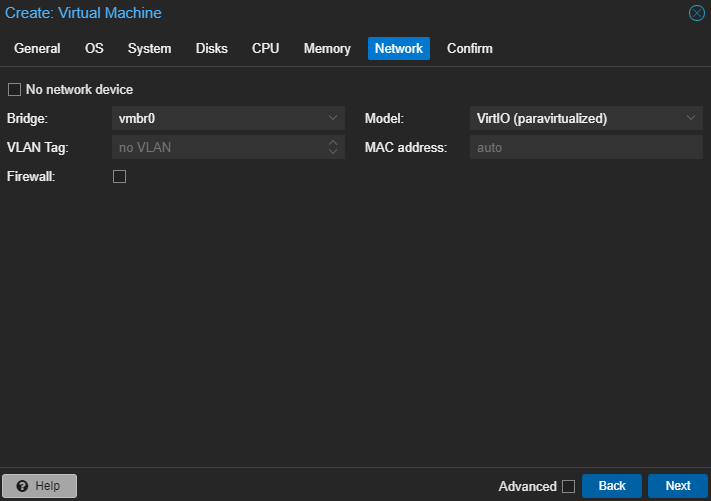
In the Network section, it will be important to configure a bridge that will allow you to have access to the corporate network to avoid connectivity problems. Also deactivate the Firewall option. Once you have finished the configuration, click on the Next button.
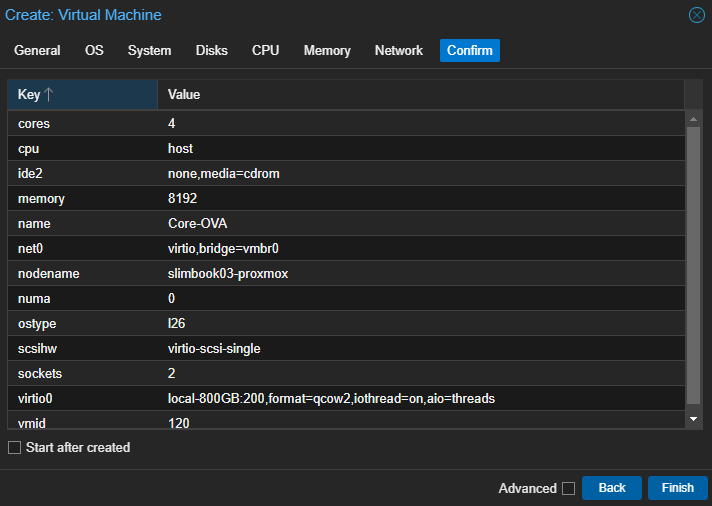
Once the configuration is completed, you will see a summary panel with all the configured information. Check that everything is correct and press the Finish button.
2.1.1.2. CLI Configuration
Once the machine has been created on the Proxmox front end, and you have downloaded the OVA you want to deploy, follow these steps to associate the OVA disk to the VM that you have created above on Proxmox.
1. Access to the Proxmox command line and go to the directory where you have previously downloaded the OVA.
2. Extract the OVA content:
[root ~]# tar -xvf <ova_name>.ova
3. When extracting the OVA, you need to convert the vmdk file <ova_name>.vmdk to a .qcow2 file.
[root ~]# qemu-img convert -f vmdk -O qcow2 <ova_name>.vmdk <ova_name>.qcow2
4. Searching for the machine created from proxmox:
Look in the unit where you have previously created the machine for the ID of our machine. In that directory, you will find a file of the type vm-<WM_ID>-disk-0.qcow2.
[root ~]# cd /var/lib/<Storage>/images/<VM_ID>
Example:
[root ~]# cd /var/lib/vz800GB/images/619/
5. Copy the file:
Finally, copy the file that you have downloaded, unzipped and transformed to <ova_name>.qcow2.
[root ~]# cp <ova_name>.qcow2 /var/lib/<Storage>/images/<VM_ID>/ vm-<WM_ID>-disk-0.qcow2
Example:
[root ~]# cp opennac_core9_1.2.5-1.20240318093610_img-disk1.qcow2 /var/lib/vz800GB/images/100/vm-100-disk-0.qcow2
Once all the configuration is done, you can access the Proxmox administration portal and start the deployed node to check if it works properly.
2.1.1.3. Importing .raw Disks to Proxmox ZFS
Note
This procedure is only performed if the volume is of type ZFS.
1. Access to the Proxmox command line and go to the directory where you have previously downloaded the OVA.
2. Extract the OVA content:
[root ~]# tar -xvf <ova_name>.ova
3. When extracting the OVA, you need to convert the vmdk file <ova_name>.vmdk to a .qcow2 file.
[root ~]# qemu-img convert -f vmdk -O qcow2 <ova_name>.vmdk <ova_name>.qcow2
4. Convert the disk to RAW format:
[root ~]# qemu-img convert -f qcow2 <ova_name>.qcow2 -O raw <vm_disk_name>.raw
Find the vm_disk_name within the Proxmox interface > VM Disks under the “Name” column, as shown in the example below:

You can also find the vm_disk_name by executing the following command:
[root ~]# pvesm list local-zfs
5. Transfer the data from the RAW disk to a ZFS volume on Proxmox:
[root ~]# modprobe nbd max_part=63
[root ~]# qemu-nbd -c /dev/nbd0 /<vm_disk_directory_name>/<vm_disk_name>.raw
[root ~]# dd if=/dev/nbd0 of=/dev/zvol/rpool/data/<vm_disk_name> bs=1M
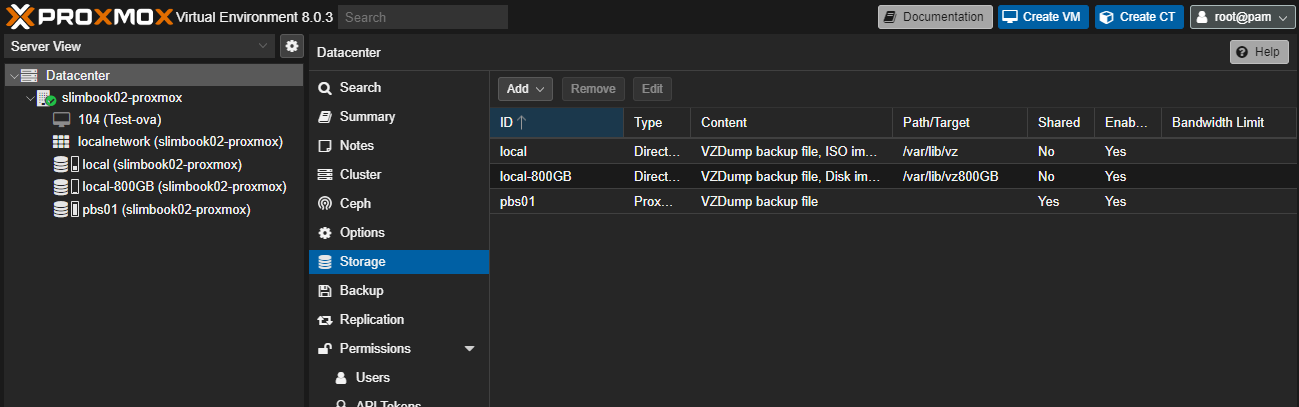
To view and manage the different storage options available in the Proxmox VE environment, use the following command:
[root ~]# cat /etc/pve/storage.cfg