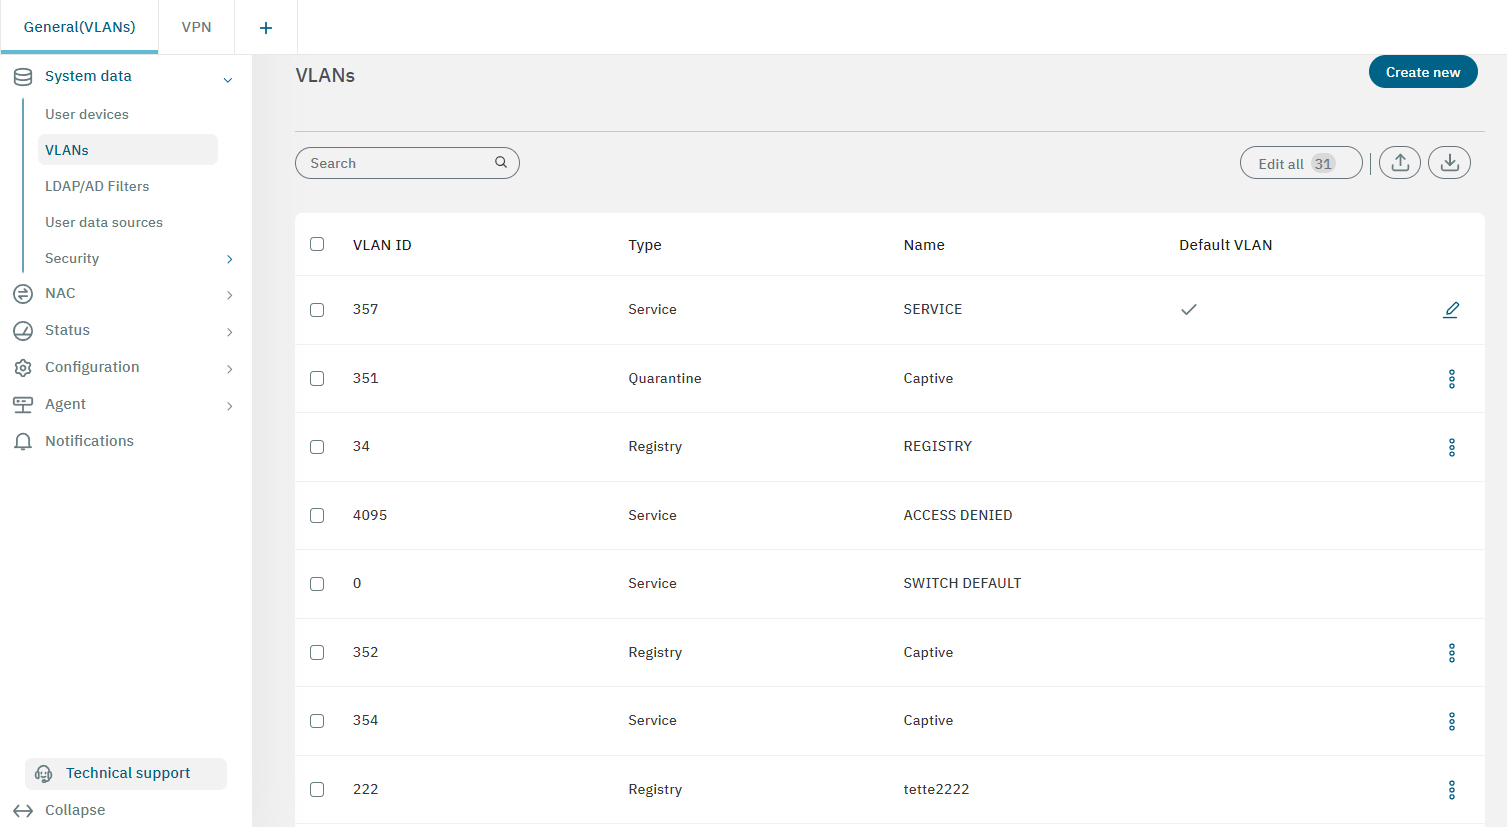
3.2.2.1.2. VLANs
In the VLANs section, you can register all the VLANs that exist in the network infrastructure where an OpenNAC Enterprise solution is being deployed.
3.2.2.1.2.1. Creating a new VLAN
To register a new VLAN, click on the Create new button. It will display a window with all the parameters needed to configure it.
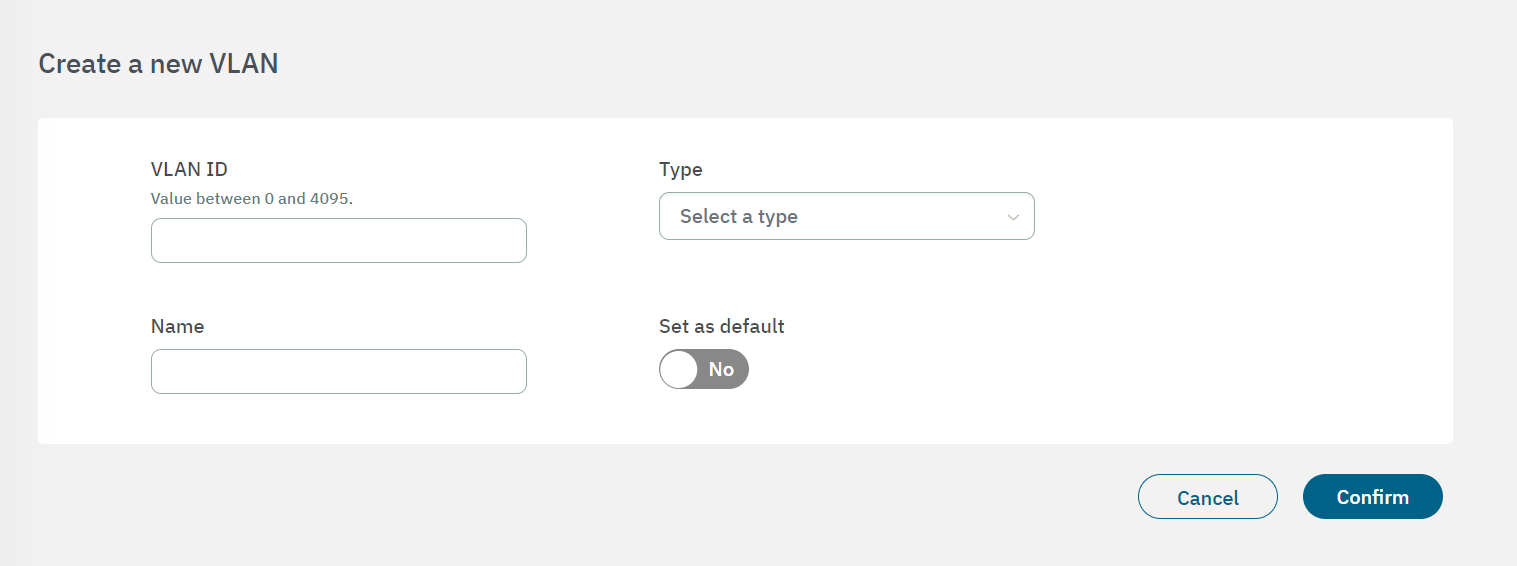
You can configure a VLAN ID in the range from 0 to 4095. By default, we assume that ID = 0 is for switch default and ID = 4095 for access denied.
The Type field displays a drop-down menu with the different types of VLANs that you can configure:
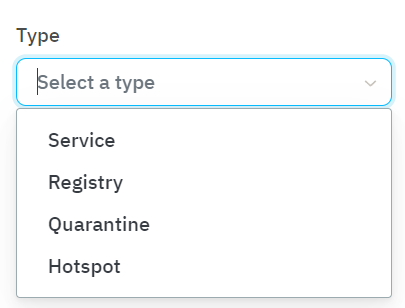
Service: VLAN type that provides access to service.
Registry: VLAN type that provides access to the registry before network access, Captive portal (Guest and external collaborators), and BYOD use cases.
Quarantine: For assets that do not complain with the authentication process to access the network. This VLAN is normally used to isolate user devices that do not comply with security policy or carry out malicious activities.
Hotspot: This VLAN is normally used to configured hotspot VLANs.
Note
If the VLAN type is unclear, it is better to configure it as a “Service” VLAN.
Enabling the “Set as default” flag allows you to set a default VLAN, which will become the default VLAN in the network once configured.
For instance, if we select the action “Quarantine” in Operate > NAC > Sessions to send a user device to quarantine, the Quarantine VLAN defined as default will be used. See Sessions for more information regarding this feature.
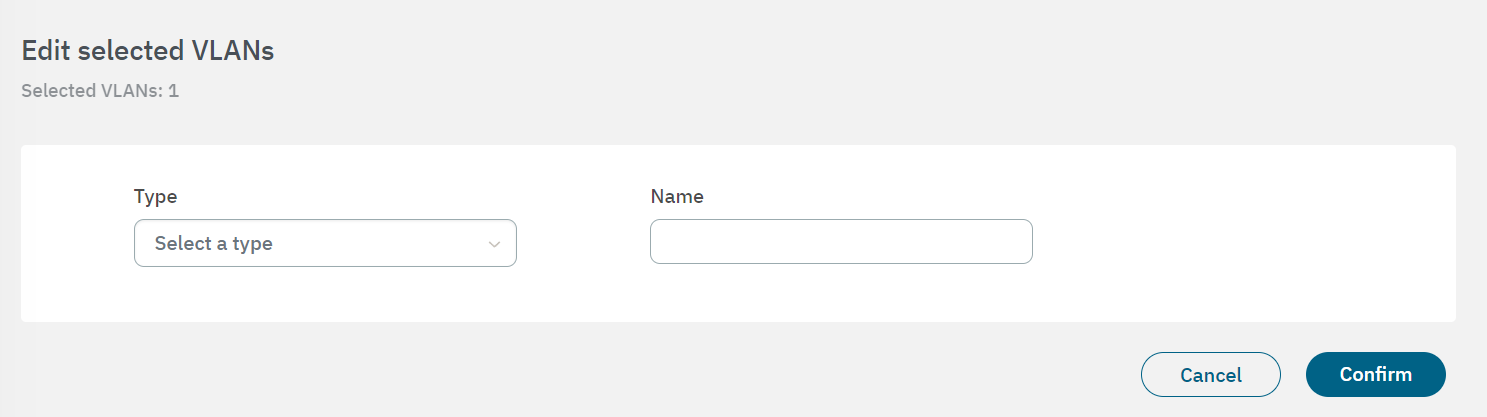
3.2.2.1.2.2. Editing a VLAN
By selecting a VLAN from the table, it will display the Action row at the bottom of the window.
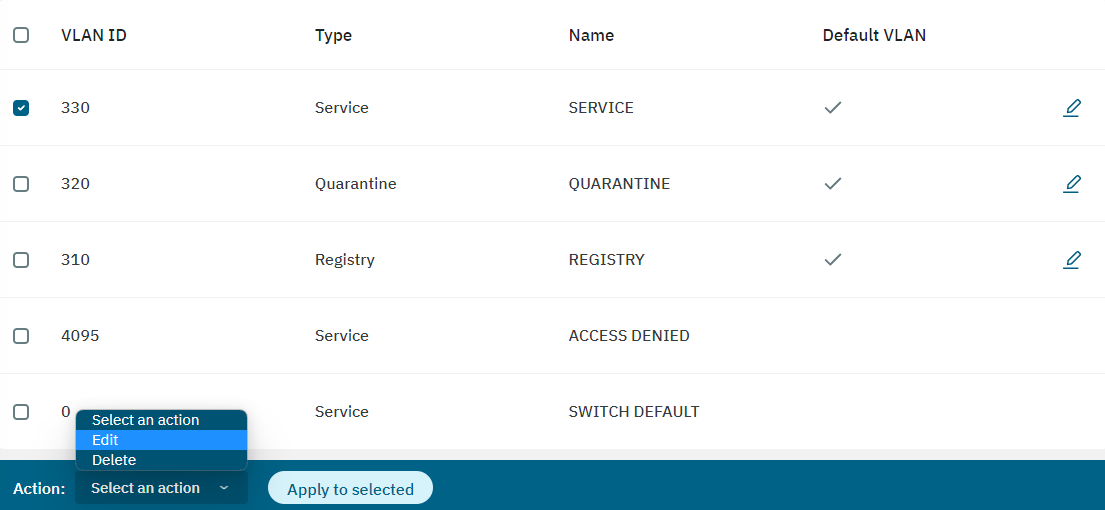
Select Edit and click on Apply to selected. It will display a window where you can modify the current configuration.
If you want to edit multiple VLANs at once, click on the Edit all button located on the toolbar. It will display the same window, but the configuration will be applied to all VLANs.

Note
To configure VLANs, especially the quarantine VLAN, they must already exist in the infrastructure.