3.2.2.7.3.2. Zones
The VPN Gateway serves as both a Layer 3 Firewall and a means to manage traffic flows within the VPN tunnel. The initial step involves identifying and configuring different zones within your network, which facilitates effective traffic management for the VPN. An example of network segmentation could be, Servers Zone, Servers DMZ, Corporate Firewall, and Frontend Firewall.
To ensure communication between the frontend and the zones of standard and critical servers, the traffic passes through the Corporate Firewall. As a result, these zones will be considered subzones of the previous zone. To achieve this configuration, you need to create these zones and subzones within the zone configuration section.
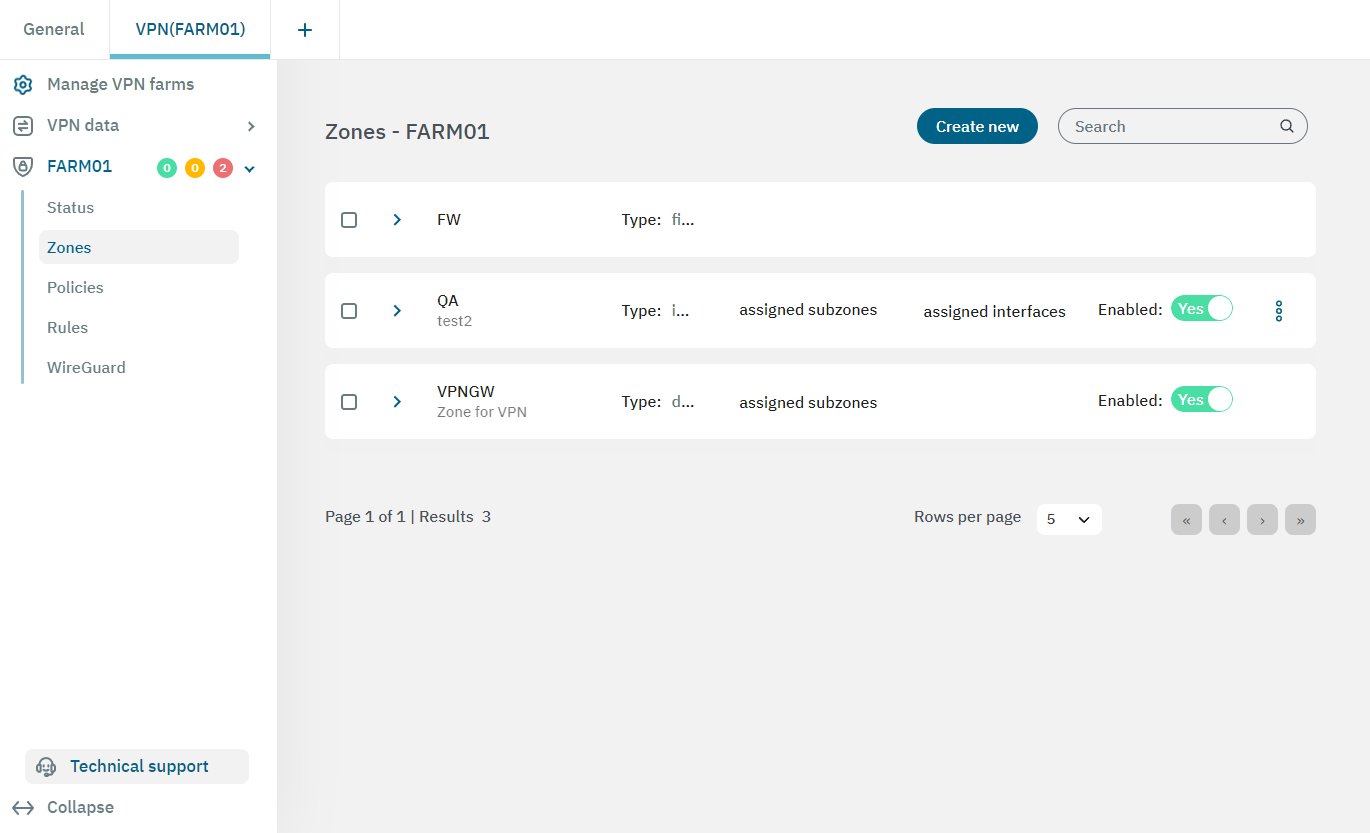
This view displays the zone name, its type, the assigned subzones (if any), the assigned interfaces (if any), and the enable flag.
From the three dot icon located at the right end of the zone row, you can edit, or delete the correspondent zone.
The firewall (fw) zone itself is already created by default.
You can create the rest of zones you need by clicking on the Create new button. It will display the following configuration window:
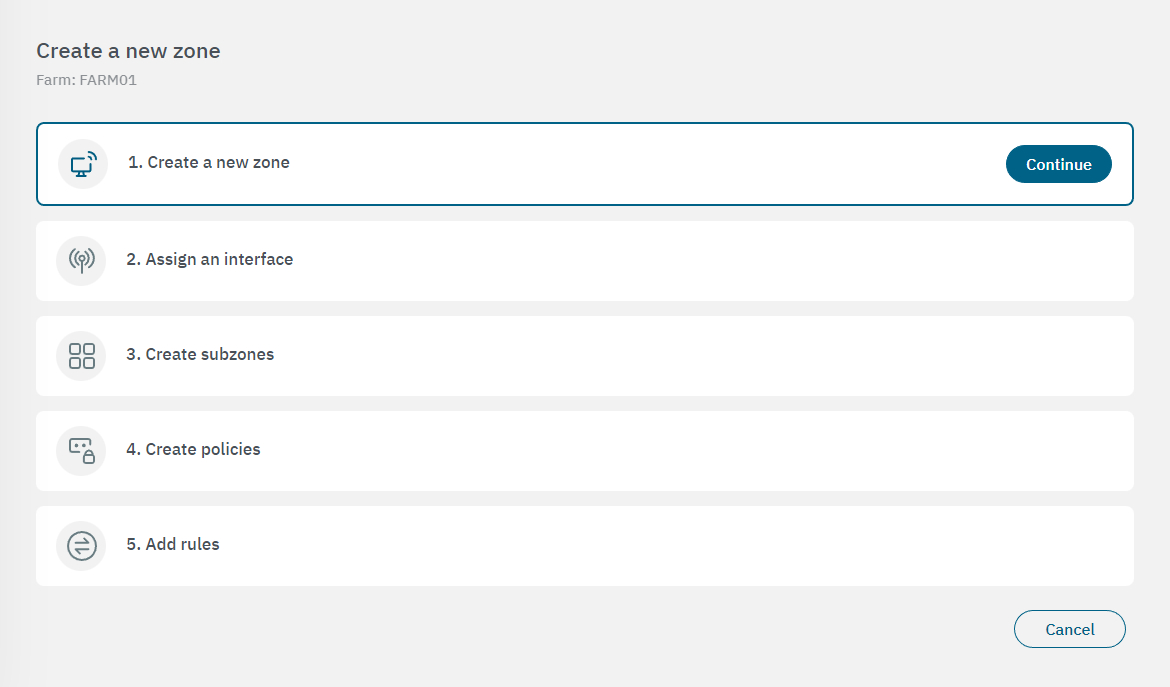
Click on Continue to open the first properties configuration window. After configuring each property, click on “Continue” again to proceed to the next configuration window.
3.2.2.7.3.2.1. Create a new zone
In the following image you can see the fields displayed in the “Create a new zone” property:
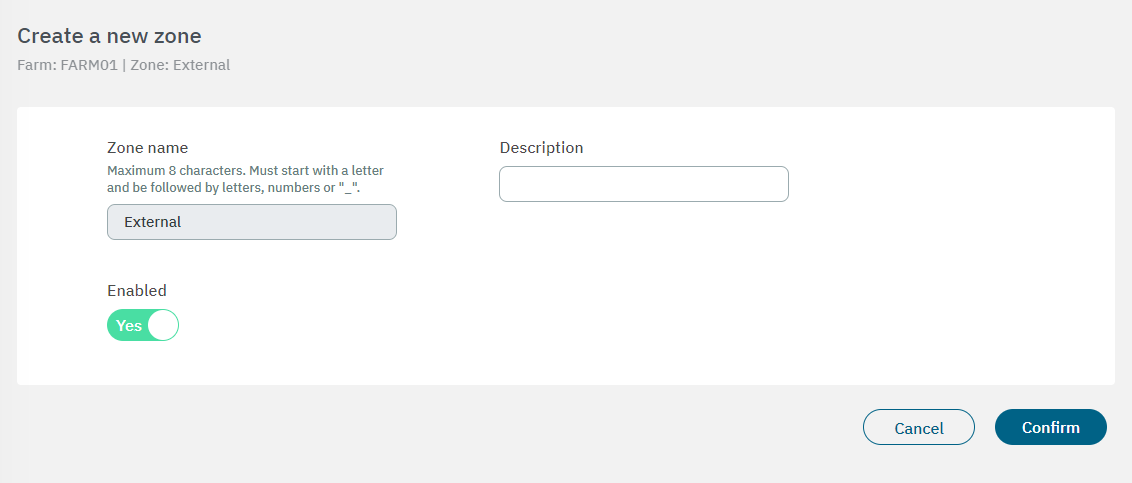
Name: The zone identification name must start with a letter followed by alphanumerical characters or underscore. It must have a maximum of 8 characters. - Example: “FWCorp”
Description: Here you can add a Zone description.
Enabled: Flag to enable or disable the zone.
After finishing the configuration, click on Confirm. It will lead you to the first configuration window.
3.2.2.7.3.2.2. Assign an interface
In the following image you can see the fields displayed in the “Assign an interface” property:

VPN Node: Select the node for the interface.
Interface: Select the network interface to associate with.
Description: You can add descriptive comment.
After finishing the configuration, click on Confirm. It will lead you to the first configuration window.
3.2.2.7.3.2.3. Create subzones
You can skip this step if you don’t want to create subzones. In the following image you can see the fields displayed in the “Create subzones” property:
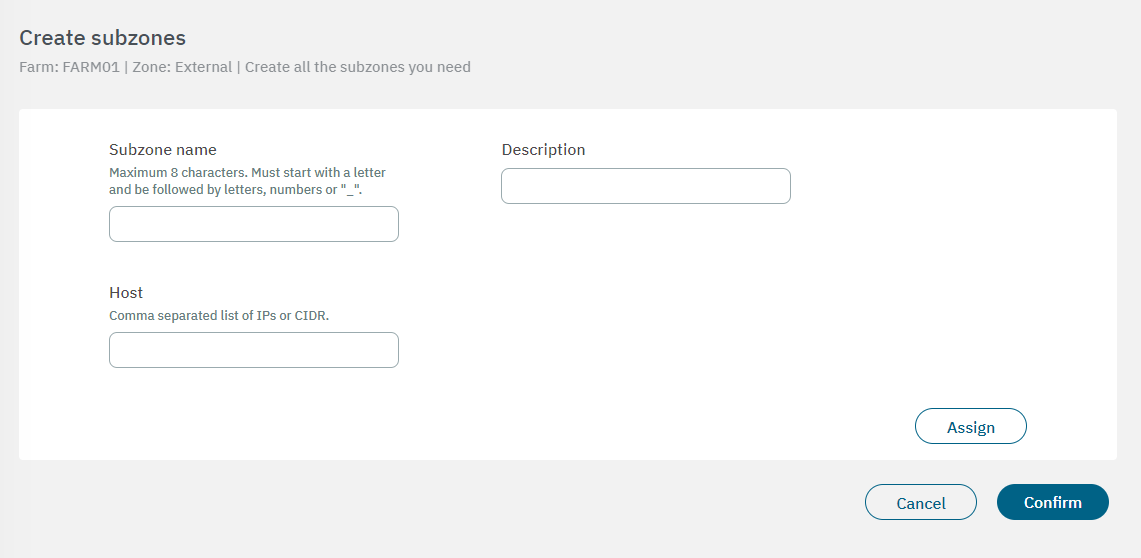
Subzone name: The subzone identification name must have a maximum of 8 characters, start with a letter and be followed by letters, numbers or “_”.
Description: You can add descriptive comment
Host: Comma separated list of IPs or CIDR.
After finishing the configuration, click on Confirm. It will lead you to the first configuration window.
3.2.2.7.3.2.4. Create policies
You can skip this step if you don’t want to create policies for this specific zone. From this configuration step, in addition to creating a new policy, you can directly assign it to the zone you are creating. In the following image you can see the fields displayed in the “Create policies” property:
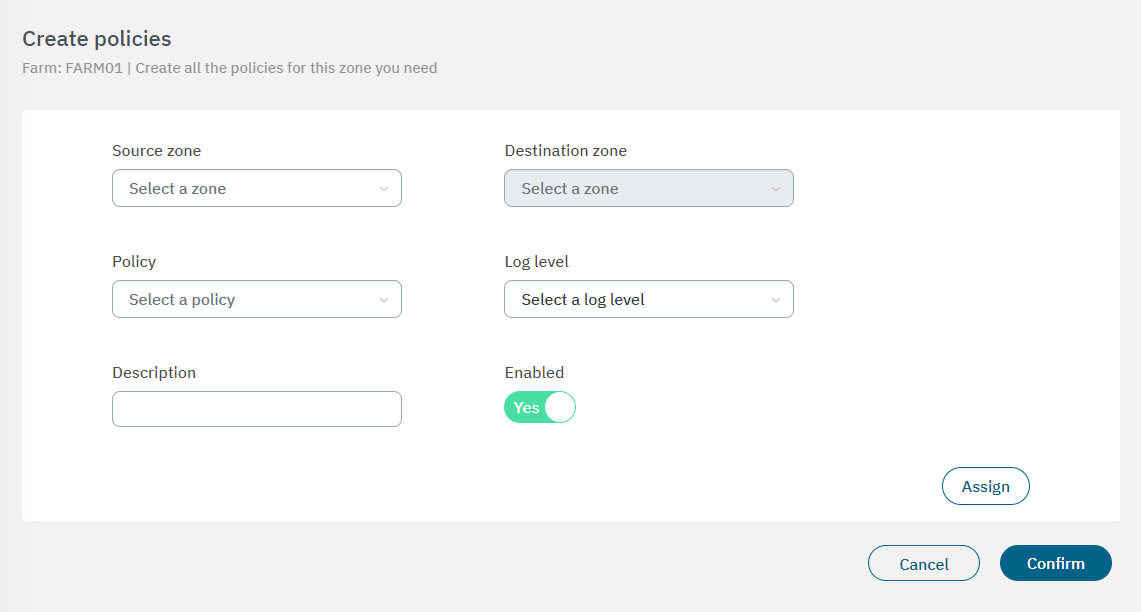
Source zone: Zone from which the communication occurs.
Destination zone: Zone to which the communication occurs.
Policy: Action we want to perform with the communication.
Log Level: Select the log level.
Description: Description of the policy.
Enabled: Flag to enable or disable the policy.
After finishing the configuration, click on Confirm. It will lead you to the first configuration window.
3.2.2.7.3.2.5. Add rules
You can skip this step if you don’t want to create rules for this specific zone. In the following image you can see the fields displayed in the “Addd rules” property:
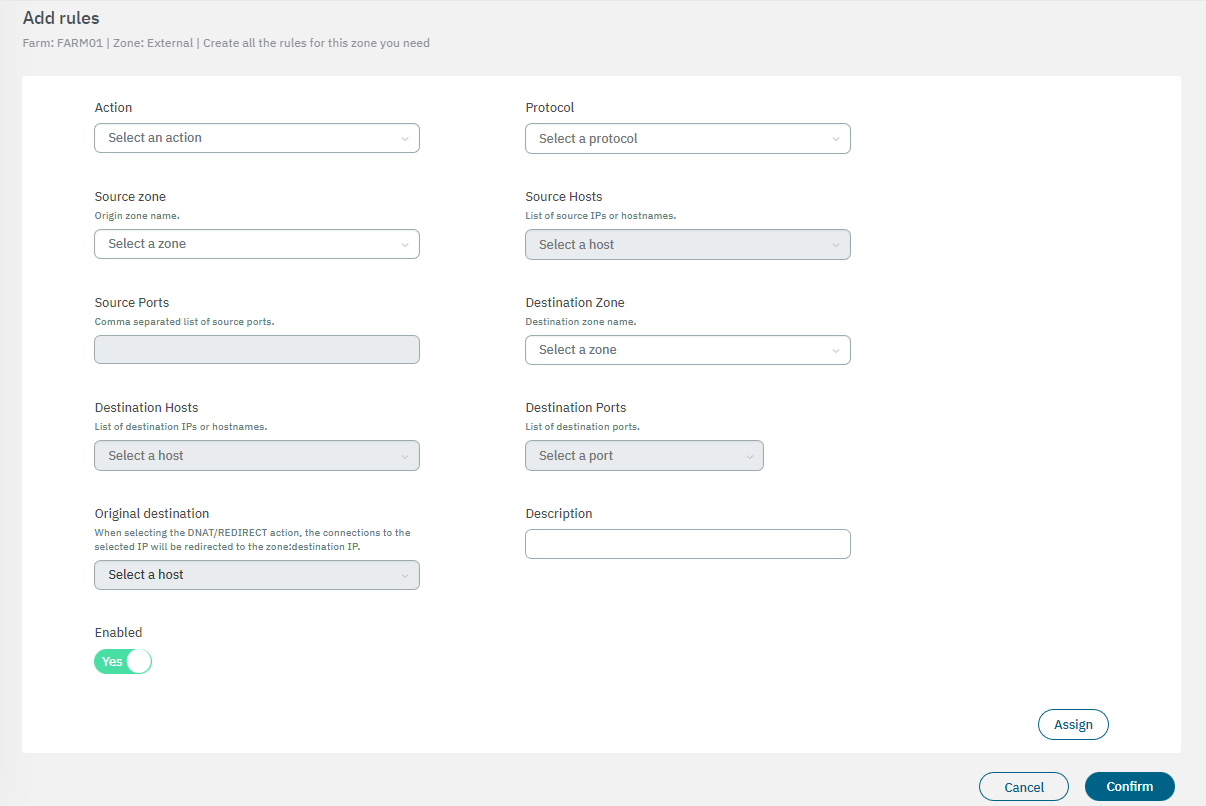
Action: Select the instruction of the rule (ACCEPT, DNAT, DROP, LOG & ACCEPT, LOG & REJECT, REDIRECT, REJECT).
Protocol: Select the rule protocol (All, TCP, UDP, ICMP, ESP)
Source zone: Origin zone name.
Source hosts: Select it from a list of source IPs or hostnames.
Source ports: Comma-separated list of source ports.
Destination zone: Destination zone name.
Destination hosts: Select a destination host to the rule.
Destination ports: Select a destination port to the rule.
Original destination: When selecting the DNAT/REDIRECT action, the connections to the selected IP will be redirected to the zone:destination IP.
Description: Add a description to the rule.
Enabled: Flag to enable or disable the rule.
After finishing the configuration, click on Confirm to finally create a new zone.