5.10.5. OpenVPN Certificates Configuration
In the 2SRA use case, the use of OpenVPN as a VPN service requires the use of certificates.
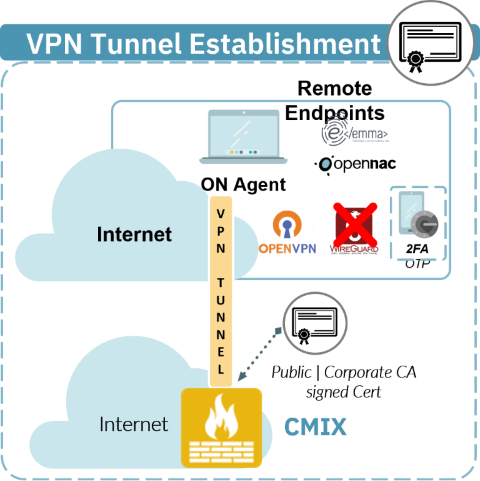
This section shows how to configure CA for OpenVPN.
5.10.5.1. CA Configuration
A) Generate CA
It is necessary to have a certificate to associate to the Ipsec tunnel that we are going to create, so if you already have a PKI infrastructure you can use your own CA and the server certificates created with it. Go to the following section of this documentation to add your CA.
If you do not have your own CA or prefer to use a new one, follow these steps:
Access CMI via SSH.
Download easy_rsa to /opt and unzip it:
cd /opt
wget -c https://github.com/OpenVPN/easy-rsa/releases/download/v3.0.6/EasyRSA-unix-v3.0.6.tgz
tar xvzf EasyRSA-unix-v3.0.6.tgz
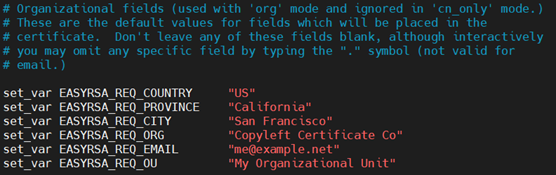
Edit and configure the variables file with the data of your organization:
Inside the directory /opt/EasyRSA-v3.0.6/, copy the “vars.example” file with name “vars” and modify its permissions
cd EasyRSA-v3.0.6/
cp vars.example vars && chmod +x vars
vim vars
Edit the newly created file “vars”.
Modify the following parameters according to your organization:
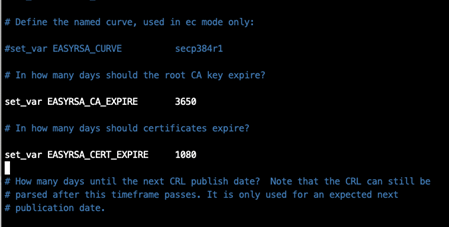
Then you have to modify the expiration time of the CA and the certificates. You will need to uncomment the following lines and adapt the time according to your needs:
Having modified the default data, create your CA by following these steps:
Initialize the PKI environment:
./easyrsa init-pki
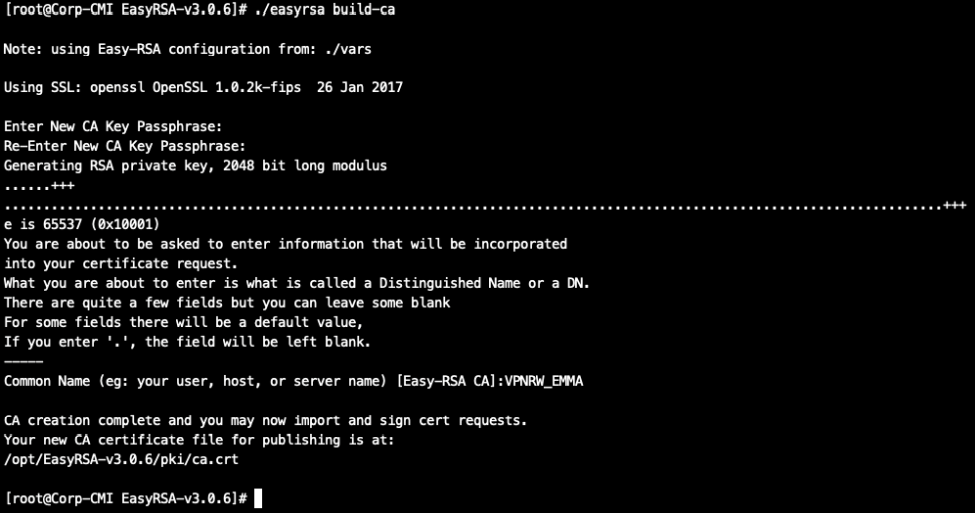
Create your CA: You will need to protect your CA with a strong password (write it down, as it will be needed in section “C) GENERATE A VPN SERVER CERTIFICATE USING THE CA”):
./easyrsa build-ca
It will ask you to enter a password and then a Common Name. In this example the Common Name is VPRW_EMMA:
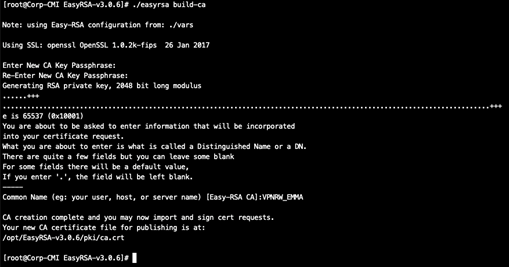
The CA will be available in /opt/EasyRSA-v3.0.6/pki/ca.crt on the server. Copy it locally for later use.
scp root@<IP>:/opt/EasyRSA-v3.0.6/pki/ca.crt <LocalDirectory>
If you want to check that the certificate was created with the parameters used, run the following command:
openssl x509 -in /opt/EasyRSA-v3.0.6/pki/ca.crt -text -noout
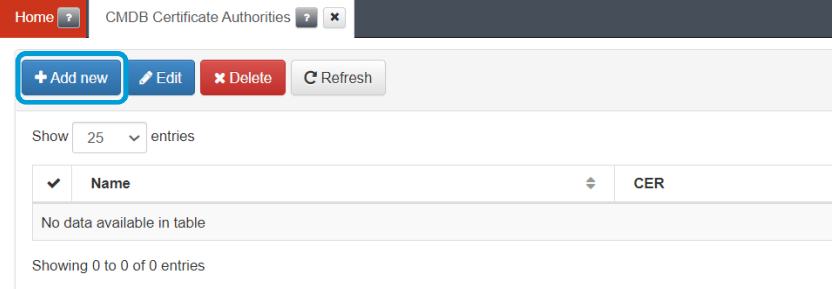
B) Register the CA in the CMDB
Once the CA has been created, it must be registered in the BackEnd so that it is available and can be used in the VPN Gateway.
Connect to the management console and go to the “CMDB -> CMDB Certificate Authorities” menu and use the “Add new” button to add your CA:
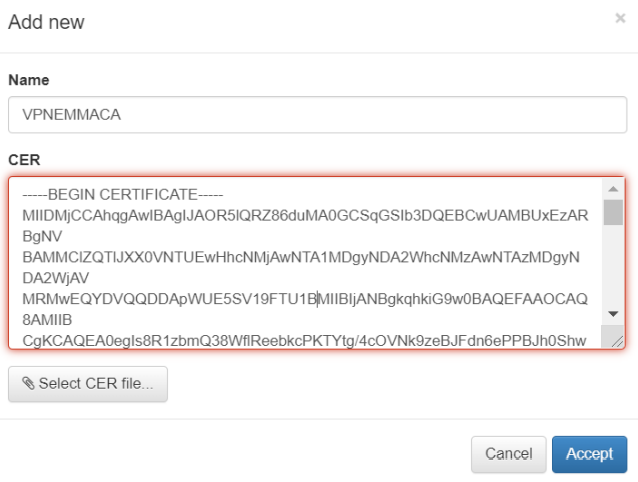
Give the new CA a name and use the “Select” button to select the file with the CA. You can also copy the content of the CA directly into the certificate area.
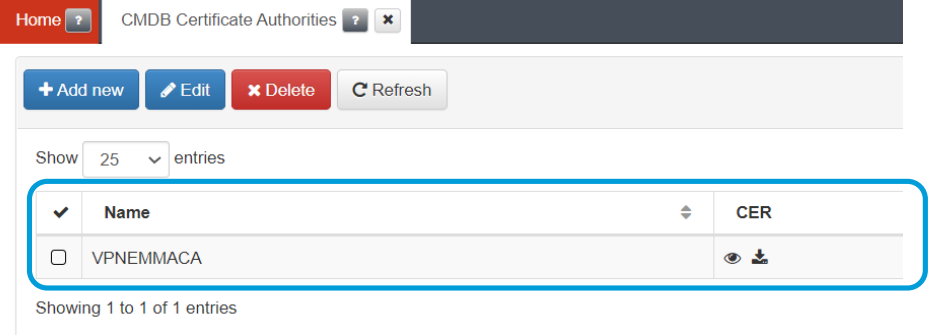
Click on accept and the CA will be loaded:
C) Generate a VPN server certificate using the CA
Once the CA is created we can use it to create new certificates.
Generate a new CSR (new certificate request), return to the same directory where the CA was generated and execute the following request:
./easyrsa gen-req VPN_EMMA_RW_SRV nopass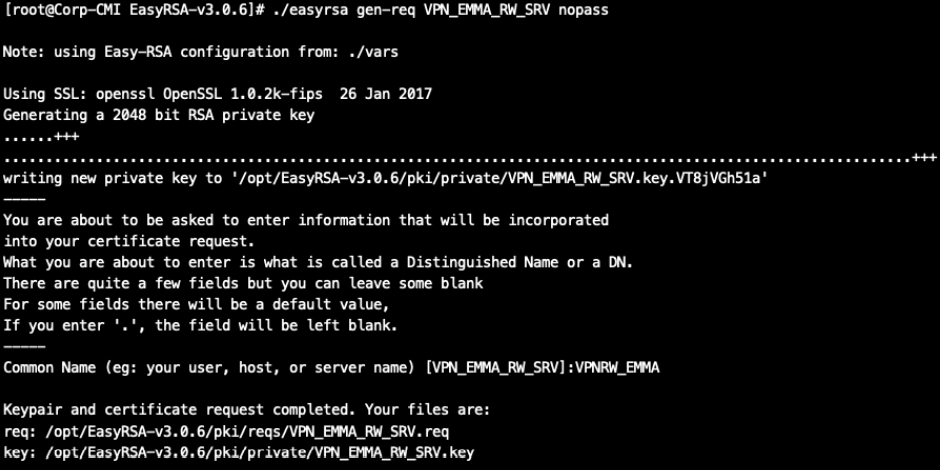
We will sign this request with our CA (for this we will need the password used in section “A) Generate a CA”):
./easyrsa sign-req server VPN_EMMA_RW_SRV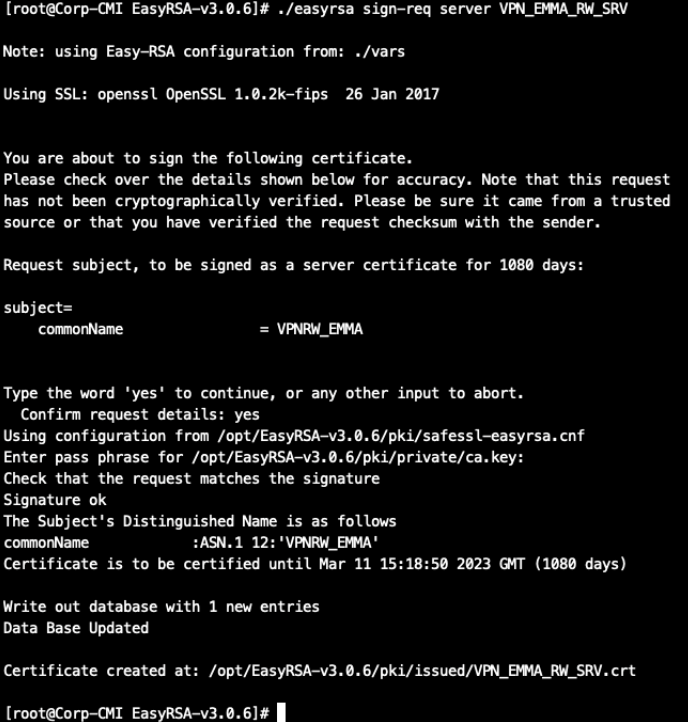
It will generate two files:
The certificate file: /opt/EasyRSA-v3.0.6/pki/issued/VPN_EMMA_RW_SRV.crt
The private key: /opt/EasyRSA-v3.0.6/pki/private/VPN_EMMA_RW_SRV.key
Copy both files to upload them to the management console for section D) “Register the server certificate in the CMDB”.
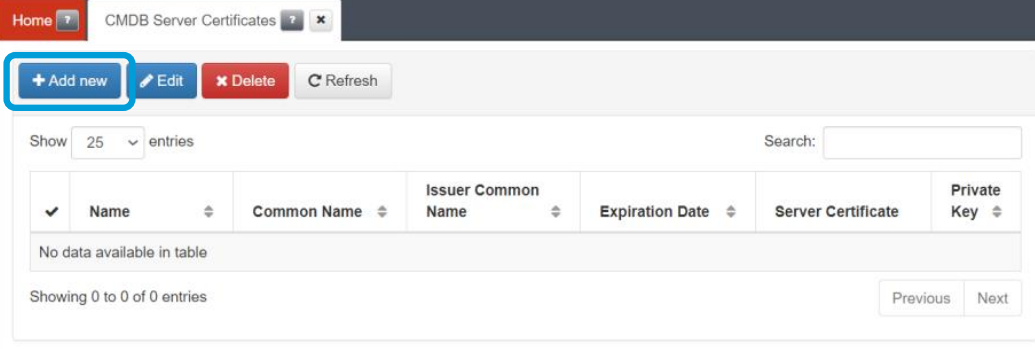
D) Register the server certificate in the CMDB
Once the server certificate has been created, it must be registered in the BackEnd so that it is available and can be used in the VPN Gateway.
Connect to the administration console and go to the “CMDB -> CMDB Server Certificates” menu and use the “Add new” button to add your Certificate:
Give the certificate a name and use the “Select” button to select the file with the certificate and then the private key. You can also copy the content directly into the certificate and private key area:
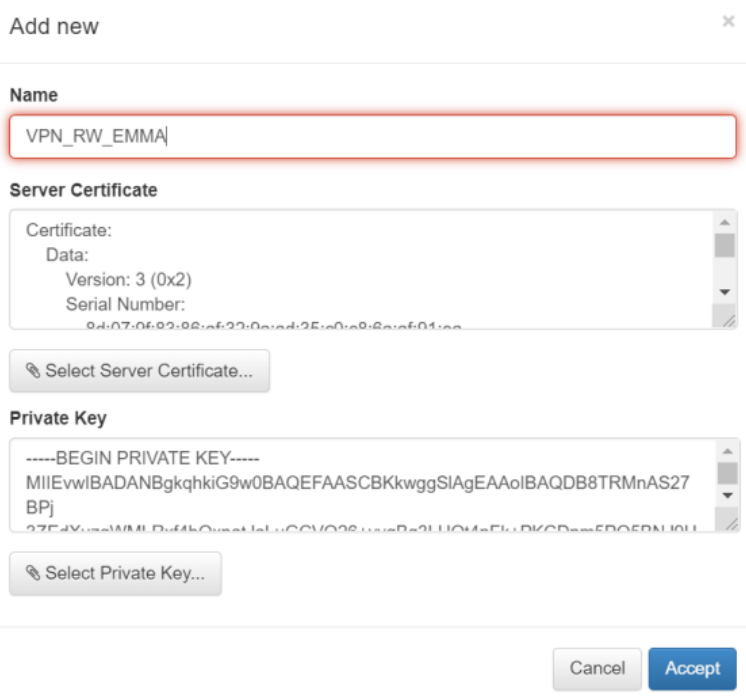
Click on accept and the CA will already be loaded
