Wizards
Initial Configuration Wizard
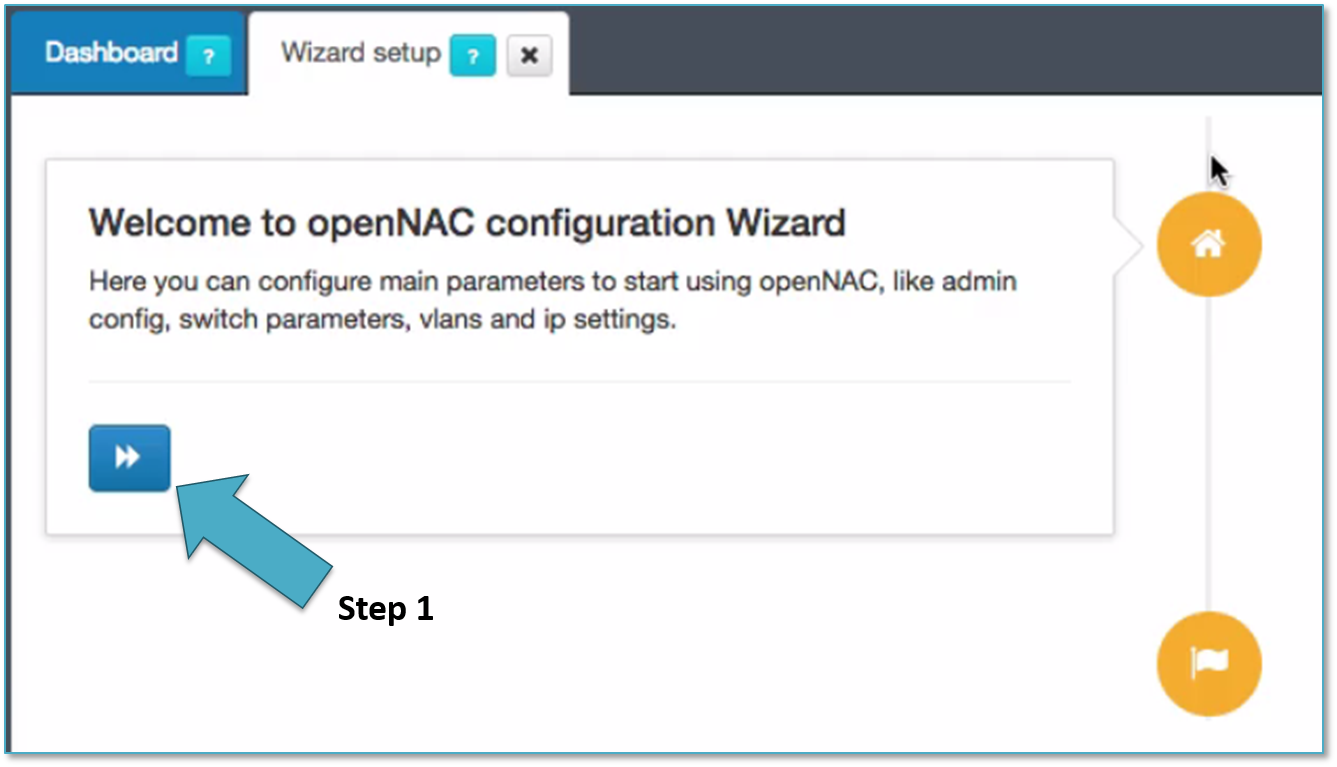
As soon as openNAC Core is deployed a configuration Wizards is launched to simplify network access integration, with this Wizards the system will ask for a common information such as switch parameters, VLANs, DHCP scopes, Captive portal information…
This configuration wizard can be launched on demand to modify parameters affected by the wizard, to do that go to Configuration -> Wizards -> Initial configuration Wizard, to follow the wizard press the button shown by step 1.
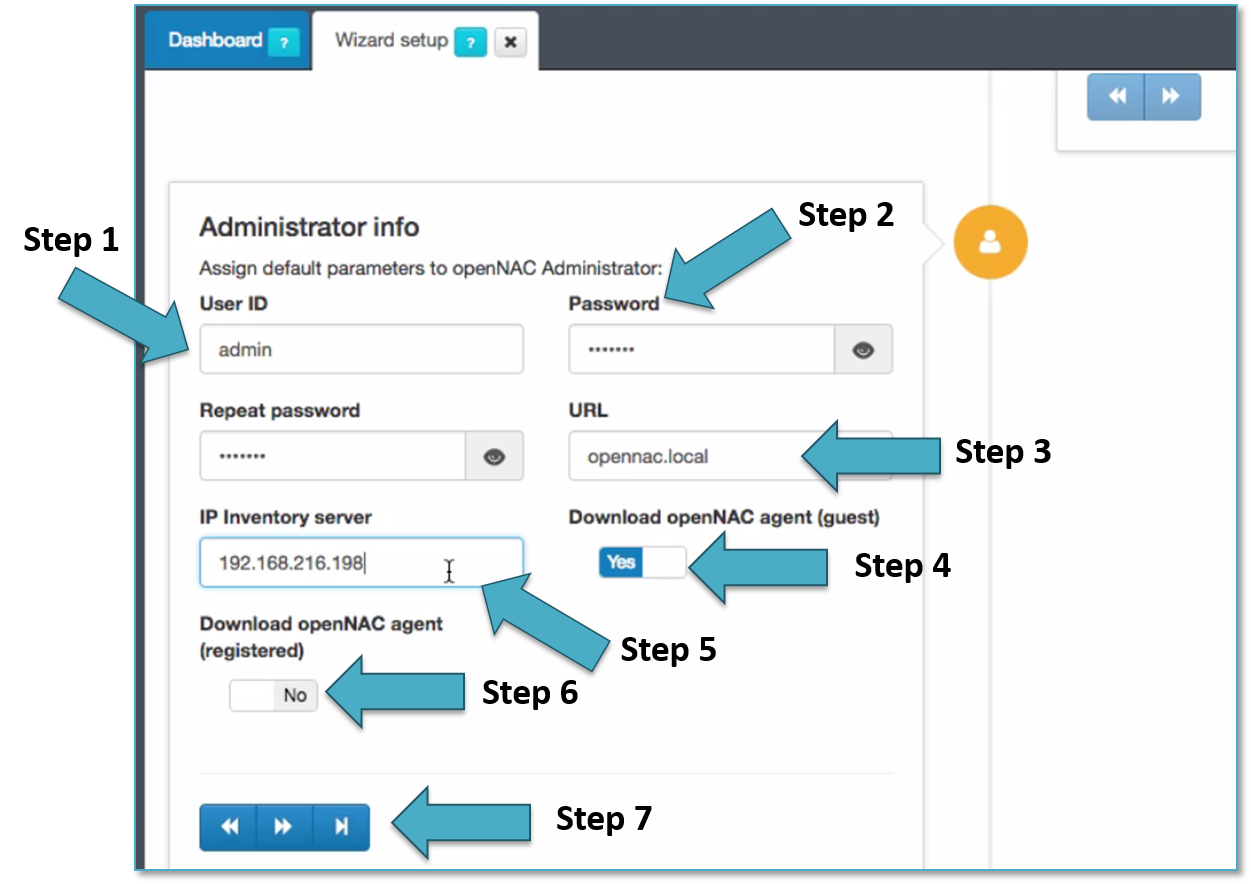
As soon as the initial configuration wizard is launched different information should be filled up, this section is called Adminitrator info.
- Step 1 allows to change default product User ID, admin is the default one.
- Step 2 allows to change admin’s password.
- Step 3 allows to change the URL assigned to the Web administration portal, by default the value is opennac.local.
- Step 4 allows to define, permit or deny to download openNAC Agent when Guest access requests are used by captive portal
- Step 5 allows to change the IP assigned to the user portal or captive portal, this will be available this is also used by openNAC Agent to connect to the openNAC Core.
- Step 6 allows to define, permit or deny to download openNAC Agent when the user devices are being registered using the registry captive portal.
- Step 7 allows to move forward to the following steps.
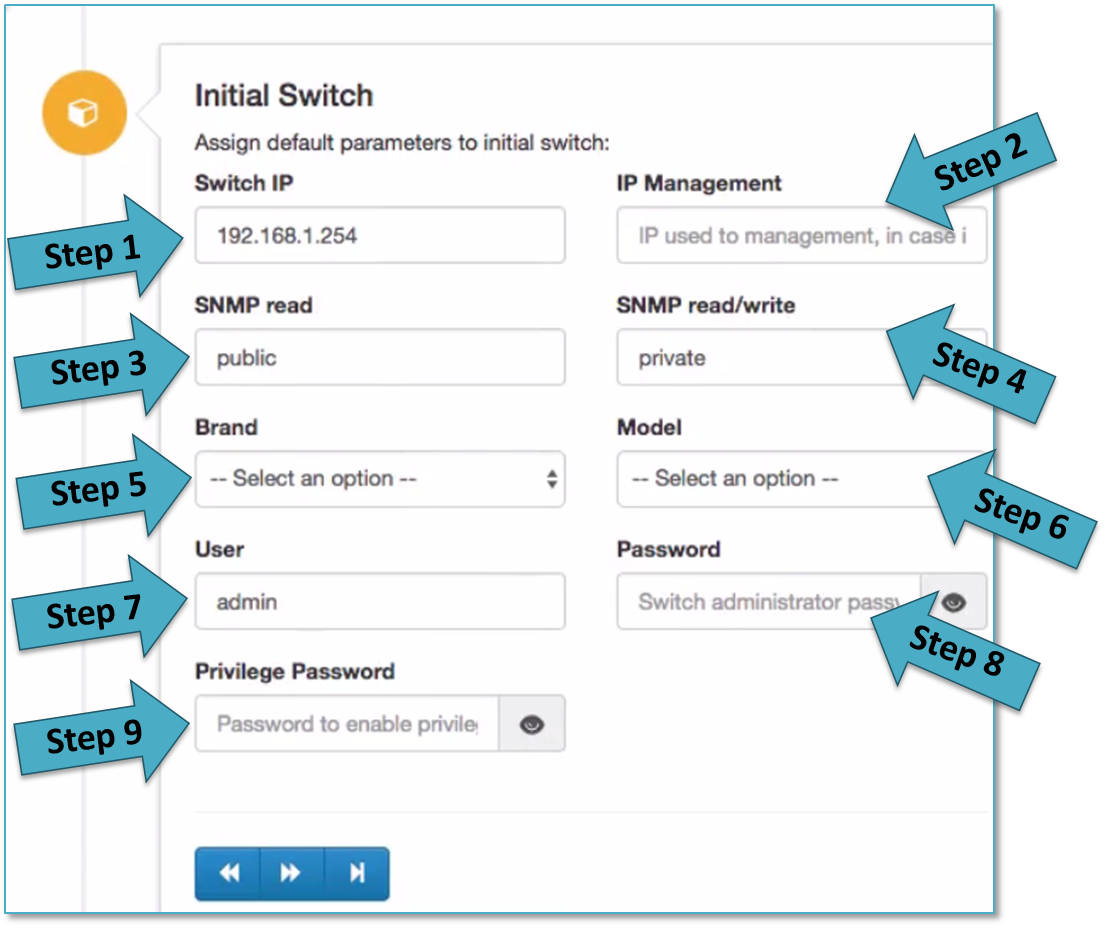
The following section called Initial switch includes the following fields that should be filled up. This section allow to integrate the first switch in the deployment, this is very useful for POCs.
- Step 1 allows to add the switch IP, this IP is the IP used to connect to the switch from openNAC Core.
- Step 2 allows to add the management IP when management IP is different than switch service IP.
- Step 3 allows to configure the snmp read community to be used by openNAC and integrate with the switch, read only tasks.
- Step 4 allows to configure the snmp read/write community to be used by openNAC and integrate with the switch. Read/write tasks.
- Step 5 allows to configure the Brand for the switch that is being integrated (for instance, Cisco, HP and many others).
- Step 6 allows to configure the model used in the integration (for instance, 2900, 3500…and many others…)
- Step 7 allows to configure the user name used by openNAC to manage the switch.
- Step 8 allows to configure the password used by openNAC to manage without privileges the switch.
- Step 9 allows to configure the privilege password used by openNAC to manage the switch.
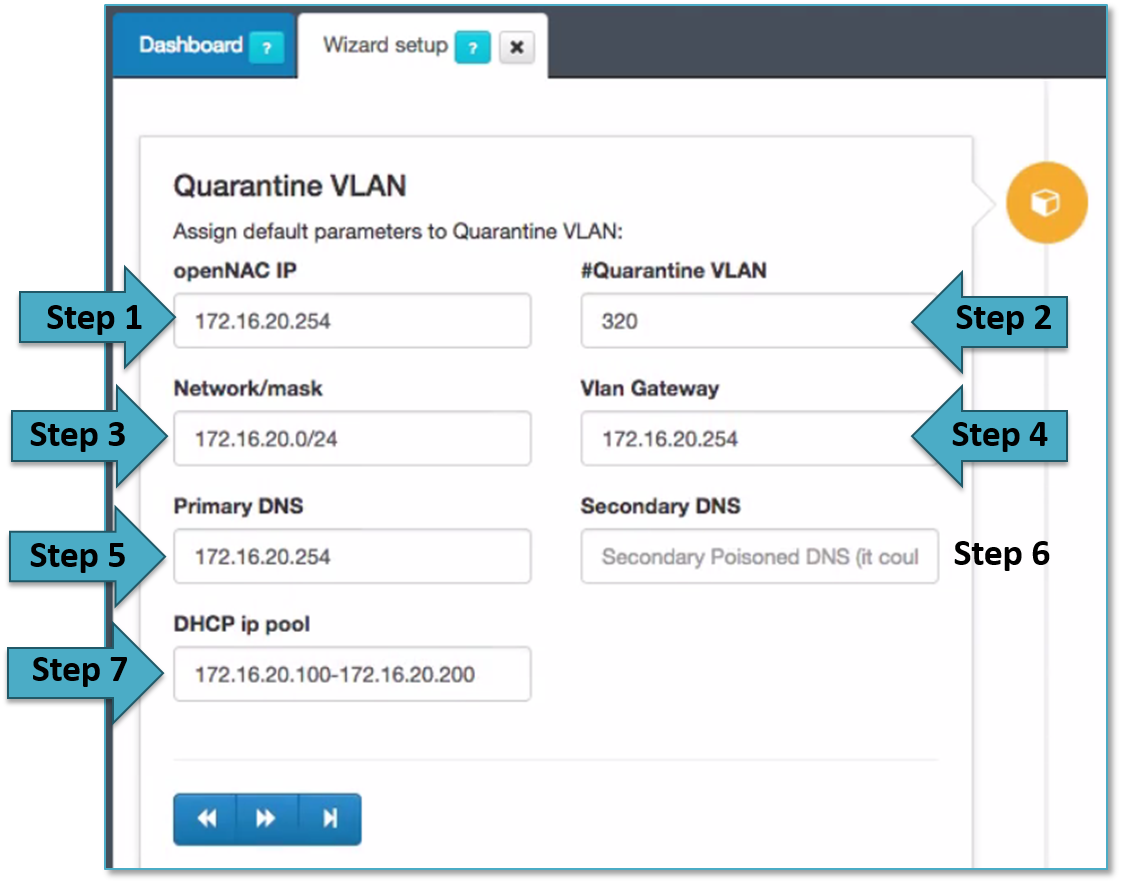
The following section called Quarantine VLAN includes the following fields that should be filled up.
This section allows to create a Quarantine VLANs in the initial openNAC deployment, if you want to send to any user to quarantine network these change must be done.
openNAC can be a DHCP server and DNS server for this network, in that way this assistant allows to configure DHCP scopes and define the DNS for the clients, the DNS is poisoned so all user’s traffic is forwarded to the captive portal to inform the user and revaluate policy.
- Step 1 allows to add the IP for the openNAC server in the Quarantine network (this is only an inventory). In case openNAC requires this IP, this IP should be change using ssh and through linux commands and configuration files as explained in section Install and deploy openNAC Core, including this IP will be created an exception in the DHCP server to avoid IP assignment overlapping. This IP is that is used to access to the openNAC Core IP in the Quarantine network, normally these VLANs are routed and will be used the VLAN Service.
- Step 2 allows to define the VLAN ID for the quarantine VLAN.
- Step 3 allows to define the DHCP Scope for this network.
- Step 4 allows to define the default gateway assigned by the DHCP to this network.
- Step 5 allows to configure the Primary DNS assigned to the clients through, remember that in case openNAC DNS is not used in the network, the DNS must be poisoned pointing to openNAC Core Ips.
- Step 6 allows to configure the secondary DNS assigned to the clients through DHCP.
- Step 7 allows to define the name of the quarantine scope used by the configuration files.
openNAC Core can provide DNS and DHCP services in the network if is required, this is not mandatory and commonly corporate DNS and DHCP services are used.
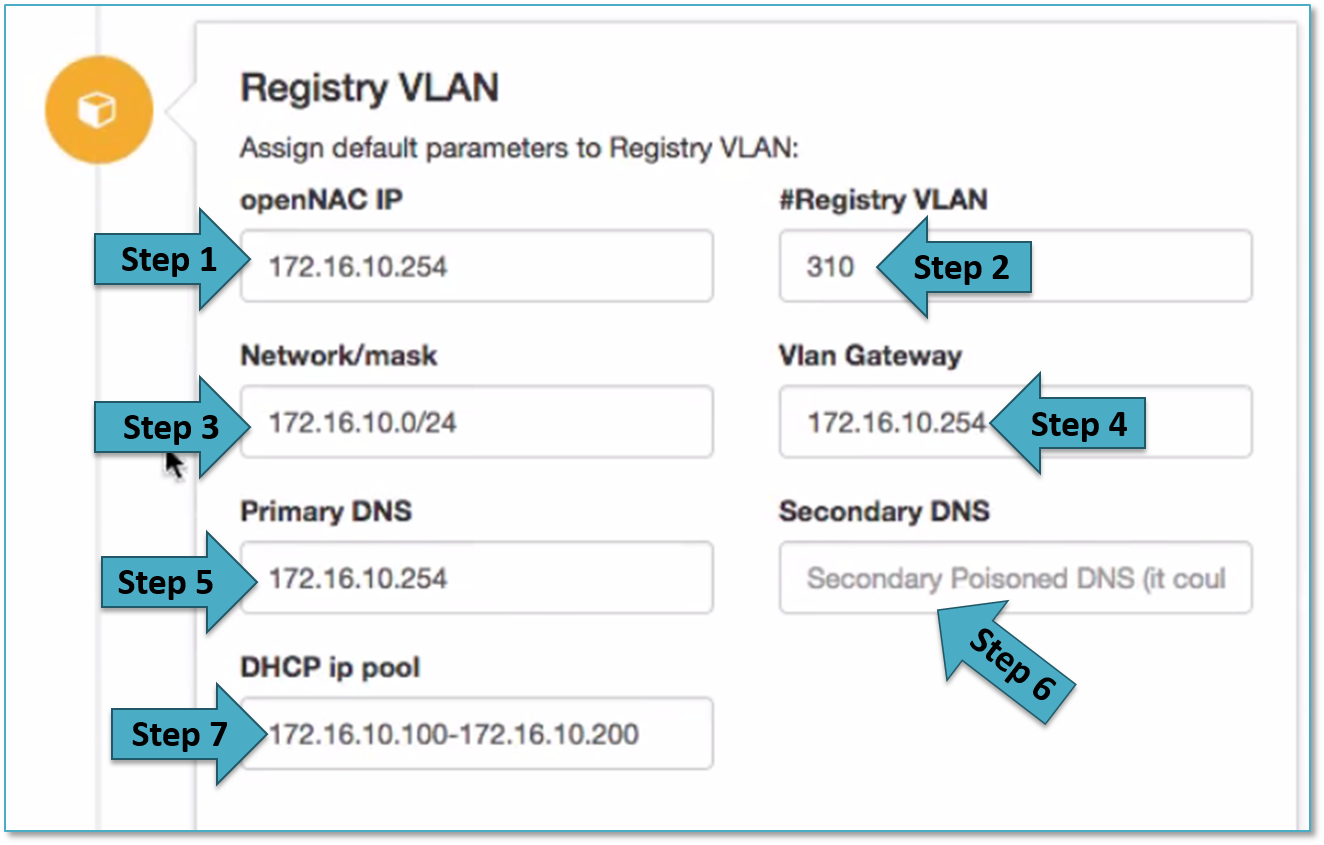
The following section called Registry VLAN includes the following fields that should be filled up.
This section allows to create a Registry VLANs in the initial openNAC deployment, if you want to send to any user to registry network these change must be done, registry VLAN can be used in Guest/Partner management network, BYOD deployments and others.
openNAC can be a DHCP server and DNS server for this network, in that way this assistant allows to configure DHCP scopes and define the DNS for the clients, the DNS is poisoned so all user’s traffic is forwarded to the captive portal that allows Guest and BYOD management capabilities.
- Step 1 allows to add the IP for the openNAC server in the Registry network (this is only an inventory). In case openNAC requires this IP, this IP should be change using ssh and through linux commands and configuration files as explained in section Install and deploy openNAC Core, including this IP will be created an exception in the DHCP server to avoid IP assignment overlapping. This IP is that is used to access to the openNAC Core IP in the Registry network, normally these VLANs are routed, and will be used the VLAN Service.
- Step 2 allows to define the VLAN ID for the Registry VLAN.
- Step 3 allows to define the DHCP Scope for this registry network.
- Step 4 allows to define the default gateway assigned by the DHCP to this network.
- Step 5 allows to configure the Primary DNS assigned to the clients through, remember that in case openNAC DNS is not used in the network, the DNS must be poisoned pointing to openNAC Core Ips.
- Step 6 allows to configure the secondary DNS assigned to the clients through DHCP.
- Step 7 allows to define the name of the registry scope used by the configuration files.
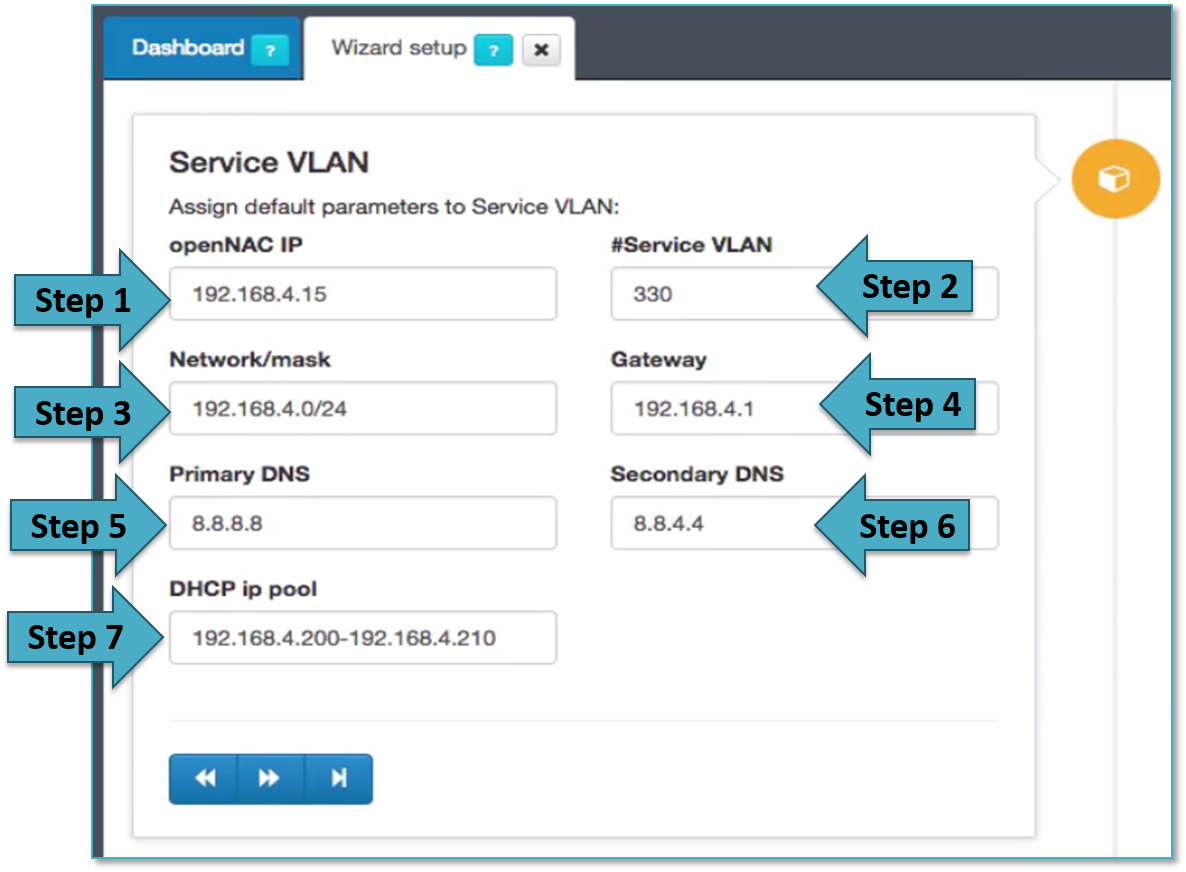
The following section called Service VLAN includes the following fields that should be filled up.
This section allows to create a Service VLANs in the initial openNAC deployment, if you want to send to any user to the service VLANs this must be defined, Service VLAN is the common VLAN used by employed, this can be modified and expanded including other VLANs an propouses, Network segmentation is a common used case covered by openNAC technologies.
openNAC can be a DHCP server and DNS server for this network, in that way this assistant allows to configure DHCP scopes and define the DNS for the clients, the DNS is poisoned so all user’s traffic is forwarded to the captive portal that allows Guest and BYOD management capabilities.
- Step 1 allows to add the IP for the openNAC server in the Service network (this is only an inventory). In case openNAC requires this IP, this IP should be change using ssh and through linux commands and configuration files as explained in section Install and deploy openNAC Core, including this IP will be created an exception in the DHCP server to avoid IP assignment overlapping. Normally the VLANs are routed and the VLAN Service IP will be used by quarantine and registry VLANs, this will publish captive portals (quarantine, openNAC agent, registry….) to all the networks (Quarantine, registry)
- Step 2 allows to define the VLAN ID for the service VLAN.
- Step 3 allows to define the DHCP Scope for this service network.
- Step 4 allows to define the default gateway assigned by the DHCP to this network.
- Step 5 allows to configure the Primary DNS assigned to the clients through, remember that in case openNAC DNS is not used in the network, the DNS must be poisoned pointing to openNAC Core Ips.
- Step 6 allows to configure the secondary DNS assigned to the clients through DHCP.
- Step 7 allows to define the name of the registry scope used by the configuration files.

As soon as the initial configuration is carried out the system should be restarted.
Important: If the openNAC server doesn’t act as DNS Server (Poisoned) or DHCP server for any VLANs is not required to restart the system.
Join Domain Wizard
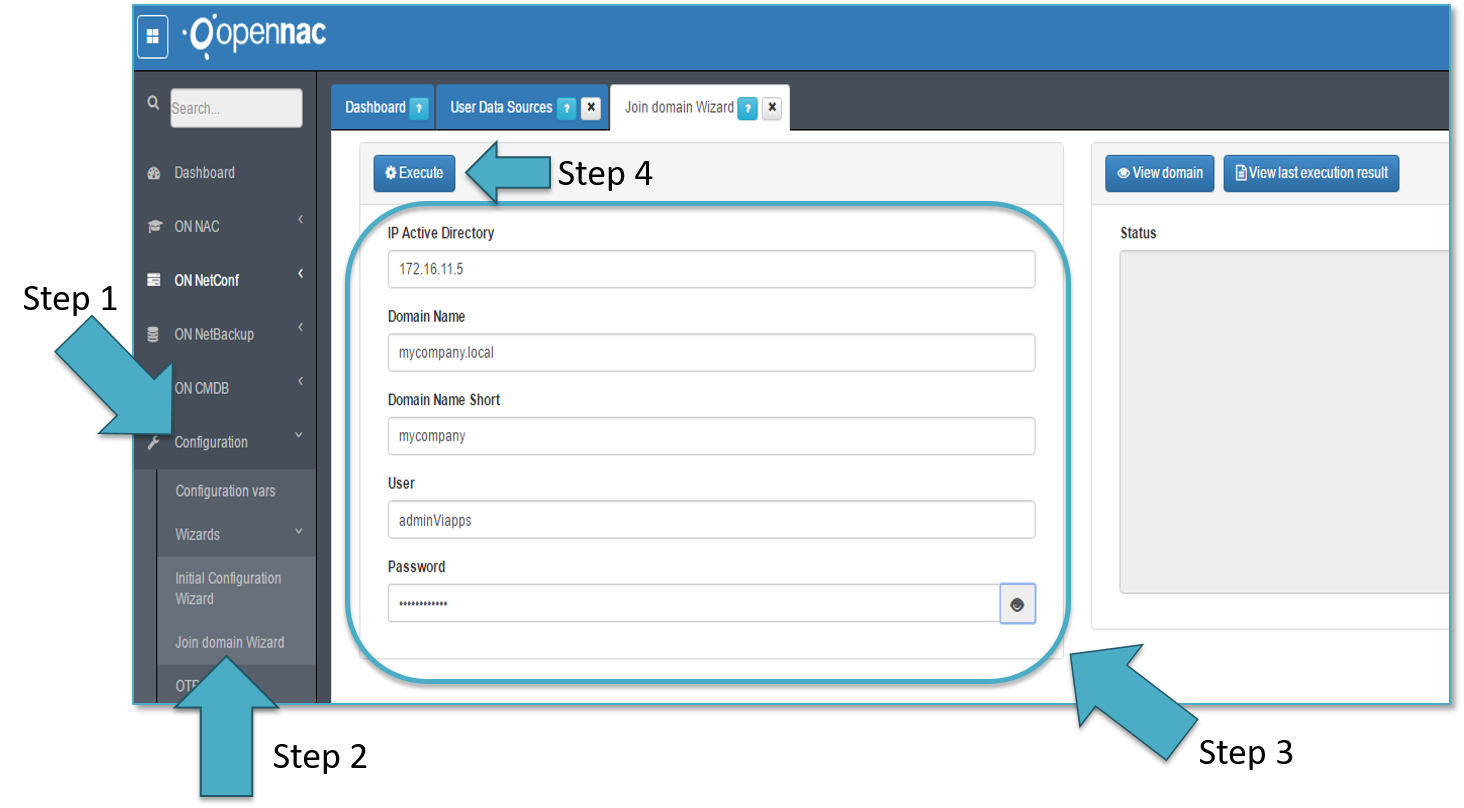
One of the main wizards created in the openNAC is which allows to join the openNAC Core with Active Directory domain.
Going to Configuration -> Join domain Wizard as shown by the step 1 and 2.
A common information must be filled up to procee as show by the step 3:
- IP Active Directory: This is the Ips of domain controller, this can include several one separate with “,”.
- Domain Name: This is the fdqn for the domain.
- Domain Name Short: this is typically the netbios name for the domain.
- User: This is the username that must have right to add workstations to the domain.
- Password: this is the password for the user in the domain.
As soon as we have included the information, the execute button must be pressed as shown by the Step 4.
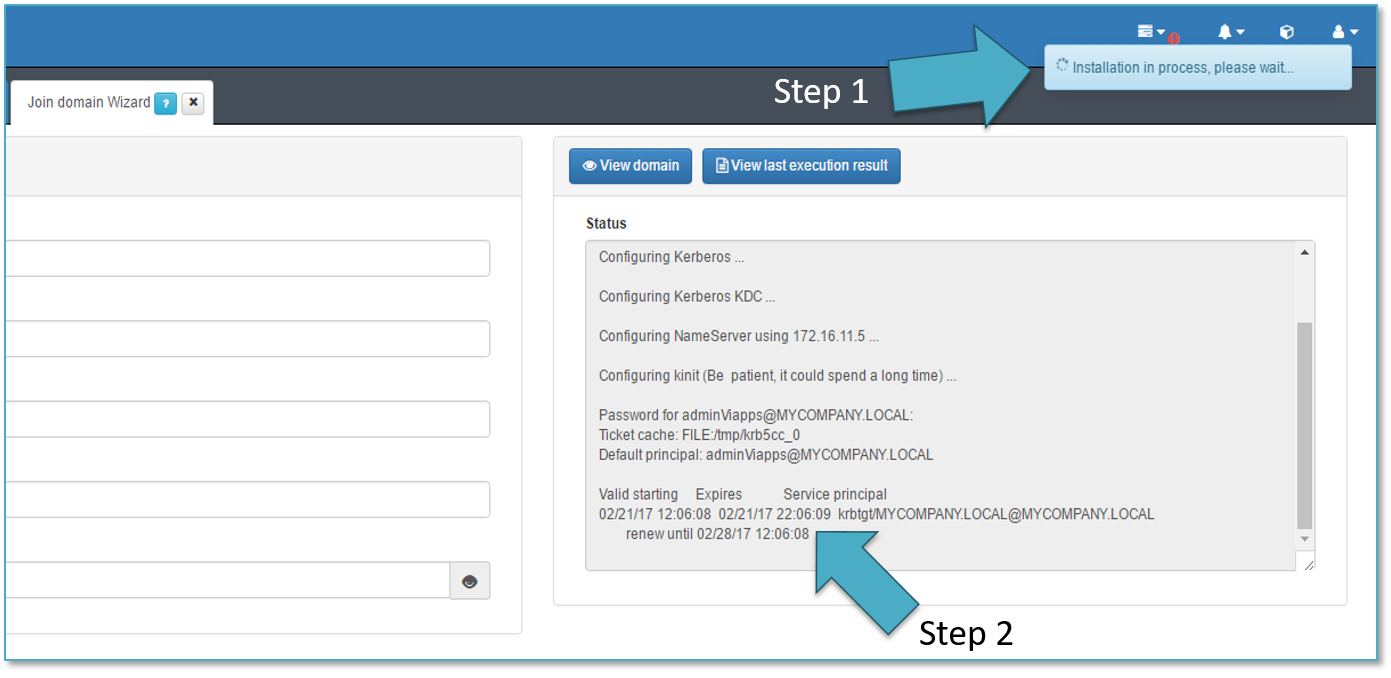
As soon as we execute the process the installation process starts as shown by the Step 1.
A message appears when the process is completed as shown by the Step 2.
As soon as we execute the process the installation process starts as shown by the Step 1.
A message appears when the process is completed as shown by the Step 2.