8.3. OAuth 2.0
OAuth 2.0 , which stands for “Open Authorization 2.0,” is an authorization framework that enables third-party applications to access user’s resources without exposing their credentials. It is a widely adopted standard for secure and delegated access in the context of web and mobile applications.
The primary goal of OAuth 2.0 is to allow users to grant limited access to their resources (such as data, profile information, or services) to third-party applications without sharing their credentials. This is achieved through a process of token-based authorization.
8.3.2. JSON Web Token (JWT)
JSON Web Token (JWT) , defined in an open standard (RFC 7519), facilitates the creation of access tokens for applications. It offers a secure means of transmitting claims, represented as properties or information in JSON format, between two parties. JWTs are digitally signed, either with a private key (as in our case) or a secret key, ensuring easy verification of integrity—modifying a JWT token renders it invalid, as the signature cannot be correctly validated.
The use of JWT tokens enhances security in certain cases, such as by embedding the Public IP of the machine for which the access_token has been issued. This inclusion allows the access_token to be digitally signed. When accessing an API, verification not only confirms the validity of the access_token but also ensures that the Public IP in the request aligns with the information included in the JWT token.
The following JSON is the response obtained when requesting an access_token:
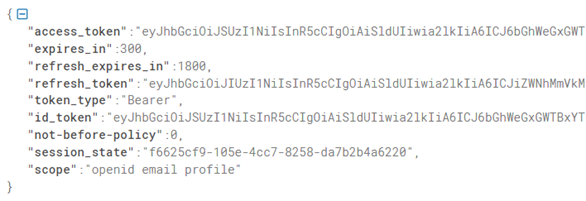
Each token contains specific user and session information. The JSON response provides access_token, refresh_token, and id_token, all of which are JWT tokens.
If we configure a refresh_token, when the application needs to call API services again, and the access token has expired, it can utilize the refresh token to request a new access token.
Additionally, the response includes parameters like expires_in (referring to the time-to-live for the access_token) and refresh_expires_in (referring to the time-to-live for the refresh_token), among other details.
See how to configure JWTs in the Keycloak configuration section.
8.3.3. OAuth 2.0 Workflow
1. The user selects Login within the application (Agent).
2. The application detects that the user is not logged in and redirects the user to the Auth 2.0 Authorization Server (/auth endpoint).
3. The Auth 2.0 Authorization Server redirects the user to a login and authorization prompt.
4. The user authenticates, and the Authorization Server redirects them back to the application with a single-use, short-lived temporary authorization code (to prevent replay attacks, the temporary code cannot be used more than once).
5. The application sends the authorization code, the application’s client ID, and the application’s credentials, such as a client secret or Private Key JWT, to the Auth 2.0 Authorization Server (/token endpoint).
6. The Auth 2.0 Authorization Server verifies the authorization code, application’s client ID, and application’s credentials.
7. The Auth 2.0 Authorization Server responds with an ID token and access token (and optionally, a refresh token).
8. The application can use the access token to call an API or other services, accessing or providing information about the user.
9. The API responds with the requested data to the application.
8.3.3.1. OAuth 2.0 Workflow: VPN Use Case
PHASE 1: First authentication (access_token)
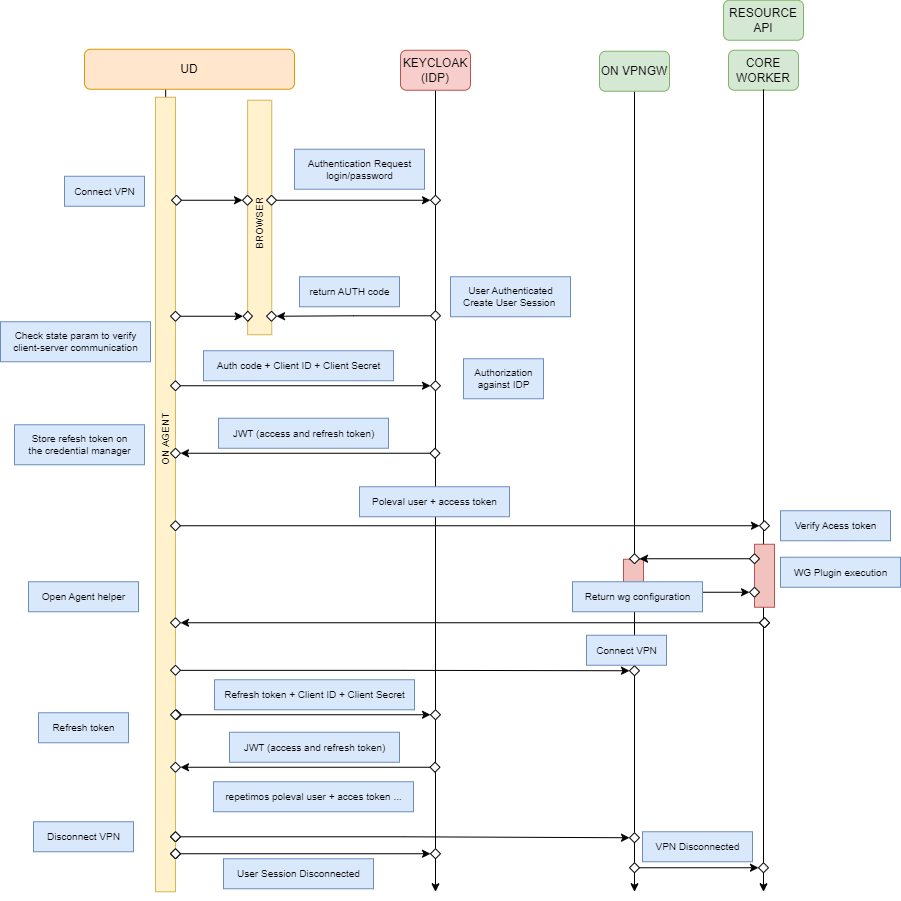
The Agent opens the browser.
The Agent authenticates against Keycloak.
Access and refresh tokens are returned and sent to the Agent with the uri_scheme.
ON Core validates the access token, executes the WireGuard plugin and returns the Agent the WireGuard configuration file to connect to the VPN.
PHASE 2: Refresh token

The Agent stores the refresh token in the OS keychain.
The Agent sends a “token user” type poleval to establish the VPN connection against the Core.
The Core validates the access token using JWT validation.
If the token is valid, the Core executes the WireGuard plugin, returns the configuration file to the Agent, and establishes the VPN connection.
8.3.3.1.1. Agent Autoconnect Flow
This section summarizes the WireGuard autoconnect flow. For more information about the WireGuard autoconnect capability, see the Agent Profile > Taskbar configuration section.
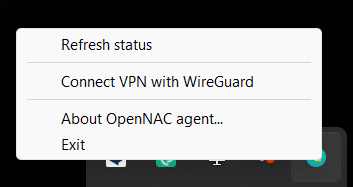
Right-click on the Agent taskbar icon and select “Connect VPN with WireGuard”:
Click on Connect:
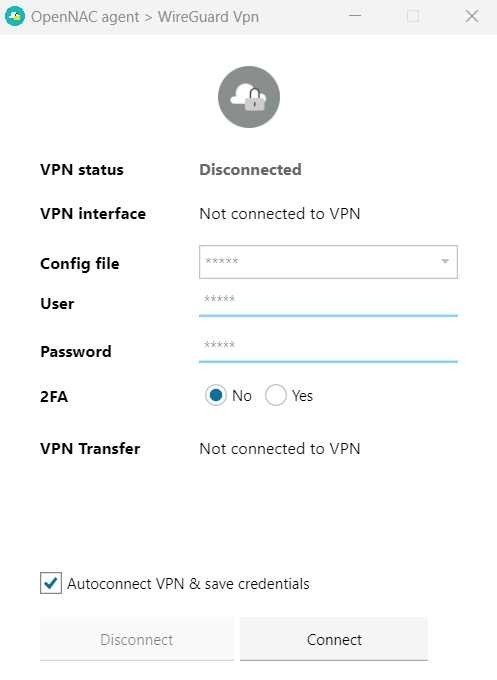
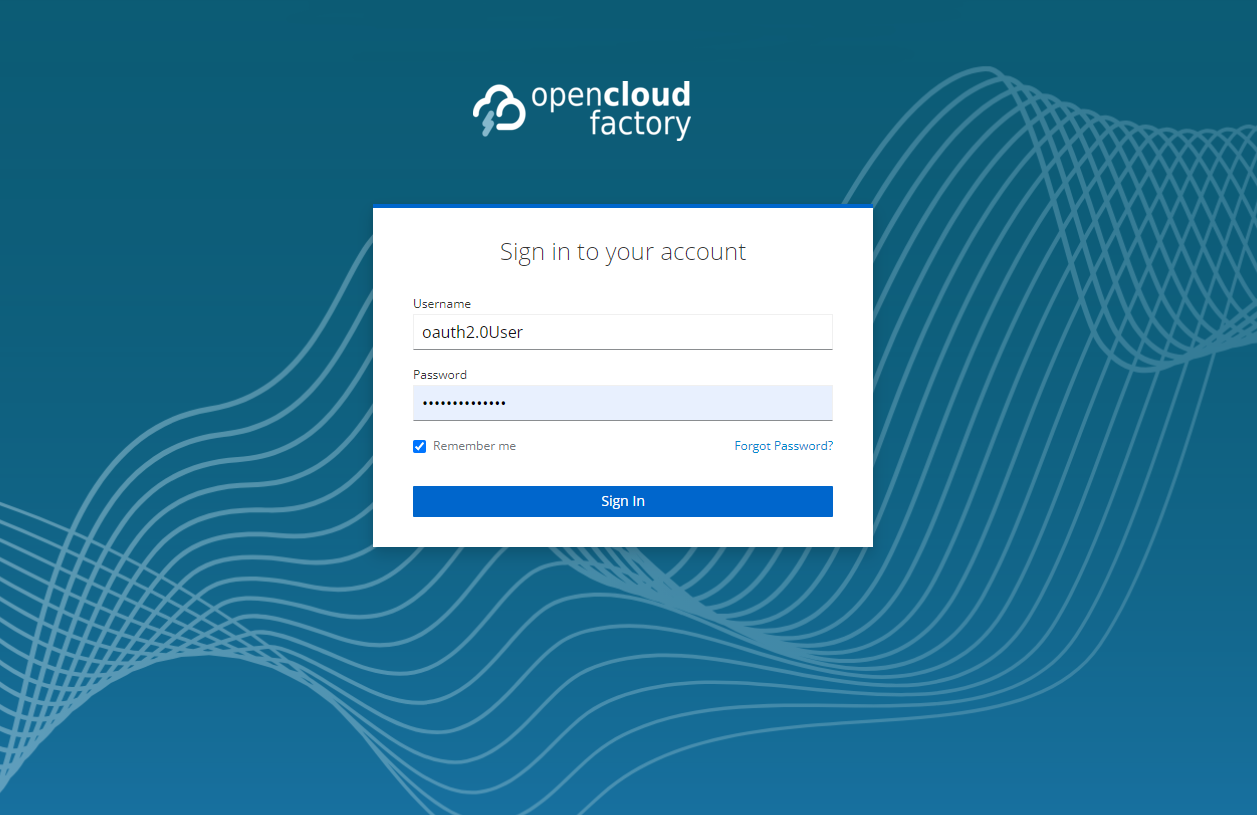
It will open a portal where you should enter your credentials:
The first time you “Sign In”, a message will appear asking for permission to open the OpenCloudFactory.Agent.UI application. Select the “Always Allow” option to grant permission and open the application.
It will open the OpenNAC Agent application and connect to the VPN.
Autoconnect Considerations:
If the session is closed and autoconnect is enabled, the Agent initiates the refresh token process.
If autoconnect is enabled and the user manually disconnects the VPN, closes Keycloak, VPNGW, and Core sessions, it deletes the keychain refresh token from the OS, and disables autoconnect.
If autoconnect is disabled and the user disconnects the VPN, VPNGW, and Core sessions, it deletes the keychain refresh token from the OS.
If autoconnect is enabled and the authentication against Keycloak is successful, but Core returns a session KO (due to an invalid access token or other issues), it deletes the keychain refresh token from the OS and prompts the user to enter credentials and restart the stream.
For more information about the autoconnect capability, see the Agent Profile > Taskbar configuration section.
8.3.3.1.2. TTL configurations
Access Token TTL: Set to a short duration, such as 30 seconds to 1 minute.
Refresh Token TTL: Set to 5 days. Every 5 days, if the user remains active, both the access and refresh tokens will be renewed. If not, the session will be disconnected, prompting the user to initiate the phase 1 process again.
Session TTL: The session will last for 30 days, assuming the user continuously renews the session using the refresh token.
8.3.4. How to implement OAuth 2.0 in OpenNAC?
The implementation of OAuth 2.0 in OpenNAC requires the following steps:
Application registration: Start by registering our application (client) in the Identity Provider (IdP). Here we will use Keycloak as IdP. During this process, you typically need to provide information such as the Redirect URI or Callback URL. This is particularly essential in flows involving redirections. It ensures that after the IdP authorizes the application, the flow redirects back to the application. This step helps manage the authorization code and/or access_token. Additionally, it restricts redirections solely to trusted URIs or URLs.
Client ID and Client Secret: Upon successful registration, you will obtain a Client ID, which serves as the application identifier in the IdP. In some flows, a Client Secret (password) may also be necessary. This secret adds an extra layer of security to certain flows.
Authentication flow: You will use the Authorization Code Flow as the authentication flow. It involves a GET call to the Endpoint (/authorize), returning the code in the response URL. This code is then used in a subsequent POST call to the Endpoint (/token) along with the Client Secret.
The code is valid for only 60 seconds and is one-time use only.
It can be used with a refresh token.
Requires the Client Secret.
You will see how to configure each of the implementation steps described above in the following section.
8.3.5. Administration Portal Configurations
After performing all the above configurations for the OAuth 2.0 integration with OpenNAC, you need to perform additional configurations in the Administration Portal:
Perform OAuth 2.0 client configurations to make it available for WireGuard Authentications.