11.2.2. Notifications Operation
This section provides a guide on how to visualize notifications and create new notification groups.
For managing filters for this dashboard, consult the Filtering data section of the Healthcheck Module. Both filter bars offer the same capabilities.
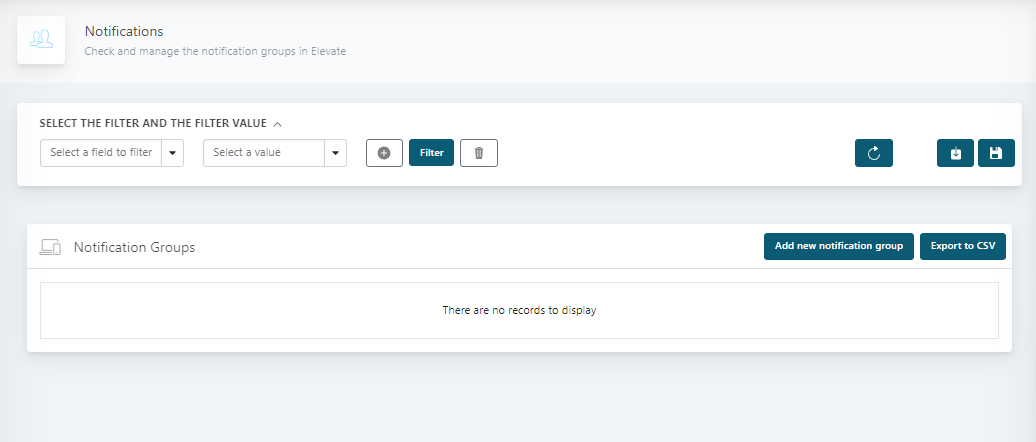
11.2.2.1. Overview
From this dashboard, you can view and create notifications for certain aspects of Elevate. You can configure sending notifications to an email address or an Element room.
As soon as you open the dashboard, the list of the created notifications will appear displaying the following fields:
Email: Displays the email addresses to which notifications for that group will be sent.
Element Rooms: Reveals which Element rooms will receive notifications.
Instances: Lists the instances for which notifications will be sent.
Time Range: Indicates the time range for sending notifications (e.g., “24/7” for continuous notification).
Events: Provides information about the events that trigger notifications.
Enabled: Allows you to toggle the button to temporarily enable or disable notifications.
Actions: Provides options to edit or delete notifications as needed.
11.2.2.2. Creating a new notifications group
If you want to create a new group of notifications, click on the Add new notification group button and a configuration window will pop up:
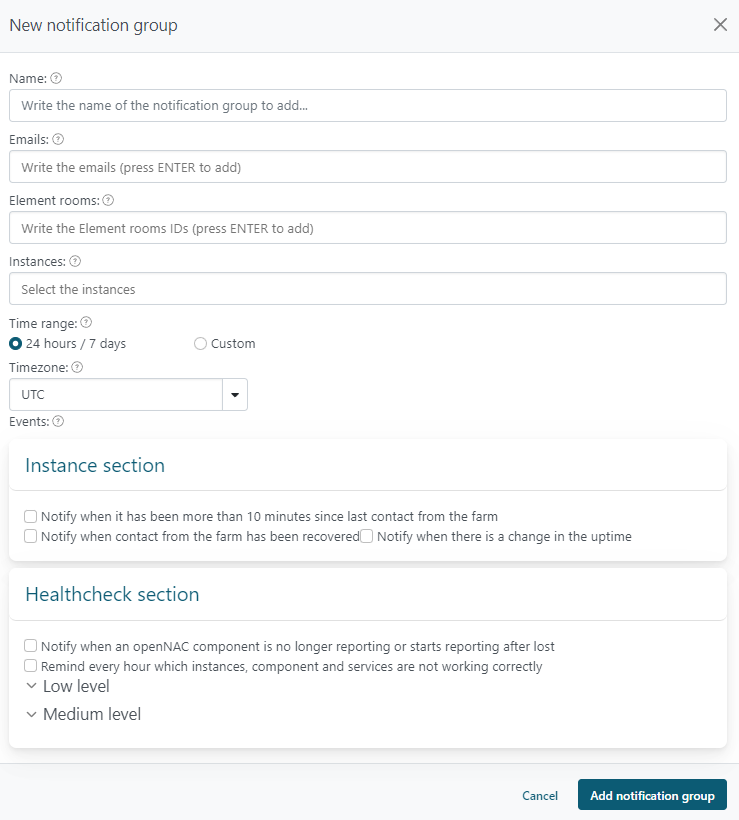
Introduce the following information:
Name: The designation for the notifications.
Emails: The email addresses where notifications will be sent. Ensure you press the ENTER key to confirm each email.
Element Rooms: The IDs of Element rooms that will receive notifications. Be sure to press ENTER after typing each room, and instructions for finding the room ID are available in the help button next to the section title.
Instances: The instances that will be monitored, triggering notifications as needed.
Time Ranges: You have two options here. Choose “24/7” to send notifications around the clock, or select “Custom” to specify the days and time ranges when notifications should be sent.
- Events:
Instance Section: This section handles notifications related to instances.
- Health Checks Section: Notifications related to health statuses are managed here, with various levels:
Low Level: Provides notifications for individual service status changes.
Medium Level: Offers a holistic view of the farm and notifies when a set percentage of services cease functioning. For instance, if you have 5 workers, equating to 5 RADIUS services, you can configure it to notify when less than 50% of the RADIUS services (only 2 in this scenario) are active.
Click on Add notification group to save your configuration and start receiving alerts about your instances on your chosen communication channel (Email or Elevate).