7.11. Increase disk on OpenNAC Enterprise component
First of all, we need to validate that more amount of GB was added to the current disk. This is validated with the following command:
lsblk
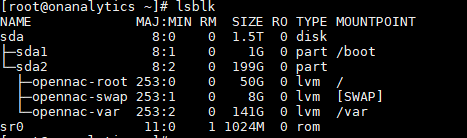
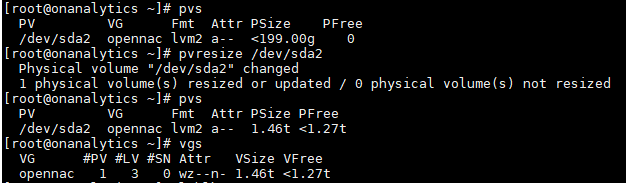
It is observed that now the disk is 1.5 T, so we proceed to increase the current pv (physical volume). We validate the current pv with the pvs command, as well as the current vg (volume group) with the vgs command.
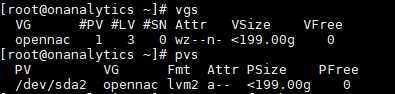
We observe that we only have 199 GB, so we proceed to increase the current pv.
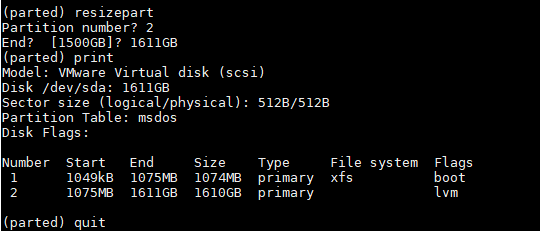
With the parted command, we enter the partition table, execute the print command inside to print the current partitions and thus obtain the partition number to extend.
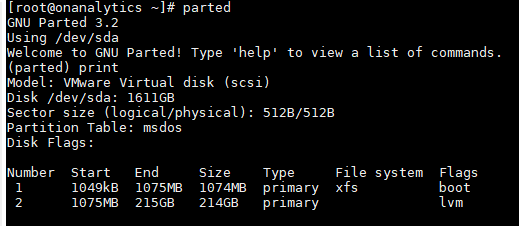
The partition that interests us in this case is number 2 and we will take as reference the maximum value of the disk which is the print output in “Disk /dev/sda: 1611GB”, we execute the resizepart command, we type the number of the partition and in the question of End? We enter the value of 1611GB, which is the maximum value in space that we have. Once the increase is done, we execute quit to exit parted.
If we validate with pvs, we will realize that the size of the disk has not yet been taken, so we execute the pvresice command to our pv, this would be “pvresize /dev/sda2”, we validate that it is now visible in our vg opennac with the vgs command.
We proceed to validate our lv (logical volume) with lvs command, to validate that lv we are going to extend.

We proceed to extend the partition of var.

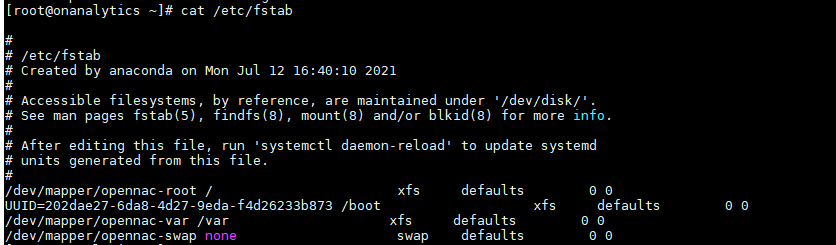
We validate the file system type in the /etc/fstab file in column number 3, in this case it is xfs.
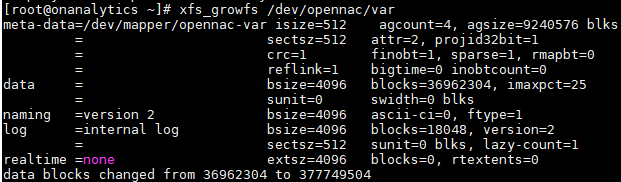
The file system is grown with the command xfs_growfs partition, in this case it is xfs_growfs /dev/opennac/var:
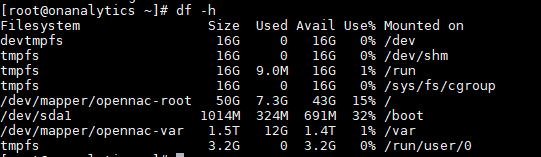
Being ready, we validate with df -h: