2.3.6.1.1. Configuring and Installing the Agent - Default Portal
First of all, we must configure the IP of the server where the ON Agent is downloaded. For this, go to the ON Agent > Agent Configuration section in the Administration Portal.
On the Download & parse tab, scroll down and provide the Server information in the “Download &Install agent options” section.
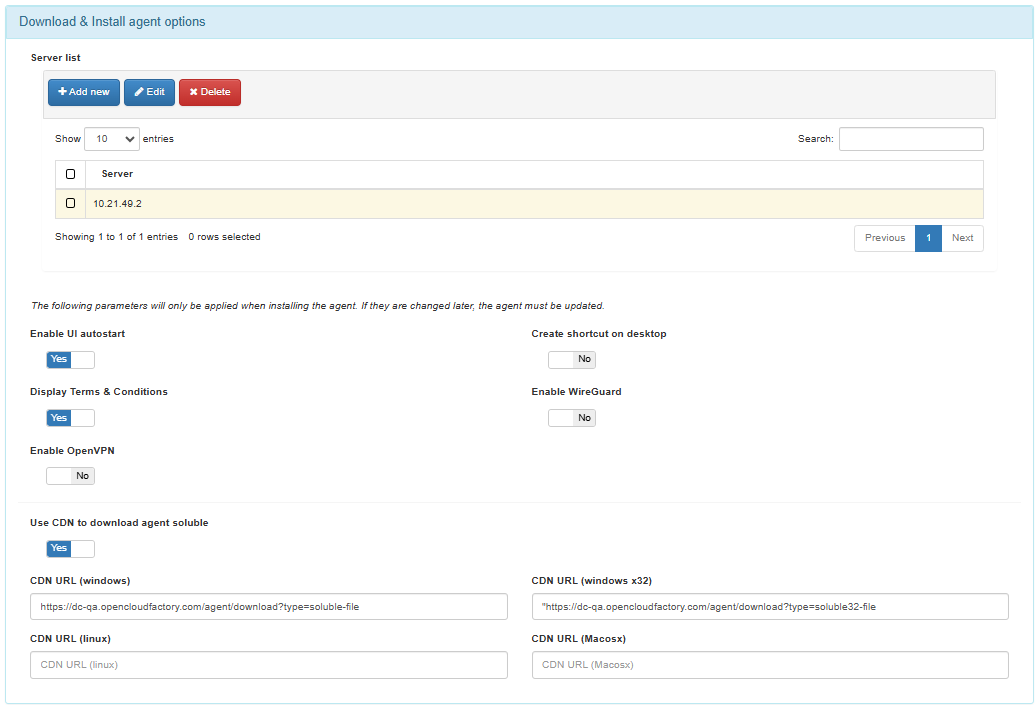
You can configure multiple agent URLs and set one as the default to indicate where the Agent can be downloaded from. IP, IP:PORT or FQDN are possible values. This is where the soluble ON Agent will send the payloads.
At the bottom of this view, you have the Agent download options:
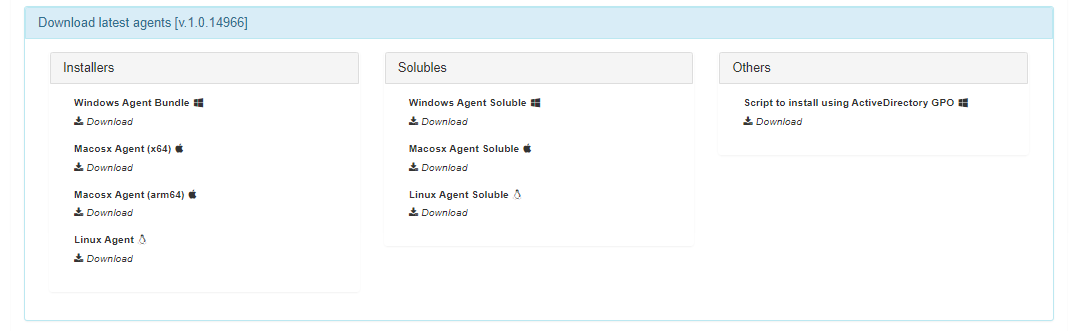
Choose the type of agent that you want to install and click on Download. In this example, we will download the Windows installable agent.
The file download starts automatically. Select in which folder in our computer you want to save the file (Documents, Downloads, etc.). It is important to remember the location of the file for future steps.
The download file name will have a format similar to the following one:
opennac-agent-1_0_xxxxx-release-windows-xxxxxxxxxxxxxxxxxx
Warning
IMPORTANT: DO NOT modify the file name, otherwise it will not work properly.
Once the download is complete, go to the folder where you have saved the file and double-click on it to start the installation process.
A dialog will ask for you permission to execute the file. Once you accept it, the installation process will begin.

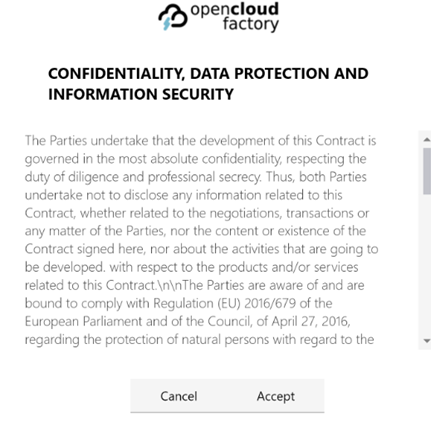
Once the installation process is complete, you will need to agree to the Agent’s Terms and Conditions. If you choose to ignore or reject them, you will receive a notification and the application will close.
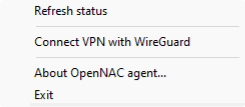
After accepting the Terms and Conditions, the installation process is finished and the On Agent Icon will be displayed in your taskbar.

After a few minutes, you can right-click on this icon to authenticate the client or establish a connection to the VPN.
Refer to the:ref:Agent Troubleshooting<agent_install_macos> section in case you encounter any errors during the installation process.
2.3.6.1.1.1. Uninstalling the Agent
To uninstall the Agent application from your machine, follow the simple steps provided below. Whether you no longer require its services or need to troubleshoot any issues, uninstalling the Agent is a straightforward process.
2.3.6.1.1.1.1. Windows
To uninstall the Agent from your Windows system, follow the standard procedure to uninstall applications:
Select Start > Settings > Apps > Apps & features .
Find the Agent application, select More > Uninstall.
2.3.6.1.1.1.2. MacOS
To uninstall the Agent from your MacOS, run the following script:
/Applications/OpenNACAgent.app/Contents/Resources/uninstall.sh
2.3.6.1.1.1.3. Linux
To uninstall the Agent from your Linux system, run the following script:
sudo apt remove opennacagent