3.1.6.1. Network Devices
In the Network devices tab, we can find all the network devices that we have already registered, the ones that the OpenNAC Enterprise system has discovered, and all the information related to them. Network devices send authentication information from user devices. There are several types of network devices, for instance, routers, switches, VPNs, Access Points, Wireless LAN Controller, and many others.
To register a network device in the OpenNAC Enterprise CMDB, look for the ON CMDB -> Network Devices in the left-side menu of the Administration Portal.
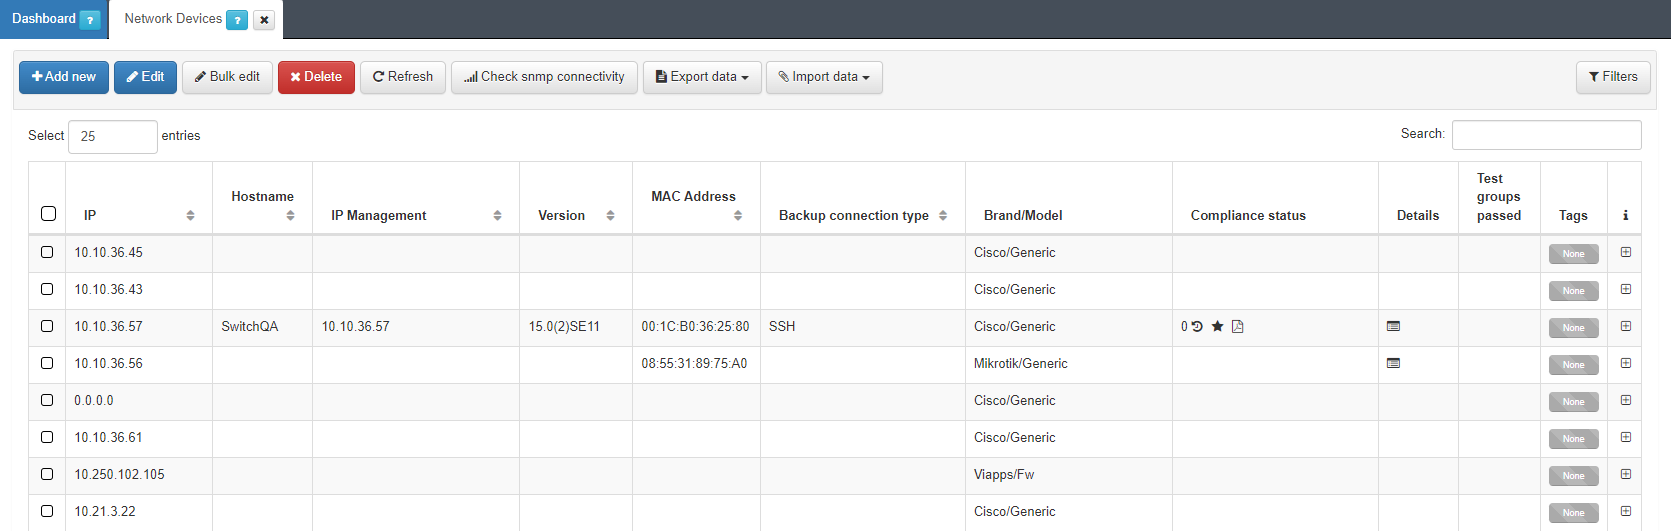
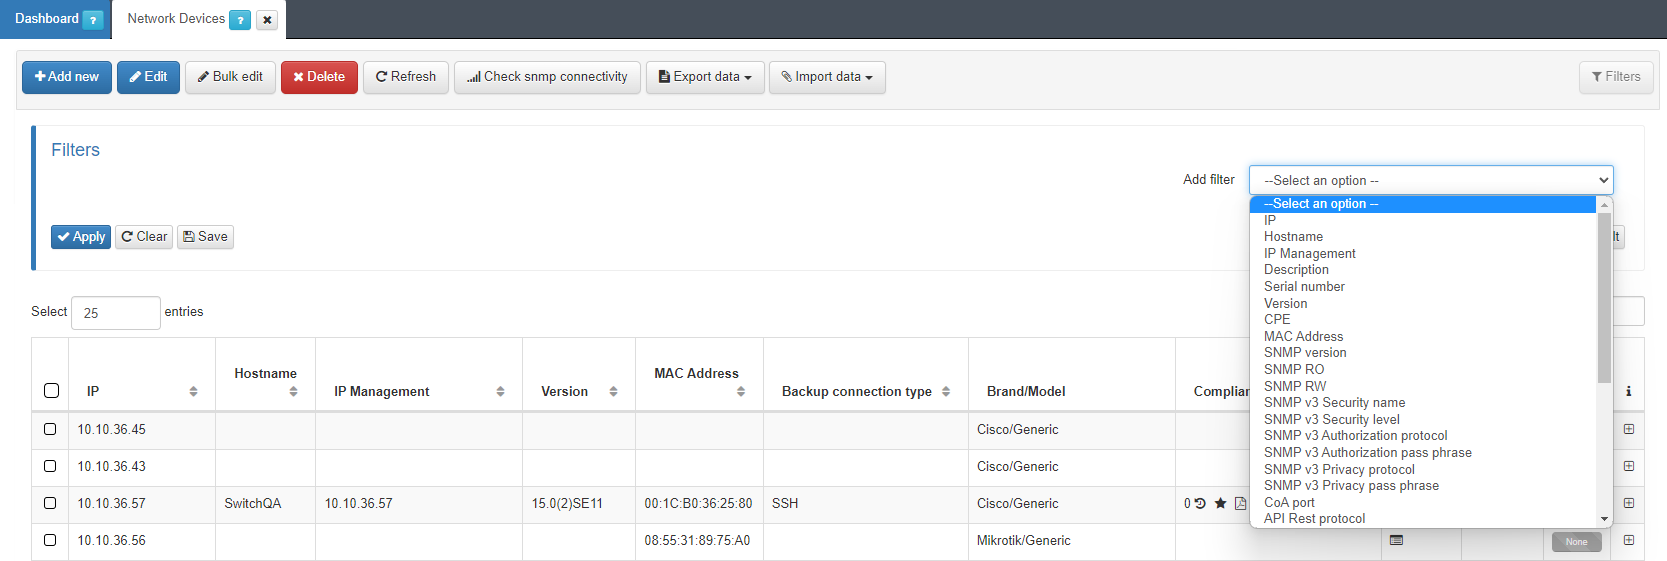
In the network devices tab, we can find the following columns:
IP: Shows the network device IP address.
IP management: Shows network device IP management address.
Backup connection type: Shows the backup connection type if the network device has backup.
Brand/Model: Shows the brand and the model for the network device.
Compliance status: Shows the number for the compliance status and two shortcuts: one that redirects to the Analytics -> Discover filtering the events for the IP of that network device, and the other that shows the compliance groups of tests.
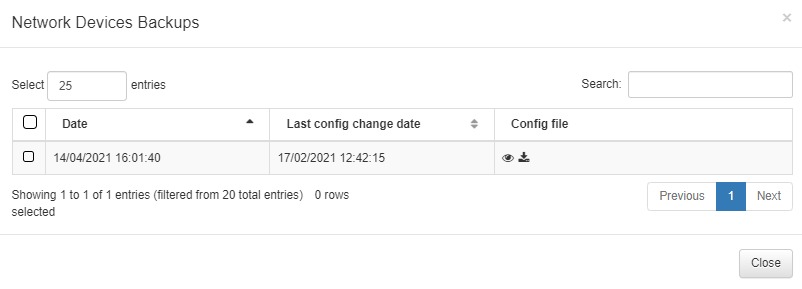
Details: Shows a shortcut that shows the backups for that network device.
Tags: Shows a bar with the number of tags of each type assigned to the device.
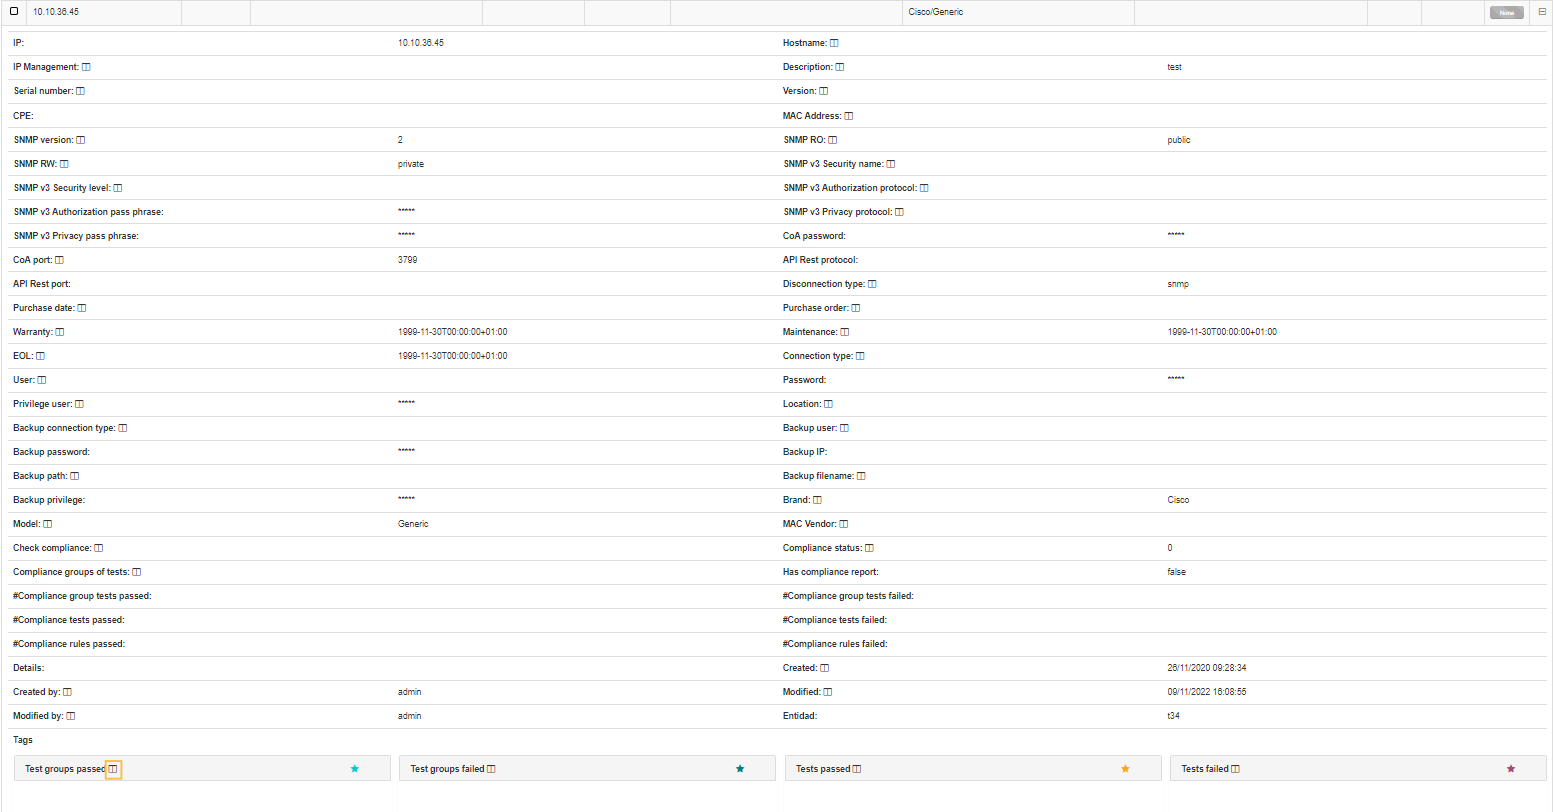
i: Allows you to expand the information.
Each tag group has an icon next to its name as you can see highlighted in the image above. It is a toggle icon, and by clicking on it you can add a new field to the network device table that will carry the name of the tag group. In the example, the group is called “test groups passes”.

3.1.6.1.1. Top menu
We can see the following options in the top menu:
Add new: Allows to add a new network device.
Edit: Allows to edit a single network device.
Bulk edit: Allows to edit a group of network devices.
Delete: Allows to delete the network devices selected.
Refresh: Allows to refresh the view.
Check snmp connectivity: Checks the connectivity to a network device SNMP.
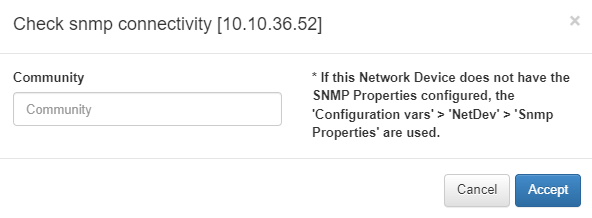
Note
If a Network Device does not have the SNMP Properties configured, the ‘Configuration vars’ > ‘NetDev’ > ‘Snmp Properties’ are used.
Export data: Export data or the last Backup in JSON format. If you do not want to export the entire database, make sure you filter the table by the desired value before exporting. The files will be displayed for download in the Status > CMDB Exports section.
Import data: Import data from a JSON or XML file. This can be done over an entire page or after filtering the data.
Filters: Search for devices on the selected business profile with predefined or custom filters such as Tags, IP, MAC address, and policy.
3.1.6.1.2. Add new
To add a new Network Device to the OpenNAC Enterprise CMDB, use the Add new button. A new pop-up window will be displayed, and there we can find multiple tabs to configure all the desired parameters and the required information for the network device.
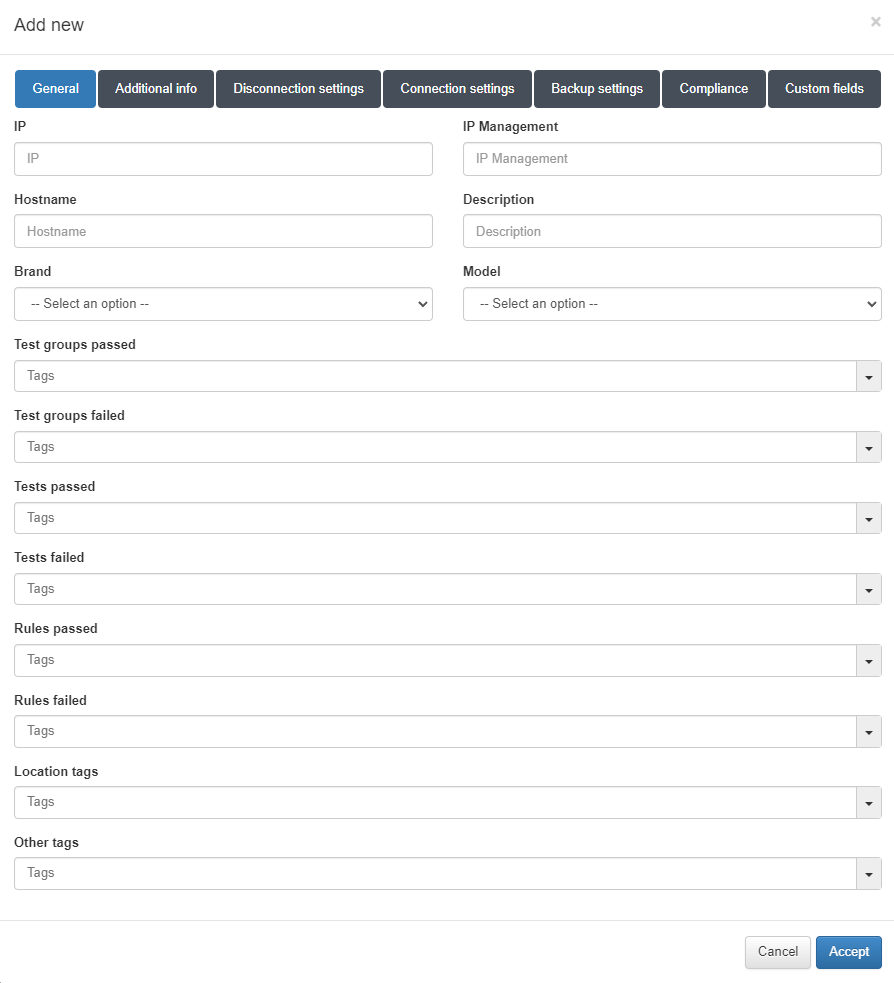
3.1.6.1.2.1. General
In this section, we can configure the main parameters for the device. The mandatory parameters are the IP, Brand and Model, the other parameters will be useful to complete the device information. In this tab we will also find the Tags fields, which will allow us to group the network devices based on different characteristics (physical location, device type, networks, etc).
Note that the Brand field displays the OpenNAC option. Selecting it, will enable the models: Analytics, Secondary, Worker, Core, VPNGW, and Sensor.
Check the Tags table to find all the available Tags and the information regarding them.
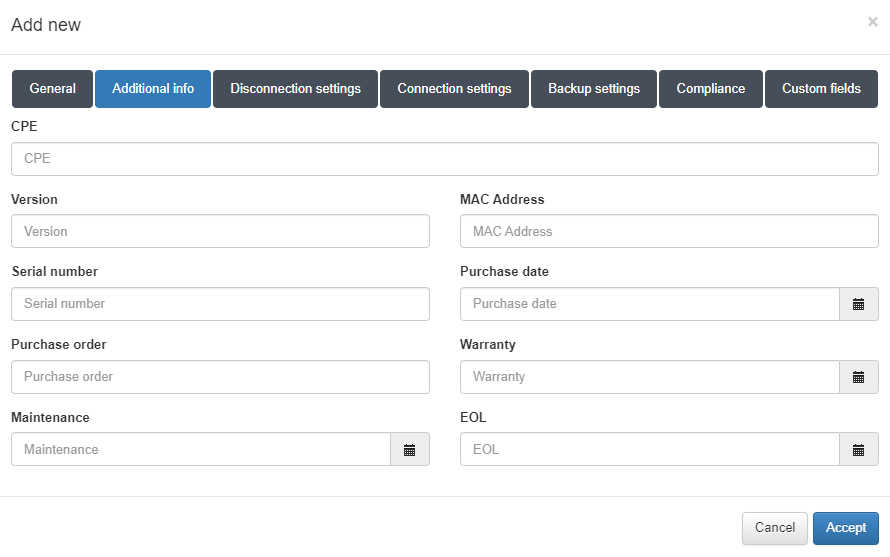
3.1.6.1.2.2. Additional info
In this section we will be able to add more information about the device such as MAC address, location, maintenance dates, etc.
Note
This information is only used to complete the device information. It’s not going to be used by any product feature.
3.1.6.1.2.3. Disconnection settings
In this section, we will be able to configure the device disconnection methods (via CoA, SNMP, or API) and their parameters. By configuring these methods, we will be able to communicate with the network device to disconnect user devices, extract information, etc. If these parameters are not configured, the global settings will be applied (check Configuration -> Configuration vars -> NetDev).
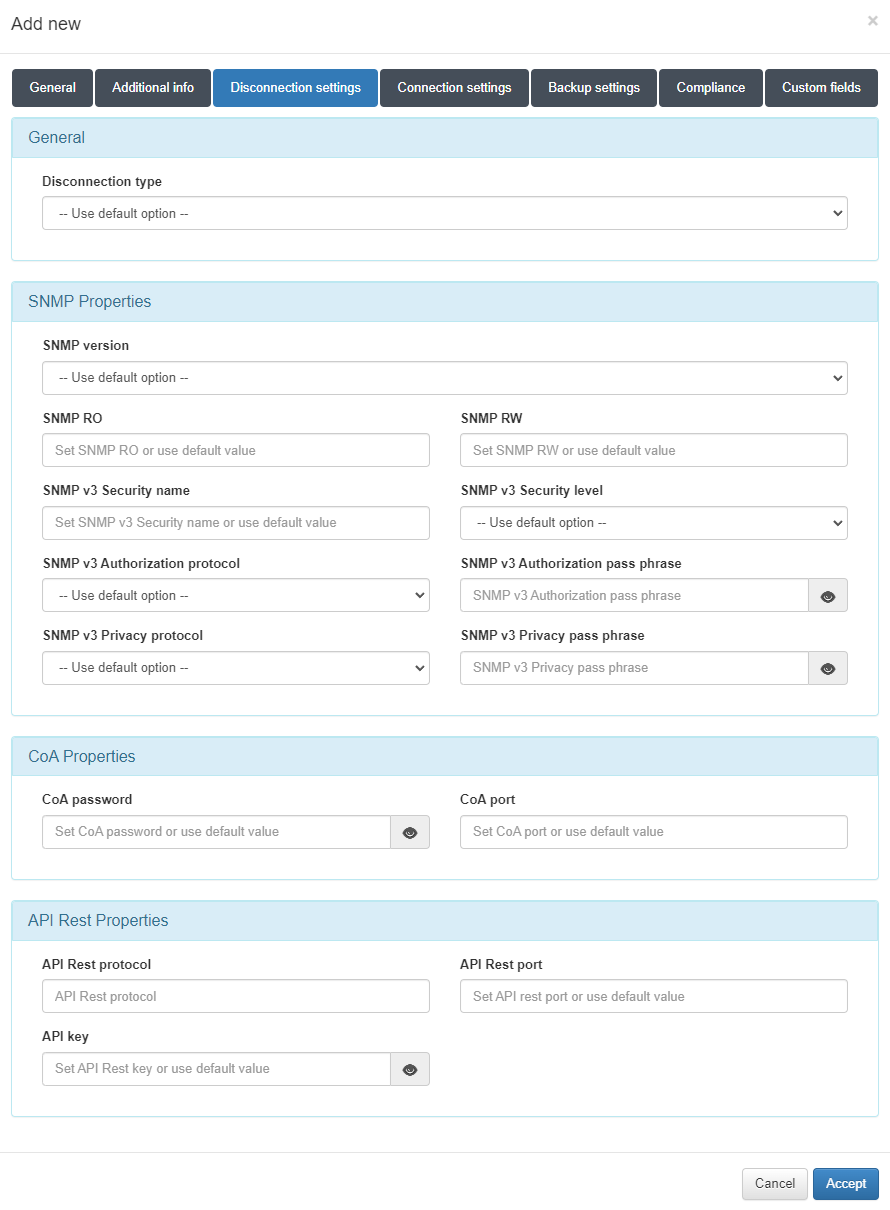
To communicate with the network devices we will need:
When using SNMP, we will need to apply the proper SNMP settings for that the network device. We will need to configure the SNMP version (SNMP v2 o higher is recommended), the different communities (Read Only and Read and Write), and if we’re using SNMP v3 we will need to fill other parameters such as security level, authorization protocol, etc.
When using CoA, we will also need to apply the proper configuration to allow communication between the ON Core and the network device through the 3799 port. Also, we will need to configure the Shared Secret Key.
When using API Rest, we will need to add the protocol (http or https), the port, and the API Key that we will need to allow communication with other devices. For example, in the 2SRA use case, as we need to enable the configuration between the VPN Gateway and the ON Core nodes, we will need to apply the corresponding configuration so that from the VPN Gateway we can communicate with the ON Core to send disconnection requests.
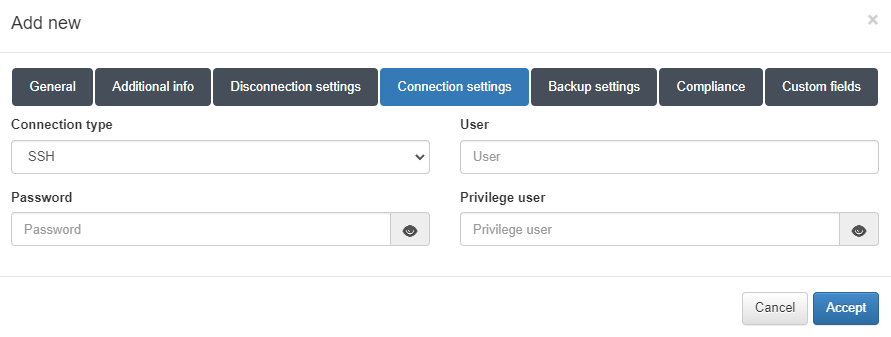
3.1.6.1.2.4. Connection settings
In this tab, we can configure the required parameters for ssh connection and the privileged user (if needed). If these parameters are not configured, the global settings will be applied (check Configuration -> Configuration vars -> NetDev). These parameters will be used in the ON NetConf module as we will need those parameters to connect to the device via ssh to apply a given configuration.
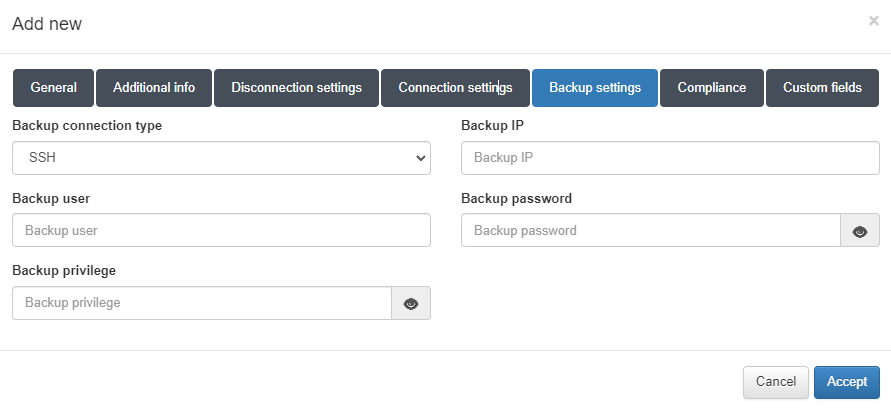
3.1.6.1.2.5. Backup settings
In this tab we will be able to configure the required parameters for SSH or SCP connection. We can also define the privilege user if necessary. If these parameters are not configured, the global settings will be applied (check Configuration -> Configuration vars -> NetDev). These parameters will be used in the ON Netbackup module as we will need those parameters to connect and extract the current configuration of a device. If we configure the SSH backup connection type, a file will be generated when we execute a NetBackup. By choosing the SCP option, a file will be sent to the defined IP in the Backup IP field.
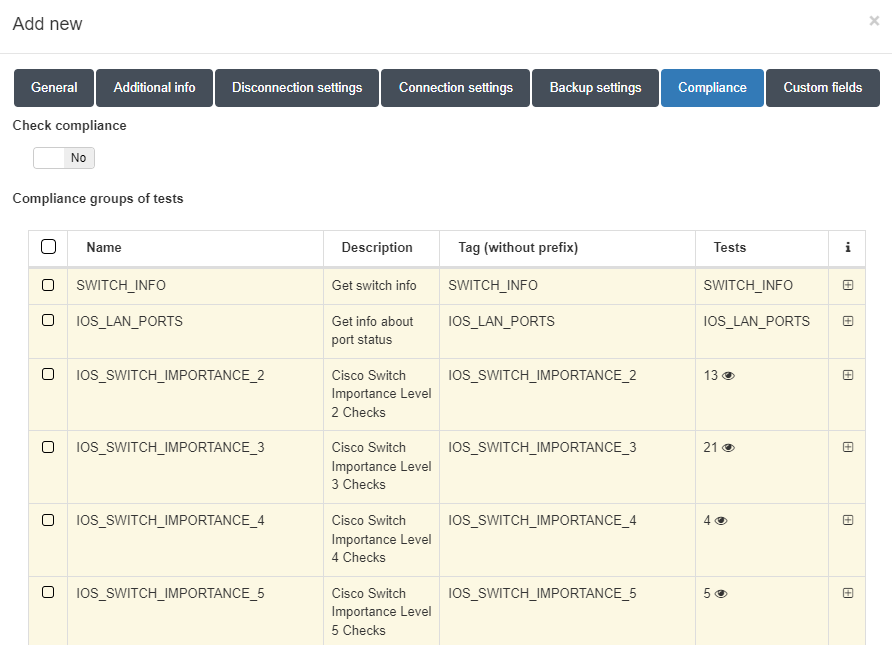
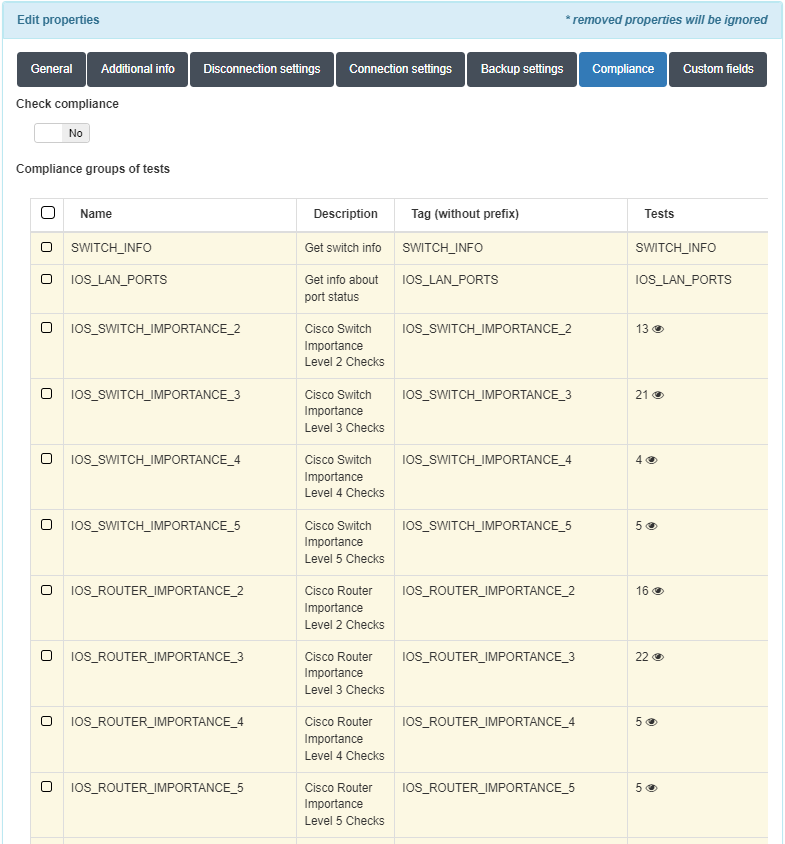
3.1.6.1.2.6. Compliance
In this tab, we can enable the compliance tests execution and select which test we want to execute. Once we execute a NetBackup on the device (if we have enabled the Check compliance flag) we will execute the compliance tests to check if the device configuration complies with the selected tests. Check the ON Netbackup module to find more information on how to run compliance tests, create rules, etc.
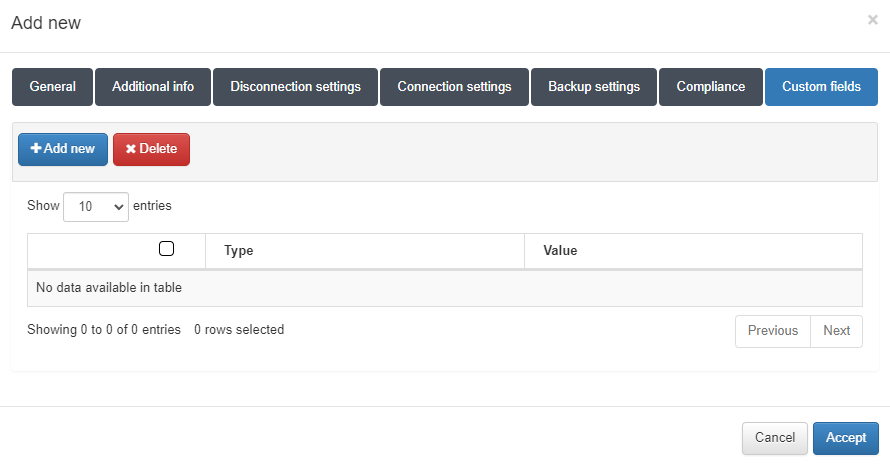
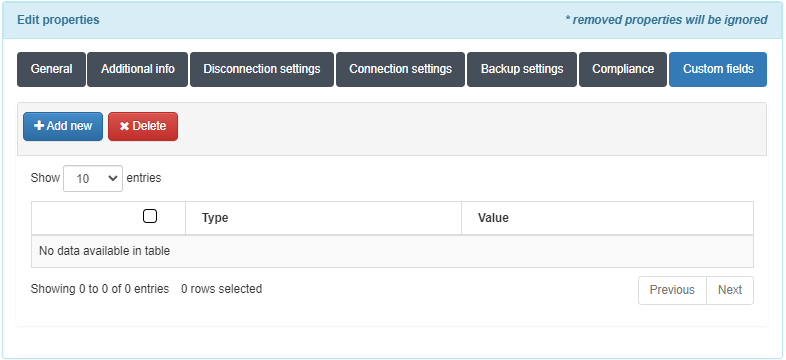
3.1.6.1.2.7. Custom fields
In this tab we can configure other parameters that are not already defined in the previous tabs. You can define any parameter and its desired value by clicking on the Add new button. This will allow us to implement filters to find our device by the custom parameters that we define.
3.1.6.1.3. Bulk edit
The Bulk edit allows you to modify multiple network devices entries at the same time. To open the features window shown below, go to the upper menu of the Network Devices tab, and find the Bulk edit button:

3.1.6.1.3.1. General
This section shows the number of the user devices that we are editing compared to the total number of user devices.
3.1.6.1.3.2. Edit properties
On this section, we can edit the properties for the network devices selected. We have two windows, the Device info and the Custom fields.
Note
Removed properties will be ignored.
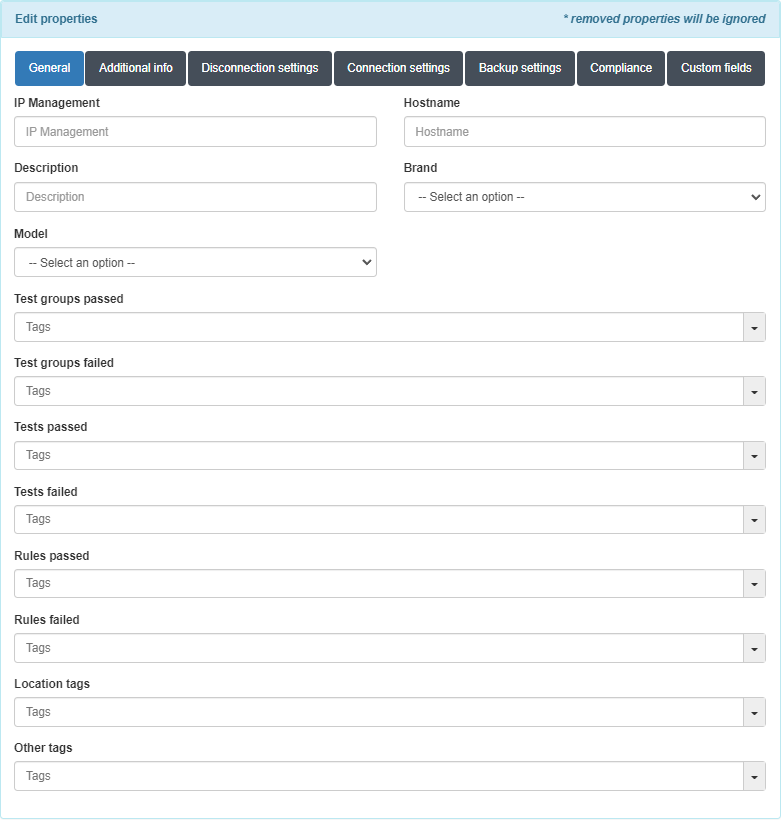
3.1.6.1.3.2.1. General
In this section, we can configure the main parameters for the network devices. The parameters are the IP, Brand, and Model. The other parameters will be useful to complete the device information. In this tab, we will also find the Tags fields, this will allow us to group the network devices based on different characteristics (physical location, device type, networks, etc). Check the Tags table to find all the available Tags and their information.
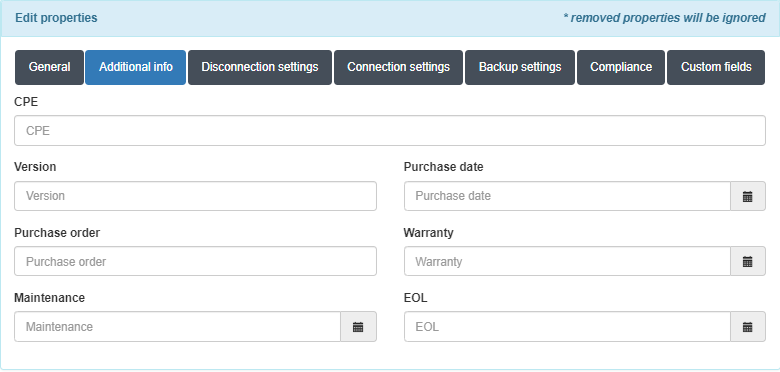
3.1.6.1.3.2.2. Additional info
In this section, we can add more information about the network devices such as MAC address, location, maintenance dates, etc.
Note
This information is only used to complete the network device information. It is not going to be used by any product feature.
3.1.6.1.3.2.3. Disconnection settings
In this section, we can configure the device disconnection methods (via CoA, SNMP, or API) and its parameters. By configuring these methods, we will be able to communicate with the network device to disconnect user devices, extract information, etc. If these parameters are not configured, the global settings will be applied (check Configuration -> Configuration vars -> NetDev).
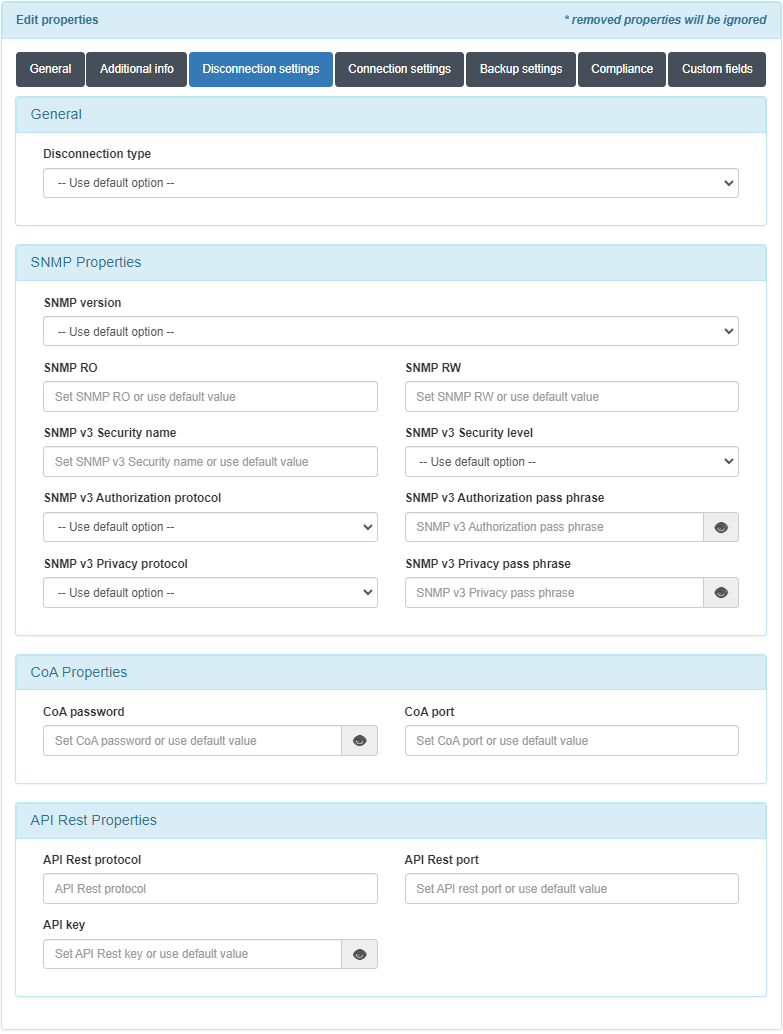
To communicate with the network devices we will need:
When using SNMP, we will need to apply the proper SNMP settings for the network devices. We will need to configure the SNMP version (SNMP v2 o higher is recommended), the different communities (Read Only and Read and Write), and if we are using SNMP v3 we will need to fill in other parameters such as security level, authorization protocol, etc.
When using CoA, we will also need to apply the proper configuration to allow communication between the ON Core and the network device through the 3799 port. Also, we will need to configure the Shared Secret Key.
When using API Rest, we will need to add the protocol (http or https), the port, and the API Key that we will need to allow communication with other devices. For example, in the 2SRA use case, as we need to enable the configuration between the VPN Gateway and the ON Core nodes, we will need to apply the corresponding configuration so that from the VPN Gateway we can communicate with the ON Core to send disconnection requests.
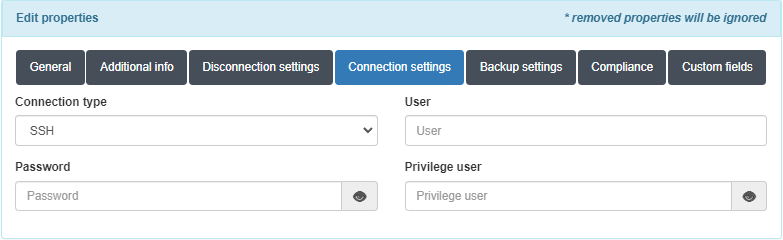
3.1.6.1.3.2.4. Connection settings
In this tab, we can configure the required parameters for ssh connection and the privileged user (if needed). If these parameters are not configured, the global settings will be applied (check Configuration -> Configuration vars -> NetDev). These parameters will be used in the ON NetConf module as we will need those parameters to connect to the device via ssh to apply a given configuration.
3.1.6.1.3.2.5. Backup settings
In this tab we will be able to configure the required parameters for SSH or SCP connection (also we can define the privilege user if it’s needed). If these parameters not configured the global settings will be applied (check on Configuration -> Configuration vars -> NetDev). These parameters will be used in the NetBackup module (check the ON Netbackup module) as we will need those parameters to connect and extract the current configuration of a device. If we configure the SSH backup connection type, a file will be generated when we execute a NetBackup. By choosing the SCP option, a file will be send to defined ip in the Backup IP field.

3.1.6.1.3.2.6. Compliance
In this tab we will be able to enable the compliance tests execution and to select which test do we want to execute, so once we execute a NetBackup on the device, if we have enabled the Check compliance flag, we will execute the compliance tests to check if the device configuration complies with the selected tests. Check the ON Netbackup module to find more information on how to run compliance tests, create rules, etc.
3.1.6.1.3.2.7. Custom fields
In this tab we will be able to configure other parameters that are not already defined in the previous tabs, you can define any parameter and it’s desired value by clicking on the Add new button. This will allow us to implement filters to find our device by the custom parameters that we define.
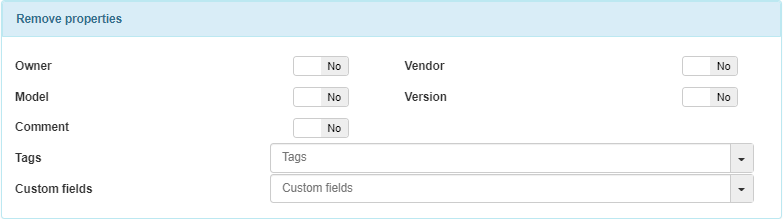
3.1.6.1.3.3. Remove properties
It is possible to delete different properties for the user devices selected. The properties to delete are the following:
Hostname: Allows deleting the hostname.
IP management: Allows deleting the IP management.
Description: Allows deleting the description.
Version: Allows deleting the version.
CPE: Allows deleting the CPE.
SNMP version: Allows deleting the SNMP version.
SNMP RO: Allows deleting the SNMP RO.
SNMP RW: Allows deleting the SNMP RW.
SNMP v3 Security name: Allows deleting the SNMP v3 Security name.
SNMP v3 Security level: Allows deleting the SNMP v3 Security level.
SNMP v3 Authorization protocol: Allows deleting the SNMP v3 Authorization protocol.
SNMP v3 Authorization pass phrase: Allows deleting the SNMP v3 Authorization pass phrase.
SNMP v3 Privacy protocol: Allows deleting the SNMP v3 Privacy protocol.
SNMP v3 Privacy pass phrase: Allows deleting the SNMP v3 Privacy pass phrase.
CoA password: Allows deleting the CoA password.
CoA port: Allows deleting the CoA port.
API Rest protocol: Allows deleting the API Rest protocol.
API Rest port: Allows deleting the API Rest port.
API key: Allows deleting the API key.
Disconnection type: Allows deleting the Disconnection type.
Purchase date: Allows deleting the Purchase date.
Purchase order: Allows deleting the Purchase order.
Warranty: Allows deleting the Warranty.
Maintenance: Allows deleting the Maintenance.
EOL: Allows deleting the EOL.
Connection type: Allows deleting the Connection type.
User: Allows deleting the User.
Password: Allows deleting the Password.
Privilege user: Allows deleting the Privilege user.
Backup connection type: Allows deleting the Backup connection type.
Backup user: Allows deleting the Backup user.
Backup password: Allows deleting the Backup password.
Backup IP: Allows deleting the Backup IP.
Backup path: Allows deleting the Backup path.
Backup filename: Allows deleting the Backup filename.
Backup privilege: Allows deleting the Backup privilege.
Check compliance: Allows deleting the Check compliance.
Compliance groups of tests: Allows deleting the Compliance groups of tests.
Tags: Allows deleting multiple tags.
Custom fields: Allows deleting multiple custom fields.