3.4.3.2. Allin1 - Deployment OpenNAC
3.4.3.2.1. General considerations
Important
This guided install process is designed to be followed step by step.
You need to be alert to the output of each command, because things can fail.
Pay attention to the variable exports, as you need to review this data and configure accordingly to your needs before exporting them.
3.4.3.2.2. Host configuration
The physical host is responsible for running the KVM and ON Sensor. So, our first steps are to configure the host machine.
Export variables
export PUBLIC_IP=10.10.36.200
export PUBLIC_PREFIX=24
export DEFAULT_GW=10.10.36.254
export DNS=10.20.0.11
export ADMIN_IF=eno1
export HOSTNAME=allinC08
Update softwares
sed -i -e "s/=enforcing/=disabled/g" /etc/selinux/config

dnf -y update

dnf -y module install virt

dnf -y install wget virt-install virt-manager virt-viewer libguestfs-tools wget virt-manager xauth tcpdump bridge-utils

systemctl enable libvirtd
systemctl start libvirtd
Configure network interfaces
Attention
In the case of the Intel NUC 8th generation, the eno1 interface will only appear after the dnf update and the reboot.
cat <<EOF >> /etc/sysconfig/network
HOSTNAME=${HOSTNAME}
EOF

nmcli general hostname "${HOSTNAME}"

cat <<EOF > /etc/sysconfig/network-scripts/ifcfg-eno1
TYPE=Ethernet
PROXY_METHOD=none
BROWSER_ONLY=no
BOOTPROTO=none
IPV4_FAILURE_FATAL=no
IPV6INIT=no
IPV6_FAILURE_FATAL=no
NAME=eno1
DEVICE=eno1
ONBOOT=yes
EOF

cat <<EOF > /etc/sysconfig/network-scripts/ifcfg-intbr0
DEVICE=intbr0
ONBOOT=yes
TYPE=Bridge
BOOTPROTO=static
IPV4_FAILURE_FATAL=yes
IPV6INIT=no
IPADDR=192.168.69.1
NETMASK=255.255.255.0
EOF

cat <<EOF > /etc/sysconfig/network-scripts/ifcfg-virpubbr0
STP=no
TYPE=Bridge
PROXY_METHOD=none
BROWSER_ONLY=no
BOOTPROTO=none
DEFROUTE=yes
IPV4_FAILURE_FATAL=no
IPV6INIT=no
IPV6_DEFROUTE=yes
IPV6_FAILURE_FATAL=no
IPV6_ADDR_GEN_MODE=stable-privacy
NAME=virpubbr0
DEVICE=virpubbr0
ONBOOT=yes
IPADDR="${PUBLIC_IP}"
PREFIX="${PUBLIC_PREFIX}"
GATEWAY=${DEFAULT_GW}"
DNS1=${DNS}"
IPV6_DISABLED=yes
EOF

cat <<EOF > /etc/sysconfig/network-scripts/ifcfg-${ADMIN_IF}
TYPE=Ethernet
DEVICE=${ADMIN_IF}
NAME=bridge-slave-${ADMIN_IF}
ONBOOT=yes
BRIDGE=virpubbr0
EOF
Reboot
reboot
3.4.3.2.3. Install sensor
Export variables
export ON_VERSION="1.2.2"
export MYSNIFFERINTERFACE=eno1
Install and configure packets
Attention below, as you need to input your Redmine username and, later, your password
wget https://redmine-opennac.opencloudfactory.com/svn_opennac/versions/${ON_VERSION}/src/utils/build-repo/install_sensor.sh --user YOUR_REDMINE_USERNAME --ask-password
Now, to the following steps:
chmod a+x ./install_sensor.sh

./install_sensor.sh --version=${ON_VERSION}
Export variables
export MYSNIFFERINTERFACE=eno1
Install and configure packets
Attention below, as you need to input your Redmine username and, later, your password
wget https://redmine-opennac.opencloudfactory.com/svn_opennac/trunk/src/utils/build-repo/install_sensor.sh --user YOUR_REDMINE_USERNAME --ask-password
Now, to the following steps:
chmod a+x ./install_sensor.sh

./install_sensor.sh
sed -i 's/OPTIONS="-r eth1 -s onmaster -q onmaster"/OPTIONS="-r '${MYSNIFFERINTERFACE}' -q oncore -s onmaster"/' /etc/sysconfig/dhcp-helper-reader

sed -i 's/CAPTURE_INTERFACES=.*$/CAPTURE_INTERFACES="'${MYSNIFFERINTERFACE}'"/' /etc/pf_ring/interfaces.conf

sed -i 's/^interface=.*$/interface='${MYSNIFFERINTERFACE}'/' /opt/bro/etc/node.cfg

/usr/bin/cp -rfv /usr/share/opennac/sensor/cron.d/opennac-sensor-watchdog /etc/cron.d/

sed -i 's/^.*onanalytics$/192.168.69.10\tonanalytics/' /etc/hosts
sed -i 's/^.*onaggregator$/192.168.69.10\tonaggregator/' /etc/hosts
sed -i 's/^.*onmaster$/192.168.69.5\tonmaster/' /etc/hosts
sed -i 's/^.*oncore$/192.168.69.5\toncore/' /etc/hosts
Configure the healthcheck:
/usr/bin/cp -rfv /usr/share/opennac/healthcheck/healthcheck.ini.sensor /usr/share/opennac/healthcheck/healthcheck.ini
/usr/bin/cp -rfv /usr/share/opennac/healthcheck/application.ini.sample /usr/share/opennac/healthcheck/application.ini
Install missing packages:
dnf install -y redis
mkdir /var/log/opennac
3.4.3.2.4. Deploy Virtual Machines
The following variable represents the full version that you will have on the OVA files, remember to change it correctly:
Note
Check the last stable version available from OpenNAC Enterprise repository before exporting the variables.
export ONCORE_FULL_VERSION="1.2.2-X.XXX"
export ONANALYTICS_FULL_VERSION="1.2.2-X.XXX"

mkdir -p /home/opennac/core6
mkdir /home/opennac/analytics

wget https://repo-opennac.opencloudfactory.com/ova/opennac_analytics_${ONANALYTICS_FULL_VERSION}_img.ova
wget https://repo-opennac.opencloudfactory.com/ova/opennac_core_${ONCORE_FULL_VERSION}_img.ova
wget https://repo-opennac.opencloudfactory.com/ova/opennac_analytics_${ONANALYTICS_FULL_VERSION}_img.ova.md5
wget https://repo-opennac.opencloudfactory.com/ova/opennac_core_${ONCORE_FULL_VERSION}_img.ova.md5

md5sum -c opennac_analytics_${ONANALYTICS_FULL_VERSION}_img.ova.md5
md5sum -c opennac_core_${ONCORE_FULL_VERSION}_img.ova.md5
If the output from the checksum command is equal to the bad result (seen below), you may have had problems with the download and you should go back to the previous step.
This is a good result:
[root@allin104 ~]# md5sum -c opennac_analytics_1.2.0-4.8471_img.ova.md5
opennac_analytics_1.2.0-4.8471_img.ova: OK
This is a bad result (delete the OVAs, step back and download again):
opennac_analytics_1.2.0-4.8471_img.ova: FAILED
md5sum: WARNING: 1 computed checksum did NOT match
If the checksum is ok, go ahead to the following step:
tar xvf opennac_core_${ONCORE_FULL_VERSION}_img.ova
qemu-img convert -f vmdk -O qcow2 opennac_core_${ONCORE_FULL_VERSION}_img-disk1.vmdk opennac_core_${ONCORE_FULL_VERSION}_img-disk1.qcow2
mv opennac_core_${ONCORE_FULL_VERSION}_img-disk1.qcow2 /home/opennac/core6

tar xvf opennac_analytics_${ONANALYTICS_FULL_VERSION}_img.ova
qemu-img convert -f vmdk -O qcow2 opennac_analytics_${ONANALYTICS_FULL_VERSION}_img-disk1.vmdk opennac_analytics_${ONANALYTICS_FULL_VERSION}_img-disk1.qcow2
mv opennac_analytics_${ONANALYTICS_FULL_VERSION}_img-disk1.qcow2 /home/opennac/analytics
Generation of the server’s xml
Attention
Before executing this, make sure that variable ONCORE_FULL_VERSION is set.
3.4.3.2.4.1. CORE:
cat <<EOF > /home/opennac/core6.xml
<domain type='kvm' id='8'>
  <name>core6</name>
  <uuid>7630cc1b-670c-4d25-b16a-4f9274dea473</uuid>
  <memory unit='KiB'>8388608</memory>
  <currentMemory unit='KiB'>8388608</currentMemory>
  <vcpu placement='static'>4</vcpu>
  <resource>
    <partition>/machine</partition>
  </resource>
  <os>
    <type arch='x86_64' machine='pc-i440fx-rhel7.0.0'>hvm</type>
    <boot dev='hd'/>
  </os>
  <features>
    <acpi/>
    <apic/>
  </features>
  <cpu mode='custom' match='exact' check='full'>
    <model fallback='forbid'>Nehalem</model>
    <feature policy='require' name='x2apic'/>
    <feature policy='require' name='hypervisor'/>
  </cpu>
  <clock offset='utc'>
    <timer name='rtc' tickpolicy='catchup'/>
    <timer name='pit' tickpolicy='delay'/>
    <timer name='hpet' present='no'/>
  </clock>
  <on_poweroff>destroy</on_poweroff>
  <on_reboot>restart</on_reboot>
  <on_crash>destroy</on_crash>
  <pm>
    <suspend-to-mem enabled='no'/>
    <suspend-to-disk enabled='no'/>
  </pm>
  <devices>
    <emulator>/usr/libexec/qemu-kvm</emulator>
    <disk type='file' device='disk'>
      <driver name='qemu' type='qcow2'/>
      <source file='/home/opennac/core6/opennac_core_${ONCORE_FULL_VERSION}_img-disk1.qcow2'/>
      <backingStore/>
      <target dev='vda' bus='virtio'/>
      <alias name='virtio-disk0'/>
      <address type='pci' domain='0x0000' bus='0x00' slot='0x09' function='0x0'/>
    </disk>
    <controller type='usb' index='0' model='ich9-ehci1'>
      <alias name='usb'/>
      <address type='pci' domain='0x0000' bus='0x00' slot='0x05' function='0x7'/>
    </controller>
    <controller type='usb' index='0' model='ich9-uhci1'>
      <alias name='usb'/>
      <master startport='0'/>
      <address type='pci' domain='0x0000' bus='0x00' slot='0x05' function='0x0' multifunction='on'/>
    </controller>
    <controller type='usb' index='0' model='ich9-uhci2'>
      <alias name='usb'/>
      <master startport='2'/>
      <address type='pci' domain='0x0000' bus='0x00' slot='0x05' function='0x1'/>
    </controller>
    <controller type='usb' index='0' model='ich9-uhci3'>
      <alias name='usb'/>
      <master startport='4'/>
      <address type='pci' domain='0x0000' bus='0x00' slot='0x05' function='0x2'/>
    </controller>
    <controller type='pci' index='0' model='pci-root'>
      <alias name='pci.0'/>
    </controller>
    <controller type='virtio-serial' index='0'>
      <alias name='virtio-serial0'/>
      <address type='pci' domain='0x0000' bus='0x00' slot='0x06' function='0x0'/>
    </controller>
    <interface type='bridge'>
      <mac address='52:54:00:d2:e6:27'/>
      <source bridge='intbr0'/>
      <target dev='vnet1'/>
      <model type='virtio'/>
      <alias name='net0'/>
      <address type='pci' domain='0x0000' bus='0x00' slot='0x03' function='0x0'/>
    </interface>
    <interface type='bridge'>
      <mac address='52:54:00:18:80:dd'/>
      <source bridge='virbr0'/>
      <target dev='vnet2'/>
      <model type='virtio'/>
      <alias name='net1'/>
      <address type='pci' domain='0x0000' bus='0x00' slot='0x04' function='0x0'/>
    </interface>
    <serial type='pty'>
      <source path='/dev/pts/3'/>
      <target port='0'/>
      <alias name='serial0'/>
    </serial>
    <console type='pty' tty='/dev/pts/3'>
      <source path='/dev/pts/3'/>
      <target type='serial' port='0'/>
      <alias name='serial0'/>
    </console>
    <channel type='unix'>
      <source mode='bind' path='/var/lib/libvirt/qemu/channel/target/domain-8-core6/org.qemu.guest_agent.0'/>
      <target type='virtio' name='org.qemu.guest_agent.0' state='disconnected'/>
      <alias name='channel0'/>
      <address type='virtio-serial' controller='0' bus='0' port='1'/>
    </channel>
    <channel type='spicevmc'>
      <target type='virtio' name='com.redhat.spice.0' state='disconnected'/>
      <alias name='channel1'/>
      <address type='virtio-serial' controller='0' bus='0' port='2'/>
    </channel>
    <input type='tablet' bus='usb'>
      <alias name='input0'/>
      <address type='usb' bus='0' port='1'/>
    </input>
    <input type='mouse' bus='ps2'>
      <alias name='input1'/>
    </input>
    <input type='keyboard' bus='ps2'>
      <alias name='input2'/>
    </input>
    <graphics type='spice' port='5901' autoport='yes' listen='127.0.0.1'>
      <listen type='address' address='127.0.0.1'/>
      <image compression='off'/>
    </graphics>
    <video>
      <model type='qxl' ram='65536' vram='65536' vgamem='16384' heads='1' primary='yes'/>
      <alias name='video0'/>
      <address type='pci' domain='0x0000' bus='0x00' slot='0x02' function='0x0'/>
    </video>
    <redirdev bus='usb' type='spicevmc'>
      <alias name='redir0'/>
      <address type='usb' bus='0' port='2'/>
    </redirdev>
    <redirdev bus='usb' type='spicevmc'>
      <alias name='redir1'/>
      <address type='usb' bus='0' port='3'/>
    </redirdev>
    <memballoon model='virtio'>
      <alias name='balloon0'/>
      <address type='pci' domain='0x0000' bus='0x00' slot='0x08' function='0x0'/>
    </memballoon>
  </devices>
  <seclabel type='none' model='none'/>
  <seclabel type='dynamic' model='dac' relabel='yes'>
    <label>+107:+107</label>
    <imagelabel>+107:+107</imagelabel>
  </seclabel>
</domain>
EOF
Attention
Before executing this, make sure that variable ONANALYTICS_FULL_VERSION is set.
3.4.3.2.4.2. ANALYTICS:
cat <<EOF > /home/opennac/analytics.xml
<domain type='kvm' id='9'>
  <name>analytics</name>
  <uuid>7a19e31e-a0a2-4211-94db-d417507834ae</uuid>
  <memory unit='KiB'>8388608</memory>
  <currentMemory unit='KiB'>8388608</currentMemory>
  <vcpu placement='static'>4</vcpu>
  <resource>
    <partition>/machine</partition>
  </resource>
  <os>
    <type arch='x86_64' machine='pc-i440fx-rhel7.0.0'>hvm</type>
    <boot dev='hd'/>
  </os>
  <features>
    <acpi/>
    <apic/>
  </features>
  <cpu mode='custom' match='exact' check='full'>
    <model fallback='forbid'>Nehalem</model>
    <feature policy='require' name='x2apic'/>
    <feature policy='require' name='hypervisor'/>
  </cpu>
  <clock offset='utc'>
    <timer name='rtc' tickpolicy='catchup'/>
    <timer name='pit' tickpolicy='delay'/>
    <timer name='hpet' present='no'/>
  </clock>
  <on_poweroff>destroy</on_poweroff>
  <on_reboot>restart</on_reboot>
  <on_crash>destroy</on_crash>
  <pm>
    <suspend-to-mem enabled='no'/>
    <suspend-to-disk enabled='no'/>
  </pm>
  <devices>
    <emulator>/usr/libexec/qemu-kvm</emulator>
    <disk type='file' device='disk'>
      <driver name='qemu' type='qcow2'/>
      <source file='/home/opennac/analytics/opennac_analytics_${ONANALYTICS_FULL_VERSION}_img-disk1.qcow2'/>
      <backingStore/>
      <target dev='sda' bus='sata'/>
      <alias name='sata0-0-0'/>
      <address type='drive' controller='0' bus='0' target='0' unit='0'/>
    </disk>
    <controller type='usb' index='0' model='ich9-ehci1'>
      <alias name='usb'/>
      <address type='pci' domain='0x0000' bus='0x00' slot='0x04' function='0x7'/>
    </controller>
    <controller type='usb' index='0' model='ich9-uhci1'>
      <alias name='usb'/>
      <master startport='0'/>
      <address type='pci' domain='0x0000' bus='0x00' slot='0x04' function='0x0' multifunction='on'/>
    </controller>
    <controller type='usb' index='0' model='ich9-uhci2'>
      <alias name='usb'/>
      <master startport='2'/>
      <address type='pci' domain='0x0000' bus='0x00' slot='0x04' function='0x1'/>
    </controller>
    <controller type='usb' index='0' model='ich9-uhci3'>
      <alias name='usb'/>
      <master startport='4'/>
      <address type='pci' domain='0x0000' bus='0x00' slot='0x04' function='0x2'/>
    </controller>
    <controller type='pci' index='0' model='pci-root'>
      <alias name='pci.0'/>
    </controller>
    <controller type='virtio-serial' index='0'>
      <alias name='virtio-serial0'/>
      <address type='pci' domain='0x0000' bus='0x00' slot='0x05' function='0x0'/>
    </controller>
    <controller type='sata' index='0'>
      <alias name='sata0'/>
      <address type='pci' domain='0x0000' bus='0x00' slot='0x06' function='0x0'/>
    </controller>
    <interface type='bridge'>
      <mac address='52:54:00:5a:6b:d1'/>
      <source bridge='intbr0'/>
      <target dev='vnet0'/>
      <model type='virtio'/>
      <alias name='net0'/>
      <address type='pci' domain='0x0000' bus='0x00' slot='0x03' function='0x0'/>
    </interface>
    <interface type='bridge'>
      <mac address='52:54:00:39:46:70'/>
      <source bridge='virbr0'/>
      <target dev='vnet5'/>
      <model type='virtio'/>
      <alias name='net1'/>
      <address type='pci' domain='0x0000' bus='0x00' slot='0x08' function='0x0'/>
    </interface>
    <serial type='pty'>
      <source path='/dev/pts/2'/>
      <target port='0'/>
      <alias name='serial0'/>
    </serial>
    <console type='pty' tty='/dev/pts/2'>
      <source path='/dev/pts/2'/>
      <target type='serial' port='0'/>
      <alias name='serial0'/>
    </console>
    <channel type='unix'>
      <source mode='bind' path='/var/lib/libvirt/qemu/channel/target/domain-9-analytics/org.qemu.guest_agent.0'/>
      <target type='virtio' name='org.qemu.guest_agent.0' state='disconnected'/>
      <alias name='channel0'/>
      <address type='virtio-serial' controller='0' bus='0' port='1'/>
    </channel>
    <channel type='spicevmc'>
      <target type='virtio' name='com.redhat.spice.0' state='disconnected'/>
      <alias name='channel1'/>
      <address type='virtio-serial' controller='0' bus='0' port='2'/>
    </channel>
    <input type='tablet' bus='usb'>
      <alias name='input0'/>
      <address type='usb' bus='0' port='1'/>
    </input>
    <input type='mouse' bus='ps2'>
      <alias name='input1'/>
    </input>
    <input type='keyboard' bus='ps2'>
      <alias name='input2'/>
    </input>
    <graphics type='spice' port='5900' autoport='yes' listen='127.0.0.1'>
      <listen type='address' address='127.0.0.1'/>
      <image compression='off'/>
    </graphics>
    <video>
      <model type='qxl' ram='65536' vram='65536' vgamem='16384' heads='1' primary='yes'/>
      <alias name='video0'/>
      <address type='pci' domain='0x0000' bus='0x00' slot='0x02' function='0x0'/>
    </video>
    <redirdev bus='usb' type='spicevmc'>
      <alias name='redir0'/>
      <address type='usb' bus='0' port='2'/>
    </redirdev>
    <redirdev bus='usb' type='spicevmc'>
      <alias name='redir1'/>
      <address type='usb' bus='0' port='3'/>
    </redirdev>
    <memballoon model='virtio'>
      <alias name='balloon0'/>
      <address type='pci' domain='0x0000' bus='0x00' slot='0x07' function='0x0'/>
    </memballoon>
  </devices>
  <seclabel type='none' model='none'/>
  <seclabel type='dynamic' model='dac' relabel='yes'>
    <label>+107:+107</label>
    <imagelabel>+107:+107</imagelabel>
  </seclabel>
</domain>
EOF
Create and start the machines:
chown qemu: -R /home/opennac

virsh define /home/opennac/core6.xml
virsh define /home/opennac/analytics.xml

virsh create /home/opennac/core6.xml
virsh create /home/opennac/analytics.xml

virsh autostart core6
virsh autostart analytics

virsh start core6
virsh start analytics
Tip
From now on, we need to access the virtual machines. Logout from the console and reconnect to the allinone with a -Y ssh option:
ssh root@<allinoneip> -Y
Now, once we are here, we can open the virt-manager interface, so we can be able to get to the vm console:
virt-manager
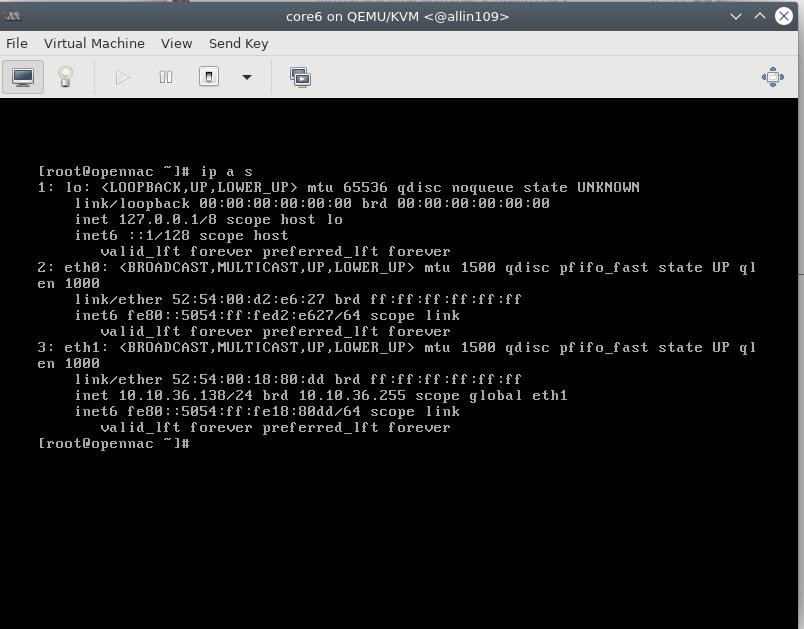
Select one of the VMs, click on the “open” button and get the IP information or configure a provisional IP for it. You will find some screenshots for guidance below:

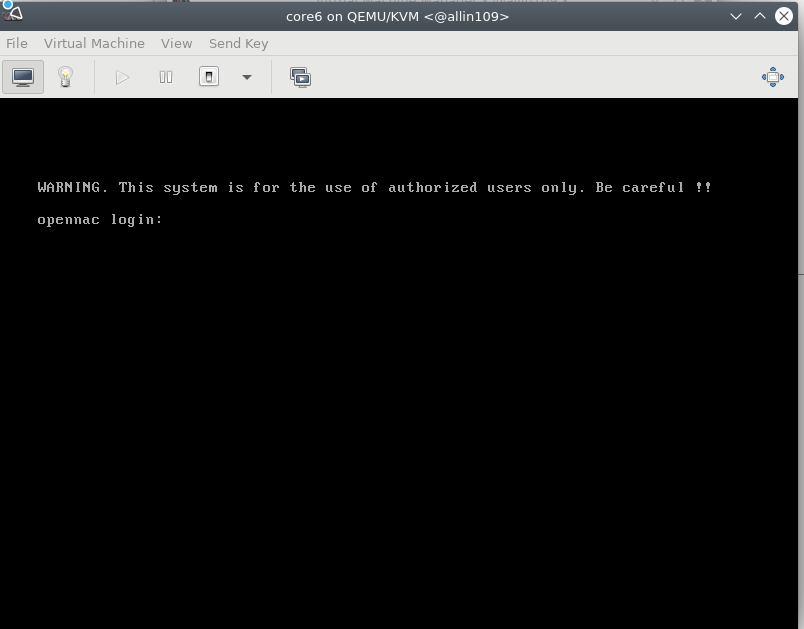
If we don’t have an IP assigned, we need to activate DHCP via
dhclient eth1
After that, we get the IP
The next steps will take place inside each virtual machine console, via SSH.
3.4.3.2.5. Core Configuration
export PUBLIC_IP=10.10.36.167
export PUBLIC_MASK=255.255.255.0
export DEFAULT_GW=10.10.36.254
export DNS=10.20.0.11
export PUBLIC_IF=eth1
export INT_IF=eth0
export HOSTNAME=oncore
Execute network configuration
cat <<EOF >> /etc/sysconfig/network
HOSTNAME=${HOSTNAME}
EOF

hostname ${HOSTNAME}

cat <<EOF > /etc/sysconfig/network-scripts/ifcfg-${INT_IF}
DEVICE="${INT_IF}"
BOOTPROTO="static"
IPADDR="192.168.69.5"
NETMASK="255.255.255.0"
ONBOOT="yes"
TYPE="Ethernet"
NM_CONTROLLED="no"
EOF

cat <<EOF > /etc/sysconfig/network-scripts/ifcfg-${PUBLIC_IF}
DEVICE="${PUBLIC_IF}"
BOOTPROTO="static"
IPADDR="${PUBLIC_IP}"
NETMASK="${PUBLIC_MASK}"
GATEWAY="${DEFAULT_GW}"
DNS1=${DNS}
ONBOOT="yes"
TYPE="Ethernet"
NM_CONTROLLED="no"
EOF

systemctl restart NetworkManager
sed -i 's/^.*onanalytics$/192.168.69.10\tonanalytics/' /etc/hosts
sed -i 's/^.*onaggregator$/192.168.69.10\tonaggregator/' /etc/hosts
sed -i 's/^.*onmaster$/127.0.0.1\tonmaster/' /etc/hosts
sed -i 's/^.*oncore$/127.0.0.1\toncore/' /etc/hosts

cat <<EOF >> /etc/hosts
192.168.69.1      onsensor
EOF
Configure the healthcheck:
/bin/cp -rfv /usr/share/opennac/healthcheck/healthcheck.ini.master /usr/share/opennac/healthcheck/healthcheck.ini
Log in with the web interface on https://PUBLIC_IP/admin and execute the initial wizard. In the wizard, remember that the Kibana IP should be 192.168.69.10.
Restart the server:
reboot
3.4.3.2.6. Analytics Configuration
Let’s start with the variables exportation
Caution
REMEMBER THAT YOU NEED TO CHANGE THE DATA TO MATCH YOUR REQUIREMENTS (PUBLIC_IP, GW, etc)
export PUBLIC_IP=10.10.36.157
export PUBLIC_MASK=255.255.255.0
export DEFAULT_GW=10.10.36.254
export DNS=10.20.0.11
export PUBLIC_IF=eth1
export INT_IF=eth0
export HOSTNAME=onanalytics
Execute network configuration
cat <<EOF >> /etc/sysconfig/network
HOSTNAME=${HOSTNAME}
EOF

hostname ${HOSTNAME}

cat <<EOF > /etc/sysconfig/network-scripts/ifcfg-${INT_IF}
DEVICE="${INT_IF}"
BOOTPROTO="static"
IPADDR="192.168.69.10"
NETMASK="255.255.255.0"
ONBOOT="yes"
TYPE="Ethernet"
NM_CONTROLLED="no"
EOF

cat <<EOF > /etc/sysconfig/network-scripts/ifcfg-${PUBLIC_IF}
DEVICE="${PUBLIC_IF}"
BOOTPROTO="static"
IPADDR="${PUBLIC_IP}"
NETMASK="${PUBLIC_MASK}"
GATEWAY="${DEFAULT_GW}"
DNS1=${DNS}
ONBOOT="yes"
TYPE="Ethernet"
NM_CONTROLLED="no"
EOF

echo "${HOSTNAME}" > /etc/hostname

systemctl restart network
Configure elk variables
#/etc/logstash/jvm.options

sed -i -e "s/-Xms256m/-Xms2g/g" /etc/logstash/jvm.options
sed -i -e "s/-Xmx1g/-Xmx2g/g" /etc/logstash/jvm.options

#/etc/elasticsearch/jvm.options

sed -i -e "s/-Xms1g/-Xms4g/g" /etc/elasticsearch/jvm.options
sed -i -e "s/-Xmx1g/-Xmx4g/g" /etc/elasticsearch/jvm.options
Edit the /etc/hosts
sed -i 's/^.*onanalytics$/127.0.0.1\tonanalytics/' /etc/hosts
sed -i 's/^.*onaggregator$/127.0.0.1\tonaggregator/' /etc/hosts
sed -i 's/^.*onmaster$/192.168.69.5\tonmaster/' /etc/hosts
sed -i 's/^.*oncore$/192.168.69.5\toncore/' /etc/hosts

cat <<EOF >> /etc/hosts
192.168.69.1      onsensor
EOF
Generate and configure the API key
token=$(curl -k -s -X POST "https://onmaster/api/auth" -H "accept: application/json" -H "Content-Type: application/json" -d "{ \"username\": \"admin\", \"password\": \"opennac\", \"useOnlyLocalRepo\": true}" | python -c "import sys, json; print(json.load(sys.stdin)['token'])")
apikey_id=$(curl -k -s -X POST "https://onmaster/api/apikey" -H "accept: application/json" -H "X-Opennac-Token: ${token}" -H "X-Opennac-Username: admin" -H "Content-Type: application/json" -d "{ \"ip\": \"192.168.69.10\"}" | python -c "import sys, json; print(json.load(sys.stdin)['id'])")
onapikey=$(curl -k -s -X GET "https://onmaster/api/apikey?filters=ip%3D%3D192.168.69.10" -H "accept: application/json" -H "X-Opennac-Token: ${token}" -H "X-Opennac-Username: admin" | python -c "import sys, json; print(json.load(sys.stdin)[0]['key'])")

sed -i 's/#HERE_GOES_OPENNAC_API_KEY#/'${onapikey}'/' /etc/default/opennac
Stop sensor services:
systemctl disable dhcp-helper-reader ; systemctl disable bro ; systemctl disable pf_ring ; systemctl disable filebeat ;
Configure the healthcheck:
/bin/cp -rfv /usr/share/opennac/healthcheck/healthcheck.ini.analy+agg /usr/share/opennac/healthcheck/healthcheck.ini
Reboot the server
reboot
3.4.3.2.7. Host Details (Physical Server)
Now, back in the host server.
Generate and send ssh key.
For the following sco and ssh, you will be prompted for the root password:
ssh-keygen -t rsa

ssh-copy-id -i ~/.ssh/id_rsa.pub root@oncore

ssh-copy-id -i ~/.ssh/id_rsa.pub root@onanalytics
Now that you have already sent the keys, try to connect with them. If the connection does not ask for a password, everything is fine.
ssh root@oncore

ssh root@onanalytics

cat <<EOF > /root/update_allin1.sh
dnf clean all && dnf -y update
ssh root@onanalytics "systemctl stop logstash; systemctl stop kibana; systemctl stop elasticsearch; dnf clean all;dnf -y update logstash kibana elasticsearch; dnf -y update"
ssh root@oncore "/usr/share/opennac/utils/build-repo/update_opennac.sh"
EOF

chmod a+x /root/update_allin1.sh

cd /root/
rm -rf opennac_*
rm -rf install_sensor.sh
3.4.3.2.8. Validations
Access your Core Administration page https://${ip_oncore}/admin;
Access your Core Administration console ssh root@${ip_oncore}
Try to get access to a Network Devices “Switch” ssh admin@${ip_switch}
3.4.3.2.8.1. Use at POC
Below, we have some base steps to execute to use the Allin1 in a PoC:
Connect the USB-ethernet adapter to the indicated USB port.
Connect the external network cable (access and administration) to the USB-ethernet adapter.
Connect the network traffic cable (the one with traffic to be analyzed) to the onboard ethernet port.
Also set up a screen and a keyboard.
Turn on the allin1.
Now, once inside the host, configure change its IP address to one in the customers network. # Restart the network service;
Now you can access it via ssh and then configure the core and analytics.
Note
IMPORTANT: Do not change the IP from the internal network interfaces (the ones 192.168.69.X).
Once you are done changing the IPs, you should be able to access the Core and start using OpenNAC Enterprise (creating policies, showing visibility, etc).