VPNs Configuration
Fortigate
Fortigate firmaware: 5.6.0
Access to the adminitration portal for Fortigate appliances, and go to the User & Device -> User Groups as shown in the picture bellow:

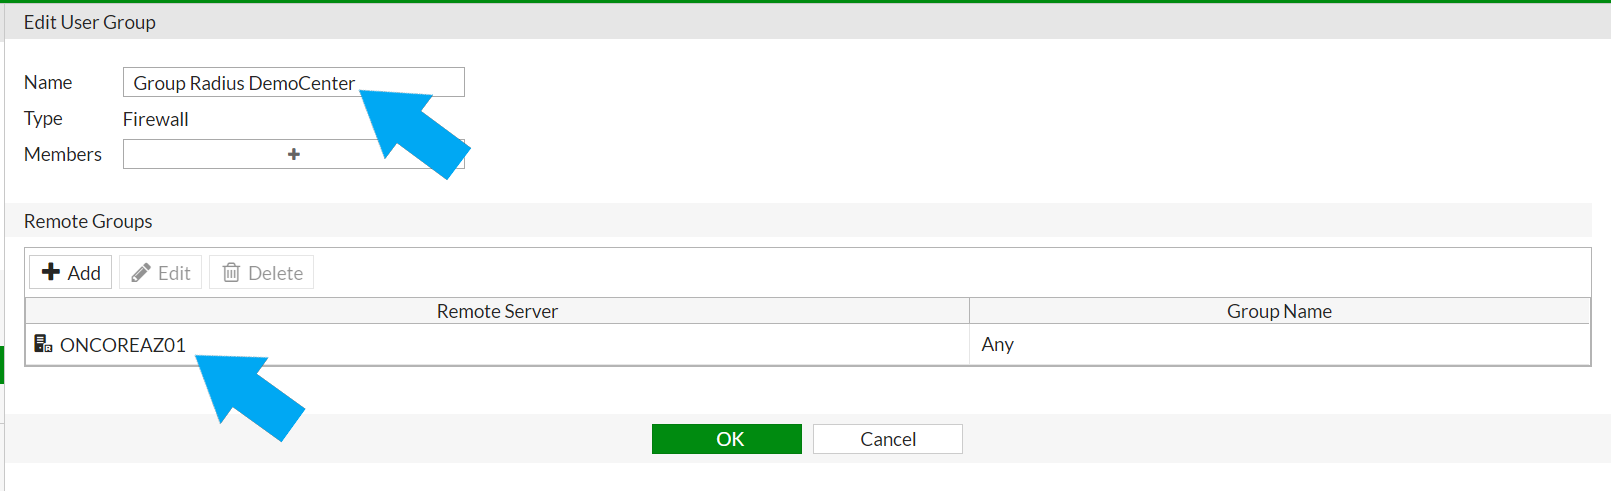
From there its required to create a user group where the VPN concentrator is selected, is important to leave the field members without any value, this is equal to ANY value.
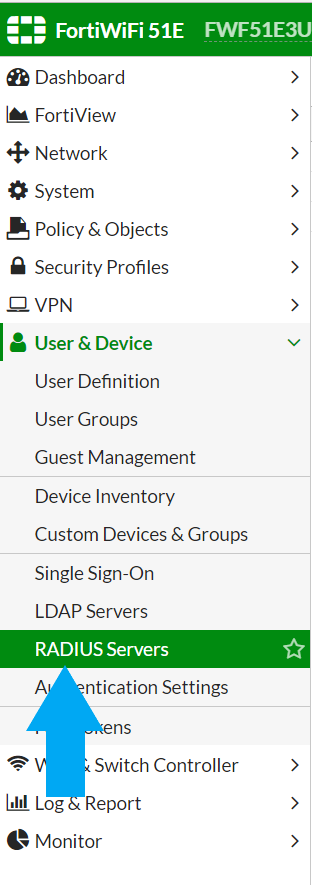
Radius Servers must be configured to integrate fortigate with openNAC Core, go to RADIUS Servers menú.
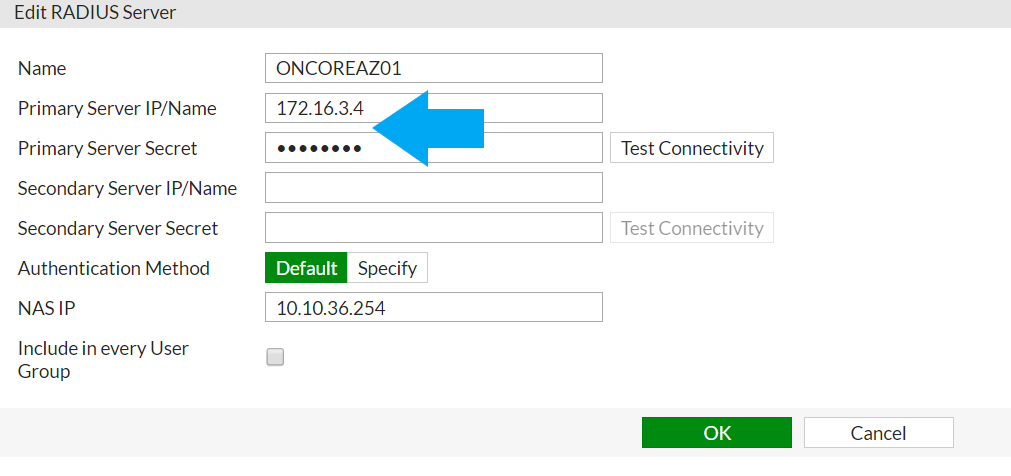
Create one radius server pointing to the openNAC Core Server where “Primary Server IP/Name” and the preshared must be set, this PSK will be defined in the openNAC Core to establishstablish the trusted relationship.
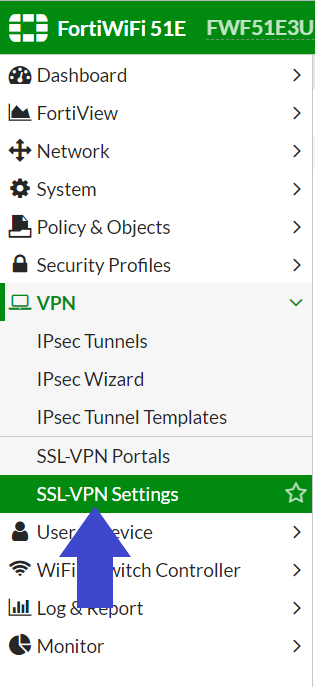
After that User groups is created, is required to enable the VPN and its configuration, go to the VPN -> SSL-VPN Settings
From settings section is required to define a few parameters to have the VPN SSL daemon up and running.
The following settings must be set:
- Interface where the VPN will listen the network access requests, in this case “internal”.
- The port where the service will be published, in this case has been set 4430.
- There will not be limited access to the SSL-VPN interface, this can be adapted by customer requirements.
- There will be used built-in certificates, if you have a PKI infrastructure in place you can use your own certificates or issued by third parties, remember that this certificate are the certificate used by VPN (server certificates)

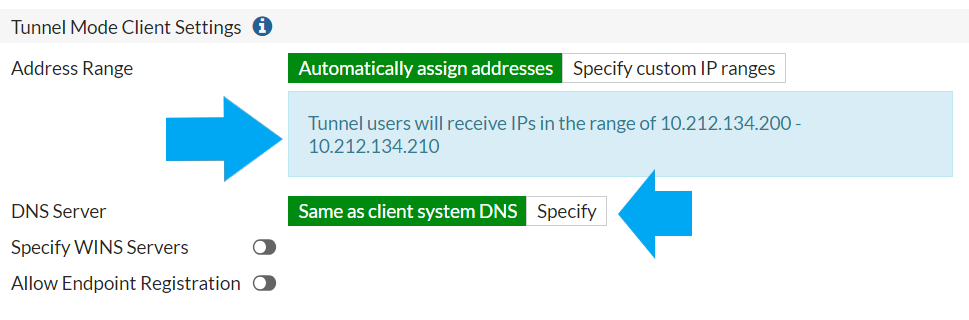
- To assign client IP configuration when accessing in the network there will be used the same VPN concentrator as DHCP Server assigning a scope 10.212.134.200-210.
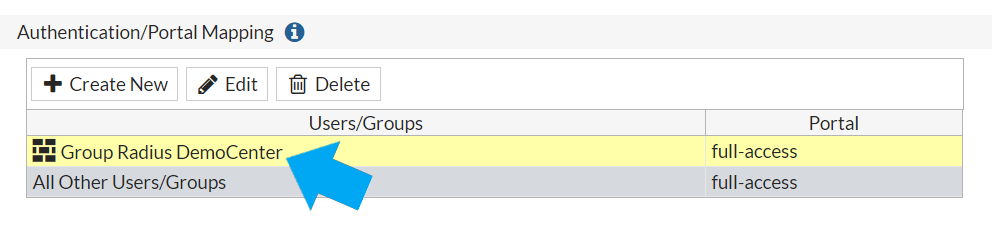
- And finally you map the group radius created before with the Authentication/Portal mapping.
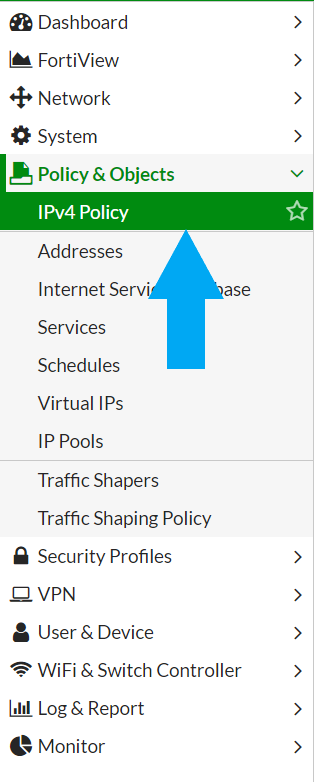
As soon as the VPN SSL and the radius configuration is in place is required to create a specific rule to allow this traffic, to manage access policy go to Policy & Objects menu.
A rule must be defined to allow SSL-VPN services.

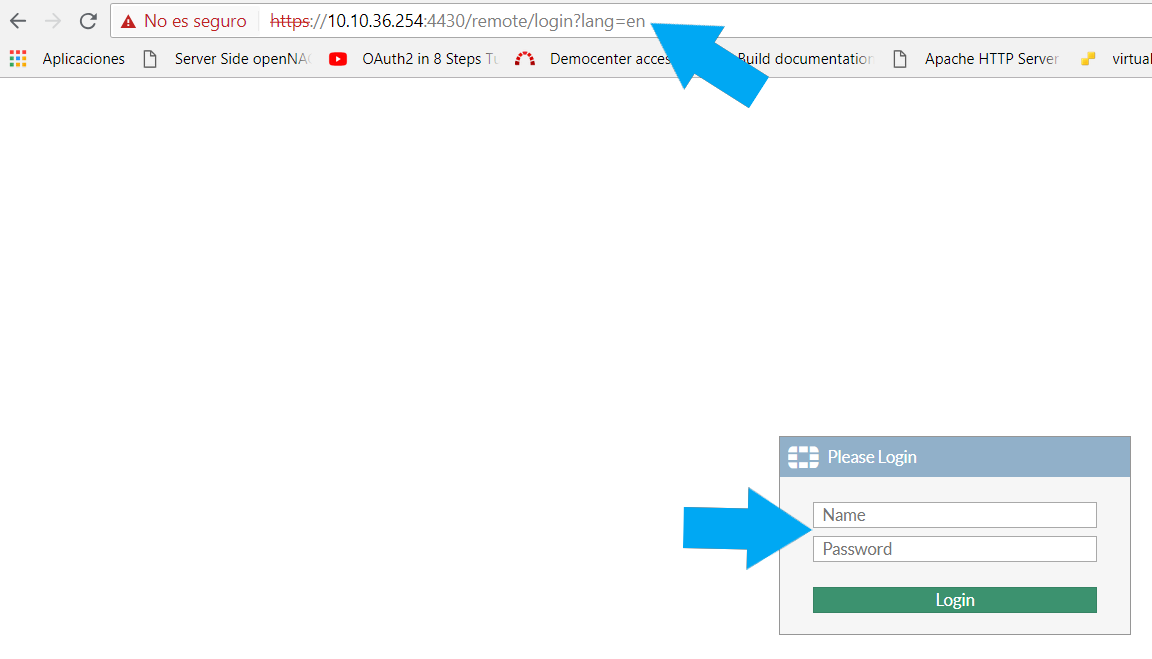
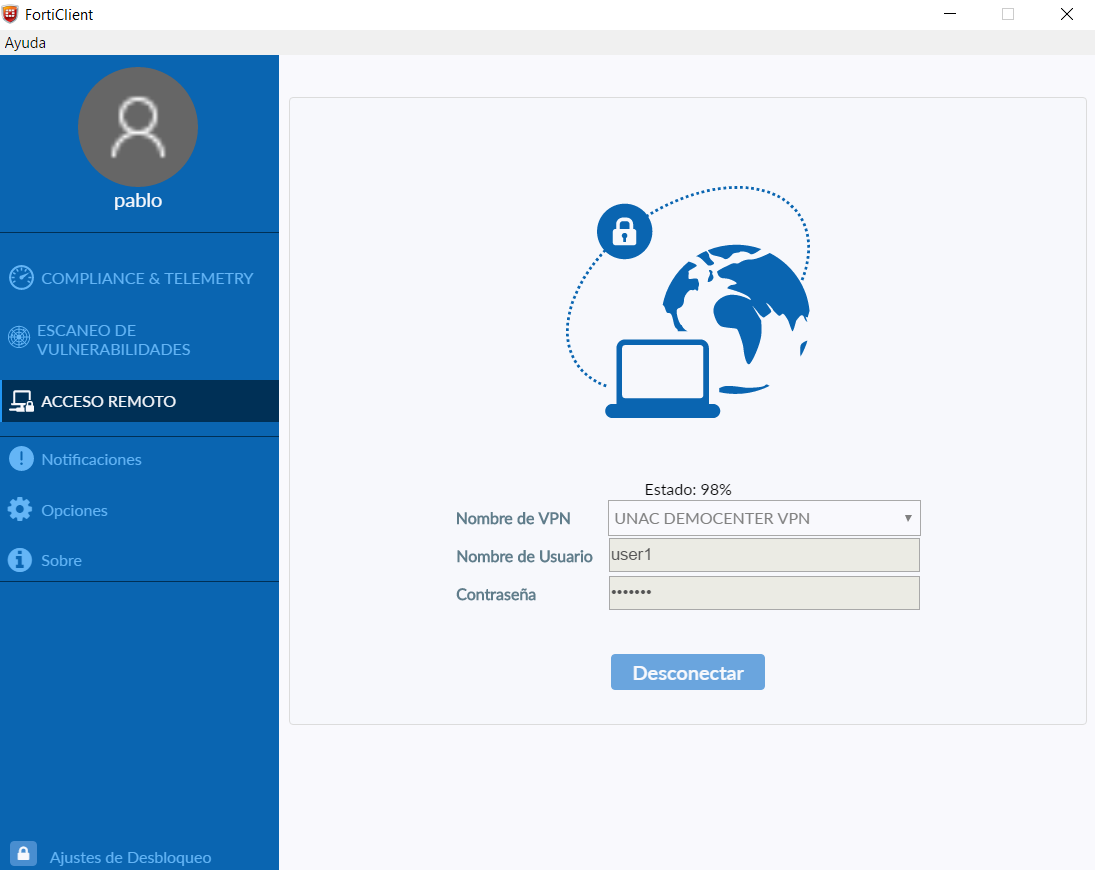
After the configuration is create is required to test it, go to the SSL-VPN web portal to check credentials, this test must be done when all the configuration pieces including openNAC are properly set.
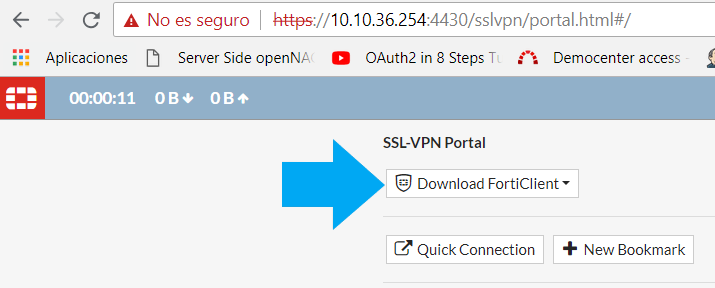
As soon as you access you are able to download the Fortigate Client.
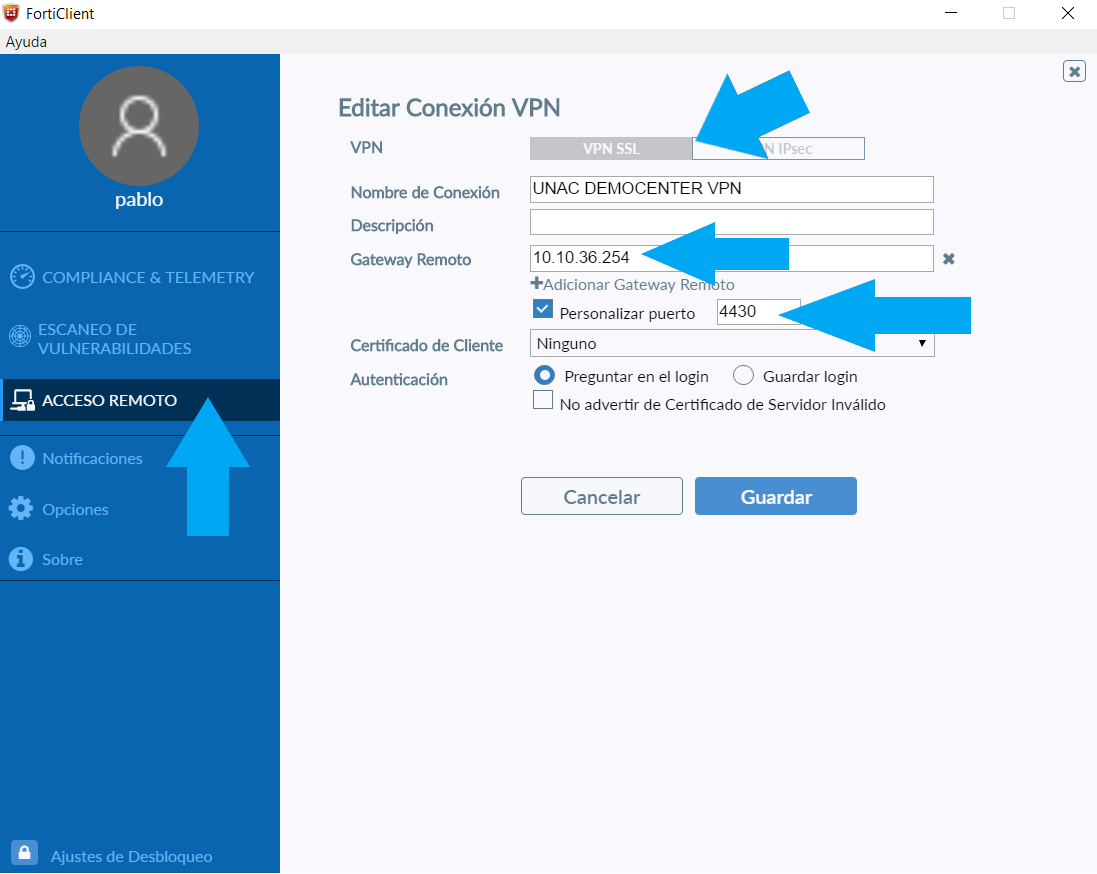
Once the Fortigate client is installed you can use the following parameters to define a new SSL-VPN connection, setting the IP, the port.
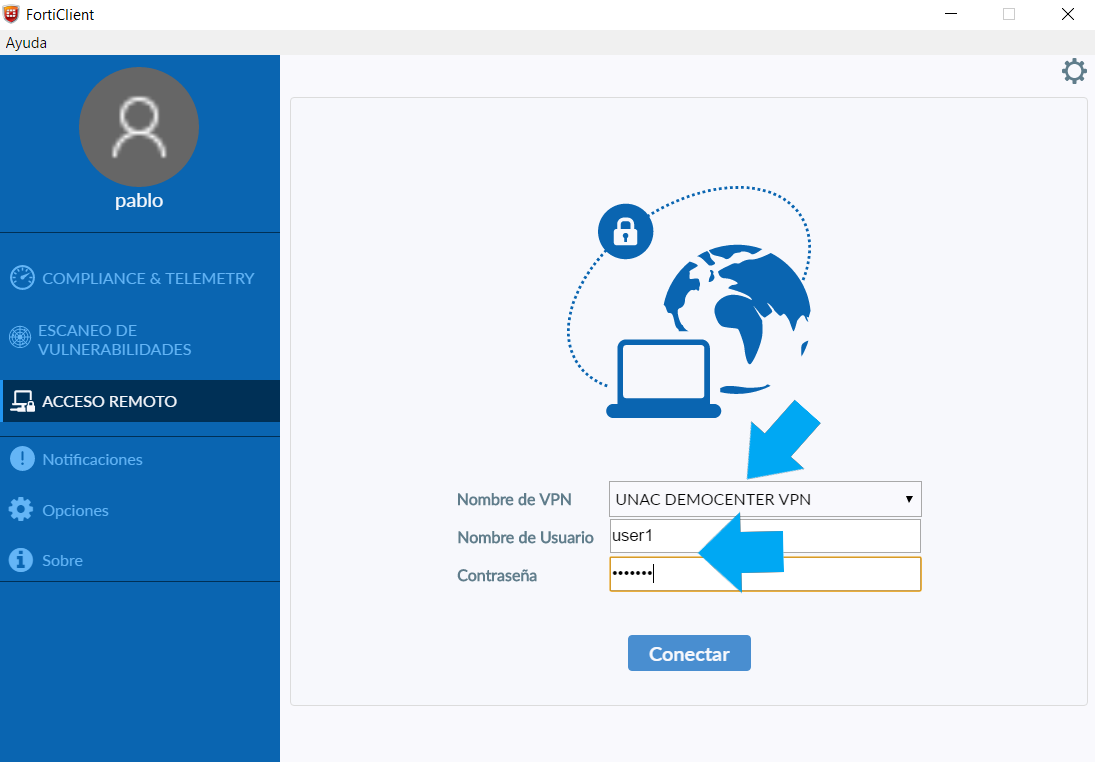
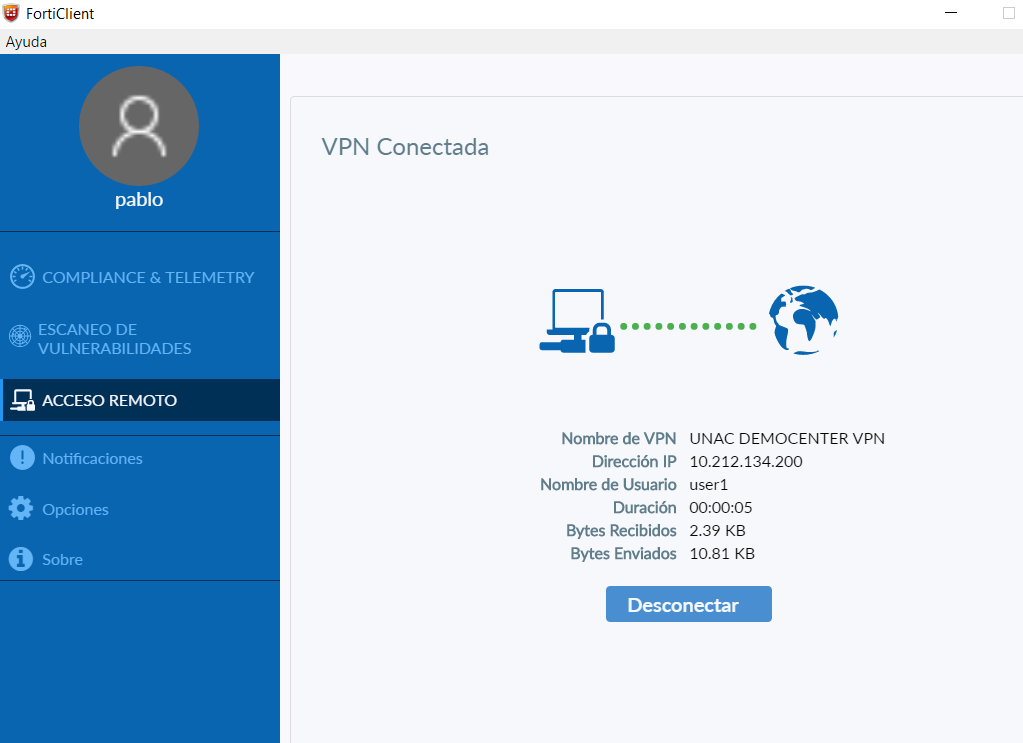
Once the Fortigate client is configured a logon prompt will apears.
Technical checks are done by Fortigate out of the box.
And the connection is finally established.
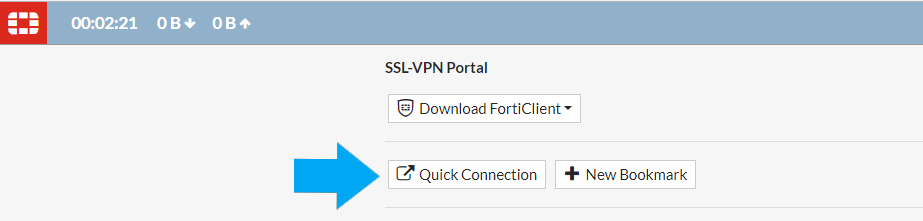
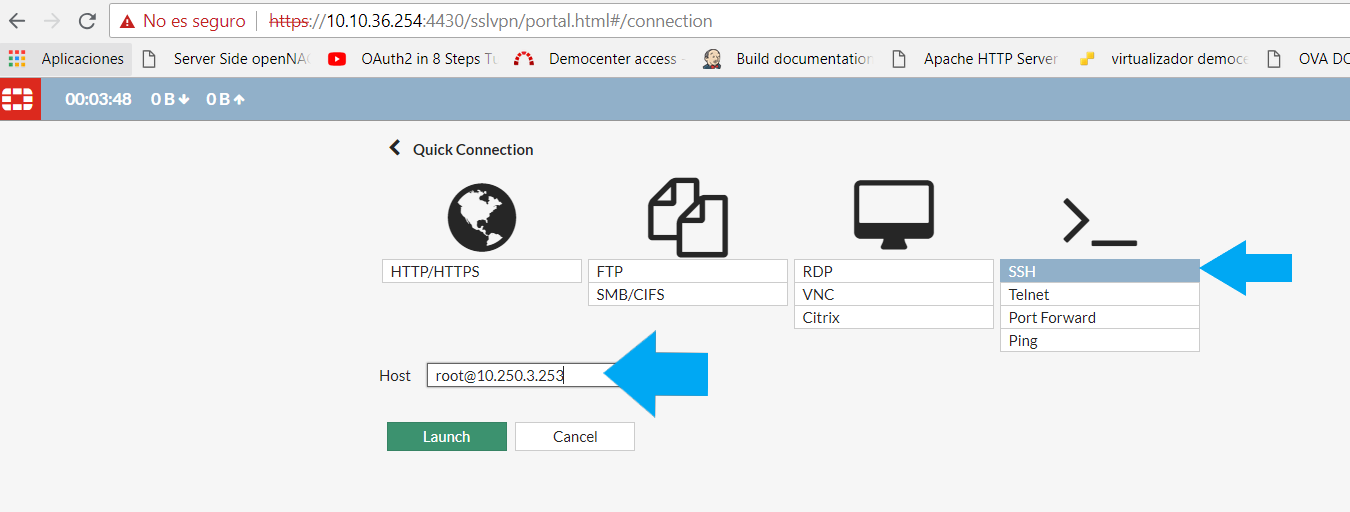
Instead of using the fortigate client is possible to use a quick connection where is possible to use the webportal plugins to connect.
To check the correct connection to any corporative internal server will be used a ssh connection.
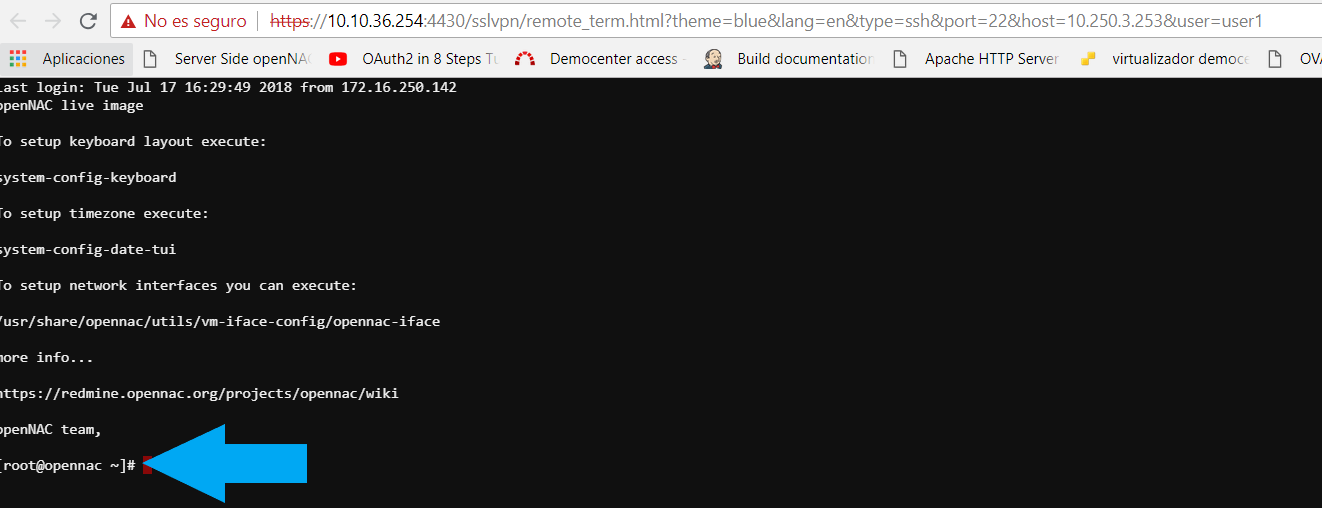
As soon as a valid credentials are introduced an promt appears.
PaloAlto
This configuration shows the integration between paloalto and openNAC with Global protect, to understand this paloalto deployment is important to mention key concepts before starting the configuration:
1. PaloAlto VPN client: That needs to be installed in the customer’s PC, the customer will use an URL vía https, this type of deployment can be deployed as multitenat so could exist multiples service URL. As soon as the client tries to connect to the VPN service a configuration file is download and is offered a valid pool of Global protect gateways, the Global protect gateway selected will be that one with the lowest TTL. The user will be sent to this gateway and the user introduce valid credentials.
2. Global protect gateway: This is the component where the service is published to the remote users.
3. Global protect portal: This is a piece where is carried out the provisioning and configuration changes.
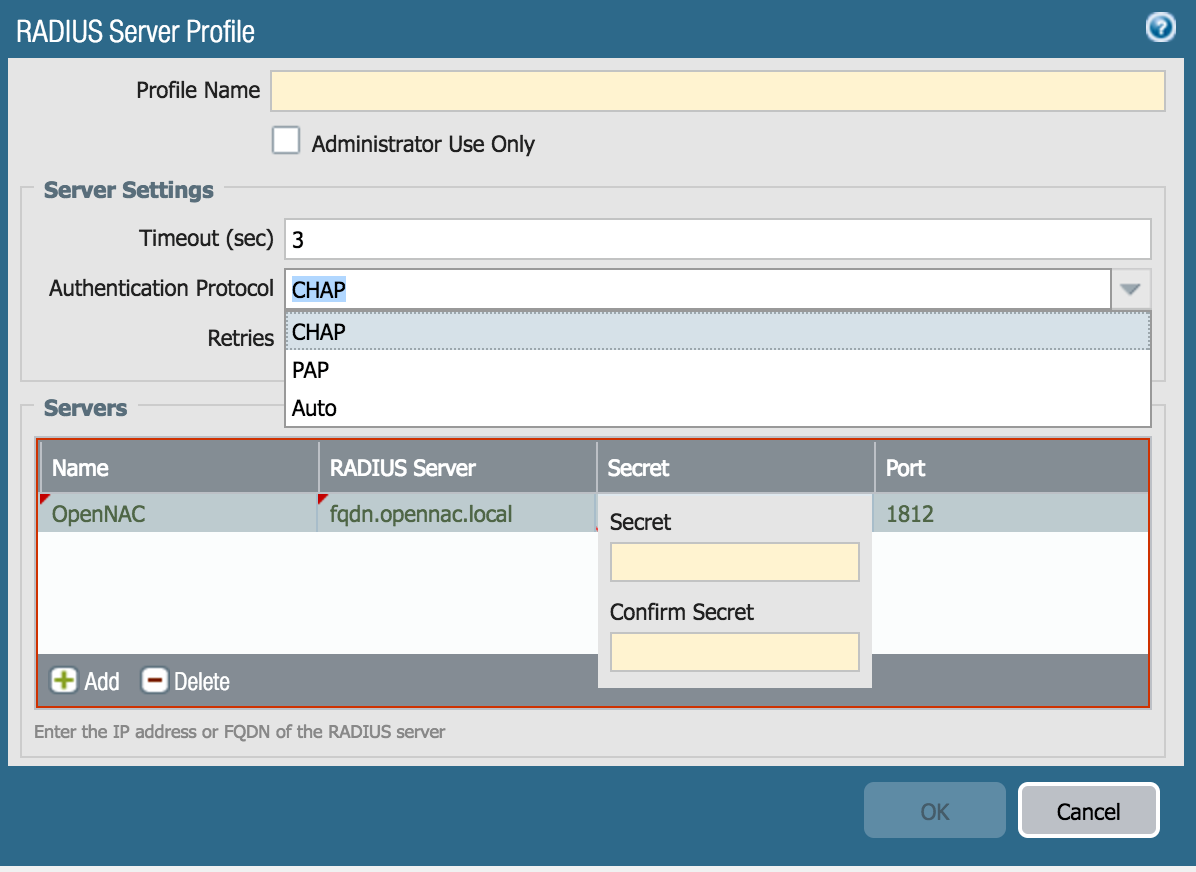
The frist step is to connect to administration portal and configure the Radius server going to Device -> Server profiles -> RADIUS Is required to define a Profile name, set CHAP as authentication protocol, the IP address or FQDN of the radius servers that in this case must the openNAC Core server. Other key important configuration is the preshared key.
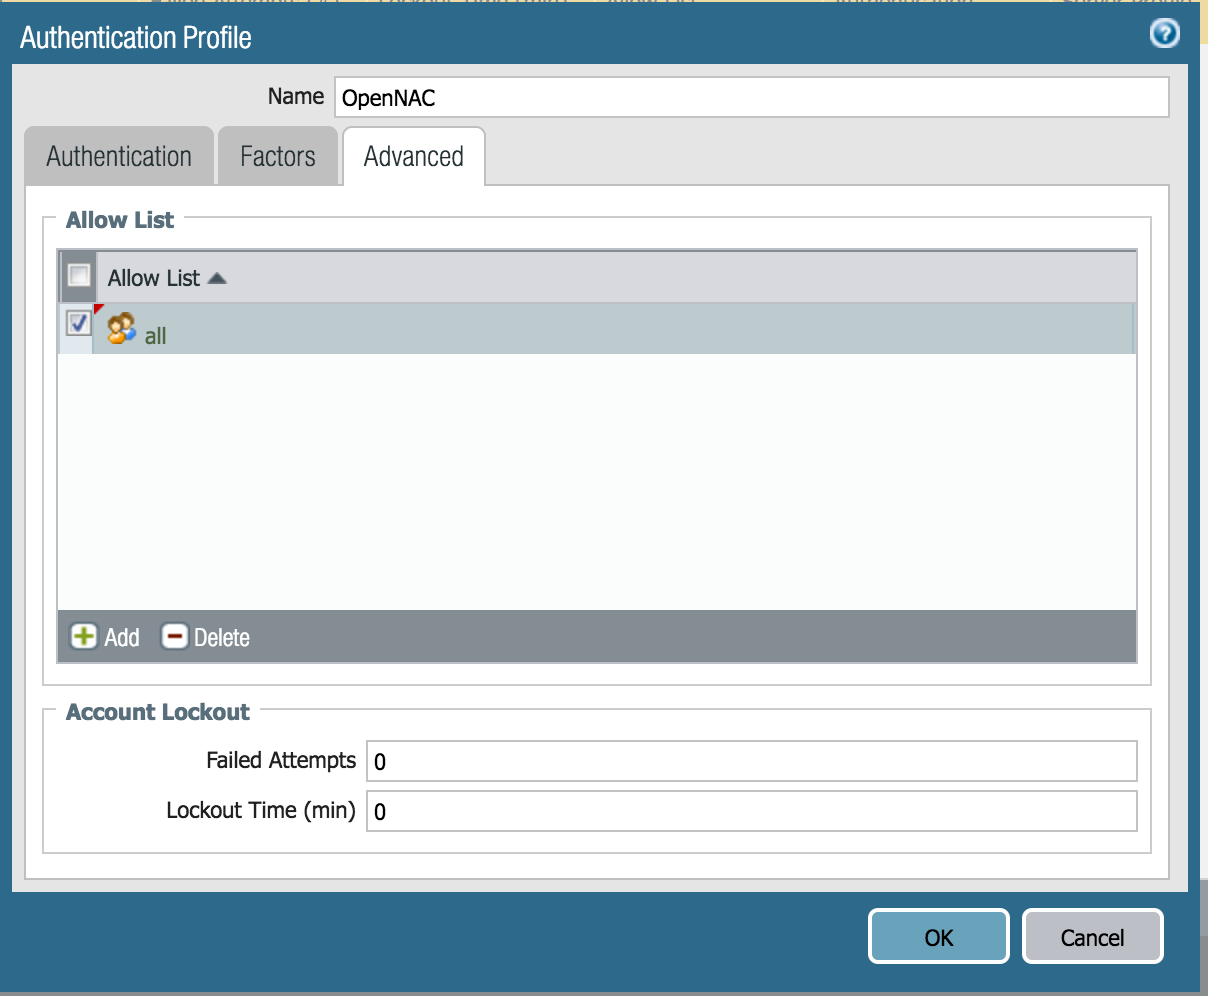
After that is required to create an Authentication profile going to Device -> Authentication Profile, where is mapped with the radius server just created in the step before.
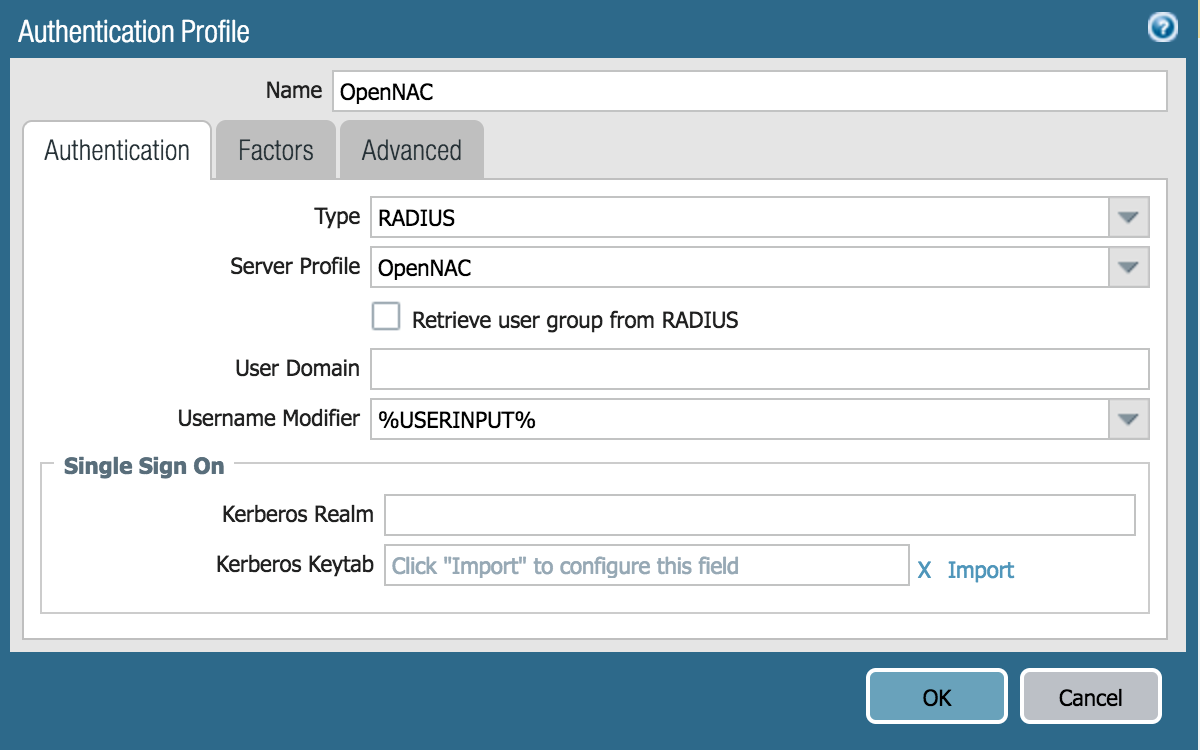
You can apply a filter and in this cases is being selected ANY, failed attempts and account lookout is also available.
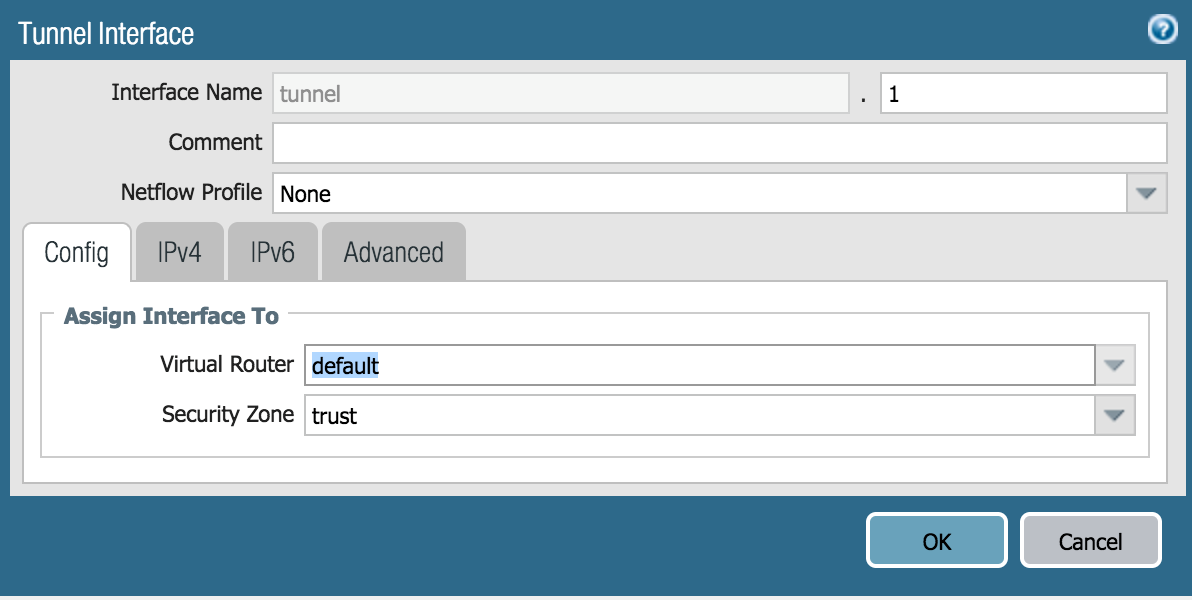
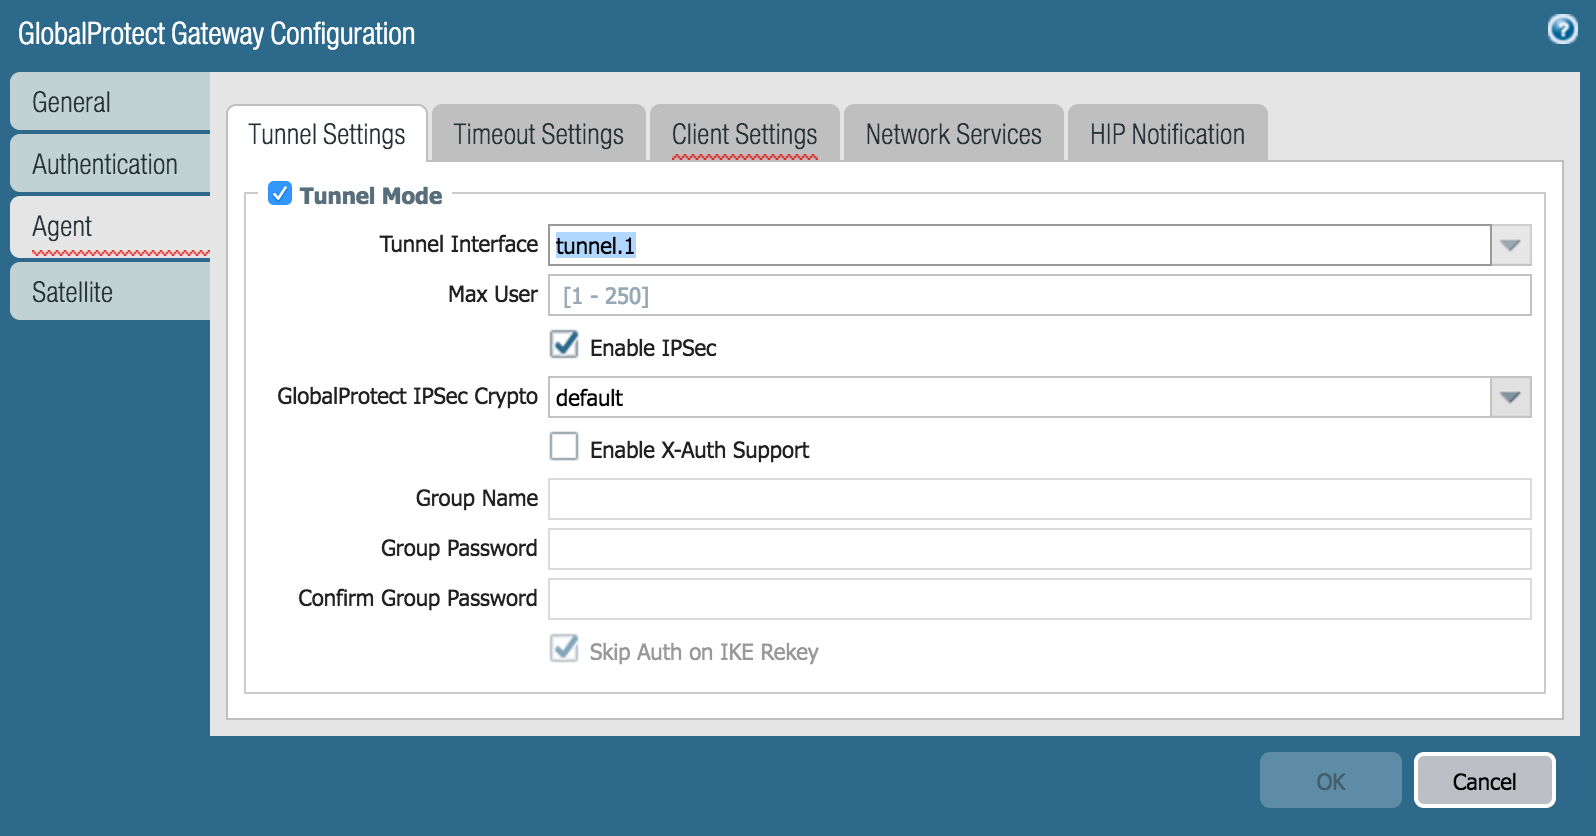
To create the VPN is needed to create an interface tunnel going to Network -> Interface -> Tunnel
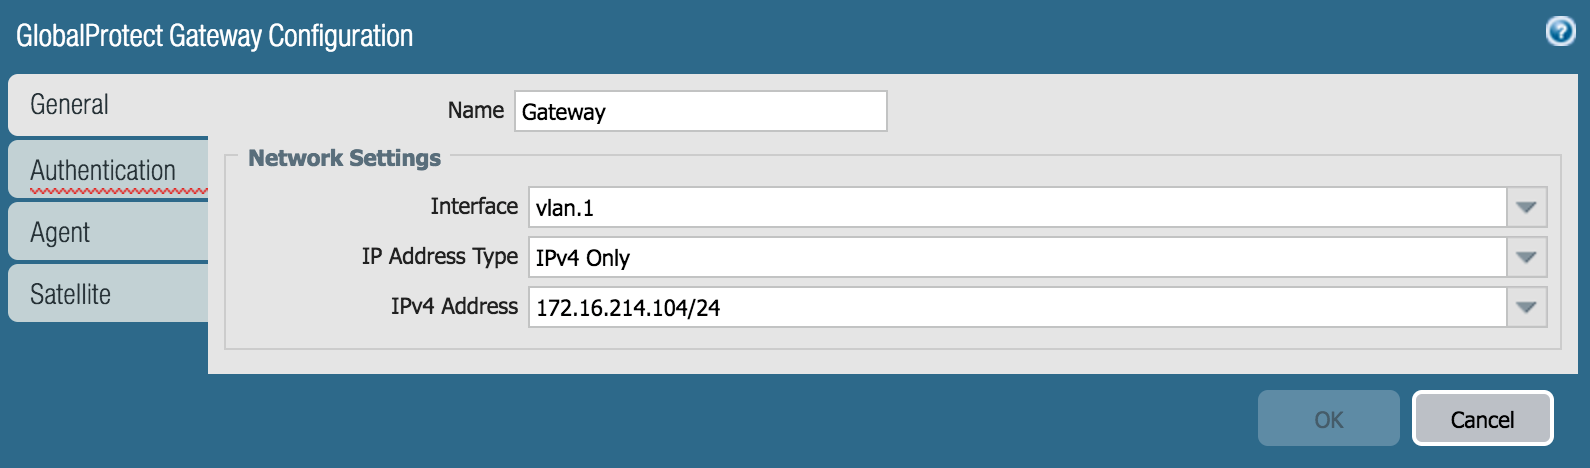
When you have a Global protect Gateway is required to configure the paloalto node (IP) that will provide the service.
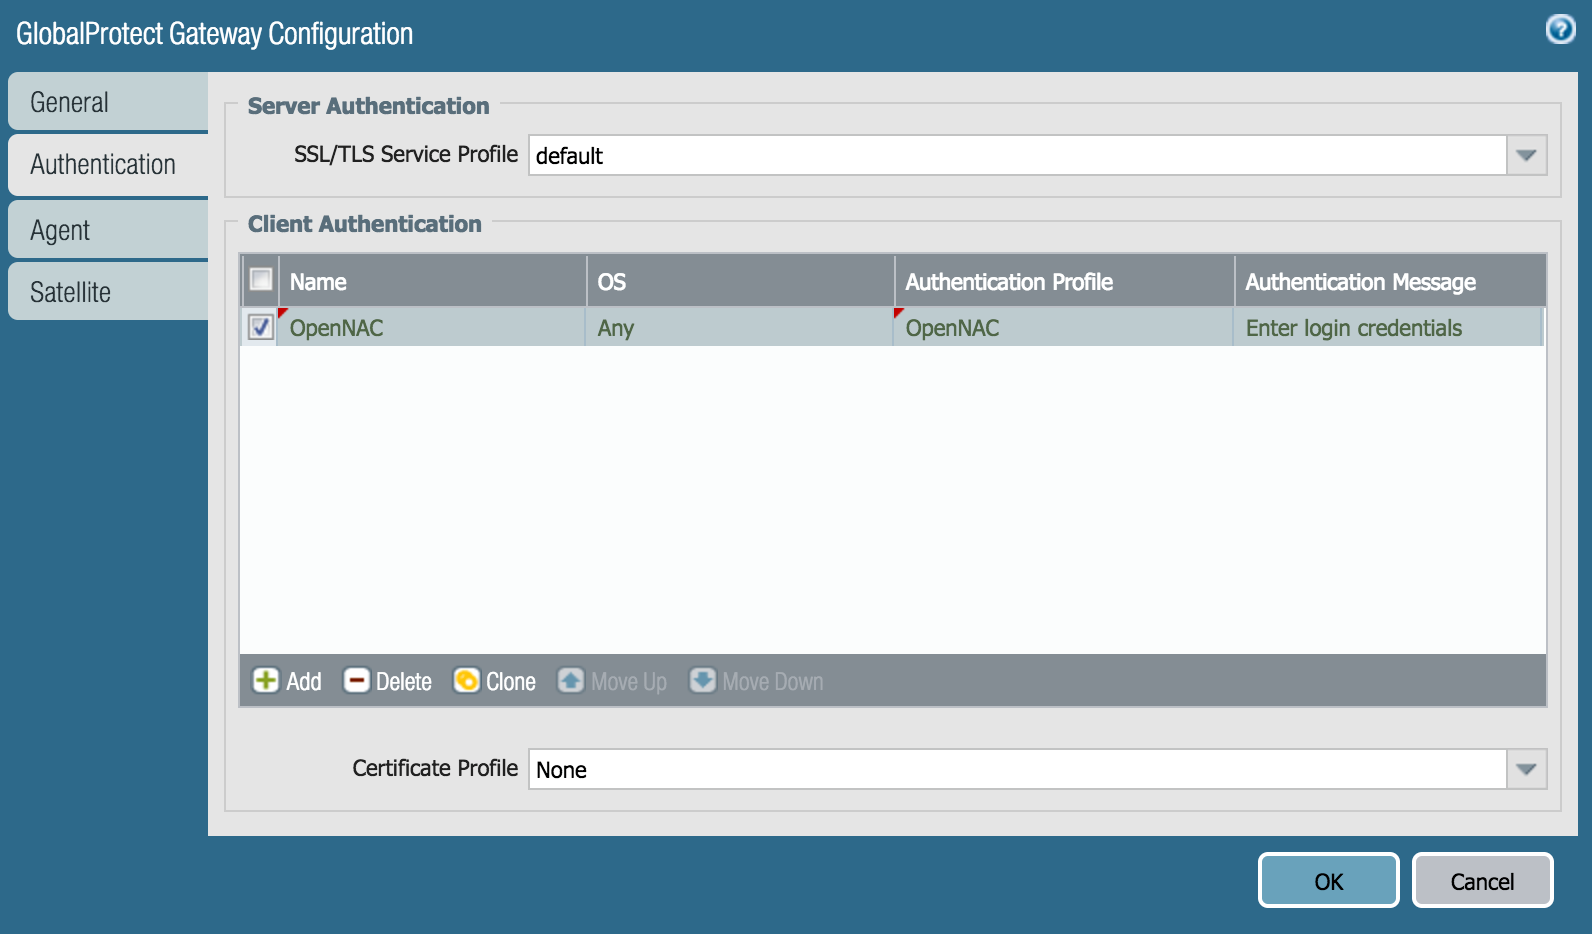
Define the server authentication allows to define authentication profile and the use of certicates, in this case will not be used certicates.
Map the gateway with the tunnel interface.
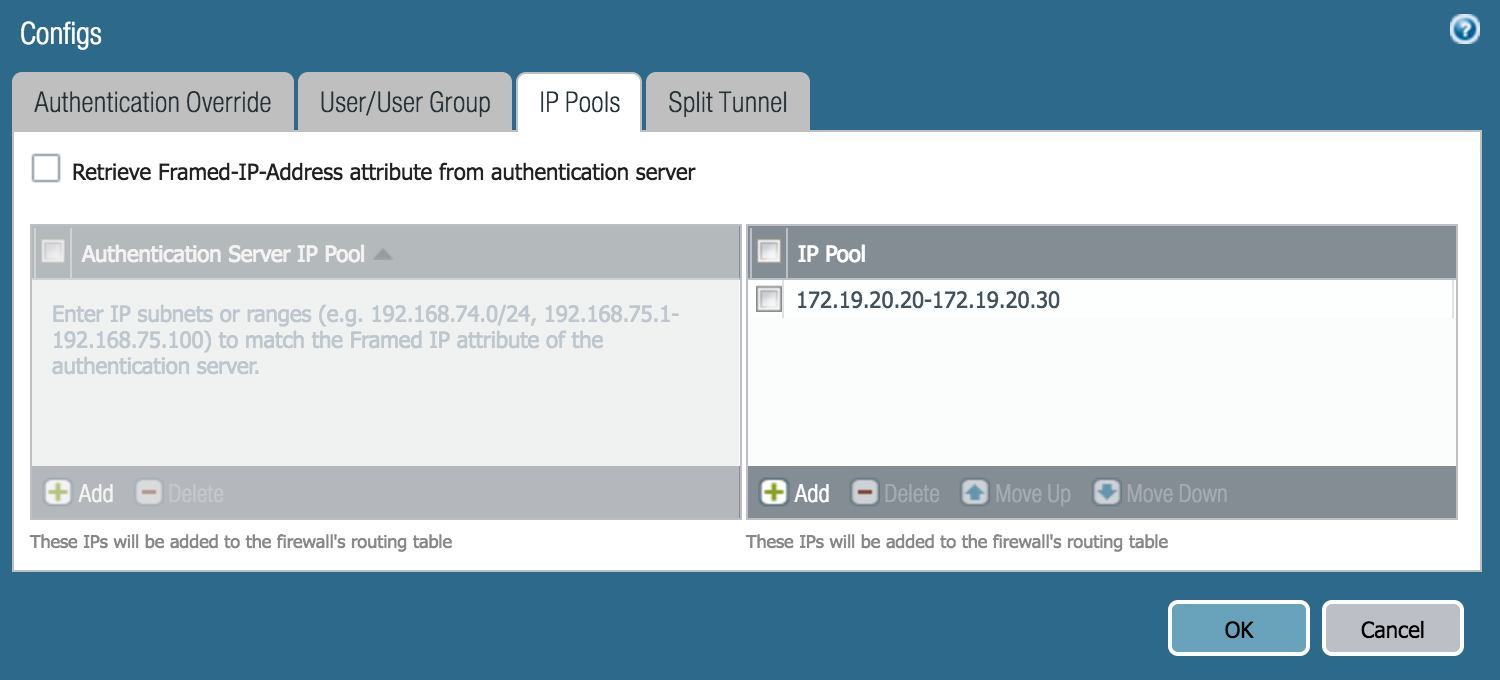
Define the DHCP pool that is going to be assigned to the remote users.

Going to the Configs section is possible to define the DHCP scope and pools.
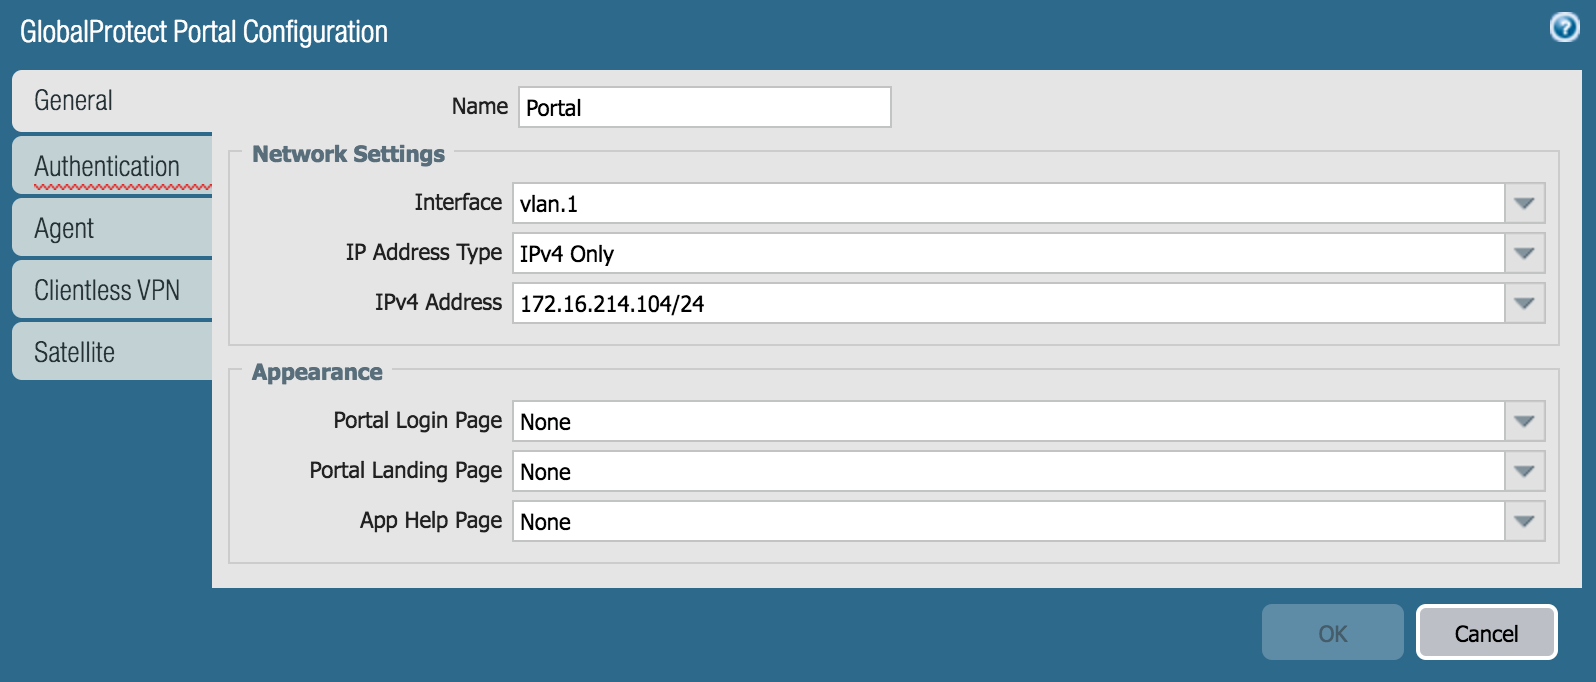
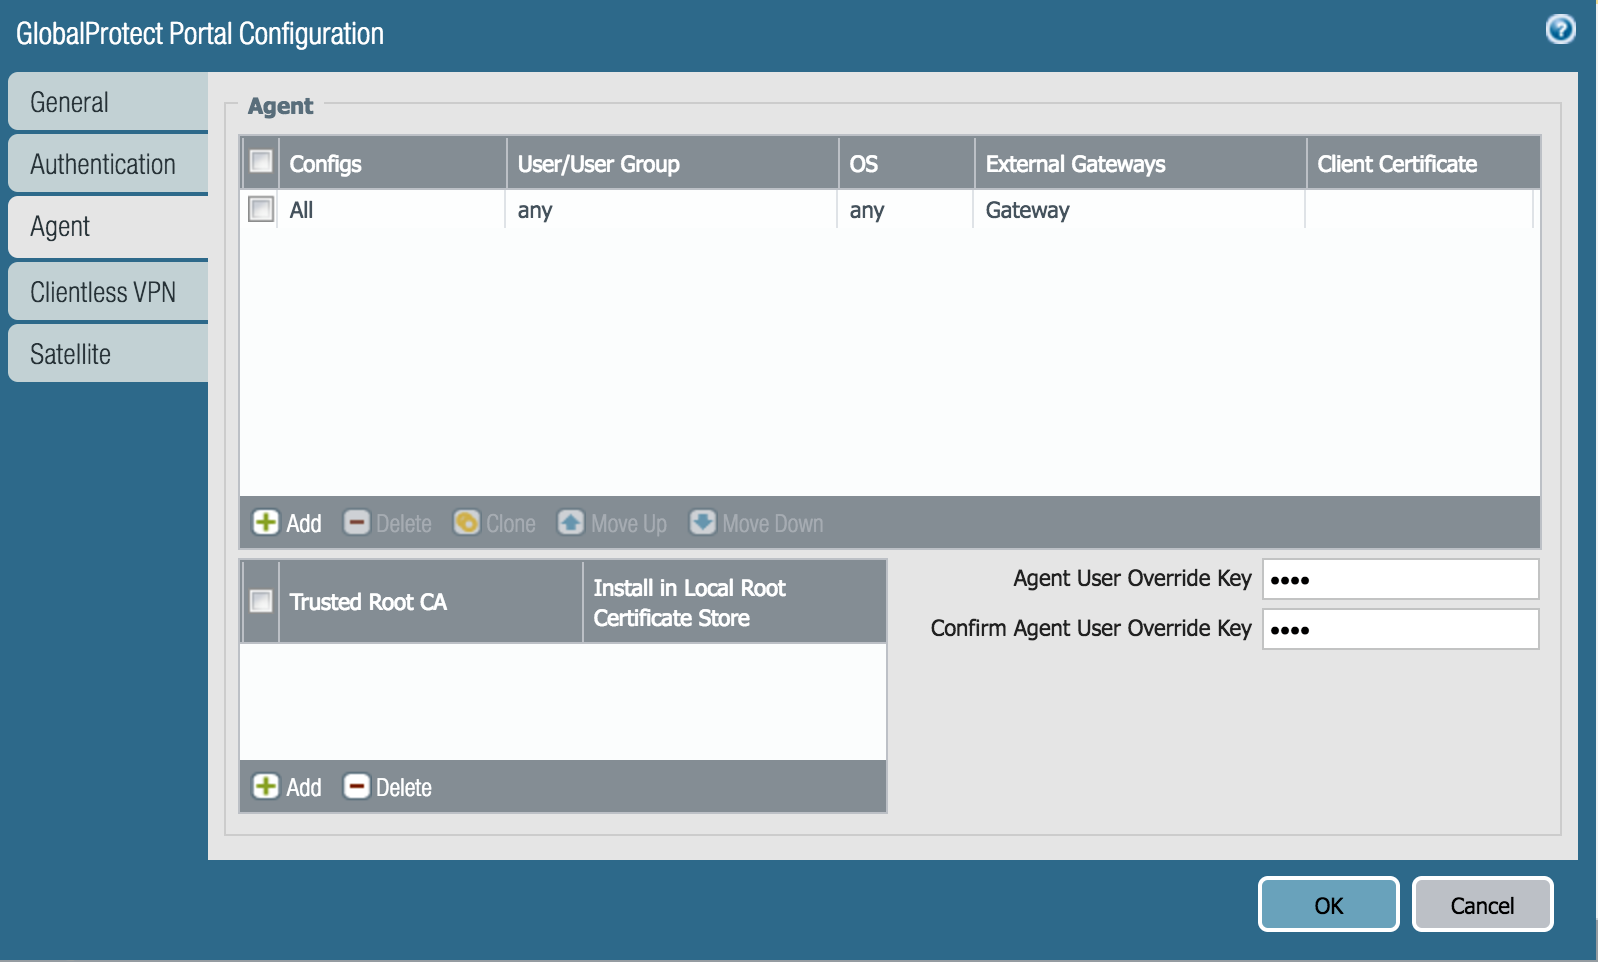
Is required to configure the Portal in the Global protect at Network -> Global Protect -> Portal, same steps are required for the Portal.
- General configuration must be set.
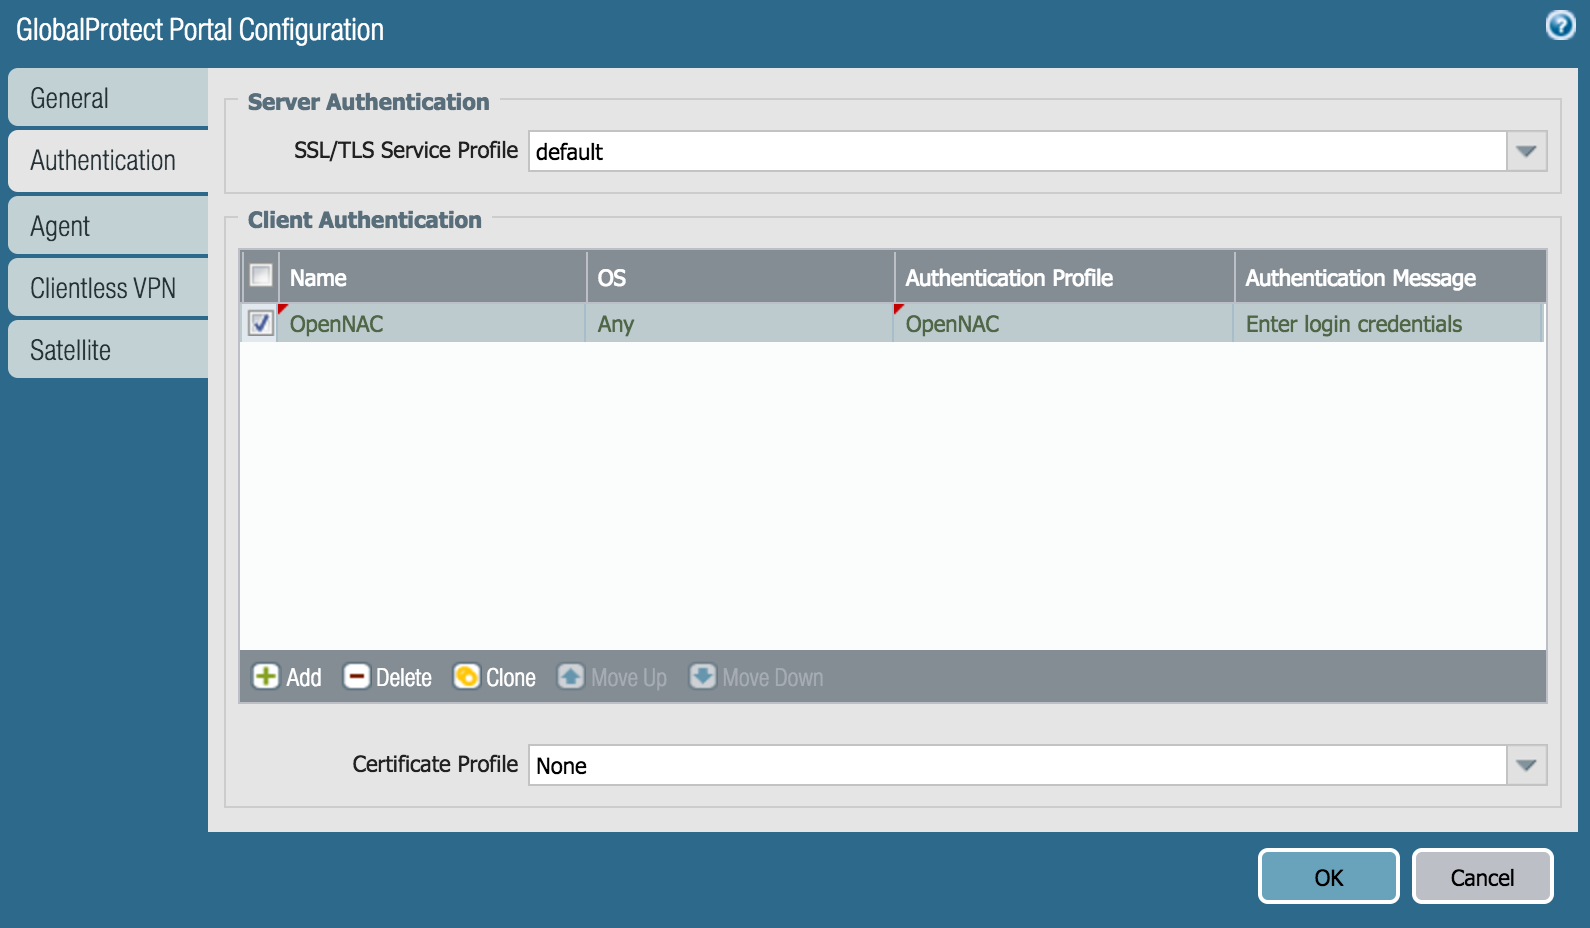
Authentication configuration must be set.
- Agent configuration.
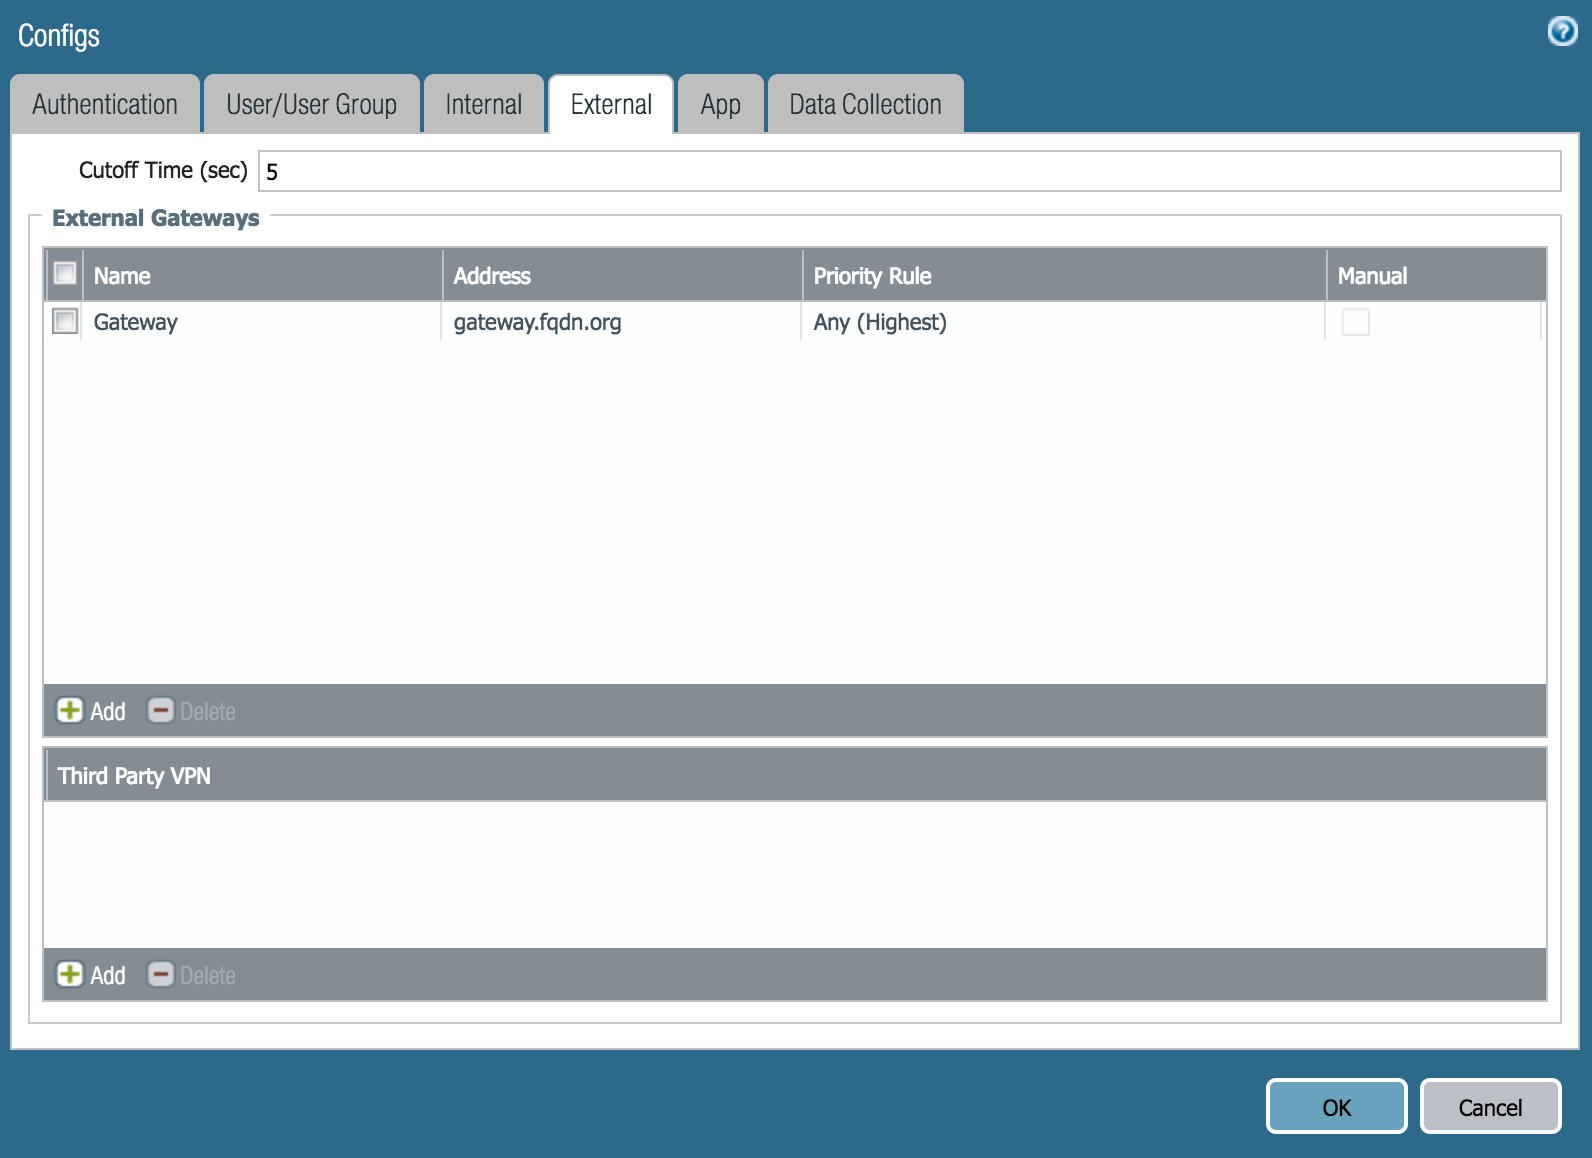
And after that to create the configuration (External) where is defined the available gateways, in this case we have only one Paloalto firewall available.