Iron Chip Integration
Before setting up the Iron Chip App configuration please review also the openNAC configurations Iron Chip Plugin.
Once we open the Iron Chip web portal, we will find the Initial Dashboard, where we can find information about:
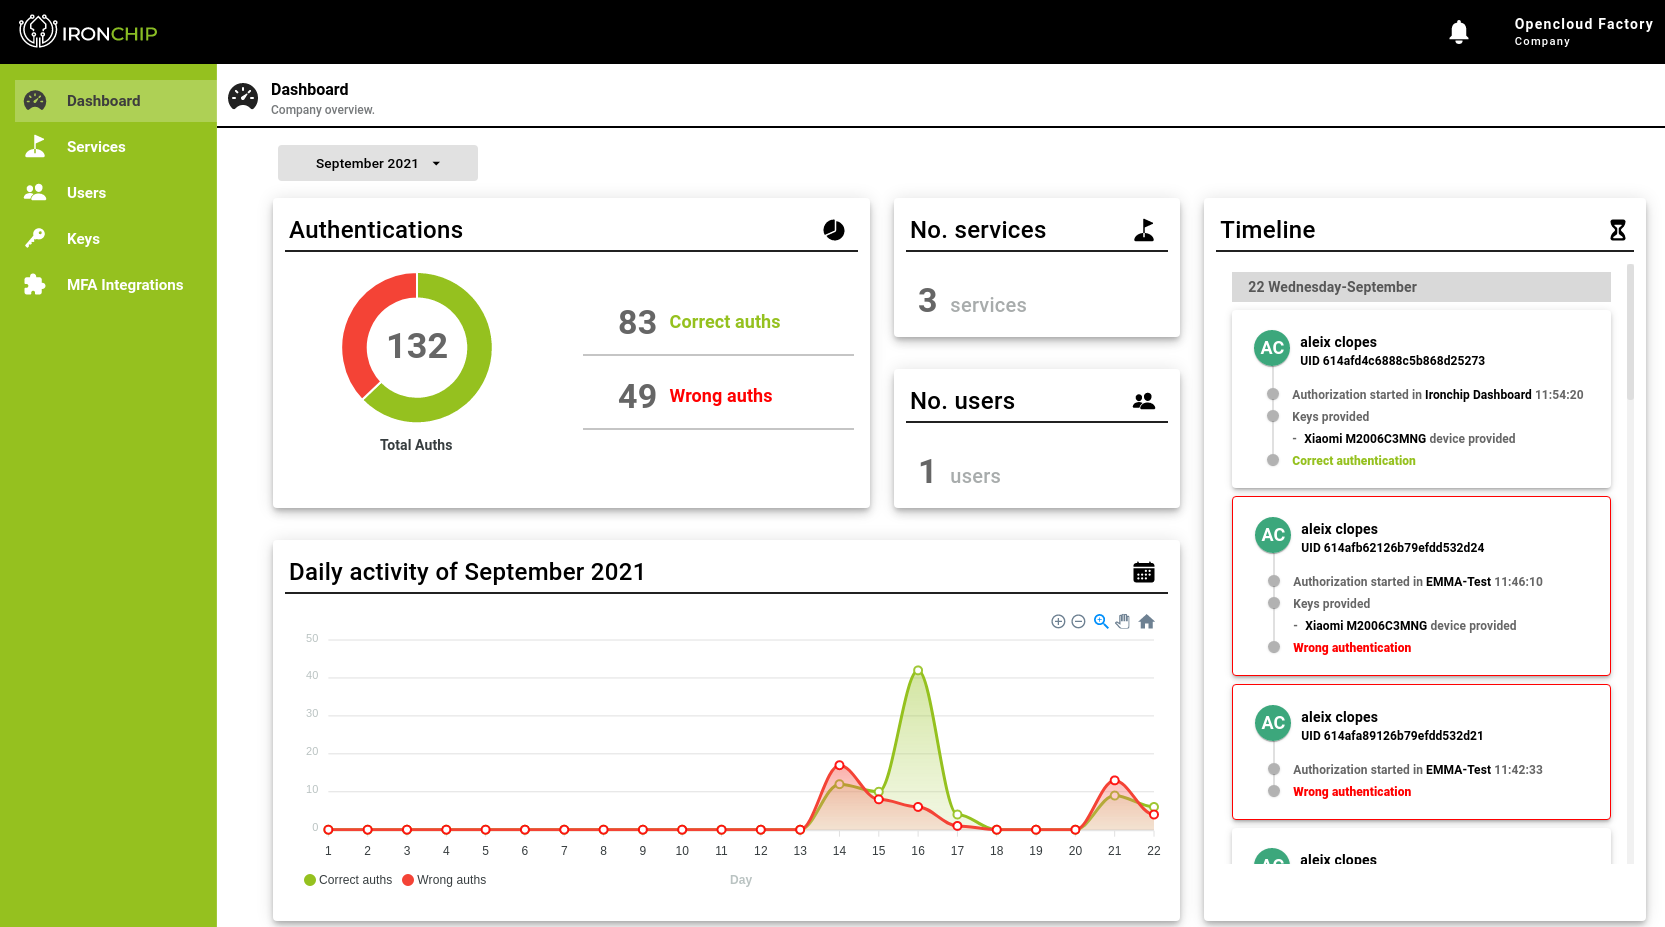
- Information about the number of authentications performed together with the result of one of them.
- No. Services, shows all the services that we have integrated with your platform. In our case, we have the mobile application service and the web service.
- No. Users, shows the number of users that are registered on the platform.
- Timeline with all registered events.
In order to configure the different services and the secure locations we must follow the following steps:
1. Register safe zone from the Iron Chip mobile app
We will start creating a secure zone (or some security zones) with the mobile App.
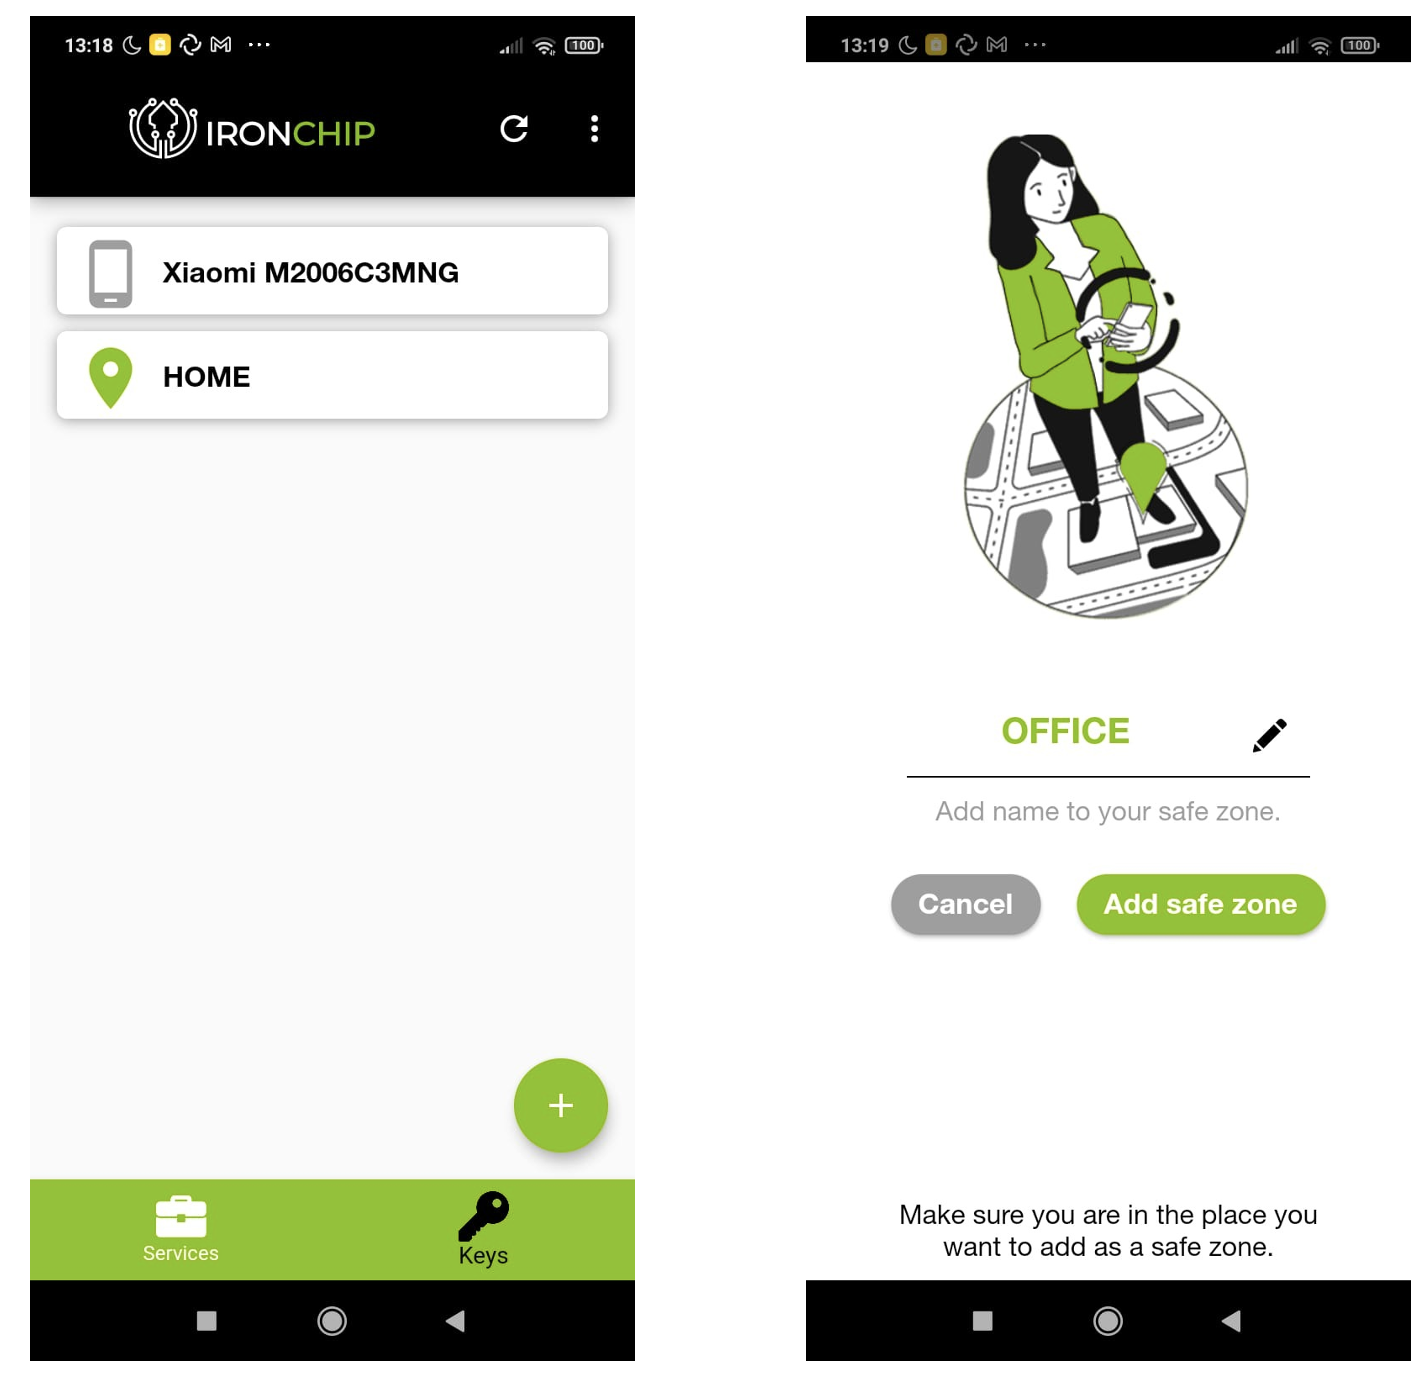
- We will access the application, from the Keys section, we will press the + button to add a new safe area
- A tab will open to configure the name of the zone
- Once introduced, the area will be scanned, recording the electromagnetic waves that are around.
2. Configure a new service
Once we’ve created the secure zone, we will have to create a new service from the web administration portal, and link it with the different security zones that the users have configured on the mobile App.
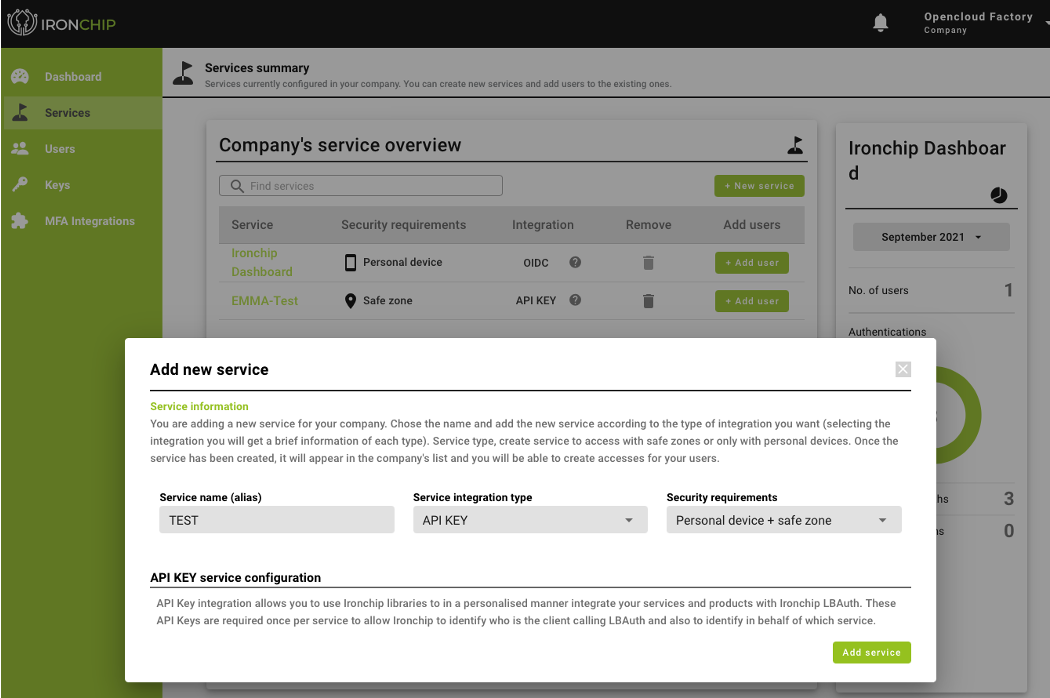
- In the web platform, we access the Services tab and create a + New service.
- We enter the Service Name, the Service integration type ( API KEY ) and the Security requirements ( Personal device + Safe zone ).
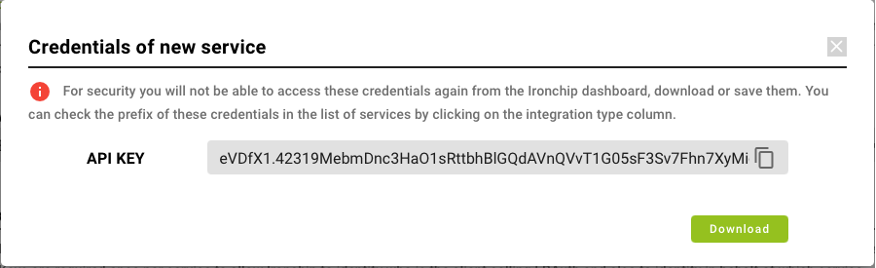
- Once we click the Add New button, a pop up window will appear with the API Key, we will use it in the plugin configuration in OpenNAC to enable the communication between the two parties.
3. Configure a user or a groups of users for a configured service
Once we’ve the security zone and the service created, we will create the link with the different users who will use the service and also, we will define those security zones.
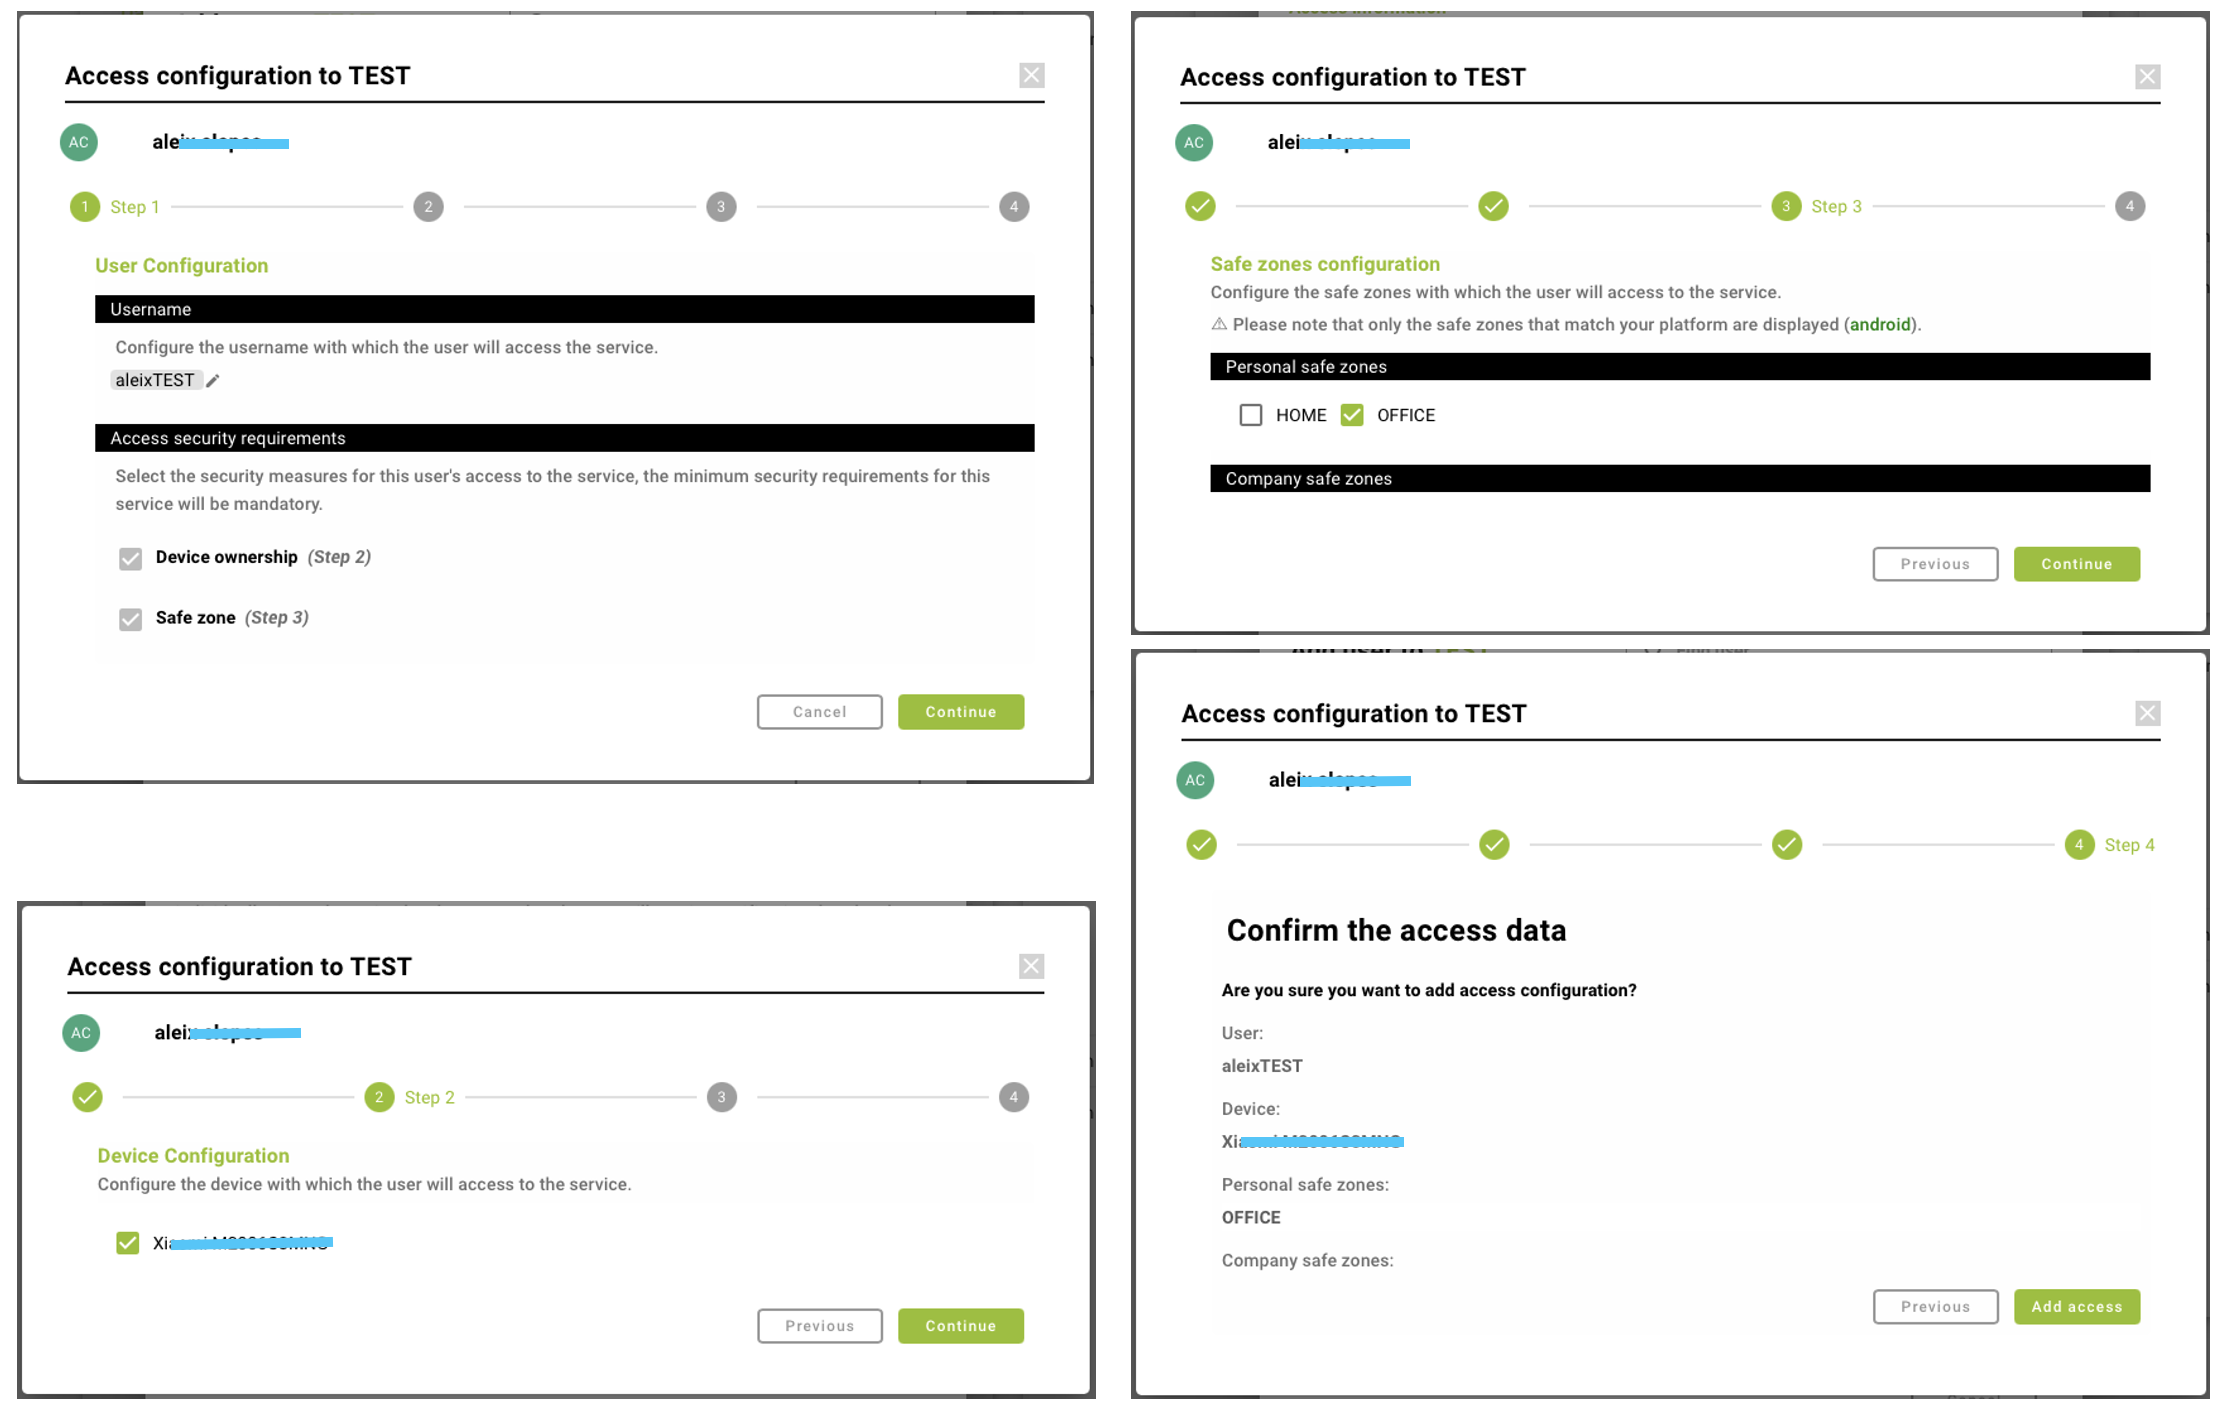
- In the Service tab, we will have a list with all the configured services, to add a user or a group of user to a service, we will click the + Add user button. A pop up window will appear, and we will have to fulfill some fields.
- Introduce the user name that we will use for to from the OpenNAC server.
- Select the device associated with the user.
- Select the security zones that you’ll like to use.
- Finally, a summary panel will appear with all the configuration made, if it is correct, we will press the Add access button.