9.2.7.1. ON Captive Portal
There is the possibility of relocating the captive portal (ON Captive role) from the ON Core node. In this way we can deploy the captive portal in an area of the network that is accessible to users who need to access it, keeping the ON Core in a secure area inaccessible to the users that should not have access to it.
The default SSH access for all images username/password is root/opennac.
Warning
Change the default password to a stronger password.
To do this, we must deploy a node with the role of ON Captive which will simply have the opennac-captive module.
This will be done by using the ON Captive specific OVA.
This ON Captive node will communicate via API (HTTP) with the ON Core node to obtain the portal configuration, quality, authentication, etc.
An example of architecture would be the following:

9.2.7.1.1. API Key for external ON Captive
When the Captive portal is in another server, we need to generate an API key for the communication between the Captive portal and the ON Core API.
To do that, go to ON CMDB > Security > API Key.

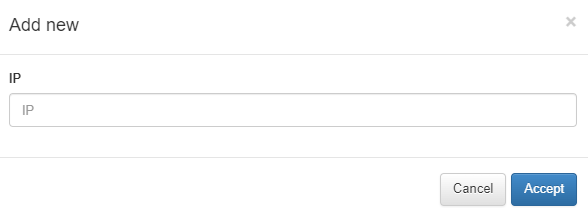
Generate one API Key by clicking on the Add new button:

Enter the Captive Portal Server’s IP Address and copy the generated key.
Open the Core CLI and edit the /usr/share/opennac/captive-portal/application/configs/globals.ini file with the captive portal’s IP address and the generated key.
api.url = "<captive_url>"
api.apiKey = "<api_key>"

captive.path = "url_extension_captive_path"

9.2.7.1.2. Collectd configuration
Collectd is used to send the trending information to the ON Principal. To configure Collectd, it is necessary to edit the following file:
vim /etc/collectd.d/network.conf
Inside the file we should have something like the following:
# openNAC collectd file
#
# This file *WON'T* be automatically upgraded with default configuration,
# due to is only configured in deployment stage

LoadPlugin "network"

## When this server is a Core Principal or
## collect all data from other nodes
## Default port: 25826
#<Plugin "network">
#        <Listen "{{ principal_IP }}">
#                SecurityLevel "Encrypt"
#                AuthFile "/etc/collectd.d/auth_file"
#        </Listen>
#</Plugin>

## When this server send info to another
## server (ex. a Core Principal or similar)
## Default port: 25826
<Plugin "network">
    <Server "onprincipal">
            SecurityLevel "Encrypt"
            Username "opennac"
            Password "changeMeAsSoonAsPossible"
    </Server>
</Plugin>
To send the collectd messages with this device, we need to go to:
vi /etc/collectd.conf
We need to add the servers hostname in the hostname parameter.
#Hostname    "localhost"
Hostname    "captive_portal-XX"
Finally, it is necessary to restart the collectd service.
systemctl restart collectd
9.2.7.1.3. Notification Service Configuration
Optionally, the system allows notifying by email when a policy is executed. As these notifications are made via emails, it will be necessary to configure the postfix service.
We can configure notifications for different email services. For this, you need to have the configuration data of the corporate mail service, with email account, password, server data, etc.
Here we will explain the basic configuration for SMTP Relay, and then Postfix configuration for notifications via Gmail and Office 365. In both cases will use the TCP/587 port.
9.2.7.1.3.1. Configuring SMTP Mail Relay
In this section we will configure the SMTP server in the ON Core so that it can send emails.
Connect via SSH to ON Core.
Update the system and install the necessary packages:
dnf update && dnf install postfix mailx cyrus-sasl cyrus-sasl-plain
SMTP Configuration:
There are two options for relaying the mail service: with authentication and without authentication.
When relaying without authentication, we utilize the SMTP protocol, and the configuration is as follows:
Configure postfix. In the relayhost section, add or modify the following lines in the
/etc/postfix/main.cf`file :
relayhost=[smtp.example.com]:25
     myhostname = principal.acme.es
Where:
relayhost: Specifies the mail relay host and port number. The hostname will be enclosed in parentheses to specify that an MX lookup is not required.
myhostname: Hostname of the server running the postfix service.
Restart postfix service and enable auto startup:
systemctl enable postfix && systemctl start postfix
Send a test mail to verify the configuration:
mail -s "Test subject" recipient@domain.com < /dev/null
Where:
recipient@domain.com: Replace this with the recipient’s email address.
Keep in mind that each email service will have specific configurations. In the following sections, we will provide the Postfix configurations for Gmail and Office 365.
9.2.7.1.3.1.1. Configuring Envelope Rewriting
By default, the envelope sender mail address of messages sent by OpenNAC via postfix service is set to the user apache, which is the user that runs the HTTPD service.
Depending on how the relay host’s administrator has configured it, certain security options or anti-spam rules may check if the sender mail address in the “From:” field matches the address in the envelope of the message. This can cause the relay host to reject mail messages from ON Core servers if the addresses are not identical.
As observed several times in production environments, the rejection of such messages often occurs because the standard mail address of the HTTPD user is not recognized as an authorized sender by the relay host.
To prevent this happen, we strongly recommend you perform additional steps in the postfix configuration.
Note
Perform the following configurations regardless of the type of relay host (Gmail, Office 365 or Microsoft Exchange).
Add a new line at the end of the
/etc/postfix/canonicalfile, according to the example below.
// my-fixed-envelope-sender@example.org
Replace the example email address with the actual sender email address of the organization.
Add the following lines to the
/etc/postfix/main.cffile:
canonical_maps = regexp:/etc/postfix/canonical
canonical_classes = envelope_sender
Restart the postfix service:
service postfix restart
9.2.7.1.3.2. Postfix Configuration for Gmail
Update the system and install the necessary packages:
dnf update && dnf install postfix mailx cyrus-sasl cyrus-sasl-plain
Set up authentication with Gmail. Edit or create the
/etc/postfix/sasl_passwdfile and add the following line at the end:
[smtp.gmail.com]:587 <UserName@gmail.com>:<Password>
Where:
username@gmail.com: mail account
password: this password should be obtained as a “Google App Password”
Note
To configure a Google App Password the account need to have 2FA activated.
How to obtain a “Google App Password”
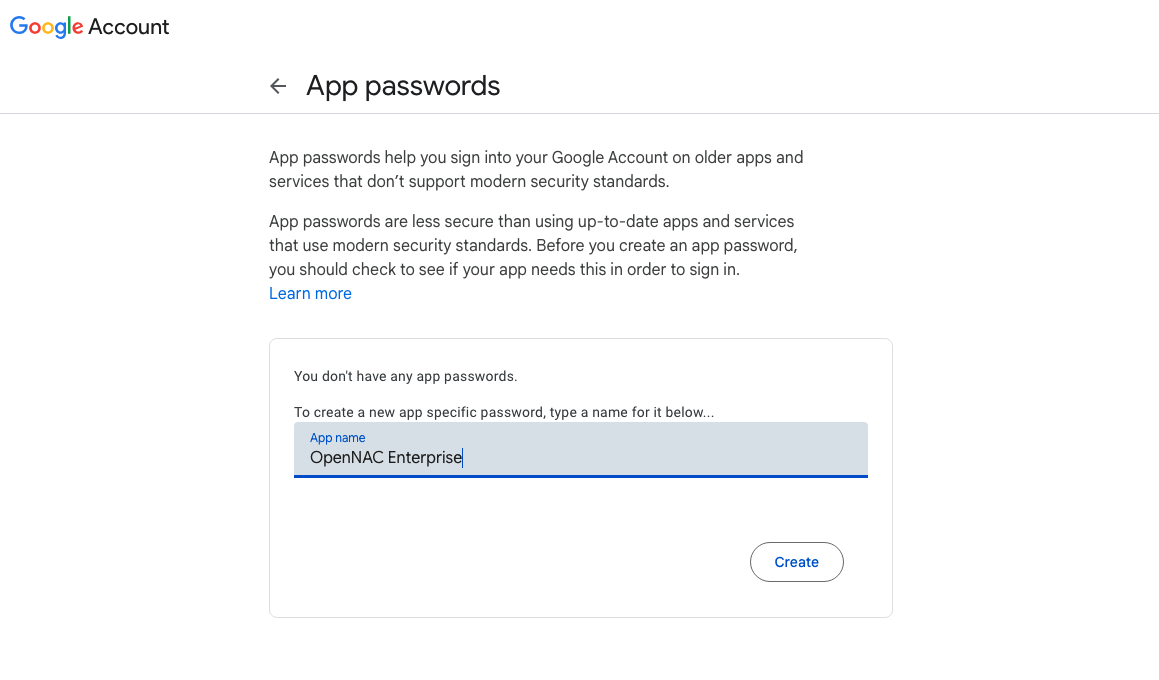
Enter in the following URL and log in with the desired account https://myaccount.google.com/apppasswords
Give a name to identify this pass

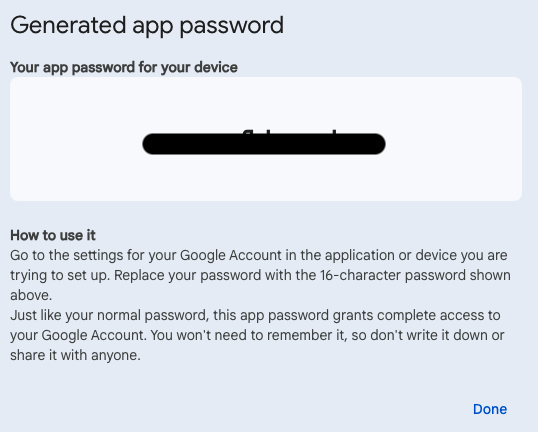
Copy the password that appears in the screen and use it in the configuration file.

Configure postfix. In the
/etc/postfix/main.cffile, apply the following configurations for the relayhost section:
relayhost = [smtp.gmail.com]:587
smtp_use_tls = yes
smtp_sasl_auth_enable = yes
smtp_sasl_security_options =
smtp_sasl_password_maps = hash:/etc/postfix/sasl_passwd
smtp_tls_CAfile = /etc/ssl/certs/ca-bundle.crt
relayhost: Specifies the mail relay host and port number. The hostname will be enclosed in parentheses to specify that an MX lookup is not required.
smtp_use_tls: Enables transport layer security.
smtp_sasl_auth_enable: Enable SASL authentication.
smtp_sasl_security_options: This should be left empty to ensure that incompatible security options are not used.
smtp_sasl_password_maps: Specifies the password file to use. This is the file created in the Postfix configuration.
smtp_tls_CAfile: Specifies the list of certificate authorities to use when verifying the identity of the server.
See an example of this configuration below:

If your mail service is NOT authenticated, you should also edit the myhostname attribute of the
/etc/postfix/main.cffile with the name of your email domain.
myhostname = mydomain.tld
Compile and hash the contents of the
/etc/postfix/sasl_passwdfile:
postmap /etc/postfix/sasl_passwd
postmap hash:/etc/postfix/sasl_passwd
Restart the postfix service and enable autostart:
systemctl restart postfix && chkconfig --add postfix
In case of failure, perform the service shutdown and startup manually:
systemctl stop postfix
systemctl start postfix
Note
By default, Gmail only allows logins from secure connections.
To enable sending emails, it is necessary to change the settings in the Gmail account by enabling “Allow less secure applications”. For more information on how to do this, please review the information at the following link: https://support.google.com/accounts/answer/6010255?hl=en
Send a test mail to verify the configuration:
mail -s "Test subject" <recipient>@<domain.com> < /dev/null
Where:
recipient@domain.com: Replace this with the recipient’s email address.
To view all mail logs and other message information:
tail -f /var/log/maillog
9.2.7.1.3.3. Postfix Configuration for Office 365
Update the system and install the necessary packages:
dnf update
dnf install postfix cyrus-sasl-plain mailx
Set up authentication with Office365. Edit or create the
/etc/postfix/sasl_passwdfile and set the credentials:
[smtp.office365.com]:587 <UserName>@<DomainName>:<Password>
Configure postfix. In the
/etc/postfix/main.cffile, apply the following configurations for the relayhost section:
relayhost = [smtp.office365.com]:587
smtp_sasl_auth_enable = yes
smtp_sasl_password_maps = hash:/etc/postfix/sasl_passwd
smtp_generic_maps = hash:/etc/postfix/generic
smtp_tls_security_level = may
smtp_sasl_security_options = noanonymous
relayhost: Specifies the mail relay host and port number. The hostname will be enclosed in parentheses to specify that an MX lookup is not required.
smtp_sasl_auth_enable: Enable SASL authentication.
smtp_sasl_password_maps: Specifies the password file to use. This is the file created in the previous step.
smtp_generic_maps: Optional lookup tables that perform address rewriting on the Postfix SMTP client, typically to transform a locally valid address to a globally valid address when sending mail over the Internet.
smtp_tls_security_level: By specifying a non-empty value, this overrides the deprecated smtp_use_tls, smtp_enforce_tls, and smtp_tls_enforce_peername parameters.
smtp_sasl_security_options: This should be left empty to ensure that incompatible security options are not used.
See an example of this configuration below:

Compile and hash the contents of the
/etc/postfix/sasl_passwdfile:
postmap /etc/postfix/sasl_passwd
postmap hash:/etc/postfix/sasl_passwd
Change the file permission:
chown root:postfix /etc/postfix/sasl_passwd
chmod 640 /etc/postfix/sasl_passwd
Configure the
/etc/postfix/genericfile to be able to send email from a valid user:
/.*/ <UserName>@<DomainName.tld>
Change the permission of the
/etc/postfix/genericfile, compile, and hash:
chown root:root /etc/postfix/generic
chmod 0600 /etc/postfix/generic
postmap /etc/postfix/generic
postmap hash:/etc/postfix/generic
As an optional configuration, if you want to send all internal system messages to an external mailbox, change the root alias to your email address in
/etc/aliases. This way, all messages sent to root will be forwarded to the system reporting address.
mailer-daemon:  postmaster
postmaster:    root
root:         <UserName>@<Domain.com>
Save and exit the file. Run the newaliases command to apply the changes.
Restart the postfix service and enable autostart:
systemctl restart postfix && chkconfig --add postfix
In case of failure, perform the service shutdown and startup manually:
systemctl stop postfix
systemctl start postfix
Send a test mail to verify the configuration:
mail -s "Test subject" <recipient>@<dominio.com> < /dev/null
Where:
recipient@domain.com: Replace this with the recipient’s email address.
To view all mail logs and other message information, run:
tail -f /var/log/maillog