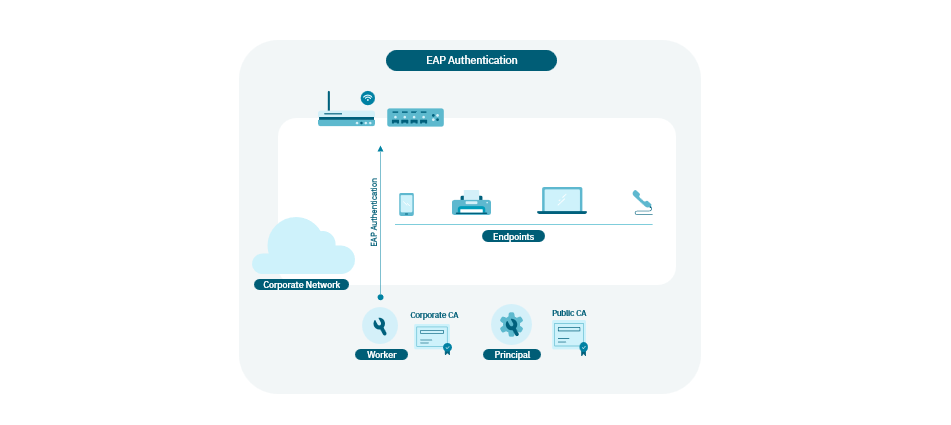
5.1.10.1. RADIUS Certificates Configuration
To perform authentications through EAP, such as EAP-TLS or to verify the identity of the servers by clients, it is necessary to configure the certificates in OpenNAC Enterprise.
When you deploy an ON Server from an OVA, you probably have the FreeRadius certificates expired, and “eapol_test” will fail.
By default, the necessary files for the configuration of the certificates in the RADIUS service are:
<ca.pem>: Certificate containing the public CA to perform EAP-TLS authentications. In case of having a PKI chain, it is recommended to include all the CAs of the chain in this file (End -> Intermediate -> Root).
-----BEGIN CERTIFICATE-----
    (Primary SSL certificate)
-----END CERTIFICATE-----
-----BEGIN CERTIFICATE-----
    (Intermediate certificate)
-----END CERTIFICATE-----
-----BEGIN CERTIFICATE-----
    (Root certificate)
-----END CERTIFICATE-----
<server.pem>: Server certificate so that clients can verify the identity of the server.
# Private key of the SSL certificate
-----BEGIN PRIVATE KEY-----
...
-----END PRIVATE KEY-----
# Public key of the SSL certificate (the server certificate)
-----BEGIN CERTIFICATE-----
...
-----END CERTIFICATE-----
Note
The server.pem file must include the certificate key at the top of the file. If not, the RADIUS service may fail to start.
5.1.10.1.2. Internal Certificate Authority
Warning
This section is for testing purposes only and is not recommended for production environments.
You can perform the following steps to renew the certificates in test mode. These steps follow the instructions in the <raddb_dir>/certs/README.
Remove old test certificates and counters. Navigate to the certificates folder and delete the old test certificates along with the certificate counters:
cd /etc/raddb/certs
make destroycerts
Note
If you only want to regenerate a specific type of certificate, remove the corresponding CRT and KEY files and set the property “unique_subject = no” in the index.txt.attr file, to allow rewrite an existing subject.
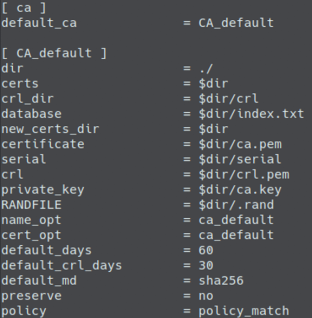
Define the “default_days” property in the relevant CNF files (e.g., ca, server, or client) to set the certificate validity period. By default, this is set to 60 days. You can also update organization information and passwords as needed.
vim <file>.cnf
Execute the bootstrap file to create the CA and server certificates:
./bootstrap
Finally, assign the correct ownership to all new files and restart the RADIUS server:
chown root:radiusd *
systemctl restart radiusd
5.1.10.1.2.1. Making a client certificate
To generate client certificates, specify a unique emailAddress and commonName in the
client.cnffile:
vim client.cnf
Create the client certificate with the following command:
make client.pem
Note
The client certificate will be named “<emailAddress>.pem”, for example, “user@example.com.pem”.
To create additional client certificates, repeat these steps, using a unique “commonName” and password for each new certificate.
Client configurations
Install the generated client certificate (client.pem) on the client intended for authentication.
On the client side, configure the supplicant to perform authentication using the certificate.
5.1.10.1.3. Certificate Troubleshooting
Important
When performing certificate validation, it is crucial that all equipment dates are correct. If the devices conducting certificate verifications have incorrect dates, validation may fail, resulting in unsuccessful authentication.
Ensure that both the OpenNAC server and the clients connecting to the network have accurate, updated dates.
1. Check that the Private Key and Server Certificate are in PEM format:
Run the following commands to check that your files are already in the required PEM format:
Check if your Private Key is in PEM format:
openssl rsa -inform PEM -in server.key
Check if your Server Certificate is in PEM format:
openssl x509 -inform PEM -in server.crt
2. Verify that the Private Key and Server Certificate match:
    openssl x509 -noout -modulus -in server.pem | openssl md5
openssl rsa -noout -modulus -in server.key | openssl md5
If the private key is within the
<server.pem>file, you can use server.pem instead of server.key.
The output of these two commands must be identical. If you cannot locate a matching Private Key to your Server Certificate, you will need to re-key the certificate by generating a new CSR and requesting an updated certificate from your corporate CA.
3. Verify that the Public Keys contained in the Private Key file and the Server Certificate are the same:
    openssl x509 -in server.pem -noout -pubkey
openssl rsa -in server.key -pubout
If the private key is within the
<server.pem>file, you can use server.pem instead of server.key.
The output of these two commands should be identical.
4. Check that the “Valid From” and “Valid To” dates of the certificate are correct:
openssl x509 -noout -in /etc/raddb/certs/server.pem -dates
Ensure that the current date is between the certificate’s Not Before and Not After dates.
5. Check the validity of the Certificate Chain:
openssl verify -CAfile /etc/raddb/certs/ca.pem /etc/raddb/certs/server.pem
If the response is OK, the check is valid.
If the client provides a client certificate, you can use this command to confirm that the client certificate is valid with the CA installed on the server, ensuring it will authenticate correctly:
openssl verify -CAfile /etc/raddb/certs/ca.pem client.pem
5.1.10.1.3.1. Test RADIUS Certificate Authentication with radtest
OpenNAC provides utilities to simulate RADIUS authentication using a certificate. This can help validate that the certificates are configured correctly and troubleshoot any potential issues.
Navigate to the radtest directory:
cd /usr/share/opennac/utils/radtest
To see all available testing options, you can view the
<README.txt>file.
cat README.txt
The relevant test is as follows:
* Send a 802.1x certificate authentication request:
./auth_802.1x.sh peap-tls.conf
Edit the
<peap-tls.conf>file to use client certificates for the test:
eapol_version=1
fast_reauth=1

network={
        key_mgmt=WPA-EAP
        eap=TLS
        identity="usertest"
        ca_cert="/etc/raddb/certs/ca.pem"
        client_cert="/etc/raddb/certs/client.pem"
        private_key="/etc/raddb/certs/client.key"
        private_key_passwd="whatever"
        eapol_flags=3
}
You must set the following parameters:
identity: Field used as the client’s identity. This information is not relevant in authentication (you can leave the default value).
ca_cert: CA that will be used to validate the server certificate in the handshake process.
client_cert: Client certificate used for authentication.
private_key: Key of the client certificate used for authentication (if it is within the client_cert we must put the same file).
private_key_passwd: Password to decrypt the client certificate and perform authentication.
After configuring the parameters, execute the test:
./auth_802.1x.sh peap-tls.conf
If the configuration is correct, you should see a “SUCCESS” result:
...
EAP: Status notification: remote certificate verification (param=success)
...
CTRL-EVENT-EAP-SUCCESS EAP authentication completed successfully
...
SUCCESS
You can also verify success in the OpenNAC Default View.
If you see a “FAILURE” message, check the logs to identify the cause. If further debugging is needed, and you are not in a production environment, you can start the RADIUS service in debug mode:
systemctl stop radiusd
radiusd -X
With the RADIUS service started in debug mode, re-run the auth_802.1x.sh test and examine the output in the RADIUS console logs to identify any issues.
Once troubleshooting is complete, restart the RADIUS service:
systemctl start radiusd