4.5.4. Configuration
To follow this configuration process, it is necessary that all nodes have been previously deployed for module operation (ON Core and ON Analytics), following the official node deployment guide.
4.5.4.1. Network device permissions
When a user device connects to a network, the network device to which it connects must send an authentication request to the authentication server (ON Core). For this request to be accepted and processed by ON Core, it is necessary to configure the “clients.conf” file.
This file allows us to control and restrict Radius permissions. Choose which network devices and other authenticators can make Radius requests to the system. In this file, we will define all those devices or network segments that have permission to make such requests, as well as the shared key that each of them must use.
To add or modify new devices or network segments we must edit the /etc/raddb/clients.conf file:
client 192.168.0.0/16 {
   secret = testing123
   shortname = internal192168
}

client 172.16.1.0/24 {
   secret = testing123
   shortname = internal172161
}
For each “client” block, 3 points must be taken into consideration:
client: IP of the host or network segment from which the requests will arrive.
secret: Pre-shared key of radius, this is the password to verify the requests.
shortname: Name to identify the client or network segment (identifier). This name is important as it will be included in the logs and can help us identify the information more easily.
Here we can define additional networks or host IPs depending on the needs. Keep in mind that the “secret” value of each of the blocks must match the value of the shared-key defined in the configuration of the network device itself. Once the file has been modified, we must restart the radius service to apply the changes (all worker nodes):
systemctl restart radiusd
4.5.4.2. Using LDAPS or TLS in communication with LDAP (UDS)
If you want to use SSL or TLS in the communication with the LDAP (Enable LDAPS or Enable TLS in the UDS configuration), a previous configuration will be necessary to secure the SSL connection.
Enable the Dynamic CA Configuration feature:
update-ca-trust enable
To get the public root CA, we can use the following command to view the Active Directory certificate information, where “server” is the FQDN or IP server:
openssl s_client -showcerts -connect server:636 </dev/null | openssl x509 -text -noout
With that information, we could obtain the URL to download the CA certificate based on the “Access to Authority Information: CA Issuers” section. If the above command does not work, we can request a public certificate file from administrators. The file would have to be similar to:
----- BEGIN CERTIFICATE -----
MIIDWTCCAkGgAwIBAgIQG5sNj3OqU69C1kh4 + Z6oMzANBgkqhkiG9w0BAQ0FADA /
MRUwEwYKCZImiZPyLGQBGRYFbG9jYWwxFDASBgoJkiaJk / IsZAEZFgRhY21lMRAw
DgYDVQQDEwdhY21lLUNBMB4XDTE5MTAyMTE0NTMzNVoXDTI0MTAyMTE1MDMzNVow
P...
----- END CERTIFICATE -----
Add it as a new file in:
cp CACERT.crt /etc/pki/ca-trust/source/anchors/
Use command:
update-ca-trust extract
4.5.4.3. Cable - Configuration
The BYOD case requires certain configurations at the network level.
In the case of using the module for wired networks, the configuration should be as follows:
4.5.4.3.1. Network Device Configuration (Switch)
4.5.4.3.1.1. Authentication
Wired network devices should be configured to perform MAB authentication.
By default, throughout the BYOD flow, these devices will perform two authentications. A first MAB for access to the registration VLAN, and a second MAB (once the workflow is complete) to access the service VLAN. The transition from one VLAN to another will be done through a TogglePort from OpenNAC.
To configure the MAB authentication of network devices, you can consult the OpenNAC Network Device Compatibility page.
4.5.4.3.1.2. TogglePort
To make a VLAN change, a reevaluation will be necessary, which will be done through a TogglePort from OpenNAC.
We have two methods to carry out said TogglePort, through SNMP or through CoA.
To configure it, you must first configure the chosen method in the network devices ( OpenNAC Network Device Compatibility).
4.5.4.3.2. DNS Poisoning
When accessing the network, the user does not have access to the resources and must register in the captive portal in order to access them.
To speed up the process, a poisoned DNS can be used on the registration VLAN:
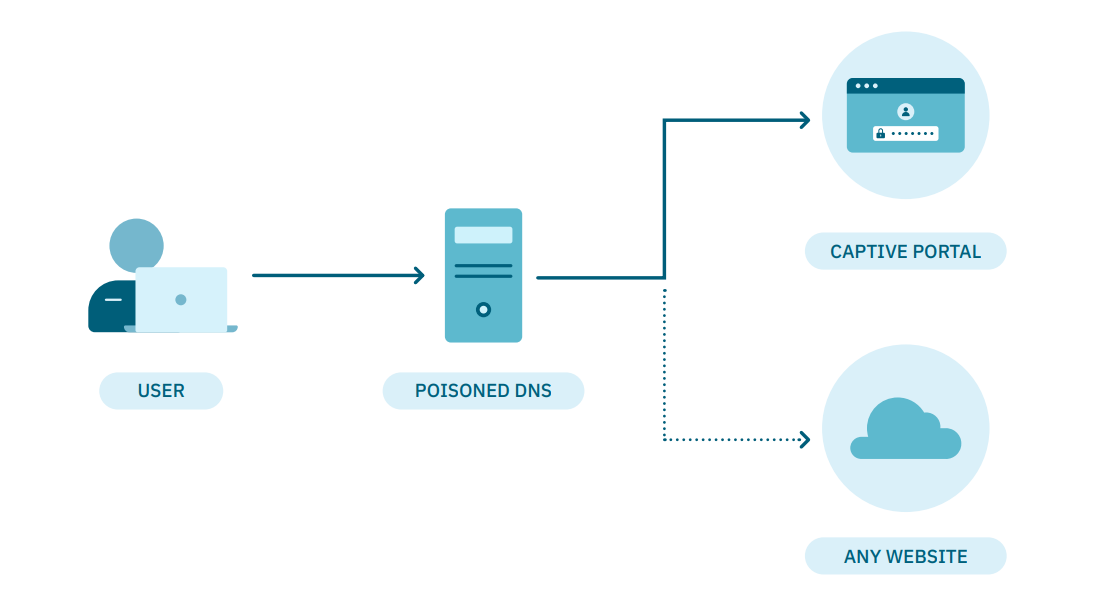
At the architecture level, it is possible to define a poisoned DNS so that any query redirects us to the ON Captive Portal to proceed with the registration.
Once the registration is finished, a VLAN change (using TogglePort) will be made to one to which we can access the resources.
OpenNAC Enterprise allows DNS poison to be carried out in the following way:
Install the dnsmasq package.
dnf install dnsmasq
Copy the OpenNAC Enterprise preconfigured files to the dnsmasq config directory.
cp -rfv /usr/share/opennac/utils/dnsmasq/etc/dnsmasq.conf /etc/
cp -rfv /usr/share/opennac/utils/dnsmasq/etc/dnsmasq.d/ /etc/
Edit catchall.conf file to configure the redirections.
vim /etc/dnsmasq.d/catchall.conf
If you want to resolve a specific URL with a specific DNS server, add the following line:
server=/<URL>/<DNS_SERVER_IP>
For redirecting all requests to any site to the ON Captive Portal, add this line at the end of the file:
address=/#/<CAPTIVE_PORTAL_IP>
Stop and disable named service.
systemctl stop named
chkconfig named off
Start and enable dnsmasq service.
chkconfig dnsmasq on
systemctl start dnsmasq
It is important that the DHCP in the registry VLAN configure OpenNAC Enterprise as a DNS server.
Note
In case of using authentication through SAML we must also allow DNS to the IDP IP/URL.
4.5.4.4. Wifi - Configuration
The BYOD case requires certain configurations at the network level.
In the case of using the module for wifi networks, the configuration should be as follows:
4.5.4.4.1. Network Device Configuration (WLC/AP)
4.5.4.4.1.1. Web Authentication
WLC/APs use the web authentication method to manage captive portals and their authentication. Unlike wire flow, WLC/APs use ACLs within networks to manage network access.
To know the configuration of the network device you can consult the OpenNAC Network Device Compatibility page.