2.3.5.2. ON VPNGW Basic Configuration
Access the machine with the following default credentials:
Note
User: root
Password: opennac
2.3.5.2.1. Keyboard configuration
To modify the keyboard language by console, you can execute the following command:
[root@vpngw ~]# loadkeys es
Loading /lib/kbd/keymaps/i386/qwerty/es.map.gz
2.3.5.2.2. Network configuration
To assign an IP, execute the graphical network manager:
nmtui
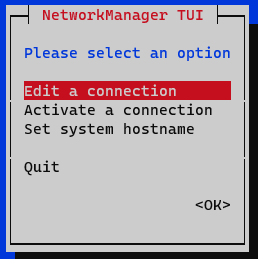
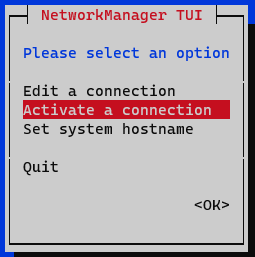
In the initial window, select Edit a connection.
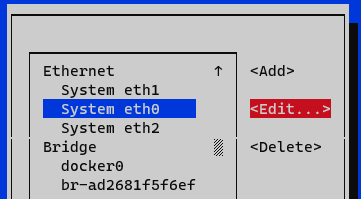
Select the interface and click on Edit.
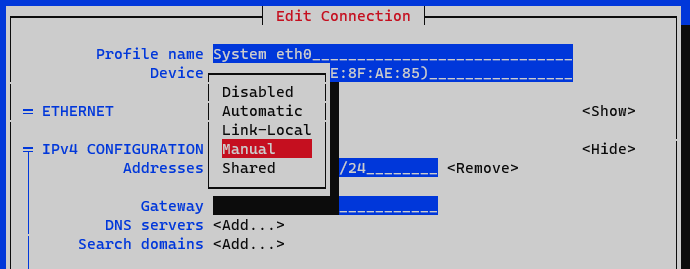
In the IPv4 Configuration section, select Manual.
Display the IPv4 configuration by selecting the <Show> option
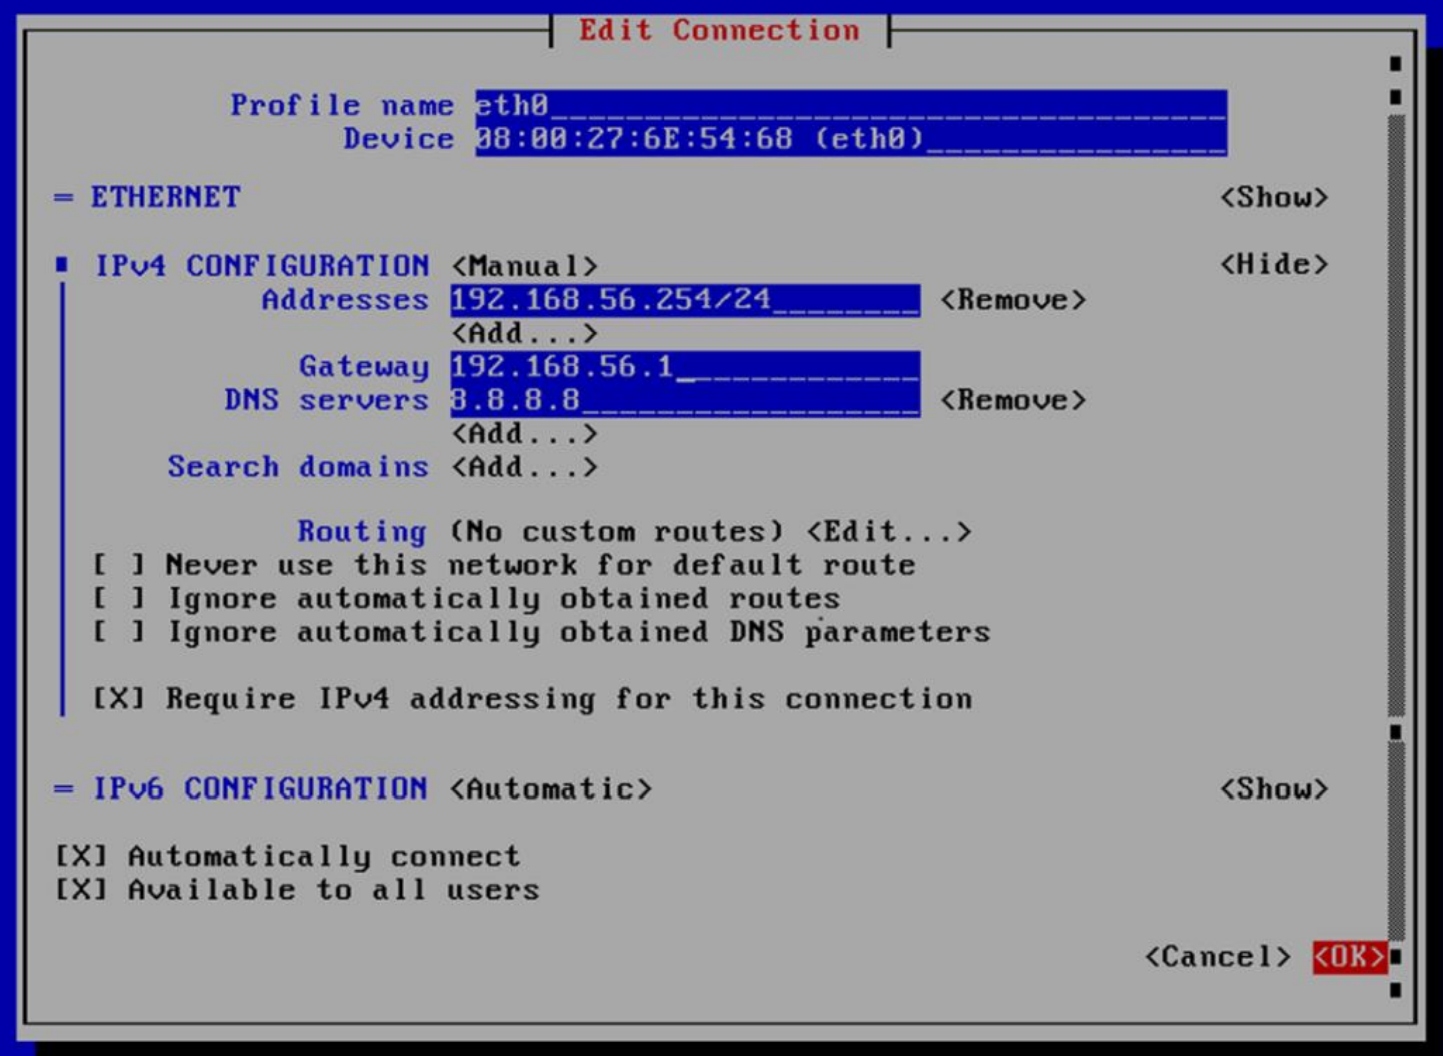
Addresses: Add the IP of the node with the corresponding network mask (<IP>/<MASK>).
Gateway: Add the gateway of the node.
DNS Servers: Add a DNS server (for example, Google).
We mark the option Require IPv4 addressing for this connection.
Finish the configuration by clicking on <OK> at the bottom-right corner.
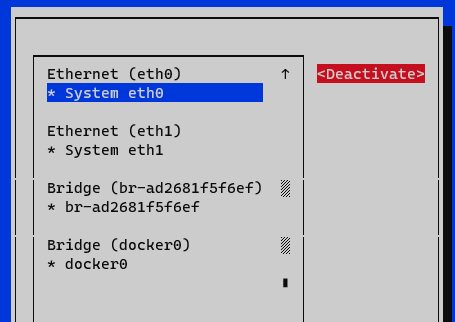
Now, you must activate and deactivate the interface to apply the changes to the interface that you have edited. In the menu, we select the option Activate a connection.
Deactivate and activate the interface and return to the initial menu.
Now you have the node configured, verify it with the command ifconfig or ip a:

You must modify the /etc/hosts file and include the appropriate ON Core address identified as onprincipal as well as the others nodes, onanalytics, onaggregator, and onsensor, if they are part of the module architecture. It should also appear as Modified IP in the previous step as emmafront.
It is important to keep these machine names with the corresponding IPs of the installation.
[root@core ~]# cat /etc/hosts
127.0.0.1 localhost localhost.localdomain localhost4 localhost4.localdomain4
192.168.45.254 onprincipal
192.168.45.253 onanalytics
192.168.45.253 onaggregator
192.168.56.252 sensor
10.10.10.184 onvpngw
2.3.5.2.3. Repository configuration and corporate proxy
Before updating the nodes it is necessary that:
The nodes have access to the internet, either directly or through a corporate proxy.
We must have the credentials to access to OpenNAC repositories for node updates.
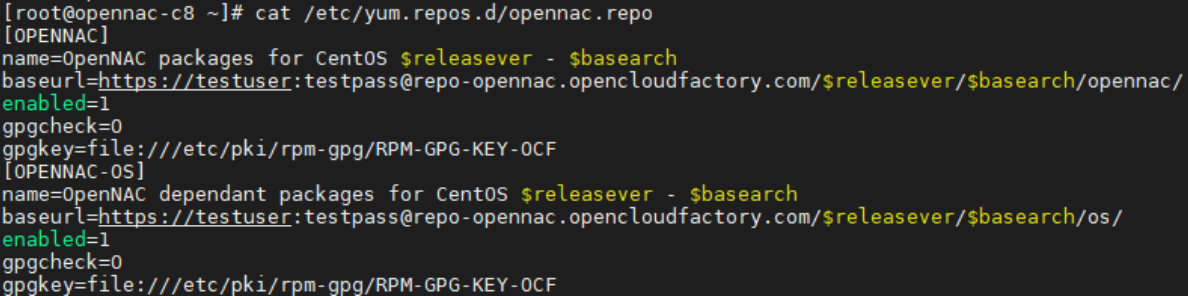
Manually configure the repository with user and password in the /etc/yum.repos.d/opennac.repo file:
2.3.5.2.4. Update to latest version
One of the recommended steps to take when the system is newly deployed is to update it to the latest version available.
To update the ON VPNGW component, go to the ON VPNGW Update Section. Once the update is finished, you can continue with the basic configuration.
2.3.5.2.5. Healthcheck configuration
Healthcheck is the system monitoring module. It has service controls that ensure that all necessary system services are running properly.
On a fresh installation of ON VPNGW, the first step is to check if the package is installed:
rpm -qa | grep opennac-healthcheck
If the healthcheck package is not installed, you need to install it:
dnf install opennac-healthcheck -y
After the installation, you need to configure it:
cd /usr/share/opennac/healthcheck/
cp -rfv healthcheck.ini.vpngw healthcheck.ini
2.3.5.2.6. Installing the Node on the ON Core
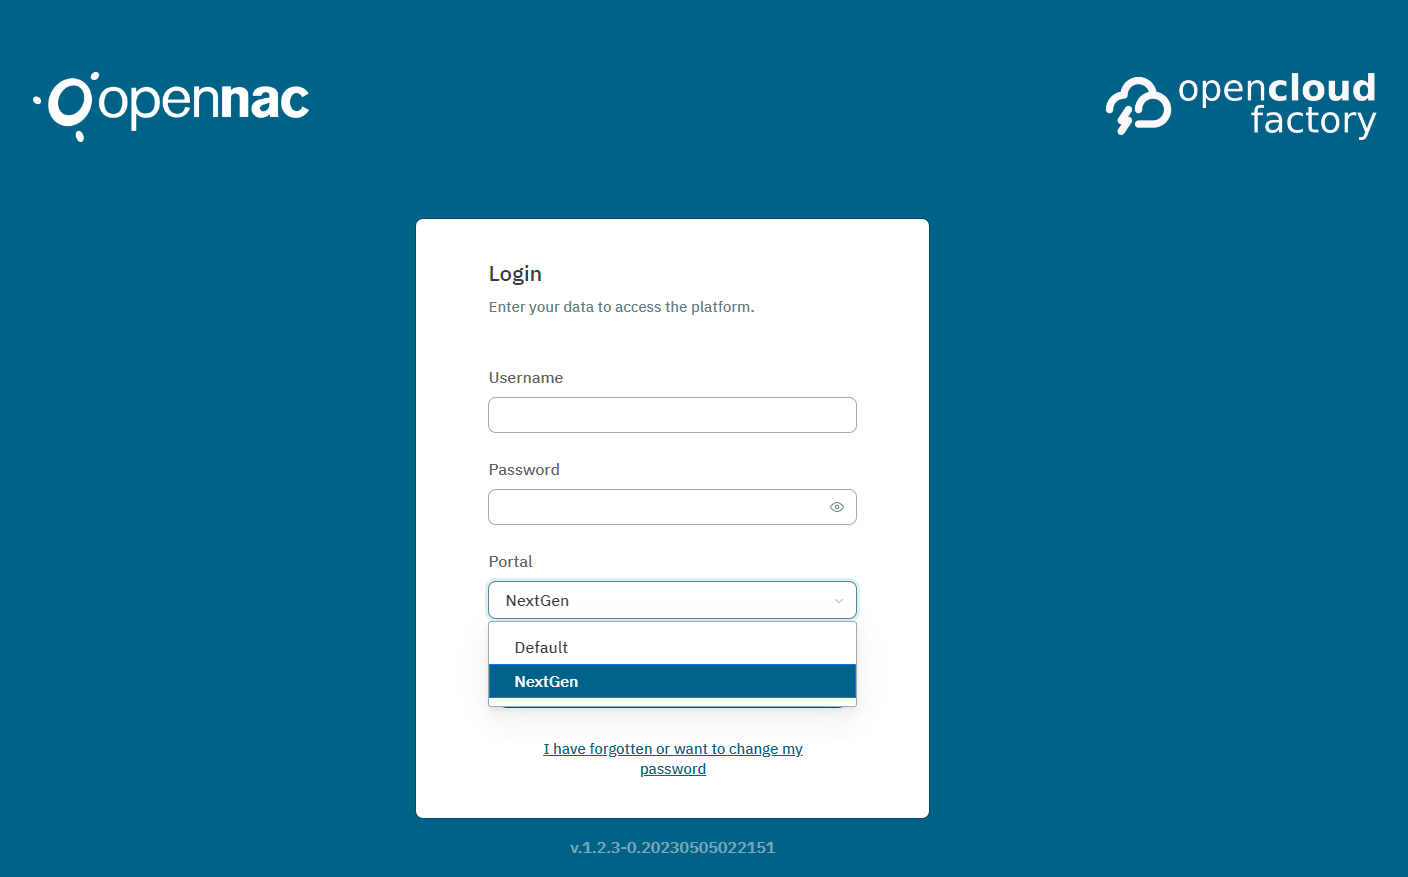
To install the node in the ON Core, access the Administration Portal.
In the main menu, open the VPN tab of the configure view and select the Manage VPN farms section.
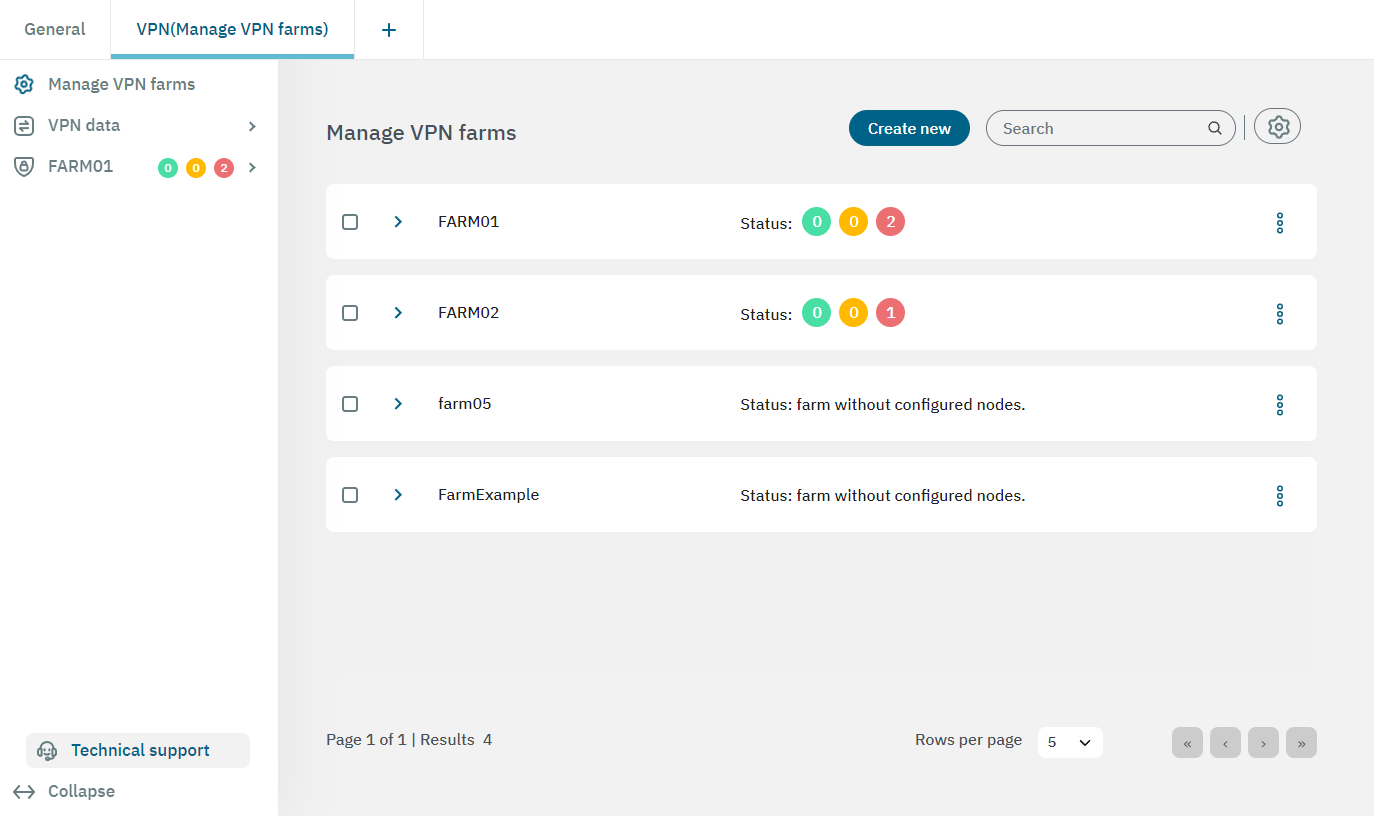
If you don’t have any farms created, click on Create new and choose a suitable name for it. Click on Confirm and you will see it displayed in the main view.

The three-dot icon at the end of the farm row displays the Add node option. Select it to open the following window where you can configure the node:
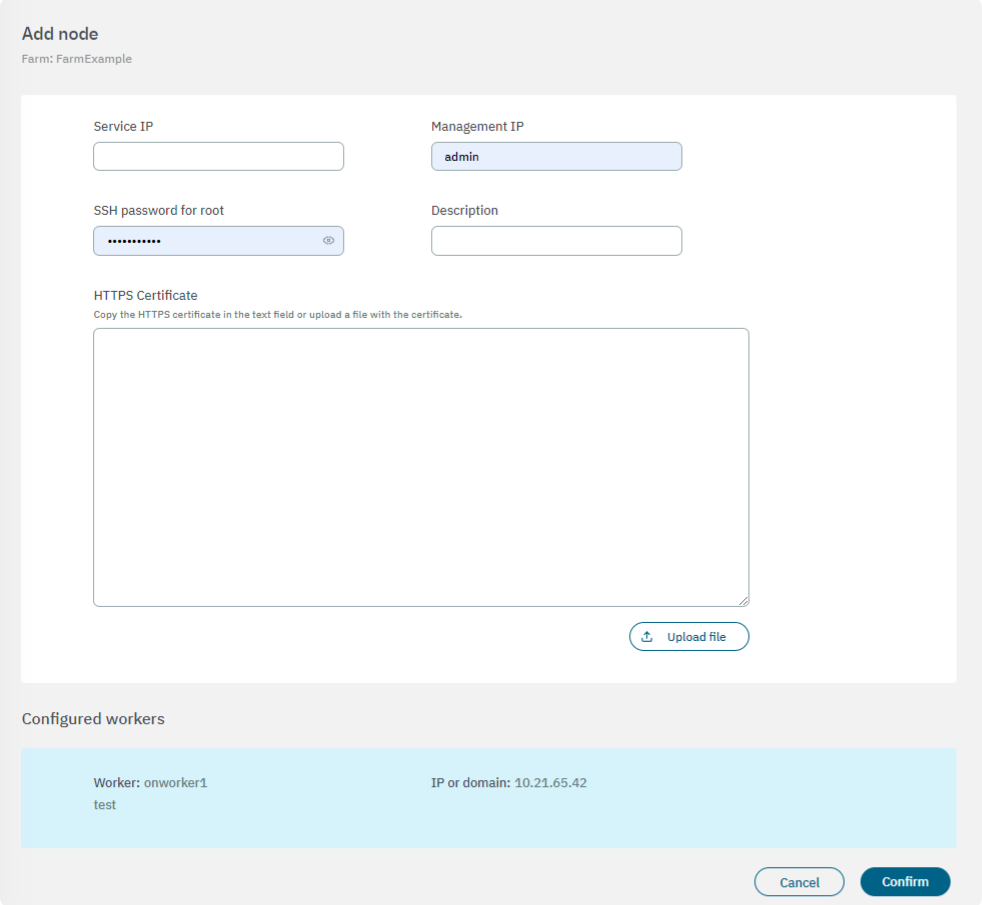
Service IP: IP assigned to the node to be imported.
Management IP: Field for the management IP of the node.
SSH password for root: SSH credentials of the node, by default root/opennac.
Description: Description of the node.
HTTPS Certificate: Copy the HTTPS certificate in the text field or upload a file with the certificate by clicking on the Upload file button.
If you don’t have a certificate you can create it with the following commands:
mkdir certificates
cd certificates/
openssl genrsa -out mydomain.key 2048
openssl req -new -key mydomain.key -out mydomain.csr
openssl x509 -req -days 365 -in mydomain.csr -signkey mydomain.key -out mydomain.crt
bash -c 'cat mydomain.key mydomain.crt' >> mydomain.pem
cat mydomain.pem
Copy the content of mydomain.pem to the HTTPS Certificate field. This file also includes the RSA Private Key in the certificate.
You will see the configured workers available at the bottom of this view.
Click on Confirm to save the configurations.