3.2.2.7.2.4. Server certificates
This section will show you how to generate a VPN Server certificate using Certificate Authorities.
Once the CA is created, we can use it to create new certificates.
Generate a new CSR (new certificate request) and return to the same directory where the CA was generated and execute the following request:
./easyrsa gen-req VPN_EMMA_RW_SRV nopass
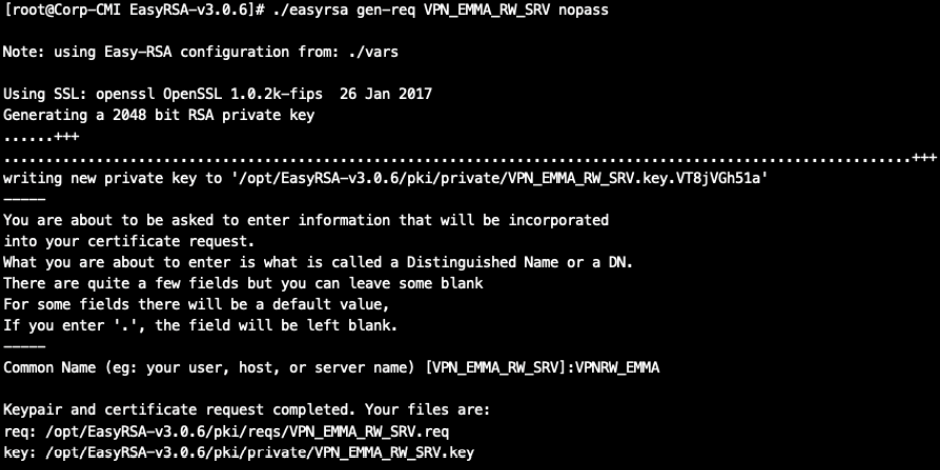
We will sign this request with our CA. For this, we will need the password used in the section “Generating a CA”:
./easyrsa sign-req server VPN_EMMA_RW_SRV

It will generate two files:
The certificate file: /opt/EasyRSA-v3.0.6/pki/issued/VPN_EMMA_RW_SRV.crt
The private key: /opt/EasyRSA-v3.0.6/pki/private/VPN_EMMA_RW_SRV.key
Copy both files to upload them to the Server Certificates section.
3.2.2.7.2.4.1. Creating a new server certificate
Once you have completed the previous step, go to the main view of the Server certificate section.
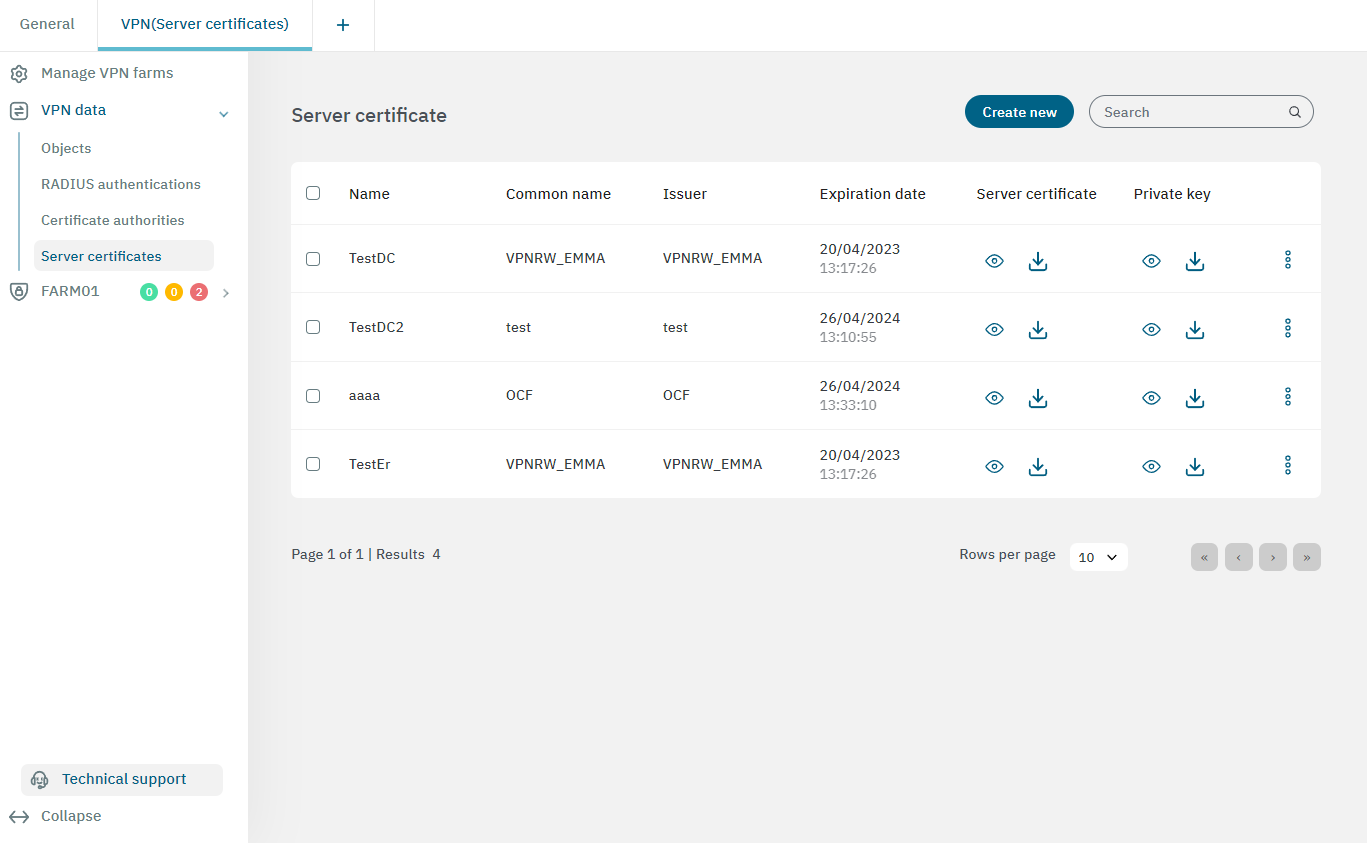
In this view, you can view and download the Server certificates and Private keys by using the respective icons.
To create a new server certificate, click on the Create new button. It will display the following window:
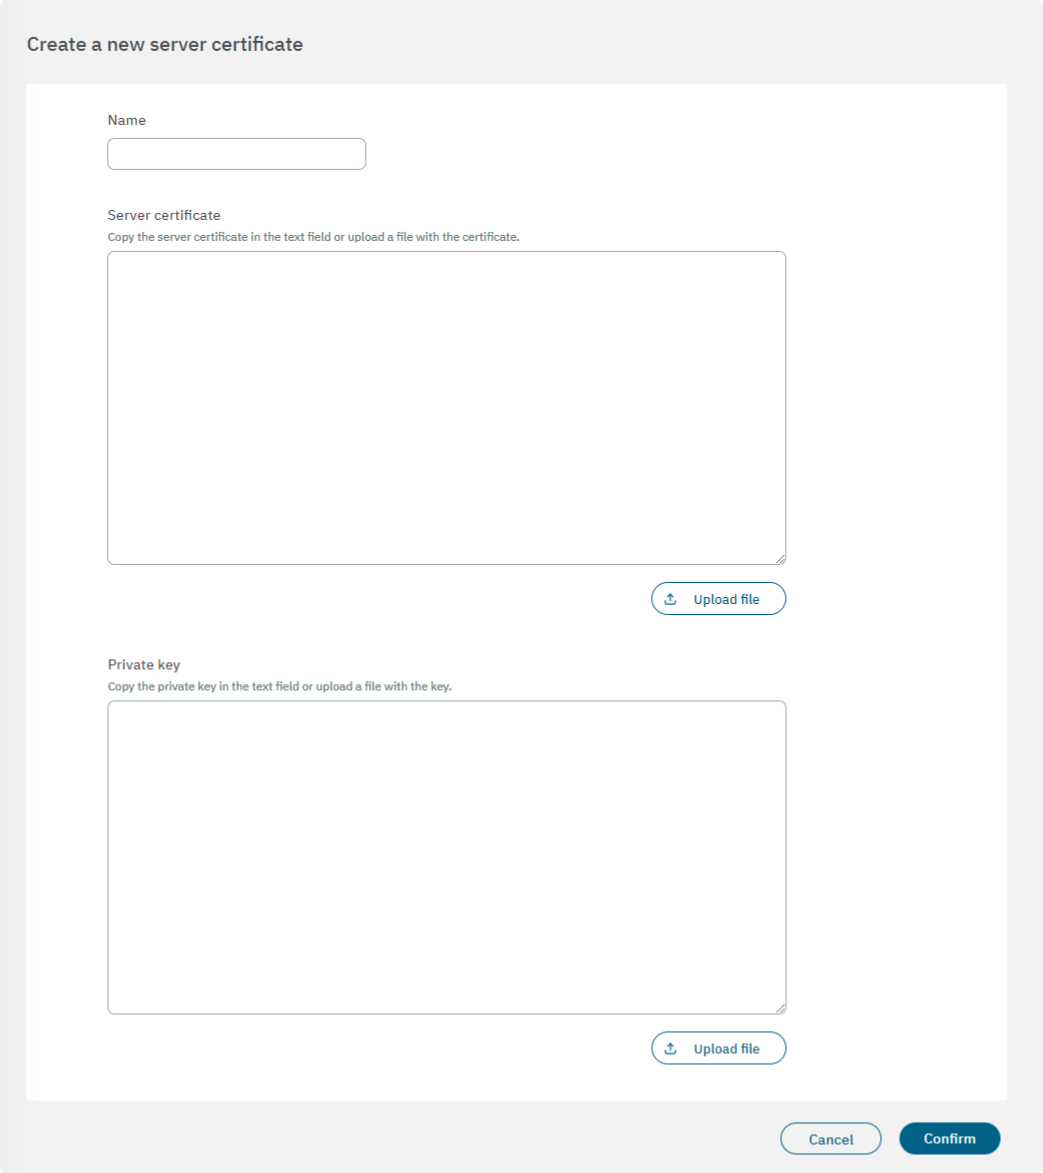
Name: Server certificate name.
Server Certificate: Copy the server certificate in the text field or upload a file with the certificate.
Private Key: Copy the private key in the text field or upload a file with the key.
Click on Confirm to load the Server Certificate and the Private Key.