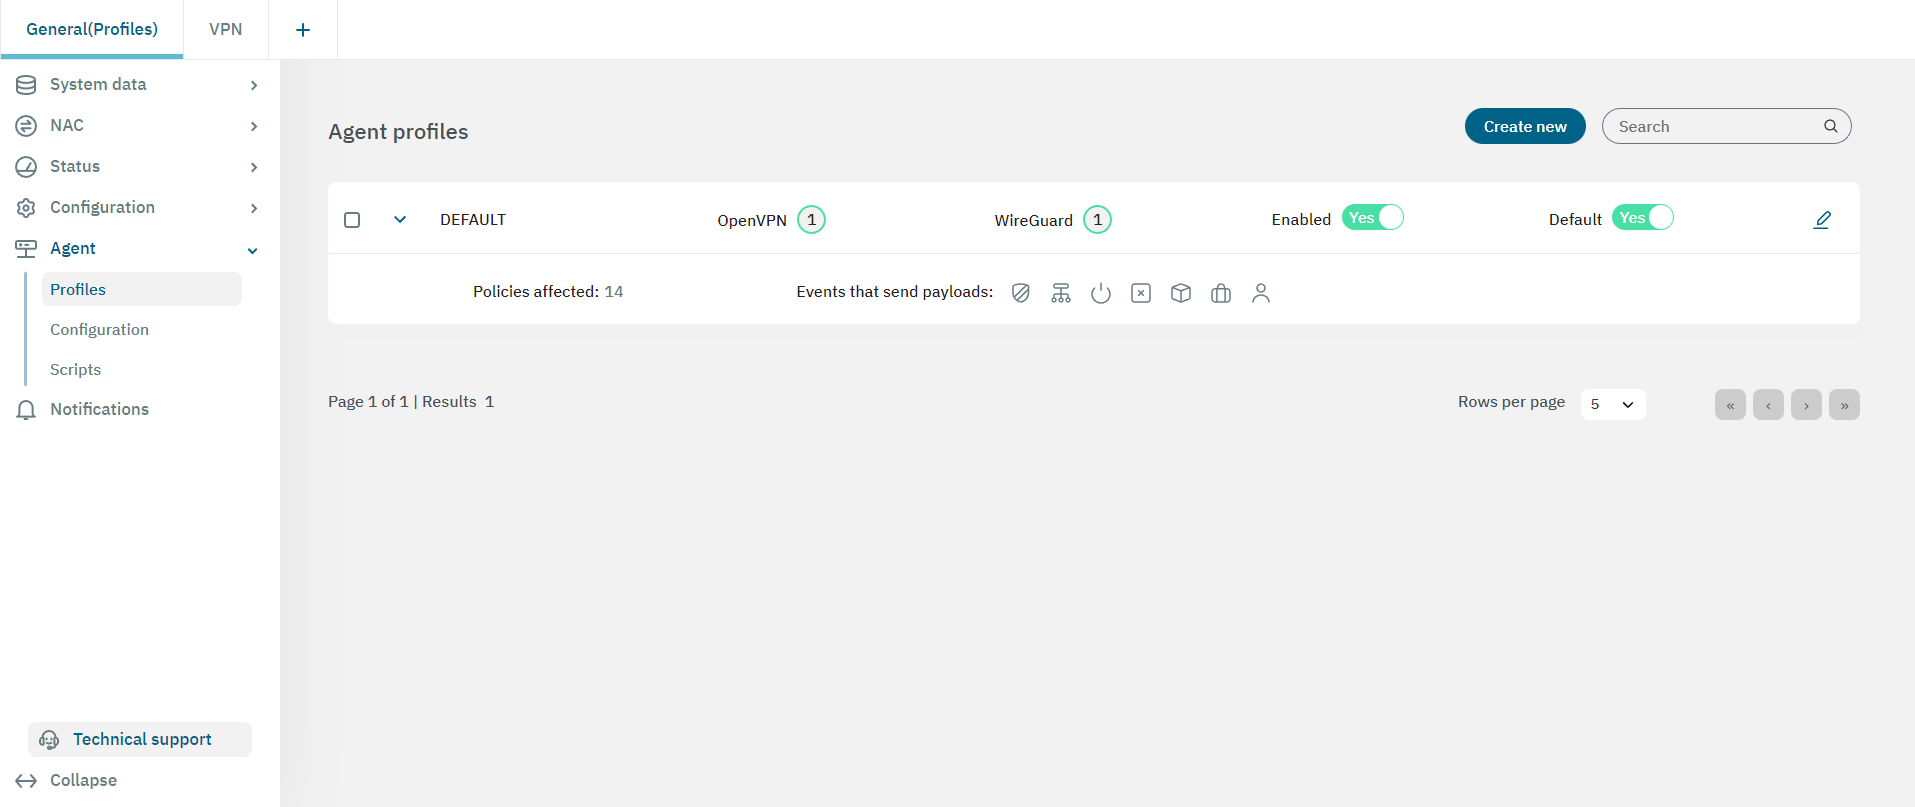
3.2.2.5.1. Profiles
This view displays a table with a list of agent objects. These agent objects are executed by policies that have postconditions associated with them. If a policy is matched and is configured with an agent profile as a postcondition, the corresponding agent profile is added to the agent along with its respective configuration.
Note that there is a preconfigured DEFAULT profile.
3.2.2.5.1.1. Creating a new agent profile
To create a new agent profile, click on the Create new button located at the upper-right corner of the window. It will display the following properties:
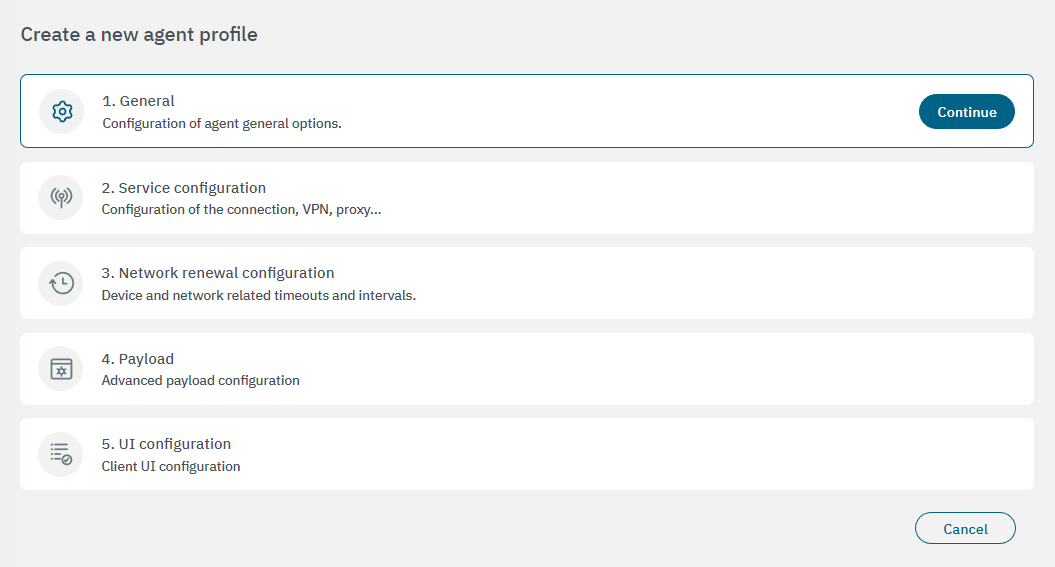
Click on Continue to open the first properties configuration window. After configuring each property, click on “Continue” again to proceed to the next configuration window.
3.2.2.5.1.1.1. General
In the following image you can see the fields displayed in the General property:
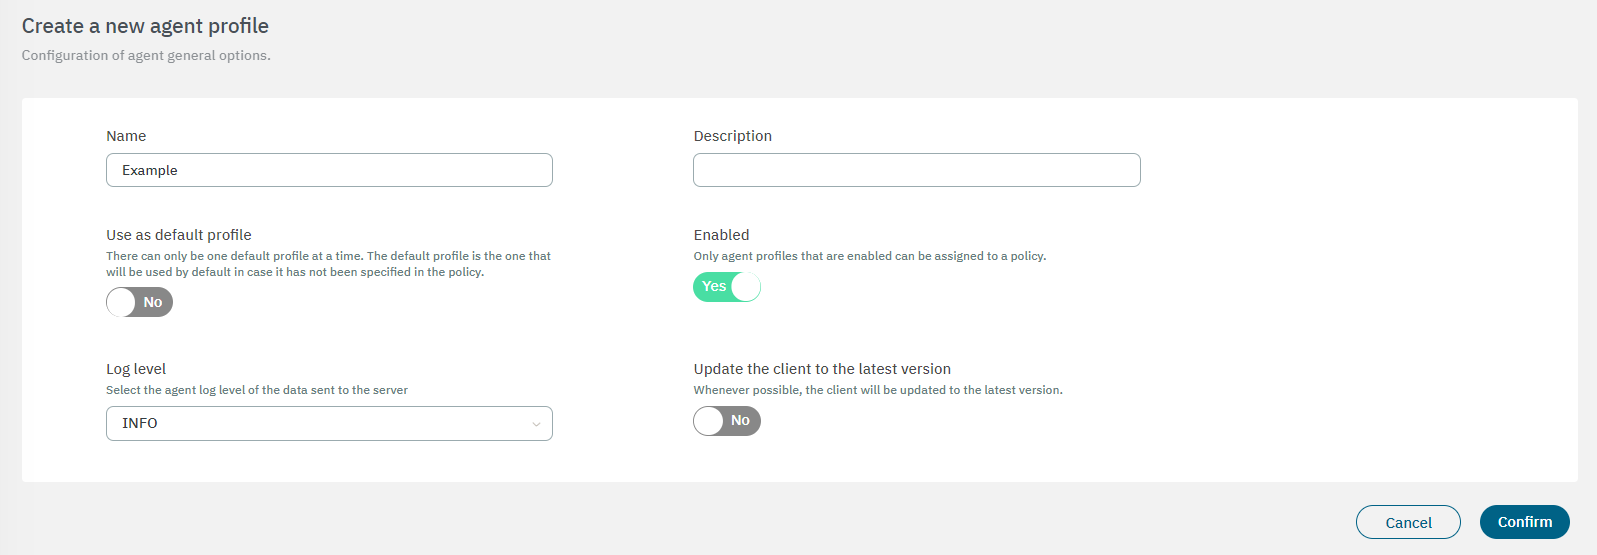
Name: Add the identification of the agent profile.
Description: Add a description of the Agent profile
Use as default profile: Set this agent profile as the default profile by enabling this flag.
Enabled: This flag is used to enable or disable the Agent profile. To assign an Agent profile to a policy, it must first be enabled.
Log level: Flag to change the service and UI log level (TRACE, DEBUG, INFO, WARN,ERROR, FATAL, OFF). Its default value is INFO.
Update the client to the latest version: Whenever possible, the client will be updated to the latest version.
After finishing the configuration, click on Confirm. It will lead you to the first configuration window.
3.2.2.5.1.1.2. Service configuration
In the following images you can see the fields displayed in the Service configuration property:
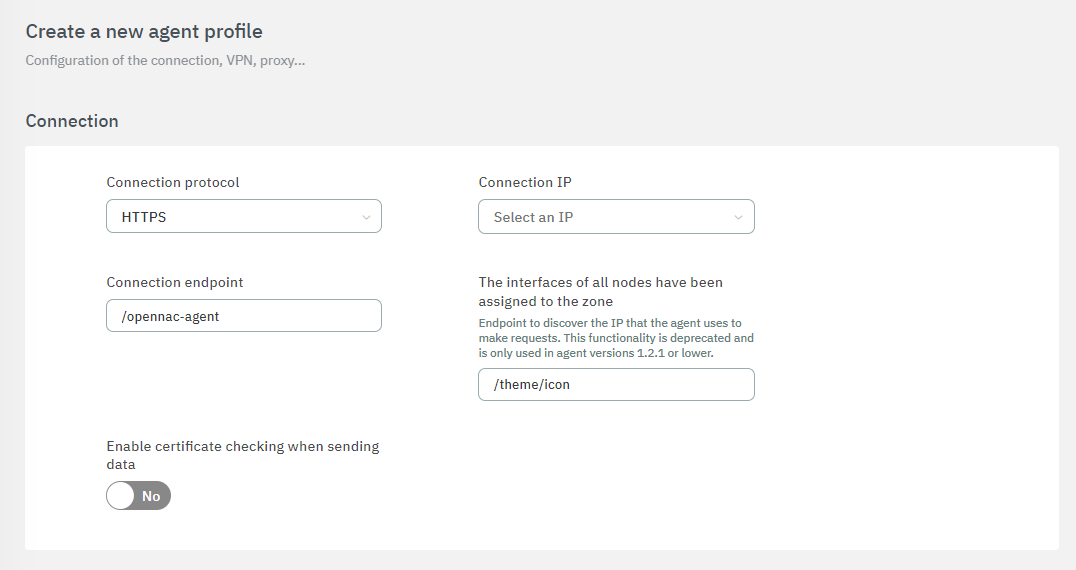
Connection
Connection Protocol: HTTP or HTTPS.
Connection IP: Select an IP from the list you have previously configured in the Agent configuration section.
Connection endpoint: By default, /opennac-agent
Special endpoint for Windows agents: Endpoint to discover the IP that the agent uses to make requests. This functionality is deprecated and is only used in agent versions 1.2.1 or lower.
Enable certificate checking when sending data: Flag to enable certificate checking when sending data.
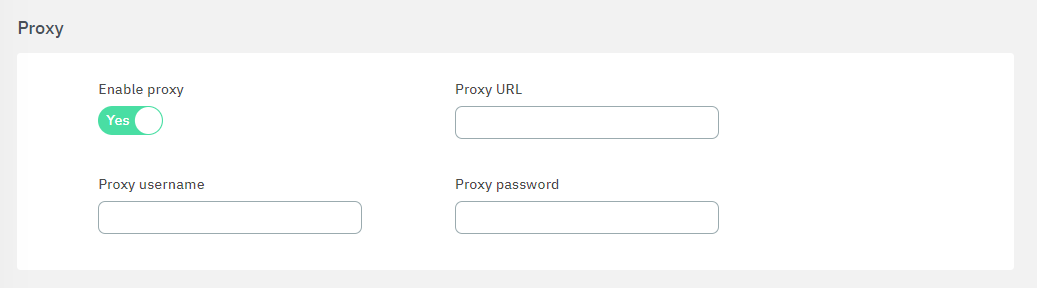
Proxy
Enable proxy: Flag to enable Proxy.
Proxy URL: URL of the proxy server you wish to use.
Proxy username: Username for authentication.
Proxy password: Password for authentication .
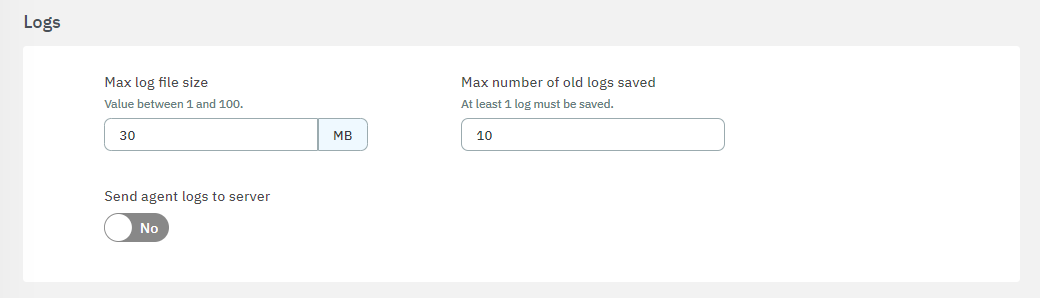
Logs
Max log file size (in MB): Value between 1 and 100. The default max size is 30 MB.
Max number of old logs saved:At least 1 log must be saved. The default value is 10 logs.
Send agent logs to server: flag to enable sending logs to server.
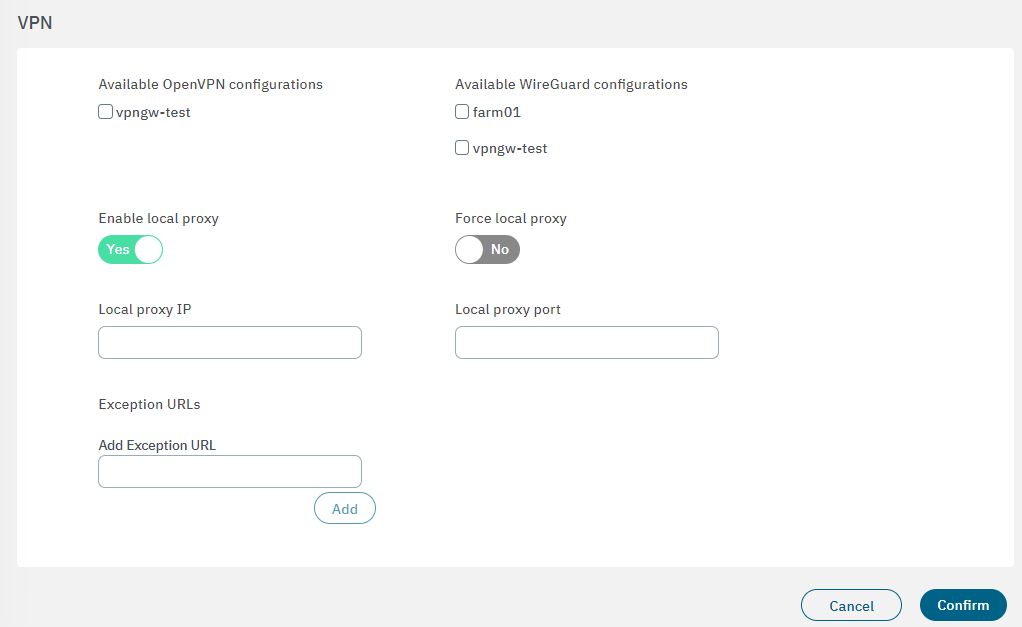
VPN
Available OpenVPN configurations: The OpenVPN options displayed where previously configured in the VPN section.
Available WireGuard configurations: The WireGuard options displayed where previously configured in the VPN section.
Enable local proxy: Flag to enable local proxy, which will be applied when the Agent connects to the VPN.
Force local proxy: This flag enables the force proxy feature, which prevents the user from disabling the local proxy through the operating system configuration.
Local Proxy IP: Local Proxy IP field.
Local Proxy port: Local Proxy port field.
Exception URL: Set exception URLs.
URL Exceptions Syntax
For the URL exceptions to work, you should use the following wildcard syntax pattern. This syntax helps in specifying a broad range of URLs or IP addresses to include in your exceptions.
*.office.com/*- Applies to everything under office’s domain*mail.office.com*- Applies to everything under the mail.office subdomain10.*.*.*- Applies to any IP address starting with 10.
After finishing the configuration, click on Confirm. It will lead you to the first configuration window.
3.2.2.5.1.1.3. Network renewal configuration
In the following image you can see the fields displayed in the Network renewal configuration property:
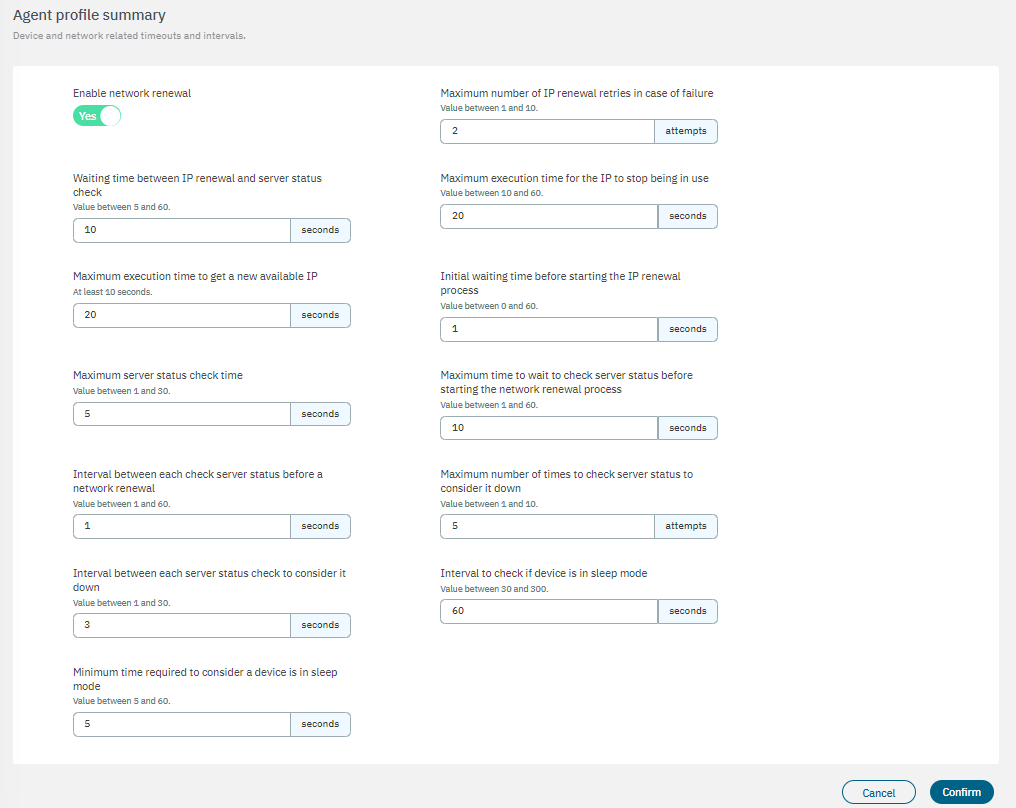
This configuration section defines network related timeouts and intervals.
When OpenNAC Enterprise applies a VLAN change to the client, this service will force the client to renew its IP address by making a new DHCP request. The client will be notified that it needs to make this request
This happens in environments where the Windows client does not detect that a VLAN change has been made at the switch layer. Therefore it no longer has connectivity.
The options available for configuring this service are:
Enable network renewal: This flag enables or disables the IP renewal service.
Maximum number of IP renewal retries in case of failure:Value between 1 and 10 attempts.
Waiting time between IP renewal and server status check: Value between 5 and 60 seconds.
Maximum execution time for the IP to stop being in use: Value between 10 and 60 seconds.
Maximum execution time to get a new available IP: At least 10 seconds.
Initial waiting time before starting the IP renewal process: Value between 0 and 60 seconds.
Maximum server status check time: Maximum time, measured in seconds, for checking the server status.
Maximum time to wait to check server status before starting the network renewal process: Value between 1 and 60 seconds.
Interval between each check server status before a network renewal: Value between 1 and 60 seconds.
Maximum number of times to check server status to consider it down: Value between 1 and 10 attempts.
Interval between each server status check to consider it down:Value between 1 and 30 seconds.
Interval to check if device is in sleep mode: Value between 30 and 300 seconds.
Minimum time required to consider a device is in sleep mode: Value between 5 and 60 seconds.
After finishing the configuration, click on Confirm. It will lead you to the first configuration window.
3.2.2.5.1.1.4. Events that send payloads
The events that send payloads are the following:
Firewall event
Network event
On close agent event
On uninstall agent event
Software event
Security center event
User session event
In the following image you can see the fields displayed in the Events that send payloads property.
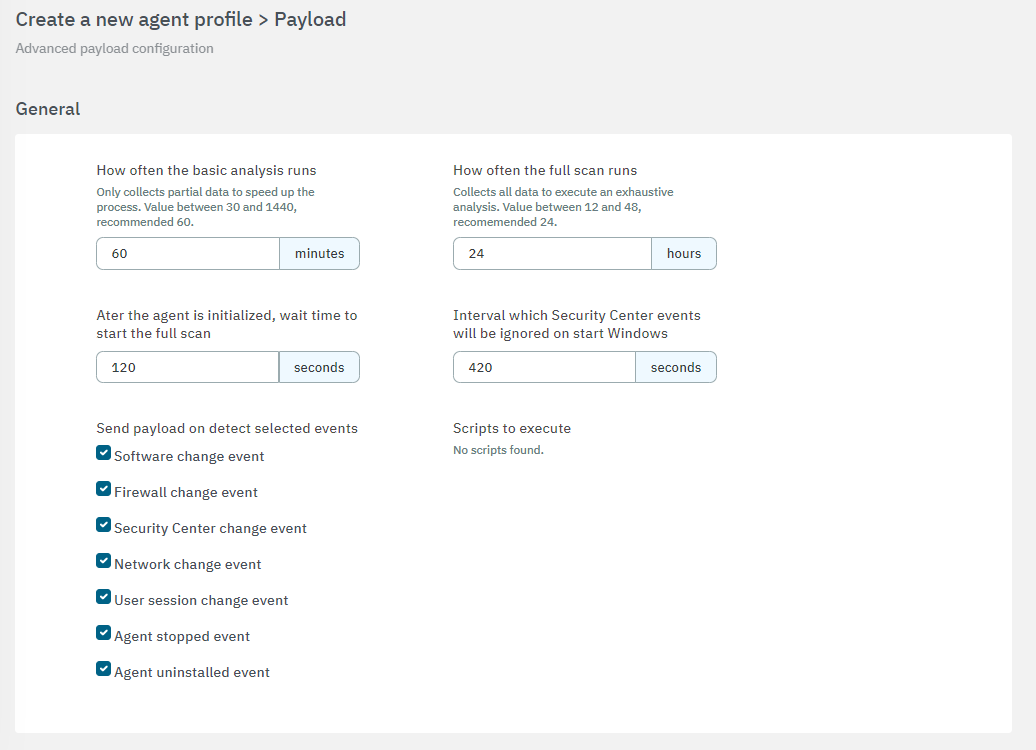
General
How often the basic analysis runs: Only collects partial data to speed up the process. Value between 30 and 1440 minutes. 60 minutes is the value recommended.
How often the full scan runs: Collects all data to execute an exhaustive analysis. Value between 12 and 48. 24 hours is the value recommended.
After the agent is initialized, wait time to start the full scan: The default time is 120 seconds.
Interval which Security Center events will be ignored on start Windows: The default time is 420 seconds.
Send payload when detecting selected events: You can enable or disable a type of payload generated automatically after an event. The events are: Software changed, Firewall changed, Security Center changed, Network changed, User session, Agent service stopped and Agent uninstalled.
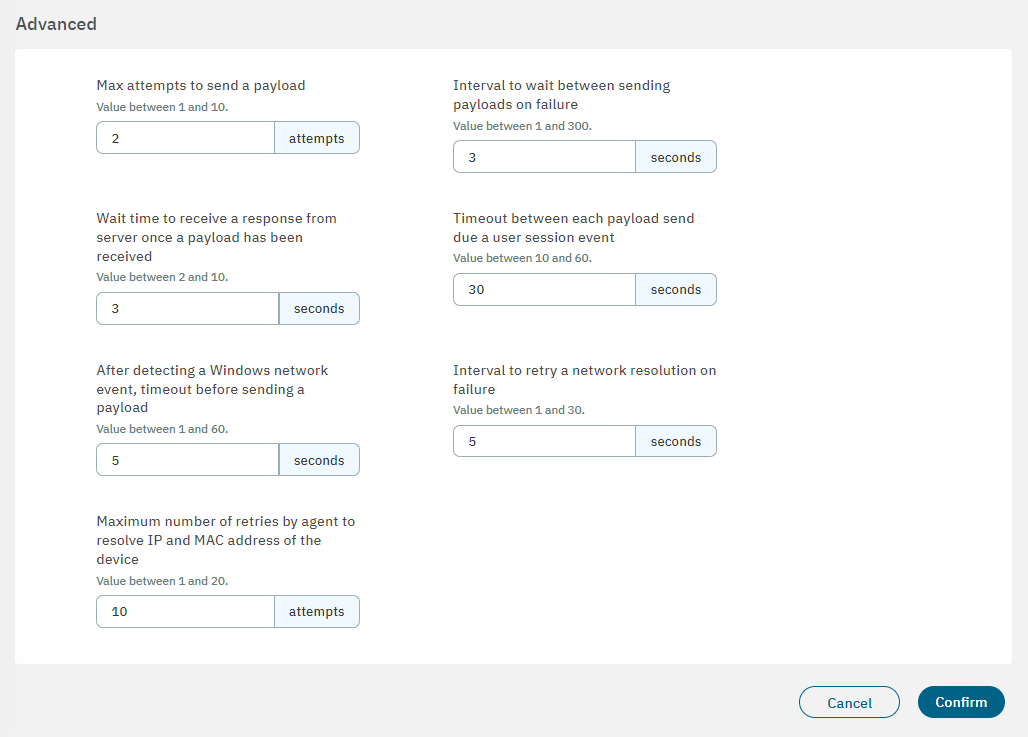
Advanced
Max attempts to send a payload: You can change the max attempt value. By default, the number of attempts is 2.
Interval to wait between sending payloads on failure: Value between 1 and 300 seconds. The default value is 3 seconds.
Wait time to receive a response from server once a payload has been received: Value between 2 and 10 seconds. The default value is 3 seconds.
Timeout between each payload send due a user session event: Value between 10 and 60. The default time is 30 seconds.
After detecting a Windows network event, timeout before sending a payload: Value between 1 and 60. The default value is 5 seconds.
Interval to retry a network resolution on failure: Value between 1 and 30. The default value is 5 seconds.
Maximum number of retries by agent to resolve IP and MAC address of the device: Value between 1 and 20. The default value is 10 attempts.
After finishing the configuration, click on Confirm. It will lead you to the first configuration window.
3.2.2.5.1.1.5. UI Configuration
In the following image you can see the fields displayed in the UI configuration property.
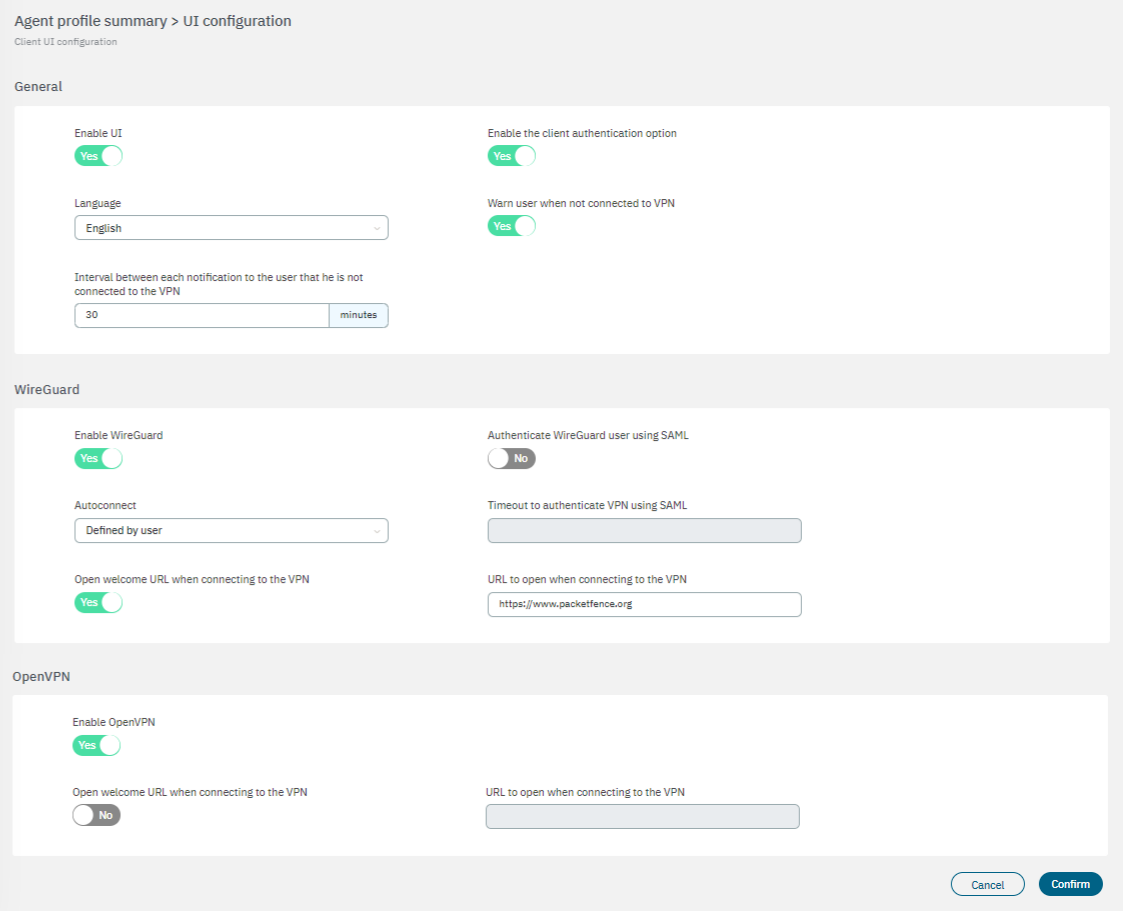
General
Enable UI: Flag to enable the Agent User Interface.
Enable the client authentication option: Flag to enable client authentication.
Language: There are five language options to choose from: English, Spanish, Catalan, French, or Portuguese.
Warn user when not connected to VPN: Flag that enables a warning notification to be displayed when a user disconnects from the VPN.
Interval between each notification to the user that he is not connected to the VPN: Define this interval value in minutes.
WireGuard
Enable WireGuard: Flag enable WireGuard. This option will only be available if you select at least one WireGuard config in Service settings.
Authenticate WireGuard user using SAML: Allow WireGuard authentication using SAML.
Timeout to authenticate VPN using SAML (in minutes): This timeout represents the maximum time between “User click Connect VPN button” and “User click on .nac file downloaded in browser”. If we don’t receive the .nac click action before the timeout configured has passed, the UI should display an error. Configure the SAML timeout by inserting the time in minutes.
Open welcome URL when connecting to VPN: To configure the URL that opens when connecting to the VPN with WireGuard. Define the URL the following field called URL to open when connecting to the VPN.
Autoconnect: The autoconnect can be Defined by user, Enabled by default, Disabled by default, or Force autoconnect.
Defined by user: When connecting to the VPN, users will have the option to enable or disable the autoconnect feature according to their preferences.
Enabled by default: Autoconnect is enabled by default in the Agent, but can be disabled by the user when connecting to the VPN.
Disabled by default: Autoconnect is disabled by default in the Agent, but can be disabled by the user when connecting to the VPN.
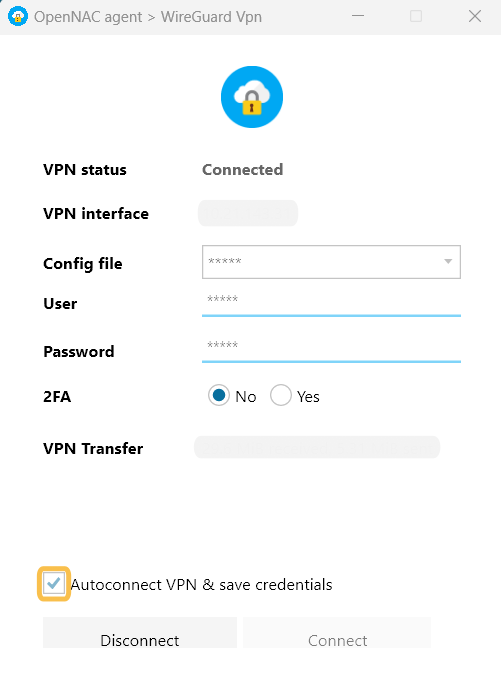
Force autoconnect: Autoconnect is enabled by default and cannot be disabled by the user. Automatic login is also available when the user recovers from a lost connection, at session start, and when the device recovers from suspension or hibernation
See the Agent User Interface and its autoconnect VPN checkbox in the image below:
OpenVPN
Enable OpenVPN: Flag enable OpenVPN. This option will only be available if you select at least one OpenVPN config in Service settings.
Open welcome URL when connecting to the VPN: To configure the URL that opens when connecting to the VPN with OpenVPN. Define the URL in the following field called URL to open when connecting to the VPN.
After finishing the configuration, click on Confirm to finally create a new agent profile.