Agent Configuration
openNAC Agent Soluble (cmd) execution with LogON Script
Computer data can be retrieved without installing any software or service. openNAC Agent soluble (cmd) is the solution!
Note
opencloud Factory recomends installing openNAC Agent as service in user computers to receive the most recent data after any system change (Network, Software, Security status, etc). Soluble version only retrive data with executions and is only recommended to Servers and external computers.
openNAC Agent Soluble (cmd) can be executed into the computer using several ways. In this example, GPO LogON Scripts will be used to retrieve computer data in each domain user login.
Note
- Example important info:
- The FilePath in the PowerShell script is a local computer path, but the path should be a network path where the users can access.
- The GPO Policy Affects to all domain, but you can select specific OU if required.
First of all, openNAC Agent Soluble (cmd) should be downloaded from openNAC portal. After downloading the agent you should move it into a network location where all computers (at least the objectives to execute the software) can access and use it.
After that, you can use the following script (Modify FilePath parameter) to use with GPO Policy.
Start-Process -NoNewWindow -FilePath "$env:PUBLIC\opennac-agent-1.0.8267-release-noarch_fb3d_591aedaa6ec2e6fbf9a7be7414c4ff31_31302e31302e33362e3433.exe"
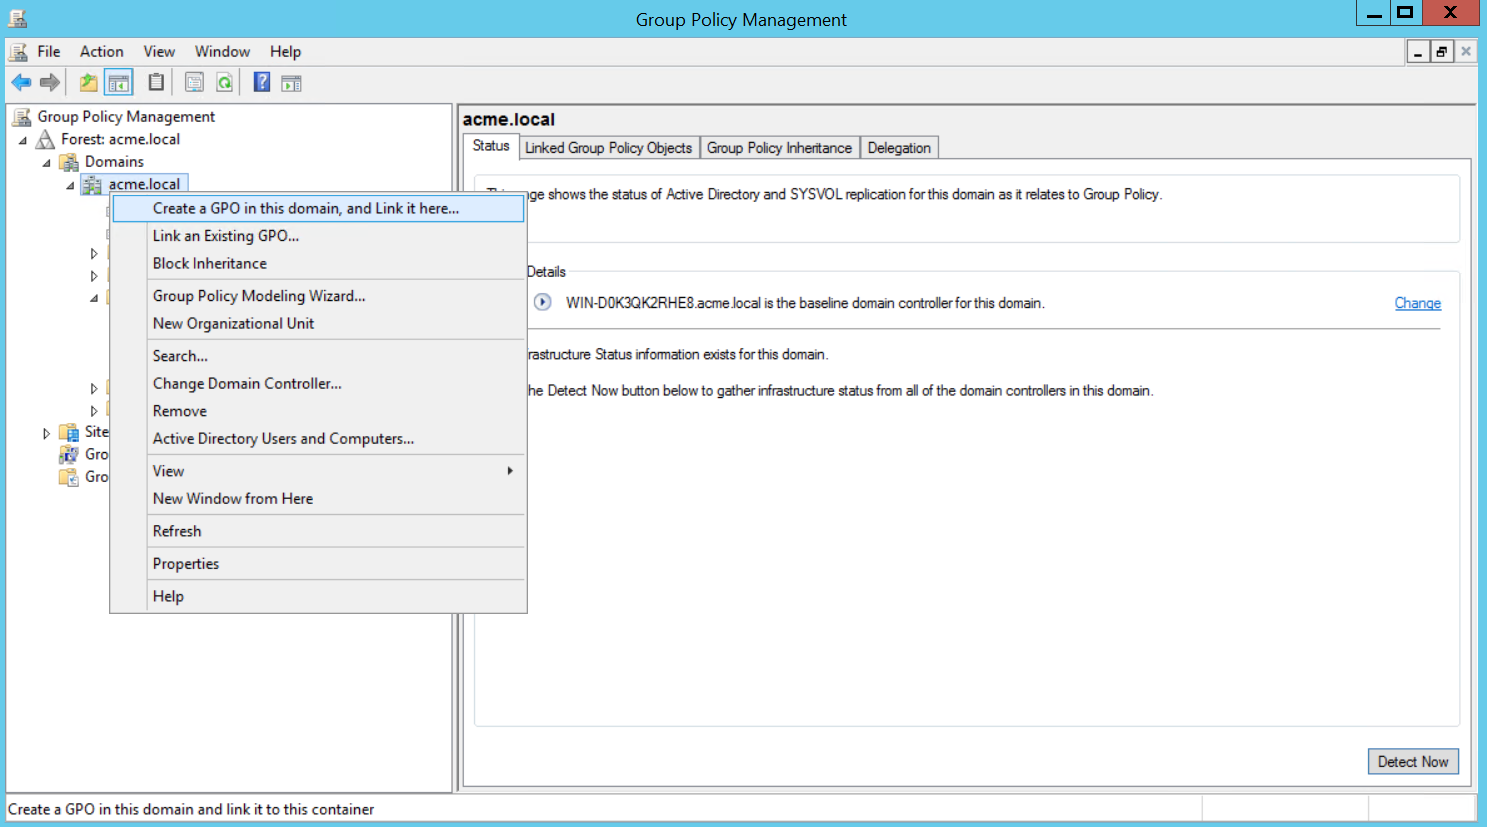
Save the script with de desired name and create new GPO with Group Policy Management Editor window.
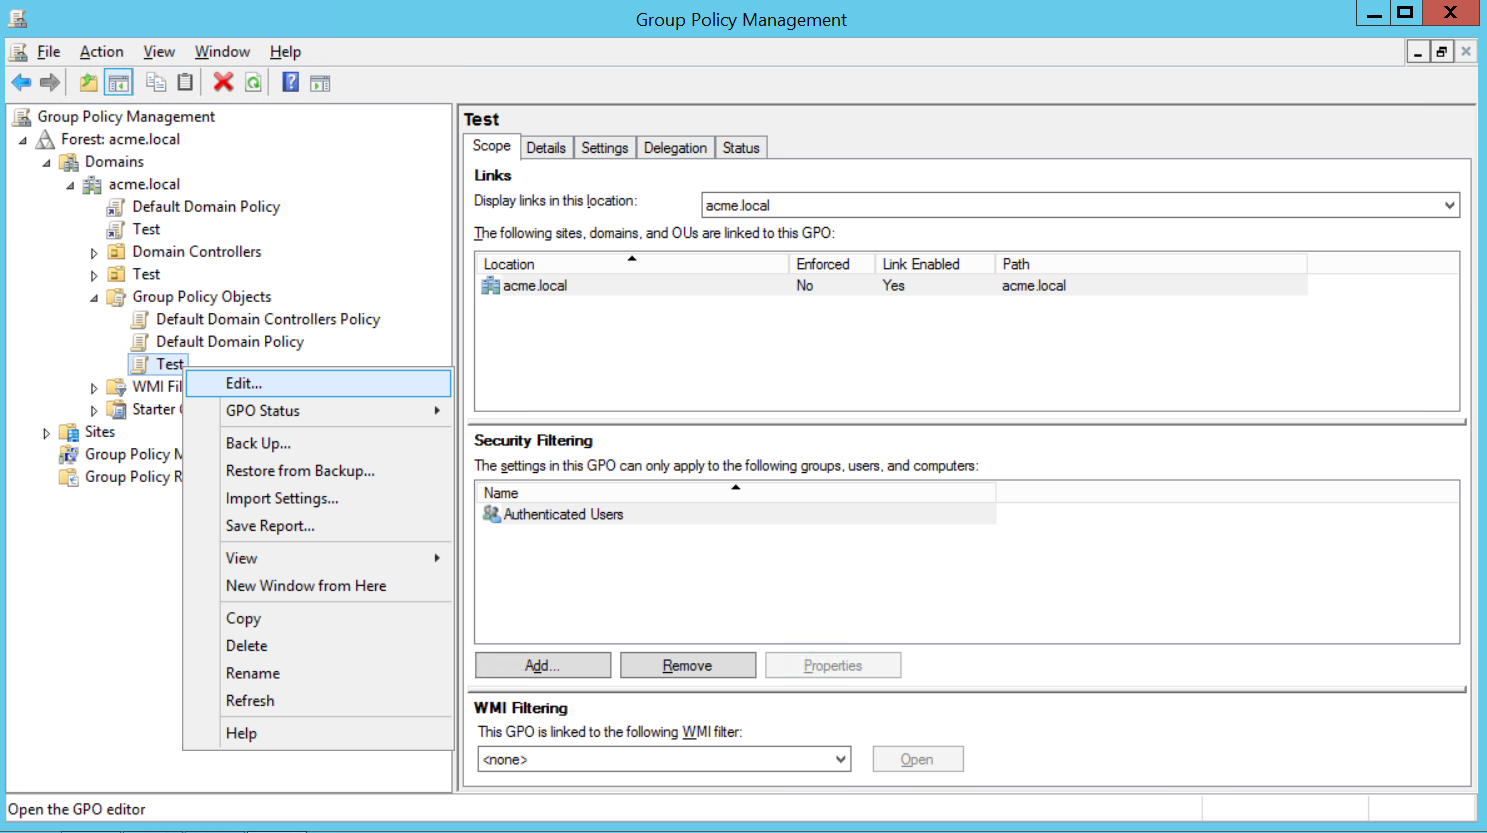
Right-click the recently created GPO and click on edit.
In the Group Policy Management Editor window, under User Configuration, expand Policies, expand Windows Settings, and then click Scripts (Logon/Logoff) and double click Logon
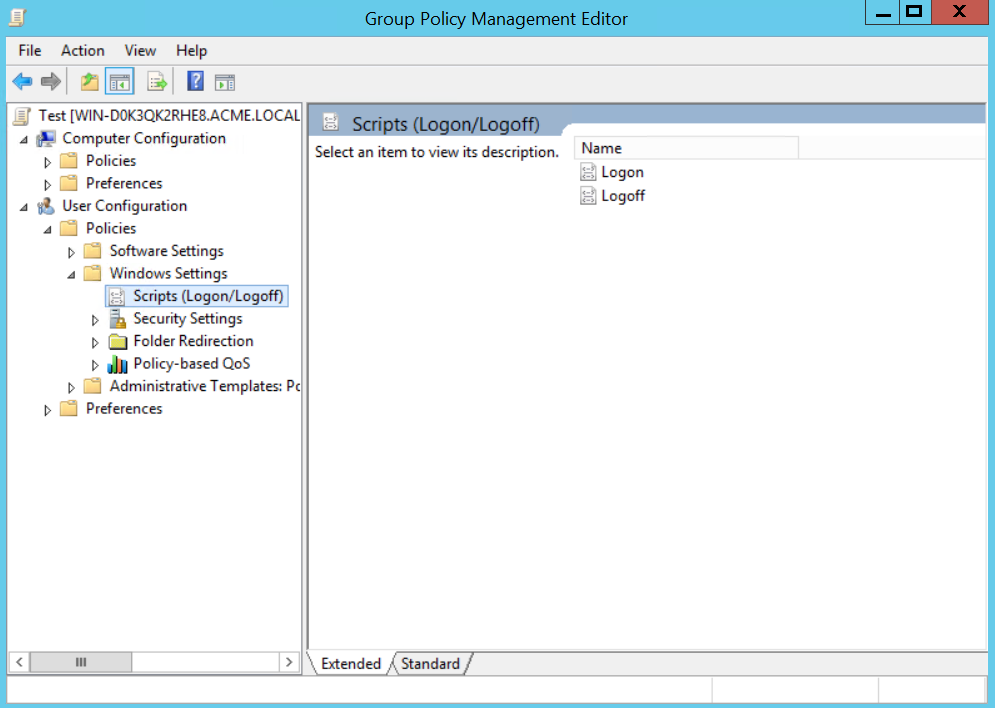
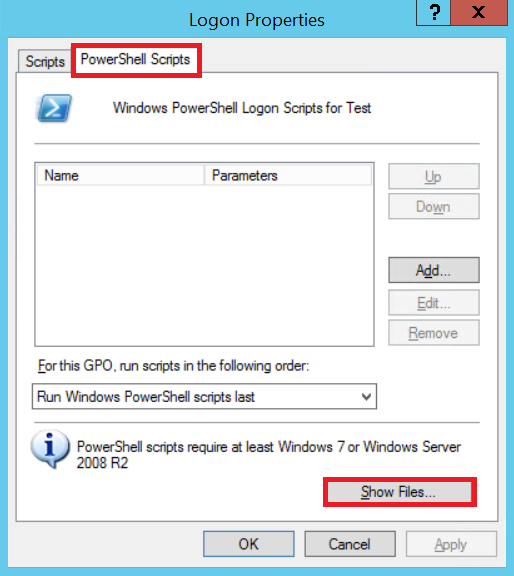
Click PowerShell Scripts tab and Click Show Files
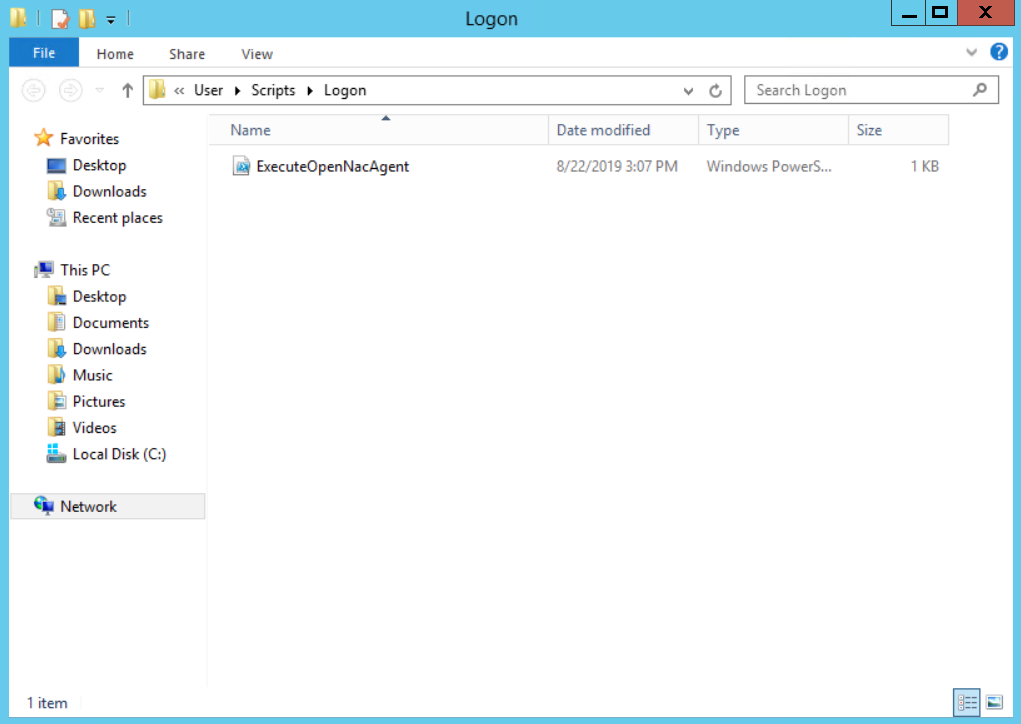
Copy the PowerShell script created before into this folder.
Close the folder and in the Logon Properties dialog box, click Add and select the recently copied script.
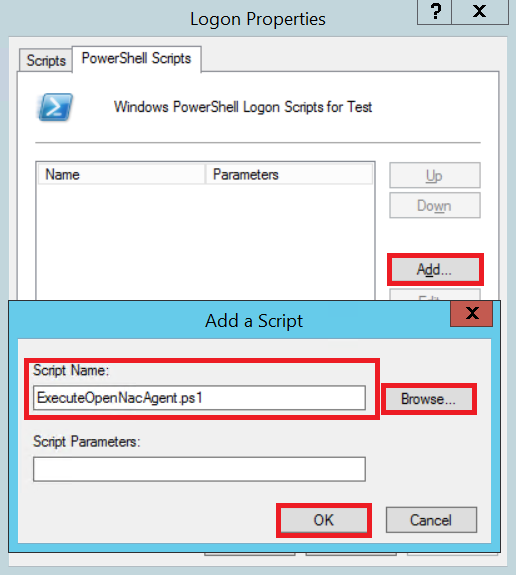
Click OK twice and close all dialog boxes.
After some time the GPO Policies will be updated and the agent will be executed when a domain user log in. The agent data will appear in openNAC.
openNAC Agent Remote Deployment for Windows
openNac agent can be easily deployed using the following PowerShell script:
The script should be configured by modifying the first section.
################################### CONFIGURE VARS ###################################

#openNac Core (AGENT PAYLOAD) Domain/IP (Without HTTP/S protocol)
#NOTE: This will be the site where openNAC agent will send the payloads (Computer information retrieved by agent). Should be a domain or an IP
#Examples: 10.10.0.50 or core.client.com
$agentPayloadHost = "democenter.opencloudfactory.com"

#openNac Core (DOWNLOAD) Domain/IP (Without HTTP/S protocol)
#NOTE: The script will download the openNAC Agent installer from this openNAC Core. MUST be an IP
#Examples: 10.10.0.50
$agentDownloadHost = "10.20.0.100"

#Install openVPN to enable VPN Agent Feature - 1: YES, 0: NO
#NOTE: openVPN Certificate should be installed as TrustedPublisher in the computer (Check doc)
# If openvpn certificate is not installed and this option is activated the installation will get blocked.
$INSTALL_OPENVPN = "1"

#Install WinPCAP to give the possibility of enable agent visibility - 1: YES, 0: NO
$INSTALL_WINPCAP = "0"

#Create Agent Taskbar shortcut on desktop (Only valid if $INSTALL_OPENVPN = 1 ) - 1: YES, 0: NO
$CREATE_SHORTCUT = "1"

#Start Agent Taskbar with Windows - 1: YES, 0: NO
$AGENT_AUTOSTART = "1"

################################### CONFIGURE VARS ###################################
NOTE: To use INSTALL_OPENVPN option the openvpn certificate should be added as Trusted Publisher into the computer certificate storage.
openVPN certificate used by openNac Agent installer can be downloaded in the following link:
After configuring the script you can save, distribute (with openvpn certificate if needed) to the desired computers and execute it to install the last openNac agent version. You can do it using several ways. The following lines will describe the process using PsExec software.
openNac Agent deploy with PsExec
PsExec: Download
First of all, the PsExec tool should be downloaded and installed:
Note: some anti-virus scanners report that one or more of the tools are infected with a “remote admin” virus. None of the PsTools contain viruses, but they have been used by viruses, which is why they trigger virus notifications. If you have a corporate anti-virus, it is possible that you would need to allowlist the psexec executable.
PsExec: Installation
Just copy PsExec onto your executable path. Typing “psexec” displays its usage syntax.
PsExec: openNac Agent deploy
In this example, openNac Agent will be installed with openVPN option activated into a computer with the IP “10.10.36.114”.
NOTE: You can create a IP List file and refer to this file with “@” notation in PsExec
First, the openVPN Certificate should be added to computer certificate storage.
- Copy Certificate:
psexec -d -c \\10.10.36.114 -u user99 -p 0p3nN4c "C:\Users\ocf\Downloads\openvpn.cer" openvpn.cer
- Install Certificate:
psexec \\10.10.36.114 -u user99 -p 0p3nN4c -h certutil.exe -addstore "TrustedPublisher" "C:\Windows\openvpn.cer"
Now openNac agent can be installed.
- Copy installer:
psexec -d -c -f \\10.10.36.114 -u user99 -p 0p3nN4c "C:\Users\ocf\Downloads\Install_Agent.ps1" Install_Agent.ps1
- Install openNac Agent:
psexec -d -h \\10.10.36.114 -u user99 -p 0p3nN4c cmd /c "powershell -executionPolicy bypass -File C:\Windows\Install_Agent.ps1"
PsExec won’t wait to openNac agent install finish. After a while (some minutes) you will see the openNac agent installed in the desired computer. You will be able to see the fresh installed agents reporting into the openNAC admin interface
openNAC Agent Installation for Windows
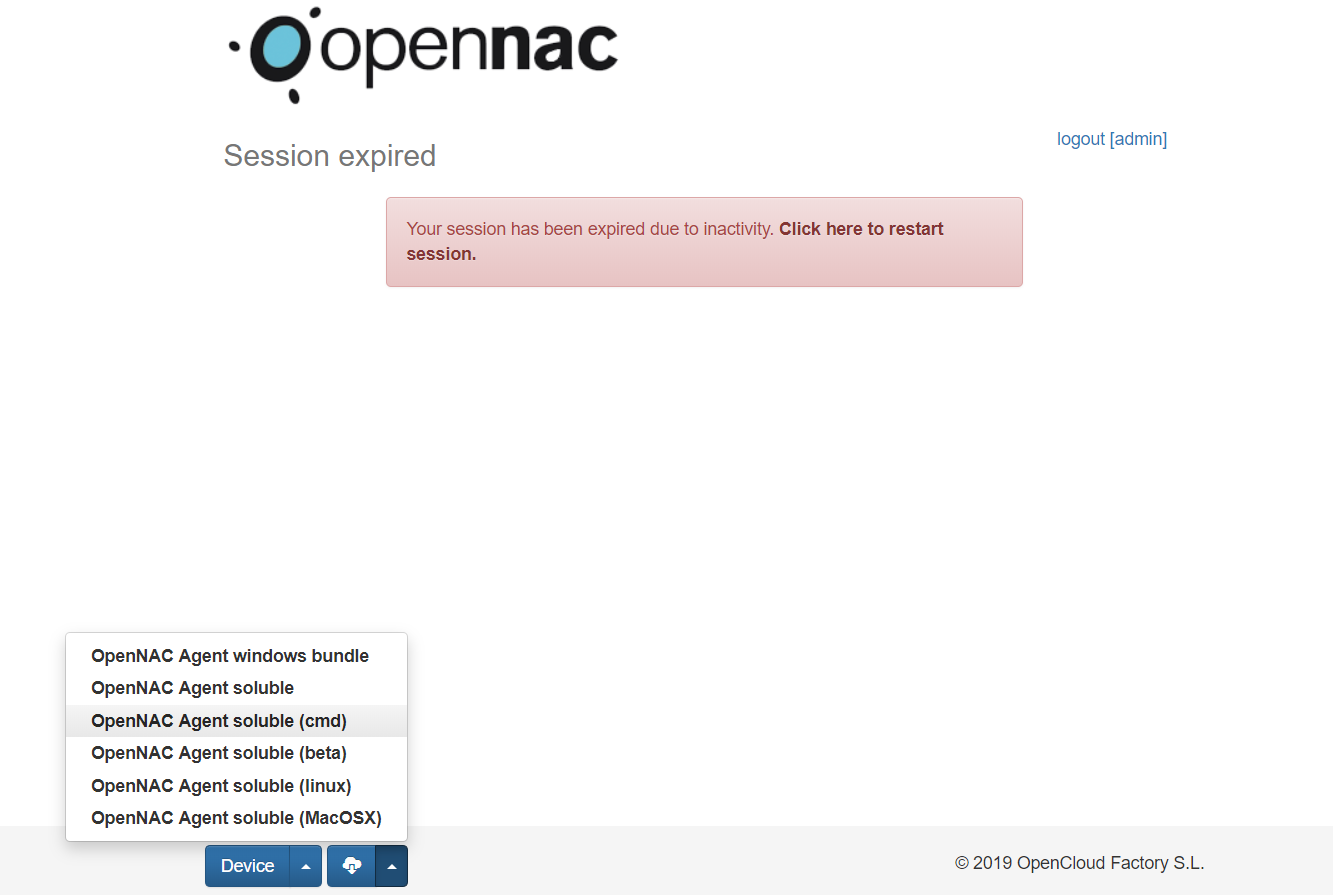
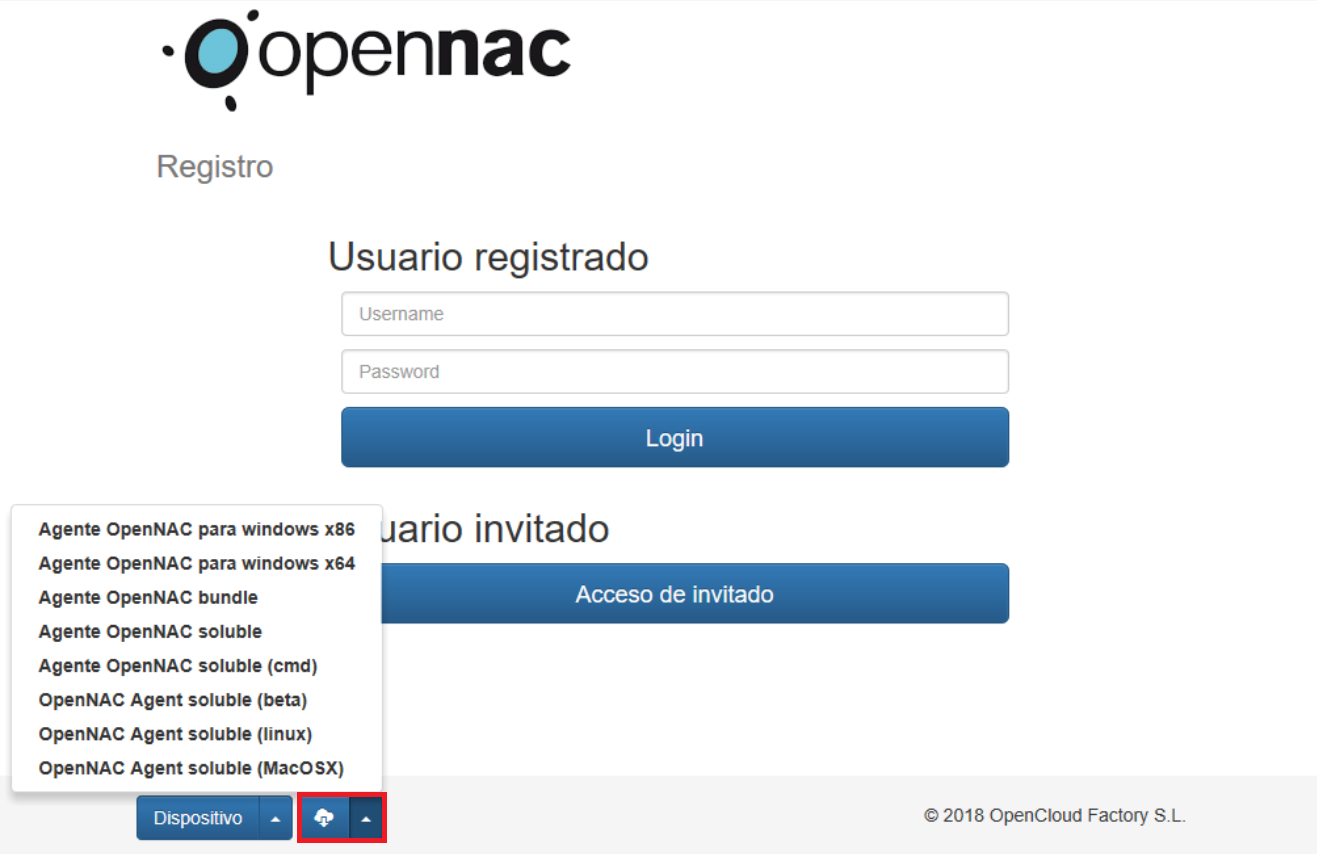
First of all, we need the installable file. This file can be downloaded from the user portal (http://userPortal_IP_or_name/), using the download button located in left-bottom side, close to the “Device” information:
Relevant files
Configuration files
- openNAC Agent Service: C:\ProgramData\OpenCloudFactory\opennac-agent\config.ini
- openNAC Agent Taskbar: C:\Program Files\opennac-agent\taskbar\opennac-taskbar.ini
Logs files
- openNAC Agent Service: C:\ProgramData\OpenCloudFactory\opennac-agent\logs\output.log
- openNAC Agent Taskbar: C:\ProgramData\OpenCloudFactory\opennac-agent\logs\output-taskbar.log
The Windows openNAC Agent installation process is:
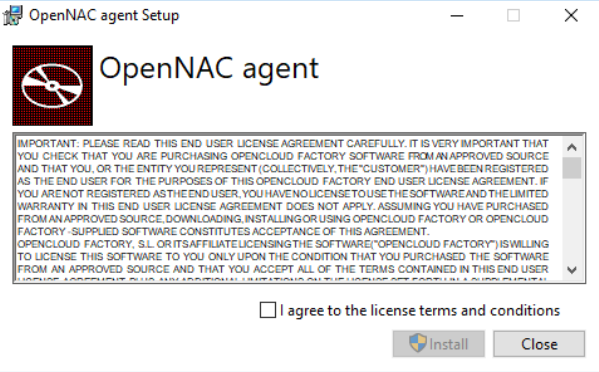
After the download, execute the agent installer.
Read and agree to the license terms and conditions, then press “Install”
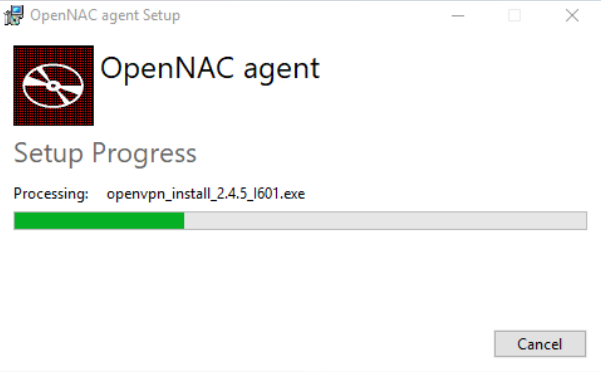
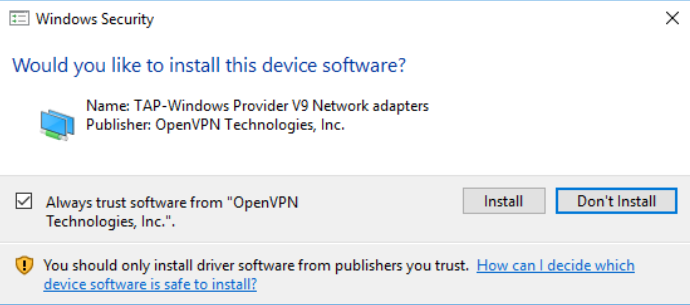
During the installation, you will be asked to accept the creationg of Open VPN’s network adapters. This should accepted, otherwise the VPN part of the client will not work.
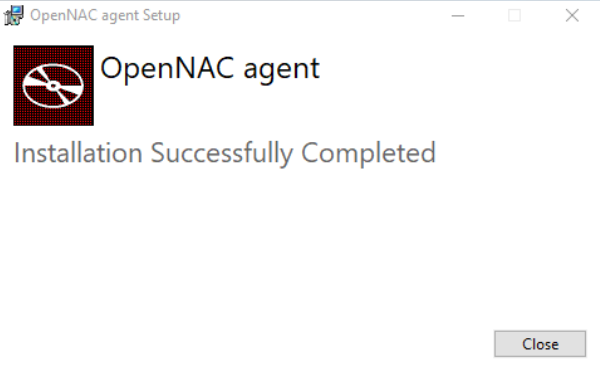
After the installation is over, click on the “Close” button.
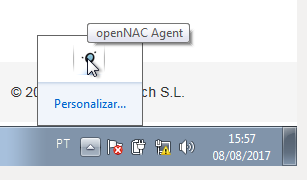
The agent will start automatically and send the computer info to openNAC.

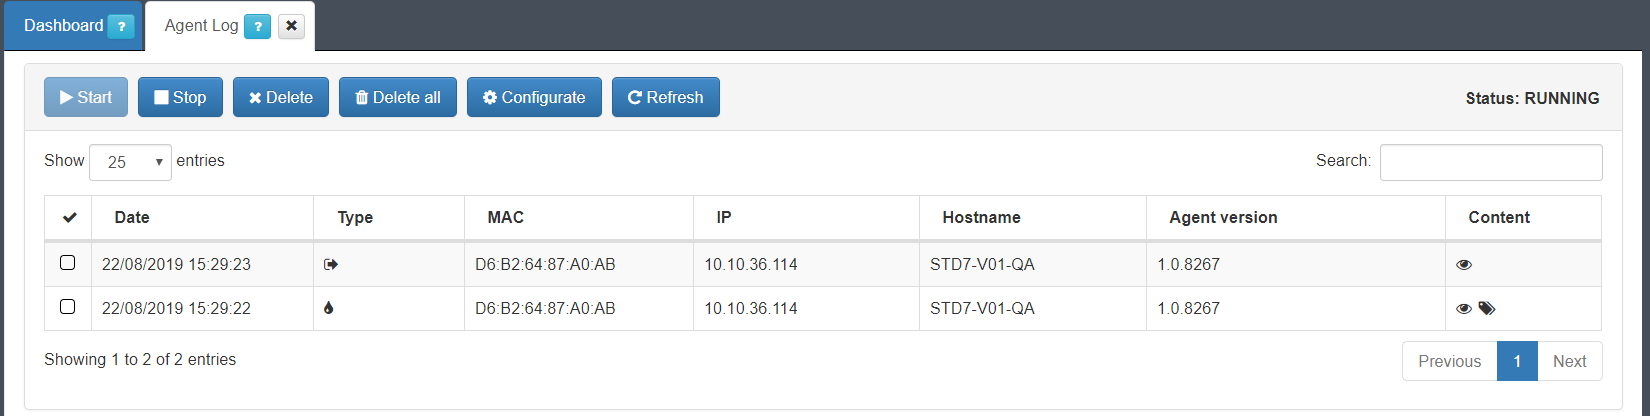
You will be able to see its communication with the openNAC Server, in the “Agent Log” tab, within Configuration > Agent > Agent Log.
Agent Update
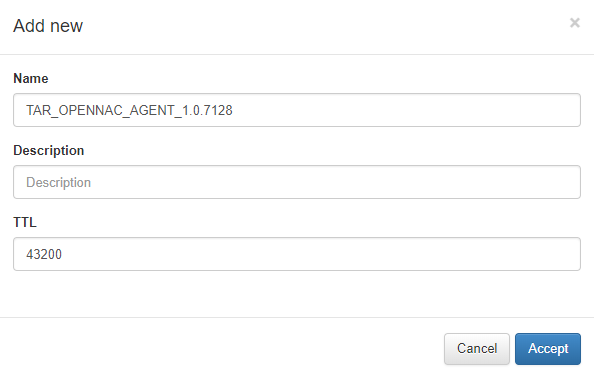
- Go into “ON CMDB –-> Tags –-> Tags of User Devices” and create a new “TAR” tag:
TAR_openNAC_AGENT_$VERSION
Where:
$VERSION should be the openNAC Agent version installed in the user portal. This will create a NCA Tag in each user device that have an older agent version that the defined in the Tag
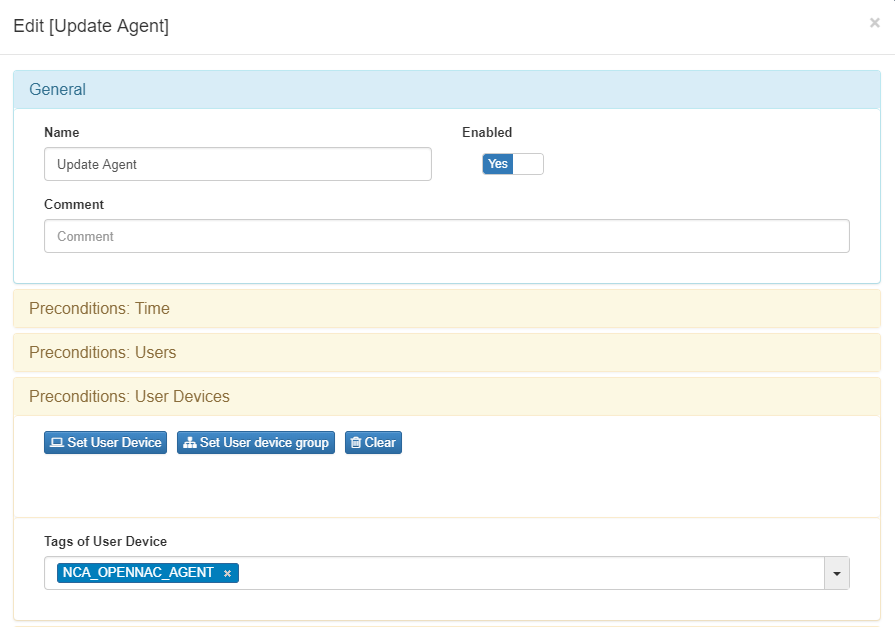
- Create a new policy with the desired name and use the NCA tag created before as user device pre-condition
The next step is configuring the update mode as custom param and it depends of the openNAC version.
Before openNAC 6953:
Add an “AGENT_QUERY” as custom param with the next content:
cscript#UPDATE#0#Set objFSO = CreateObject("Scripting.FileSystemObject")#Set objFile = objFSO.CreateTextFile("Update_Agent.ps1")#objFile.WriteLine "function Get-IniFile"#objFile.WriteLine "{"#objFile.WriteLine "param("#objFile.WriteLine "[parameter(Mandatory = $true)] [string] $filePath "#objFile.WriteLine ")"#objFile.WriteLine "$anonymous =" & chr(34) & "NoSection" & chr(34)#objFile.WriteLine "$ini = @{}"#objFile.WriteLine "switch -regex -file $filePath "#objFile.WriteLine "{"#objFile.WriteLine "" & chr(34) & "^\[(.+)\]$" & chr(34)#objFile.WriteLine "{"#objFile.WriteLine "$section = $matches[1]"#objFile.WriteLine "$ini[$section] = @{}"#objFile.WriteLine "$CommentCount = 0"#objFile.WriteLine "}"#objFile.WriteLine "" & chr(34) & "^(;.*)$" & chr(34)#objFile.WriteLine "{"#objFile.WriteLine "if (!($section))"#objFile.WriteLine "{"#objFile.WriteLine "$section = $anonymous"#objFile.WriteLine "$ini[$section] = @{}"#objFile.WriteLine "}"#objFile.WriteLine "$value = $matches[1]"#objFile.WriteLine "$CommentCount = $CommentCount + 1"#objFile.WriteLine "$name = " & chr(34) & "Comment" & chr(34) & "+ $CommentCount"#objFile.WriteLine "$ini[$section][$name] = $value"#objFile.WriteLine "}"#objFile.WriteLine "" & chr(34) & "(.+?)\s*=\s*(.*)" & chr(34)#objFile.WriteLine "{"#objFile.WriteLine "if (!($section))"#objFile.WriteLine "{"#objFile.WriteLine "$section = $anonymous "#objFile.WriteLine "$ini[$section] = @{} "#objFile.WriteLine "}"#objFile.WriteLine "$name,$value = $matches[1..2] "#objFile.WriteLine "$ini[$section][$name] = $value"#objFile.WriteLine "}"#objFile.WriteLine "}"#objFile.WriteLine "return $ini"#objFile.WriteLine "}"#objFile.WriteLine "if(Test-Path " & chr(34) & "$env:ProgramData\OpenCloudFactory\opennac-agent\config.ini" & chr(34) & "){"#objFile.WriteLine "$configFile = Get-IniFile "& chr(34) & "$env:ProgramData\OpenCloudFactory\opennac-agent\config.ini" & chr(34)#objFile.WriteLine "}elseif(Test-Path " & chr(34) & "$env:PUBLIC\opennac-agent\config.ini" & chr(34) & "){"#objFile.WriteLine "$configFile = Get-IniFile " & chr(34) & "$env:PUBLIC\opennac-agent\config.ini" & chr(34)#objFile.WriteLine "}"#objFile.WriteLine "$OnNacHost = $configFile.Connection.IP"#objFile.WriteLine "if(!$OnNacHost){"#objFile.WriteLine "$OnNacHost = $configFile.NoSection.IP"#objFile.WriteLine "}"#objFile.WriteLine "$OnNacHost = $OnNacHost.Replace('"& chr(34) &"'," & chr(34) & chr(34) & ").Trim()"#objFile.WriteLine "$OnNacHostHex = "& chr(34) & chr(34)#objFile.WriteLine "$OnNacHost.ToCharArray() | foreach-object -process {"#objFile.WriteLine "$OnNacHostHex += '{0:X}' -f [int][char]$_"#objFile.WriteLine "}"#objFile.WriteLine "$OnNacHostHex=$OnNacHostHex.ToLower();"#objFile.WriteLine "if([intPtr]::Size -eq 8){"#objFile.WriteLine "$arch=" & chr(34) & "x64" & chr(34)#objFile.WriteLine "}else{"#objFile.WriteLine "$arch=" & chr(34) & "x86" & chr(34)#objFile.WriteLine "}"#objFile.WriteLine "$url = "& chr(34) & "https://$OnNacHost/win-agent-download?type=$arch" & chr(34)#objFile.WriteLine "$outpath = " & chr(34) & "opennac-Update_$OnNacHostHex.msi" & chr(34)#objFile.WriteLine "[System.Net.ServicePointManager]::ServerCertificateValidationCallback = {$true}"#objFile.WriteLine "$client = New-Object -TypeName System.Net.WebClient"#objFile.WriteLine "$client.DownloadFile($url,$outpath)"#objFile.WriteLine "if(Test-Path $outpath){"#objFile.WriteLine "$arg = " & chr(34) & "/quiet /norestart" & chr(34)#objFile.WriteLine "Start-Process -Wait -Filepath " & chr(34) & "$outpath" & chr(34) & " -ArgumentList $arg"#objFile.WriteLine "$app = Get-WmiObject -Class Win32_Product | Where-Object {"#objFile.WriteLine "$_.Name -match " & chr(34) & "openNAC Agent*" & chr(34)#objFile.WriteLine "}"#objFile.WriteLine "$oldAgentUninstalled=0"#objFile.WriteLine "if($app){"#objFile.WriteLine "$app = Get-WmiObject -Class Win32_Product | Where-Object {"#objFile.WriteLine "$_.Name -match " & chr(34) & "openNAC_Agent" & chr(34)#objFile.WriteLine "}"#objFile.WriteLine "if($app){"#objFile.WriteLine "$app.uninstall()"#objFile.WriteLine "$oldAgentUninstalled=1"#objFile.WriteLine "}"#objFile.WriteLine "$app = Get-WmiObject -Class Win32_Product | Where-Object {"#objFile.WriteLine "$_.Name -match " & chr(34) & "openNAC Agent 1.0.0" & chr(34)#objFile.WriteLine "}"#objFile.WriteLine "if($app){"#objFile.WriteLine "$app.uninstall()"#objFile.WriteLine "$oldAgentUninstalled=1"#objFile.WriteLine "}"#objFile.WriteLine "if($oldAgentUninstalled){"#objFile.WriteLine "$Users = Get-ChildItem " & chr(34)&"$env:HOMEDRIVE\Users" & chr(34)#objFile.WriteLine "ForEach ($User in $Users){"#objFile.WriteLine "$path = " & chr(34) & "$env:HOMEDRIVE\Users\$user\AppData\Roaming\Microsoft\Windows\Start Menu\Programs\Startup\Opennac" & chr(34)#objFile.WriteLine "If (Test-Path $path){"#objFile.WriteLine "Remove-Item -path $path -ErrorAction SilentlyContinue"#objFile.WriteLine "}"#objFile.WriteLine "}"#objFile.WriteLine"$path = " & chr(34) & "$env:ProgramData\Microsoft\Windows\Start Menu\Programs\StartUp\Opennac.lnk" & chr(34)#objFile.WriteLine "If (Test-Path $path){"#objFile.WriteLine "Remove-Item -path $path -ErrorAction SilentlyContinue"#objFile.WriteLine "}"#objFile.WriteLine "Start-Process -Filepath " & chr(34) & "$env:PUBLIC\Desktop\OpennacVPN.lnk" & chr(34) & " -ArgumentList $arg"#objFile.WriteLine "Start-Service -name " &chr(34) & "openNAC Agent" & chr(34)#objFile.WriteLine "}"#objFile.WriteLine "$openNACTaskbar = Get-Process " & chr(34) & "opennac-taskbar" & chr(34) & " -ErrorAction SilentlyContinue"#objFile.WriteLine "if (!$openNACTaskbar){ "#objFile.WriteLine "Start-Process -Filepath " & chr(34) & "$env:ProgramFiles\opennac-agent\taskbar\opennac-taskbar.exe" & chr(34)#objFile.WriteLine "}"#objFile.WriteLine "Remove-Item -path$outpath-ErrorAction SilentlyContinue"#objFile.WriteLine "}else{"#objFile.WriteLine "echo " & chr(34) & "Failed installing new agent version" & chr(34)#objFile.WriteLine "}"#objFile.WriteLine "}else{"#objFile.WriteLine "echo " & chr(34) & "Failed downloading new agent version" & chr(34)#objFile.WriteLine "}"#objFile.WriteLine "Remove-Item " & chr(34) & "$PSScriptRoot/Update_Agent.ps1" & chr(34) & ""#objFile.Close#Set oShell = CreateObject ("WScript.Shell")#oShell.run "cmd.exe /C powershell -executionPolicy bypass -file ""Update_Agent.ps1"""
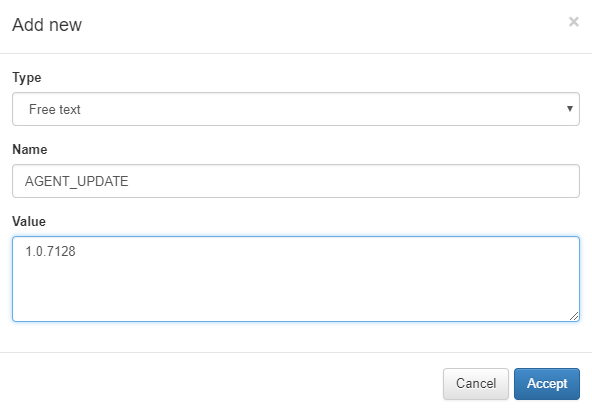
After openNAC 6953 and before openNAC 7110
Add an “AGENT_UPDATE” as custom param using “Free Text” option. The content should be the $VERSION defined before.
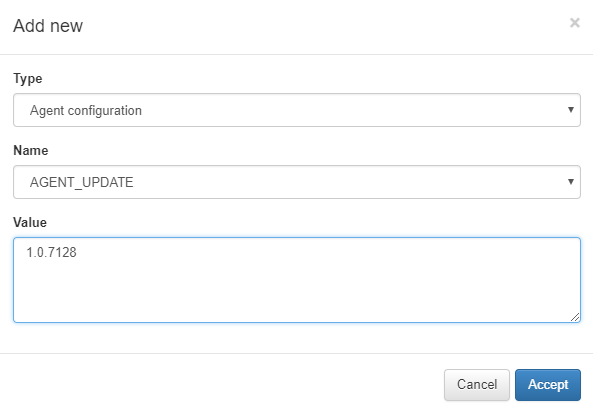
After openNAC 7110
Add an “AGENT UPDATE” as custom param using the correct option for this. The content should be the $VERSION defined before.
Agent Policy Variables
| VARIABLE | VALUE | MEANING |
|---|---|---|
| AGENT_CONFIG_INTERVAL | 240 | Execution interval of the software service |
| AGENT_CONFIG_FULL_INTERVAL | 600 | Execution interval of the full service |
| AGENT_CONFIG_START_MODE_INTERVAL | 120 | Initial interval of the software service |
- The value of the variable is defined in seconds
Opennac 1.2.1-1 version
- Go into “Configuration → Agent → Agent Configuration” and select the agent profile “default” for example:
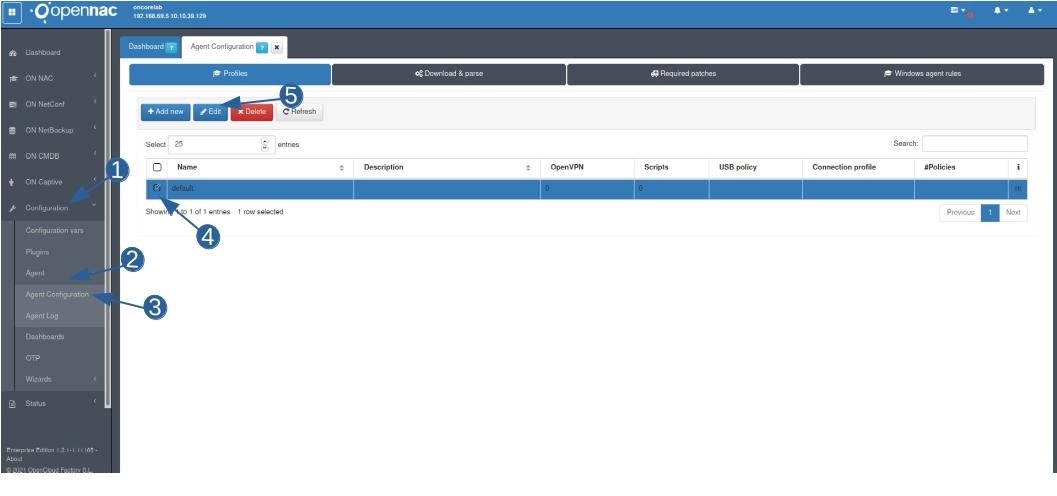
- Edit
- In the INPUT form “Minimum version required” write your current agent version.
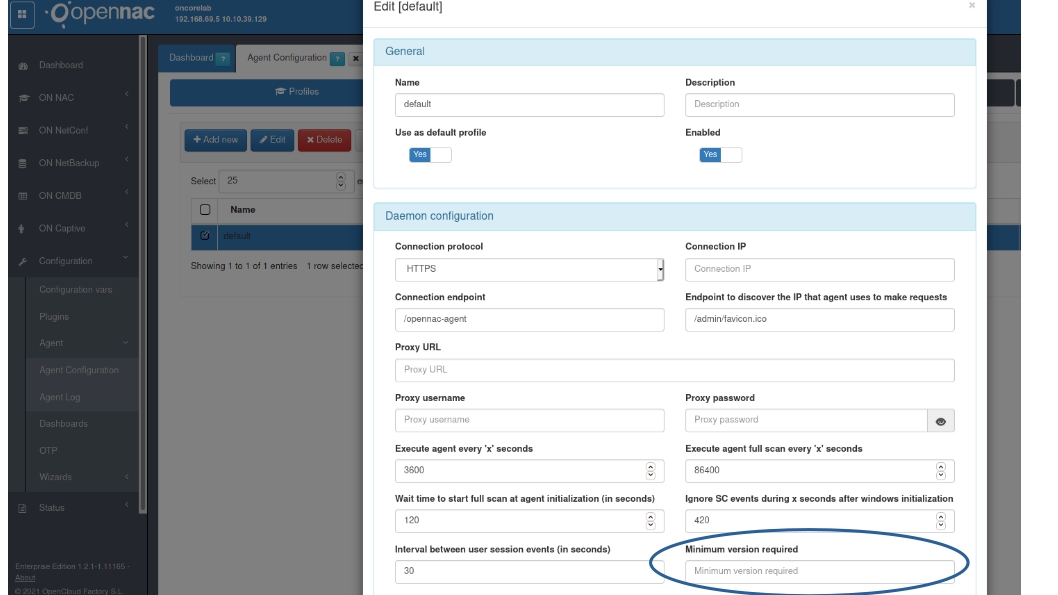
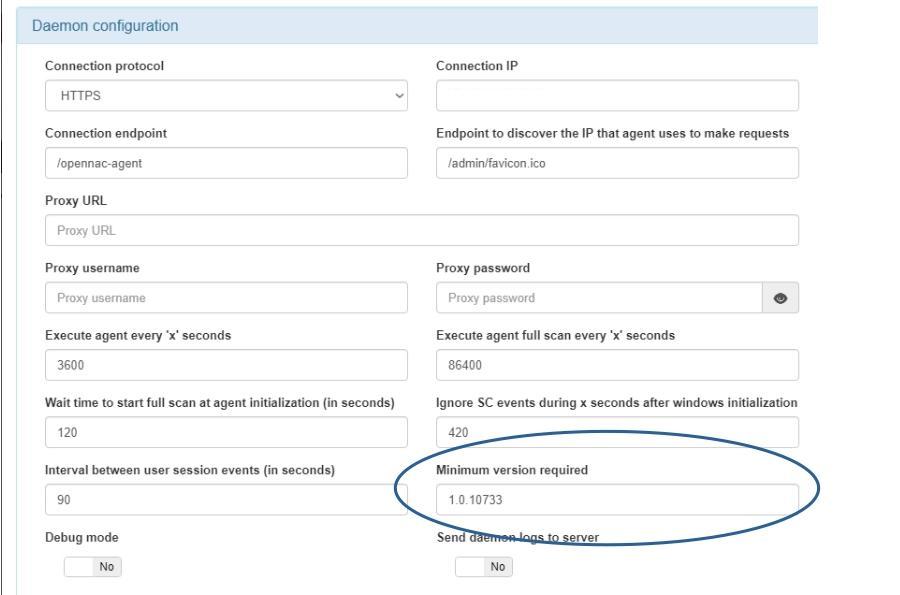
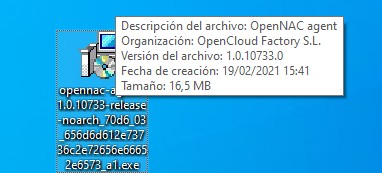
For check the version download the agent from the https://<base_url>/index/init and take note of the version.
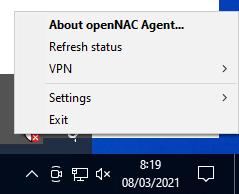
- You can check that it is working properly by performing a Refrest Status.
To verify that there are no problems, we will check that in the route C:\ProgramData\OpenCloudFactory\opennac-agent exist the file agent-update.ps1 and the content is not the following
<html><body><h1>503 Service Unavailable</h1>
No server is available to handle this request.
</body></html>
If it does not exist or the content is the above check the firewall configuration and the path https://<base_url>/agent-update-file is accessible from your computer.
- The update process may take a few minutes, and the service will be deleted and recreated. After a few minutes, if we check the version, it should match the current version.