6.3. Agent End User Guide
This section provides all the necessary information for Agent end users. Here, you will learn how to set up your environment to establish a secure VPN connection to the corporate network through the OpenNAC Agent using a 2FA (Two-Factor Authentication) service.
6.3.1. Installing the Agent
To download the OpenNAC Agent, access the URL given by your administrator. It will display the Agent Download options:
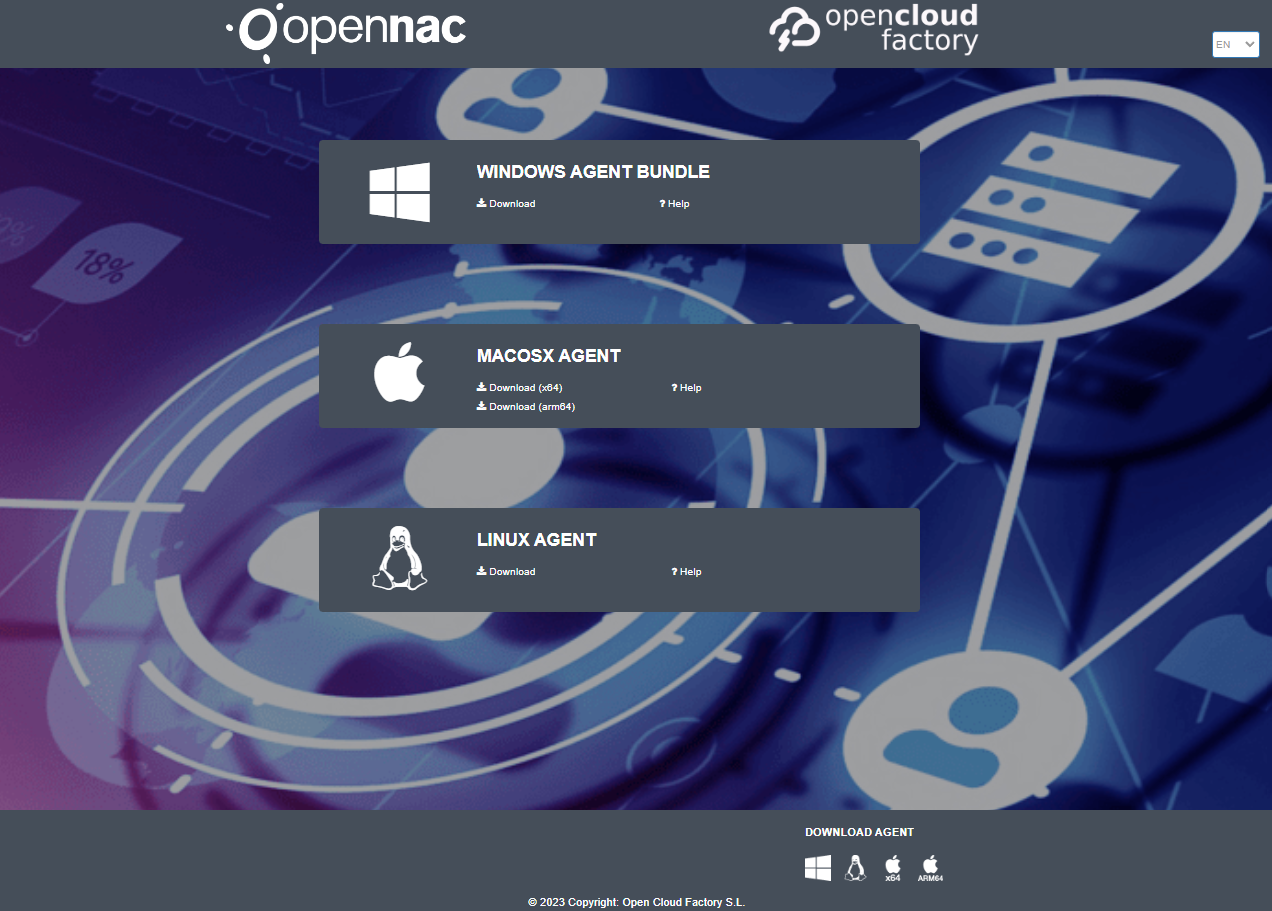
Choose the type of agent that you want to install and click on Download. In this example, we will download the Windows installable agent.
The file download starts automatically. Select in which folder in our computer you want to save the file (Documents, Downloads, etc.). It is important to remember the location of the file for future steps.
The download file name will have a format similar to the following one:
opennac-agent-1_0_xxxxx-release-windows-xxxxxxxxxxxxxxxxxx
Warning
IMPORTANT: DO NOT modify the file name, otherwise it will not work properly.
Once the download is complete, go to the folder where you have saved the file and double-click on it to start the installation process.
A dialog will ask for you permission to execute the file. Once you accept it, the installation process will begin.

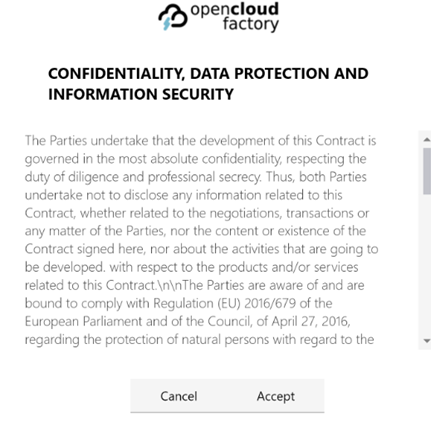
Once the installation process is complete, you will need to agree to the Agent’s Terms and Conditions. If you choose to ignore or reject them, you will receive a notification and the application will close.
After accepting the Terms and Conditions, the installation process is finished and the On Agent Icon will be displayed in your taskbar.

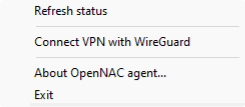
After a few minutes, you can right-click on this icon to authenticate the client or establish a connection to the VPN.
Refer to the:ref:Agent Troubleshooting<agent_install_macos> section in case you encounter any errors during the installation process.
6.3.2. Ongoing Google Authenticator Authentication
After finishing the OTP configuration, you will need a QR authenticator app, such as Google Authenticator. To set up your user account, you need to scan the QR code sent to your email.
To install the application, download it from one of the following links:
For detailed information about how to install and use the app, visit the Google Authenticator help documentation.
After installing the application, you need to scan the QR code sent to you via email from OpenNAC Enterprise using Google Authenticator. The email will provide detailed instructions on how to perform the scanning process and guide you through all the necessary steps:
If this is your first time using Google Authenticator, follow these steps:
Click on “START SETUP”.
Then, click on “Scan Barcode”.
Scan the QR code attached to the email.
Now you will be able to view the code.
If you have previously used Google Authenticator, follow these steps:
Click on the “+” symbol at the top right.
Then, click on “Scan Barcode”.
Scan the QR code attached to the email.
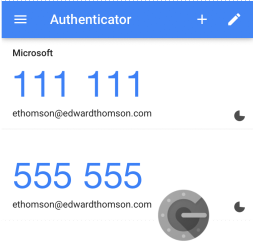
Now you will be able to view the code.
When you scan the QR, a dynamic PIN appears and it will be displayed in the app for about 30 seconds.
6.3.2.1. Agent 2FA Connection
Once the Agent is installed on clients’ computers, we can continue with the Google Authenticator registration and the connection tests. See the Agent’s Deployment section for detailed information about download and installation options.
To connect to the VPN using the 2FA option, follow these steps:
1. Open your Agent interface. 3. Enter your username and password and click on Connect.
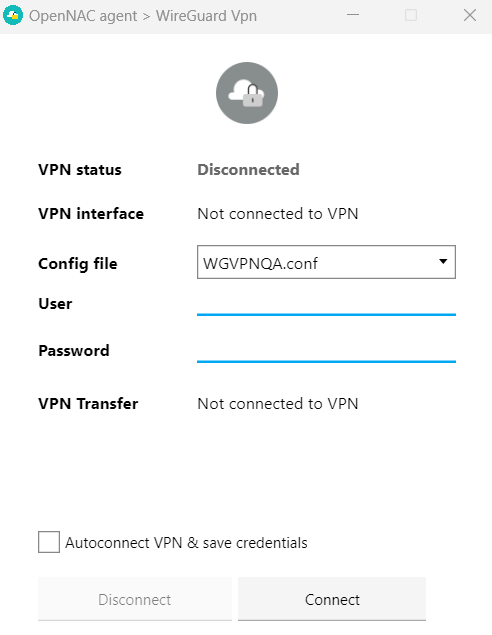
The Agent will then send a payload to the server, which responds indicating whether 2FA is necessary for that user.
If a second authentication factor is indeed required, the user is prompted to enter an OTP code (the PIN generated by Google Authenticator) to proceed with the connection.
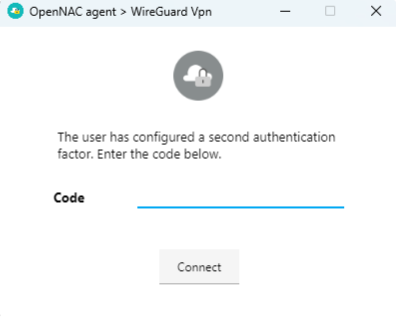
Click on the Connect button.
6.3.3. Registering one-time QR codes
When establishing a VPN connection using one-time QR codes, you will be prompted to provide a double authentication factor (2FA). The 2FA is facilitated through the captive portal specified in the configuration. To register your user account, you need to scan the QR code sent to you via email.
To obtain the 2FA code, you must scan the QR code received in the specified email.
By scanning the code, you will be directed to a web portal that will generate the OTP and redirect you to your password wallet (Apple) or default application (Android) to save and display the access code:
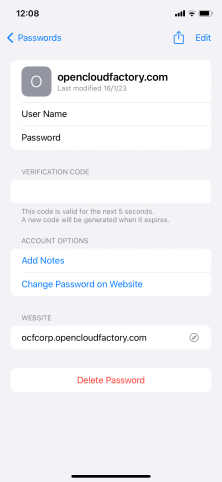
In the event that the QR has expired or the maximum number of scans has been reached, the portal will display an error message.
6.3.4. Authenticate WireGuard user using SAML
This section will provide a SAML authentication example.
Once you have already downloaded and installed the Agent:
Right-click on the Agent icon in the taskbar and select the “WireGuard” type VPN connection:

It will open the Agent UI, and it will attempt to connect to the VPN automatically without requiring access credentials. To establish the connection, you simply need to click on Connect.

A new window will automatically open in the browser, directing you to the IdP access page (example image), where you need to enter our credentials.
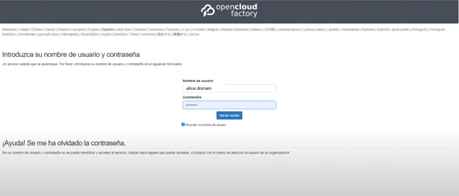
After authenticating, you will be redirected back to the ON Core portal. If you have accessed it correctly, you will be able to download the VPN access file.
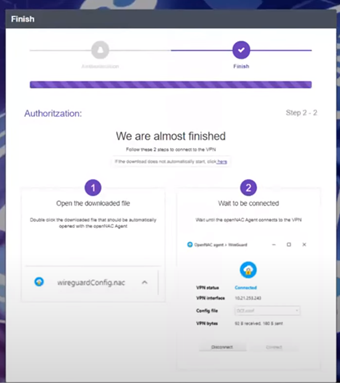
Once you have downloaded the VPN access file, execute it.

The Agent will automatically configure itself and access the VPN:
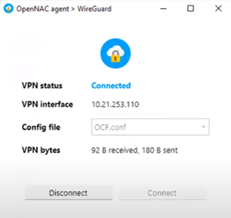
For a complete list of notifications messages that may be displayed on the Agent’s User Interface, see the Agent Troubleshooting section.
Choose the type of agent that you want to install and click on Download. In this example, we will download the Windows installable agent.
The file download starts automatically. Select in which folder in our computer you want to save the file (Documents, Downloads, etc.). It is important to remember the location of the file for future steps.
The download file name will have a format similar to the following one:
opennac-agent-1_0_xxxxx-release-windows-xxxxxxxxxxxxxxxxxx
Warning
IMPORTANT: DO NOT modify the file name, otherwise it will not work properly.
Once the download is complete, go to the folder where you have saved the file and double-click on it to start the installation process.
A dialog will ask for you permission to execute the file. Once you accept it, the installation process will begin.
Once the installation process is complete, you will need to agree to the Agent’s Terms and Conditions. If you choose to ignore or reject them, you will receive a notification and the application will close.
After accepting the Terms and Conditions, the installation process is finished and the On Agent Icon will be displayed in your taskbar.
After a few minutes, you can right-click on this icon to authenticate the client or establish a connection to the VPN.
Refer to the:ref:Agent Troubleshooting<agent_install_macos> section in case you encounter any errors during the installation process.